The new season is not complete without stylish new items. This time, the veil manicure came under the close attention of the girls. The design is a translucent design with a subtle haze that looks like the texture of tights or tulle.
A veil manicure, as a continuation of the stylish design using the negative space technique, looks feminine and gentle on nails of any length. Translucent manicure looks especially attractive on short square nails.
Stylish manicure veil: features of translucent design
The attractive look of a veil manicure is achieved through the play of an openwork or lace pattern and a translucent background. Essentially, the design is a delicate, almost weightless pattern applied to a barely noticeable background. Unlike the negative space technique in a veil manicure, the entire nail plate is covered with gel polish.
The design of the veil suits the looks of women of any age, regardless of preferences in clothing, accessories and makeup. Translucent manicure can be done with almost any pattern: floral, geometric, openwork.
It is worth noting that not all types of gel polishes are suitable for creating a veil manicure. For example, pearlescent or jelly varnishes with thick textures and pigments are not suitable for design. Mirror or magnetic gel polishes can only be used to complement a translucent background. To make your veil manicure expressive and beautiful, choose high-quality matte or glossy finishes.
Step by step guide
Despite the apparent complexity of this design, the “veil” is quite easy to make, especially if you have basic skills in creating manicure patterns. Let's take a closer look at the technique of creating translucent grace:
- Apply a thin layer of base and dry thoroughly in an ultraviolet lamp (about 2 minutes);
- Draw the edges of the nails with a thin elegant line with undiluted varnish, making a “veil” edging, and then dry the layer.
- Use a thin brush or special manicure tools to draw a pattern. It is better to start drawing with large elements, gradually moving to small ones. The rule “the more the better” does not apply to this design. Excessive density of the pattern or overload with patterns can spoil the impression and dissipate the “airy veil” effect. It is quite enough to make one elegant element or a mesh with dots that will imitate women's tights. “Lace” looks beautiful with a pattern that is not a dense color, but translucent or a tone darker than the haze. You can also use rhinestones, stickers, beads, and glitter as additional decor.
- Apply a thin layer of the previously prepared “veil” and dry.
- After complete drying, enjoy the sophistication and sophistication of the trendy pattern on your nails.
Manicure veil with gel polish: what shades to use
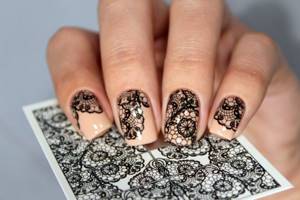
The veil design looks attractive in a variety of shades. But among the extensive color palette there are favorites that are most often used for nail design. First of all, it is black. It is the black veil on the nails that attracts admiring glances and looks incredibly mysterious and aristocratic.
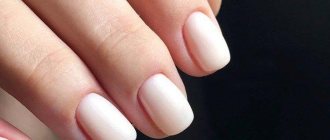
A veil manicure in white looks gentle and feminine. White openwork patterns on a translucent background are ideal for a wedding celebration. Such nail art cannot be excluded in everyday looks.
You should not use pastel shades to match your skin tone for a veil manicure. This design simply will not be noticeable on the nail plate. Use pastel colors as a contrast to darker shades. In general, a dark color palette is more suitable for creating a veil manicure: black, dark purple, chocolate, coffee, bronze, rich blue.
Hit of the year
Some call it lace, others call it a translucent black coating. The second name for the manicure is “tights” because it resembles the famous patterns of women’s clothing. In any case, the print looks elegant both on tights and on nails. In just a few months, he managed to win the hearts of many fashionistas.
There are two options for creating nail designs. They are not much different from each other. Each girl chooses a technique that is convenient for her:
- first a pattern is created, and then the plate is covered with a translucent smoky background;
- First, the tint is applied, and then graceful lines are drawn on the nails.
How to create a manicure veil yourself
There are two ways to perform a translucent veil manicure. In the first case, a design is first applied to the nail, which is then covered with a layer of translucent varnish. The second method involves covering the nail plate with a smoky base and then decorating and fixing the design. What the two options have in common is a basic set of tools:
- LED or UV lamp
- top, preferably matte, coating
- base coat
- dehydrator
- acrylic or gel paint
- manicure brush for creating a pattern
- dots with several attachments
- foil for creating a palette
First you need to prepare a smoky layer. To do this, use a transparent top coat and a few drops of gel polish of the selected shade. The components are mixed on a piece of foil or any convenient surface. The transparency of the smoky layer is controlled by the amount of gel polish.
Veil manicure techniques include:
- preliminary preparation of nail plates for design: trimmed or untrimmed manicure, removal of cuticles, treatment of nails with a dehydrator
- decorating nails - for this, use a manicure brush to draw a mesh, openwork patterns, dots using dots
After this, cover your nails with the resulting translucent mixture and dry your nails in a lamp.
Professional artists create a veil directly on the nail. To do this, the nail is covered with a transparent top, then a small amount of gel polish is dripped onto it and thoroughly shaded with a brush.
Choosing materials and colors
- The highlight of this design is the translucent tone that covers the nail and creates the illusion of nylon. It is almost impossible to achieve a similar effect with conventional varnishes.
- The easiest way to perform this technique is with gel polishes.
- They are also best suited for a base coat under a pattern, just like shellacs.
No matter in what proportions you mix transparent varnish with black, the result is unlikely to meet your expectations - the haze will come out either blurry or insufficiently expressive. Therefore, it is better to avoid conventional varnishes at all stages.
Watch the video for a lesson on nail design using the veil technique using gel polishes.
Color palette
- In the classic version, a tights manicure involves the use of black, white and nude tones.
- Although, more and more often, masters are moving away from this rule and boldly experimenting with colors.
- In order for such experiments to be successful, it is necessary to use a special color wheel, with which it is easy to create a combination of compatible shades.
- There are several examples of the color wheel, but in this case the extended version, consisting of 12 sectors, each of which is additionally divided into another 8 shades, is perfect.
- For a veil manicure, it is better to select colors according to a monochrome scheme (from the same sector).
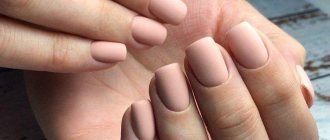
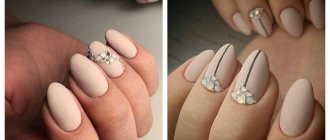
An example of nylon design in nude manicure
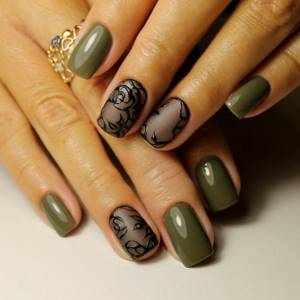
Manicure black veil
Black openwork patterns on nails look noble and very feminine. They give the whole image a touch of mystery and inaccessibility. To make the design look stylish and well-groomed, use an openwork pattern on 1-2 fingers, and cover the rest of the nails with plain black varnish. As for the design itself, it can be classic lace patterns, dots using dots, geometric shapes, flowers.
The combination of black and white in one design looks great. This manicure is ideal for celebrations or business style. At the same time, it is worth deciding in advance which shade will be dominant in your nail art and based on this, build the entire nail art.
Advice from the experts
To make your manicure neat and last a long time, you should follow the recommendations of professionals:
- Do a high-quality treatment of the cuticle, cleanly remove the pterygium, and do not file down too much the ingrowth points of the plates. Only in this case will it be possible to lay the flower bed flat, and it will not chip or peel off.
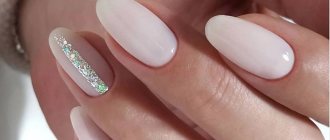
- When choosing a pink shade of gel polish, take into account the natural color of your nails. This way the manicure will look neat longer as it grows, thanks to the matching tones.
- For thin nails, use strengthening gel. These products also come in transparent, nude shades.
- Before applying, roll the bottle of gel polish in your palms. This will help distribute the color more evenly on the nails, because some translucent shades appear in stripes.
Transparent nails are one of the win-win manicure options. They look equally good on young girls and grandmothers, and are appropriate on weekdays and for special occasions. A variety of shades and decor will help make the design unique.
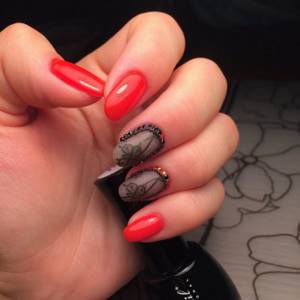
Manicure red veil
The method of creating a red veil manicure is practically no different from previous nail art. Lace, dots, flowers, geometry - all this looks great in rich red color. As for contrasts, the best complement to a red veil will be black elements. Black and red manicure looks truly chic and charming.
Use burgundy, cherry, garnet colors for manicure, that is, deep, not flashy shades. If you still prefer scarlet tones, then use matte gel polishes to create your design. They will smooth out an overly catchy design and make the manicure more casual.
Description of the technique
The “veil” manicure technique is based on the principle of translucency. It usually uses the same base color and pattern. The coating itself or the background should be translucent, the tone of the pigment in the classic version should be perfectly the same in order to create the desired illusion of nylon tights. It is essentially a design with a pattern on a translucent background.
Advanced nail salon masters manage to use a similar technique on already painted nails.
Thus, they decorate accent nails with a monochromatic manicure, and sometimes combine the “veil” with other techniques (classic, French, gradient).
The “veil”, combined with the negative space technique, looks beautiful. For example, part of the nail may have a nylon design, and the second part may have a lace pattern on an unpainted nail plate.
The “veil” technique allows the use of varnish products with different coating textures. For example, for this nail design you can use glossy and matte gel polishes. At the same time, matte varieties can have different imitation textures (velvet, corduroy, satin or velor). If you don’t have matte varnish at hand, but you definitely want to make the design matte, then for “tights” use glossy varnish, covering the pattern with a layer of matte topcoat.
Veil manicure using sliders and stamping
Not every girl can create beautiful patterns on her nails, which can significantly complicate the creation of a translucent manicure. In this case, use ready-made sliders or a stamping kit. For a design with sliders, choose stickers with a transparent background, through which the smoky layer will be visible.
Stamping helps out many girls who want to see complex and original patterns on their nails. Use plates with openwork, floral or abstract decor. Using a roller, transfer the pattern onto the nail plate, covered with a translucent layer, and secure the result with a topcoat.
Translucent veil manicure is a new product of the season, which has already gained unprecedented popularity among women of all ages. Even if you don’t know how to draw beautiful patterns, ready-made sliders or stamping come to the rescue. With this set of tools, you can easily create an effective and stunning veil design.
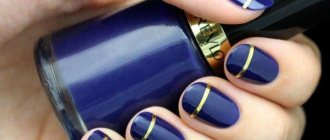
Exquisite casting
Another common stocking manicure design is the “exquisite casting”. Gold or silver varnish as a base under the patterns creates a beautiful shimmering effect (you can choose any other color as the base). This veil option is suitable for evening events. It is best to paint the mesh with black pigment. You can create this nail art using the following steps:
- Apply primer and base to pre-treated nails. Dry.
- Paint the entire surface of the plate with gold or silver shellac. Place your fingertips under the rays of the lamp.
- Dip the dots in acrylic dye or varnish and make dots in different places on the nail, trying to keep the distance the same.
- Connect them with lines of medium thickness. Place your fingers in the lamp.
- If you wish, you can decorate your nails with rhinestones or broths. Apply a clear coat of topcoat and seal the end. Dry again.
Instead of gold or silver varnish, for “exquisite casting” it is allowed to use manicure foil with a peel-off top layer. It should be remembered that this foil is disposable, so it is best to purchase it in large quantities at once.