Volumetric sculpting on nails amazes with its beauty and grace, but scares novice nail artists with the seeming complexity of execution. This type of decor really has many nuances. But even a novice master can master the process of creating beautiful three-dimensional figures and get the result desired by the client. What are the features of 4D modeling and how to do it correctly and aesthetically? This is what we will talk about today.
Characteristics of sculpting on nails
Volumetric patterns on nails are created using acrylic powder or a special modeling gel. For acrylic modeling you will need special acrylic powder and liquid monomer or, as it is also called, liquid .
Nail sculpting made with acrylic
By mixing these components, the master obtains a plastic mass for modeling. A small piece of material is taken with a damp brush and the desired pattern is created on the foil . When all the smallest details have been created, the decoration must dry completely.
The master glues the finished drawing to the nail plate and secures it with an additional layer of acrylic. This will ensure the safety of the manicure for several weeks.
To create a gel masterpiece, modeling gel . After the master has created the drawing, it must be dried under an ultraviolet lamp . These are the main differences between gel manicure and acrylic sculpting.
General principles of nail sculpting
- Work with acrylic very quickly and accurately , because it only takes a couple of minutes to harden.
- Experienced masters create designs directly on the nail plate. However, for beginners it is better to start sculpting on foil or paper. And only after a successful result can you transfer the design to your nails.
- Modeling powder should be elastic and not subject to crystallization. Then the material will not turn yellow on the nails.
- The molding lasts for a very long time. To get rid of it, you just need to cut down the entire volume of the plate.
- Toenails are rarely decorated with sculpting because they are quite small for a three-dimensional design. This work should only be performed by an experienced craftsman.
- Sculpting can be done on both natural and extended nails .
Gel sculpting on nails
Recommendations
Acrylic paints are very economical, but dry quickly. In order for them to last for a longer time, several rules should be followed.
For acrylic you need:
- comply with the storage conditions specified by the manufacturer;
- check the expiration date before purchasing;
- squeeze out of the tube in small portions.
Acrylic in tubes still dries out over time - then it is diluted with water, just like in cans.
To independently master nail painting techniques at home and surprise others with small masterpieces, you should listen to the advice of professionals.
Recommendations from nail design specialists:
- The hand should lie motionless. To do this you need to choose a convenient place.
- When painting, do not press the brush with force. Masks should be lightweight.
- For beginners, it is better to choose designs that are easy to perform.
- First, the outline is drawn, then it is shaded.
- If a complex pattern is taken, then it must be performed on one finger. The rest are made of simple overlapping fragments.
- Another fashionable trend: they take one finger of each hand and draw two overlapping scenes on them. And on the rest - just a monochromatic coating.
- A special fixative is applied to the finished miniature to fix the design.
If errors occur during the drawing process, excess layers of paint can be removed with water. To do this, use a regular cotton swab.
After work, you should not leave acrylic on the brush. It will be almost impossible to wash.
Beginners are advised to practice on plain paper. Try mixing and applying paints, work with painting patterns, study the results of applying paints to each other.
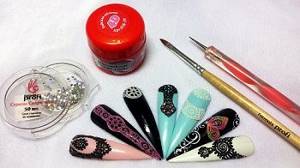
Tools and materials for modeling
To create three-dimensional patterns from acrylic powder you need:
- Acrylic powder of the desired color.
- Brushes for sculpting with acrylic. Choose tools No. 1, 2 and 3 made of natural bristles. You can also use dots.
- Monomer and a glass for it.
- Nail file
Materials for sculpting nails
For gel sculpting you need to purchase:
- Colored gels . Sold in sets.
- Brushes No. 1, 2 and 3 with synthetic bristles.
- Ultraviolet lamp .
- A special liquid for working with gel – clinser .
- 3D gel . The denser and more flexible structure of this gel allows you to create three-dimensional 3D designs on your nails.
- 4D gel . In appearance it resembles dense plasticine or clay. When using such a gel, the master sculpts all the details of the design with his hands or a stick.
When choosing a brush, look carefully at the tip. It must be completely assembled and level. Buy a lamp with closed sides so that the drawing hardens faster.
Video lessons on modeling from plasticine, salt dough and clay!
Modeling for children and adults. Here from plasticine, salt dough, polymer clay, mastic, plastic, cold porcelain, sand, mass and even snow. Everything about how to make cool crafts, for example, making animals (cat, dog, monkey, bear and other animals), food (fruits, vegetables, buns, pies, pies, buns, dumplings, dumplings, ice cream and other products), and also flowers, a person, a girl, a doll, Freddy, a dinosaur, a snowman, Smeshariki, figurines and other toys made of plasticine, dough, clay and other materials for modeling. Detailed video reviews about tools and materials for modeling: plasticine, salt dough, polymer clay, mastic, plastic, cold porcelain, sand, mass, snow and so on. Tell your friends and acquaintances about the site, share it on social networks.
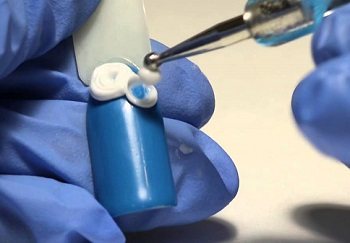
The process of sculpting nails using gel
- Preparing your nails . We extend them with gel or acrylic. The natural plate must be coated with transparent gel polish and wait until it dries completely.
- Using a pusher, take a small part of the gel . manually form the basis of the future drawing.
- We transfer the material to the nails and continue to work on the shape of the pattern . To do this, we need a brush dipped in clinser.
- Dry the patterned nails in an ultraviolet lamp for about 2 minutes.
- If you need to create several designs on one nail, repeat all the previous steps again. But do not forget to dry each new element on the nail in a lamp.
- Finally, we apply a finishing layer , which will provide additional protection to the sculpt.
The process of sculpting gel on nails
Who is it suitable for?
Acrylic sculpting can be performed exclusively on acrylic extended nails. This is due to several reasons. So, it is impossible to sculpt on a natural or gel plate for the following reasons:
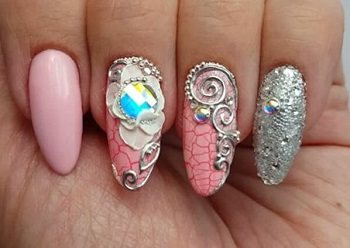
- The sculpting design is heavy, it overloads the free edge of the nails, even when the sculpture is as small as in the photo. At the same time, the natural plate can crack or break both during the sculpting process itself and with minimal pressure on the free edge of the nail. From this point of view, only the simplest and smallest volumetric designs can be performed on natural nails;
- Fastening the frame for complex and strongly protruding figures is possible only on an extended plate. It is not always possible to do this even when using tips. The most preferable option for this parameter are acrylic nails made on forms;
- The surface of the nail should be as large as possible, as well as even and smooth. The slightest unevenness can cause the figure to fall off, and the acrylic itself will cause detachments. On natural nails, simply covering them with gel, such smoothness cannot be achieved.
For extensions, you should choose acrylic, since the most durable “adhesion” of such nail designs with acrylic, like sculpting, will only be achieved with a similar material. In addition, this material is stronger than gel, and therefore it is not necessary to make the plate thick in order for it to withstand the weight of even a fairly large figure. The only downside is that it is almost impossible to repair acrylic, and therefore if there is a crack in the nail, you will have to remove it completely, even if the sculpting element is not damaged.
The process of creating an acrylic manicure
- We extend the nail with gel or acrylic. We cover natural nails with transparent gel polish.
- Take a thin brush and wet it in liquid .
- Dip the brush into acrylic powder and make several rotational movements. It is necessary that a small ball of acrylic forms .
- Carefully transfer the lump onto the nail, exactly to the place where you plan to create the design.
- Using a brush we form all the details of the sculpt . If the acrylic begins to dry out, wet the brush again in the liquid.
- It is not necessary to apply a topcoat to acrylic. This can only be done if you want your nails to shine.
Modeling nails with acrylic
How to choose brushes?
Secondly, you will need special brushes. It is better to purchase several different types. This way you can experiment with the size of the flowers. To create a 3D design on your nails you will need: a round brush with a sharp tip, an oval cat-tongue brush and a thin hair brush.
IMPORTANT TO KNOW: Newspaper manicure: what is it and how to do it?
Rules for placing patterns on nails
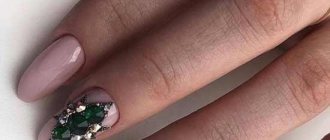
The pattern located closer to the cuticle line looks beautiful
In order for a drawing to please you with its beauty longer, it is important to know the rules for its placement. You need to create a sculpt at the highest point of the nail , because by placing the pattern at its tip, you expose the nail plate to deformation during filing.
You need to start creating a pattern as close to the cuticle as possible . Try not to create 3D images on small nails. Small patterns in the form of dots or thin lines are suitable.
It is best to decorate only one nail in an everyday manicure . It's very gentle and feminine. For a special event, you can decorate all your nails with sculpting.
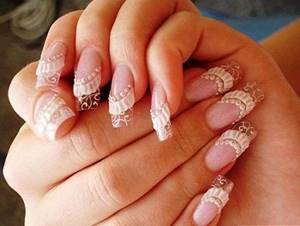
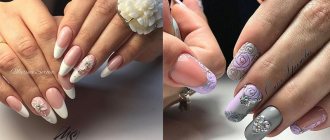
Wedding manicure with sculpting
For any other holiday, you need to select the type of drawing to match your appearance and theme of the event.
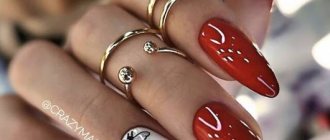
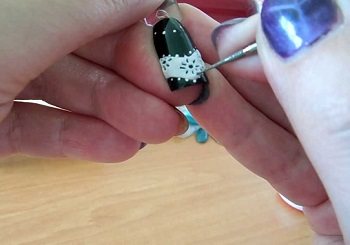
In a New Year's manicure, you can paint voluminous snowflakes with gel or acrylic. If you are a beginner, then just make small dots of white color. Craftsmen can create a 3D image of Santa Claus, deer and other holiday attributes.
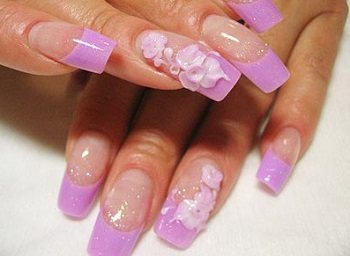
Wedding manicure requires beautiful floral and delicate patterns. Large and bright drawings will be superfluous here.
What you should pay attention to when choosing tips
The key points in choosing tips should be:
- artificial nail shape;
- the material from which they are made;
- color spectrum;
- features of the contact zone.
Tips forms
If a girl extends her nails at home, then the tips should be chosen in such a shape that they are as similar as possible to the appearance of the natural nail plate.
This will avoid the need to adjust the contact area, and will also significantly reduce the risk that extended nails will look rough or unnatural in combination with the length or thickness of a particular person’s fingers.
If the tips are selected for use by a girl in her professional activities (regardless of where she provides services - at home or in a beauty salon), it is necessary to buy artificial plates of various shapes.
The greater the choice of forms the master has, the higher the quality of his work will be (only thanks to correctly selected tips can you create a neat, natural-looking manicure). If it is not possible to purchase tips of various shapes, it is recommended to manually adjust artificial plates, cutting off excess plastic or nylon using special templates.
Material
Despite the fact that the most popular are tips made from ABS plastic, in the vast majority of cases nylon plates are more suitable for manicure.
Not only can they be used when working with nails of any length (plastic tips can only be attached when creating a manicure of minimal or medium length), but they also sit more firmly on the nail plate and are also of higher quality.
To check the quality of the tips, just bend them in half. High quality materials will not allow the plate to break, and when unbent, there will be no traces of mechanical impact left on its surface. Low quality samples will break or crack when bent, and after returning to their original shape, creases will remain at the bend site or local discoloration will form.
Color spectrum
Tips in their appearance should be as close as possible to the natural shade of the human nail plate. It is recommended to choose milky or light beige plates. Professional craftsmen in some cases also use transparent tips.
Although this type of consumable will look exactly like natural nails, it is not in great demand among professional nail technicians. This is due, first of all, to the high cost, as well as the lack of distribution of such goods in stores and suppliers.
Features of the contact zone
The contact zone of the tips is the area of the artificial plate, which is attached in close proximity to the cuticle. This part of the tips can be round, square, oval, and so on.
Despite the fact that it, like the free edge (the part of the tips extending beyond the finger and natural nail plate) can be adjusted manually, only experienced manicurists can do this efficiently.
If the contact zone is improperly filed, the tips will not fit tightly to the nail, which will make the extension process impossible. Correction of the contact zone should be carried out using a hard file or a special attachment on a machine for hardware manicure.
Nail design ideas with sculpting
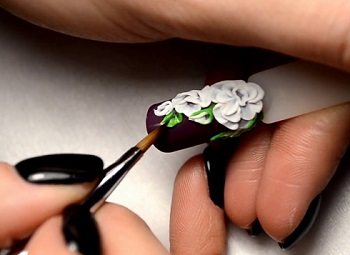
Step-by-step process for sculpting an acrylic rose
The process of creating a rose from acrylic paste
- Take a small ball of red acrylic and transfer it to foil .
- Using a brush we form a rose . To do this, lightly press the ball from the middle and draw out spiral-shaped petals.
- Separately, we form a leaf . To do this, press the small green ball as much as possible and give it an oval shape. Carefully remove the leaf veins with a thin tool.
- Using glue, first apply the leaf to the nail plate. We wait a couple of minutes until it dries and glue the rose to the leaf in the same way. The voluminous flower is ready.
More experienced masters create three-dimensional designs directly on the nails. Watch a master class on creating a rose:
Fashion trends
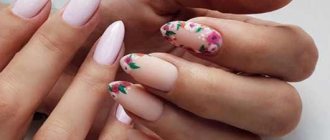
The simplest drawings for beginners are dots, lines, curls and flowers. This pattern can be used to decorate the entire nail plate, the ends of the nails, or just one finger on each hand. Combine well-matching colors and the result will please you.
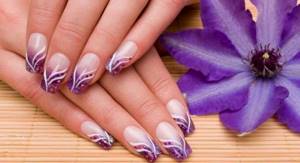
Simple drawings made in transparent watercolor technique look especially impressive:
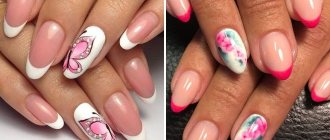
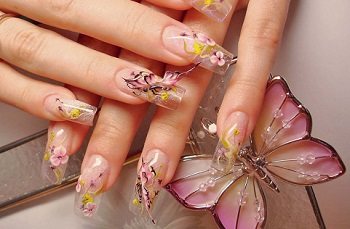
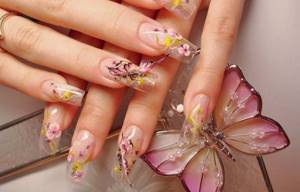
Fruits, animal prints, butterflies and other insects are a more complex option for painting with acrylic paints. They look very interesting and fresh. The main thing in work is patience and accuracy.
Delicate lace on the nails, which can be combined with different colors of varnish or draw lace along the French line.
Watch the video master class on luxurious “lace” nail design:
A standard French manicure with a smile line painted with flowers or dotted patterns.
The highest aerobatics in nail design with acrylic paints is Chinese painting, watch a video tutorial on the basics of nail art using Chinese techniques:
https://youtube.com/watch?v=kMyQwZiqUCM
Drawings on nails with acrylic paints - an economical and simple nail design at home. It does not require large expenses or special skills, and the result, depending on the chosen design, looks professional and interesting.