Lunar manicures and colored French manicures are being replaced in 2015 by a new wave of decorations called fimo nail design. What is fimo? This is a polymer clay that has been produced by the German company Fimo since 1964. At first, this transparent clay with the addition of color pigments was used to make dolls. Over time, the number of manufacturers and the range of polymer clay expanded, and marketers decisively attacked buyers with new solutions for using fimo. It was proposed to use it as crafts for children, souvenirs, Christmas tree decorations, earrings, brooches, etc. In the end, polymer clay also found its use for decorating nails, which turned out quite well and even stylish and extravagant. Fimo women liked it, and in 2015 this type of nail design reached its peak (or maybe not) in popularity.
What is fimo?
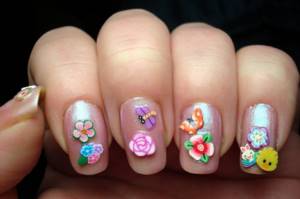
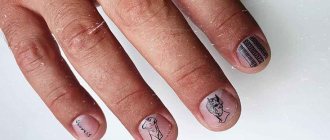
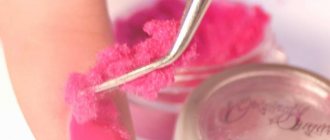
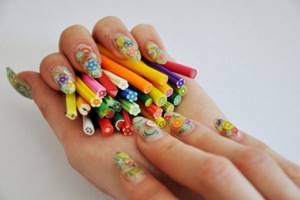
You've probably seen a similar manicure on your girlfriends or work colleagues, you just didn't know that it was created using fimo for nails. Sticks or rods made of polymer clay, having a length of about 6 cm and a simple bright design in the center - these are fimo sticks for nails. The master uses a special blade or a stationery knife to cut thin plates from the barbell, and then uses miniature pictures in the nail design.
Using this decor, you can create a manicure without the time spent on applying a design, and the price of the jewelry is very low, from 10 rubles per bar. You can buy them in specialized stores that sell nail art products. You can also find already cut records on sale. If the craftsman does not have a special blade, he can use ready-made jewelry.
The cost of a set of records with different designs is approximately 80 rubles. However, by cutting yourself, you can save a little and, if desired, make the plates of the desired thickness. Usually the finished plates in the set are quite thick, they are about 1 mm thick. Such decorative elements are not suitable for natural nails, and it will be more difficult to cover them with gel.
Where to buy fimo figures?
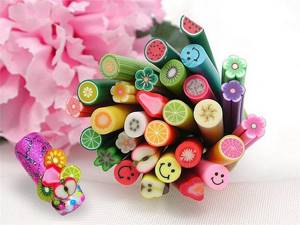
You may ask, where can you find such miracle fimo? The answer is completely simple - buy in special store departments or choose what you like and order in an online store. Fimo for decorating nails is sold in the following variations: in the form of solid tubes (sticks, rolls) and ready-made cut-out figures. Sliced ones, in comparison with whole ones, are more expensive, but they are much more convenient to use and save a lot of time. Whole rolls are worth buying for those who not only want to save money, but also can cut them themselves. Moreover, it is not at all difficult to do.
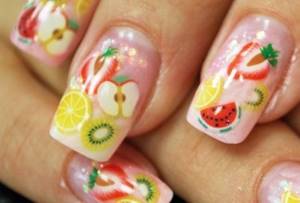
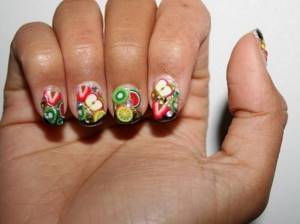
When you purchase a set of uncut sticks, it comes with a special blade. You can cut the figures yourself using a blade from the kit or a stationery knife of various thicknesses and at any angle. When cutting fimo sticks, you choose the shape you want: semicircle, circles, quarters. The horizontal cut will have different designs and images. Nowadays, fruits are at the peak of popularity because they add something tasty, fresh, juicy, bringing a feeling of late spring or early summer. You can see how cutting is done correctly in the video.
Fimo in professional nail design
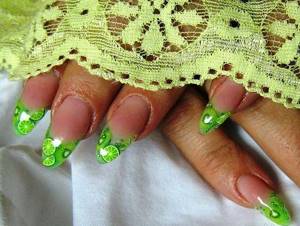
The nail technician certainly knows how to do a fimo manicure. Professionals also use this decorative element in the design of extended nails. The plates are laid out in the required order on all or some of the nails and covered with a layer of gel. To ensure that the manicure is practical and the decor does not interfere with your everyday life, the master will try to make the surface of the nail smooth so that the decorations do not rise above the plate and their edges do not protrude beyond its boundaries.
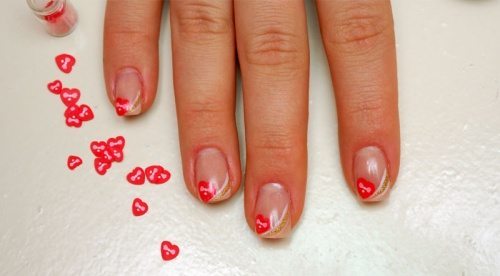
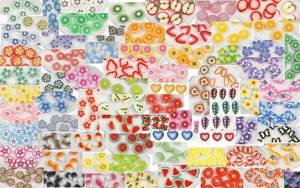
There are a lot of design options, as well as pictures on this decorative element. Depending on your wishes, you can choose fimo fruits, flowers, emoticons, hearts, leaves, images of animals. Of course, this fimo manicure is not suitable for business women. But for teenagers and young, active girls, this is a godsend. You can create simple-to-execute, yet complex-looking 3D designs that you couldn't do by hand with a brush. The stickers look quite cheap, and the stencil will not allow you to make multi-color images so accurately, so fimo can be considered a godsend for craftsmen.
Application with gel or acrylic
Before performing a manicure, your nails need to be prepared. Standard procedure:
- Steam in a bath;
- Remove dirt and cuticles;
- Give the desired shape.
Apply the starter coat to clean nails, cut fimo sticks on it, and top with a fixing layer of gel or acrylic.
In principle, that's all.
But that would be too boring, transparent and not entirely interesting. Therefore, we turn on our imagination, scratch the cosmetic bottom, and add to the design everything that glitters and shimmers: rhinestones, sequins, kamifubuki, confetti.
How to use this decor yourself
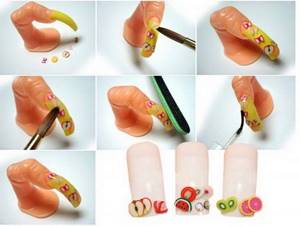
If you don’t like gel extensions or don’t want to go to a salon, you can do fimo nail design with your own hands at home. For natural nails, these decorative elements will not be so practical; be prepared for the fact that the plates may interfere with you, cling to clothes, and if they are not fixed securely enough, even fall off. If you decide to create a manicure with fimo, read the step-by-step instructions. She will tell you how to use fimo for nails:
- Cut the stick into slices as thin as possible.
- Cover your nails with a clear topcoat or any other solid color, depending on the desired design.
- Using a toothpick, apply a drop of false nail glue to the back of the picture.
- Using tweezers, lift the plate by the edge and place it in the desired place.
- Press the jewelry for 2-3 seconds.
- Apply clear varnish on top, maybe in 2 layers.
- Wait until the varnish is completely dry.
It’s quite difficult to get a perfect manicure using fimo for nails on your own, even if you follow the step-by-step scheme described above. Such decorations are largely intended for aquarium design, so they will not last long on a natural nail, no matter what glue you choose. This manicure will be short-lived, but unusual.
How to draw strawberries on your nails: step-by-step photo instructions
Lena Sevelenium Manicure and makeup expert, creator of useful and unusual DIY videos
Drawing strawberries on your nails is not as difficult as it might seem. Prepare everything you need and follow the recommendations from our step-by-step instructions.
You will need:
- Colorama nail polish from Maybelline New York 749,
- Essie nail polish “To the fullest”, “Perfect cut”, Galentine.
Berry manicure is a great idea for summer. In this photo tutorial we will offer two designs united by a strawberry theme.
- 1 Apply a base color polish to your nails. For a design with strawberries, white, blue, peach and other delicate pastel shades are suitable. In this case, the nails were painted with Essie milky polish in the shade “Perfect Fit.” Due to the fact that it does not look as contrasting as thick white varnish, a bright design will look more subdued against its background.
- 2 You are already familiar with the “dry brush” technique; we have used it more than once in other design options (for example, in a manicure with dandelion). This time, also remove excess varnish from the brush - using the neck of the bottle. This is the first step necessary to more accurately control the amount of varnish.
- 3 When there is no varnish left on the brush, use the corner to pick up varnish from the neck of the bottle. So that it turns out to be a small drop. Due to the fact that there is no longer any varnish on the brush that would flow down to the tip of the brush, the likelihood of making too large a mark is minimized.
- 4 Press the side of the brush with the drop onto your nail, hold for a second so that the polish has time to distribute. Remove the brush in an upward motion. You will get excellent preparations for strawberries. If you are ready for a bright design, place the berries all over the nail; if you want the result to be a calmer option, then one is enough.
- 5 Next you will need a small diameter dots or toothpick. Place a small drop of white polish on it.
- 6 Place dots on top of the strawberries, and also place inflorescences of five dots between them.
- 7 To make the strawberry stop looking like a fly agaric, add yellow dots on top of the white dots. Yellow varnish looks bright, and if there is a white outline visible somewhere, it will only add volume. Place yellow dots in the center of the flowers.
- 8 Add green leaf dots to complete the composition.
- 9 Apply topcoat. A glossy top will add brightness, while a matte top will slightly mute the colors. Strawberry manicure is ready!
Strawberry and red are inseparable. Therefore, using the example of a bright strawberry manicure, we show how to properly apply and remove bright varnish so that neither the nails themselves nor the skin around them are stained.
- 1 First of all, apply a protective base. It will act as a barrier between the bright varnish and the nail plate.
- 2 Next, apply red polish to all nails. This will already make your nails look like strawberries. All that remains is to add cream. For this you will need white varnish.
- 3 Using a large diameter dot, make large dots to outline the design.
- 4 Next, add a few more dots so that they overlap each other: this way you will achieve different saturation, and the drawing will look more voluminous.
- 5 Using dots, draw splashes. To do this, first place a dot, then move the dots down, gradually tearing it away from the nail. This will make the line narrower.
- 6 Add yellow seeds, apply topcoat. Ready!
1 Before removing bright polish, first protect your skin with a caring oil or cream. This will prevent harsh nail polish remover from causing skin dryness or irritation. Next, take two cotton pads and cut each into 5 pieces.
2 Soak each triangle in nail polish remover. Press them onto your nails and leave them on for a minute.
As soon as the fleece begins to turn the color of the varnish, you can remove it.
3 In this case, it is important not to rub the varnish, but simply pull the cotton down. This will protect the skin from staining. If suddenly the polish remains at the edges of the nail, take a new clean piece of cotton wool and gently wipe these areas
If suddenly the polish remains on the edges of the nail, take a new clean piece of cotton wool and gently wipe these areas.
Nails are ready for experiments again!
Manicure ideas with this decoration
Fimo for nail design can be used in different ways:
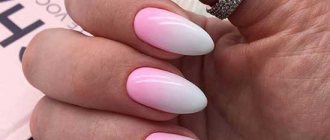
- place the jewelry on the tip, you will get an unusual jacket;
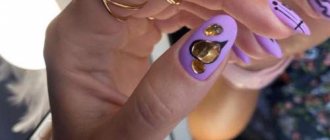
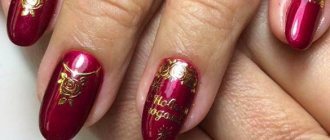
- using single plates, you can focus your manicure on decoration;
- by combining lines drawn with acrylic paint and fimo, you can create entire pictures;
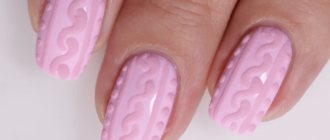
- By placing decorations throughout the nail plate, you will get an interesting textured coating.
If you want to make a bright and unusual manicure with your own hands, but do not have the skills to paint with acrylic paints and want to spend a little money, fimo nail designs are suitable for you. You can combine these decorations with sparkles and coatings of different colors. Don't try to make all your nails the same. In addition, you can use this decoration to design your toenails in the summer.
How to apply fimo shapes
Multi-colored rolls can be used on both nail extensions and your own nails. In a situation with your own (natural) ones, you should use gel polish, but if you don’t have one, then a regular one will do. Regardless of the type of nails, cutting and applying various figures and elements occurs almost the same way, differing only in small, insignificant nuances.
- For extended nails, fimo is attached directly to the gel or acrylic coating, then the elements are covered with another layer of modeling gel or acrylic paste and carefully sanded. For natural nails, a special glue for tips is used, on which selected figures sit. After this, the fimo is fixed with a top. The figures can be laid out on the entire nail plate or on the very edge.
- If your nails are being extended, the figures are usually cut into medium thicknesses. After all, fimo will hide between the dense gel and acrylic layers. For natural nails, it is best to use very thin figures so that they do not protrude above the surface of the nail plate.
- If regular varnish is used to cover the figures, then the created manicure will last about 3 days (however, this largely depends on the girl’s physical activity). Using a gel coating, you can safely go through an original manicure for even a week. Extended nails with 3D elements will hold unusual figures much longer.
Application options
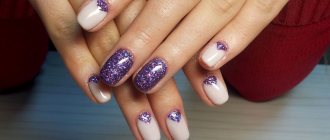
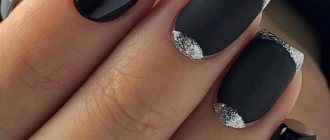
There are many options for using fimo sticks. It looks stylish when literally 1-2 nails in a general manicure are decorated with fimo sticks, and everything else is decorated with any plain colored varnish.
1 more stylish way
. Lay out layers of thin fimo files to imitate a French manicure. It looks cool, and if you use non-flashy colors, it’s also discreet and very stylish.
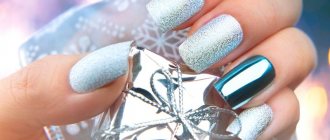
You can use seasons and events as applications. For example, if you are going to the sea, you can design an applique in a marine theme using blue and yellow flowers.
In winter, on New Year’s Eve, draw a Christmas tree and lay out imitation Christmas tree decorations from fimo, and use glitter varnish to draw rain.
With regular varnishes
As in the previous case, your nails need to be prepared.
Apply 1 layer of any base coat to strengthen your nails. While the varnish is still wet and has not yet dried, we make fimo sticks. Our base coat will serve as both a healer for lifeless and peeling nails, and a glue that will retain its beauty.
Apply any top coat over the application to extend the manicure for up to 10 days. It will keep your manicure for almost 2 weeks and give it a glossy shine.
The use of rhinestones and confetti is optional.