Kamifubuki as a manicure trend first appeared on the nails of Hollywood stars in 2016, and then the baton of creativity was taken up by manicurists around the world. Fashionistas of all countries and ages sought to try out all sorts of nail art techniques and methods, introducing a new “toy” into their looks. What is so interesting about this generally not new decor (after all, manicures were decorated with all kinds of sequins before)?
Kamifubuki -
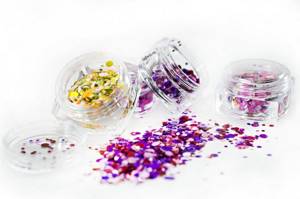
These are round sequins with a combination of different sizes and colors, which received the status of “trend of the year 2017”. Buying a small jar of kamifubuki opens up a huge field for creativity and experimentation for their owner.
Design options
Top masters say that the droplet effect can be used in a variety of types of manicure. It also looks beautiful and elegant in the following options:
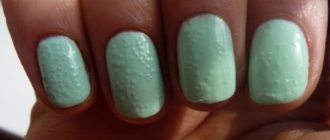
Plain
Perhaps there is nothing simpler than making your nails one color and “placing” splashes of water on top. This glossy decor looks impressive, especially on a matte finish. This design option produces a very impressive play of textures.

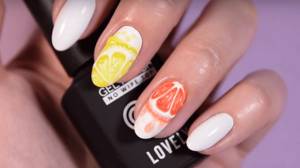
Fruit
The image of exotic fruits on her nails will give a girl a special charm in the summer. And if you decorate them with droplets of water, then such an unusual manicure will look even prettier and will certainly lift your spirits.
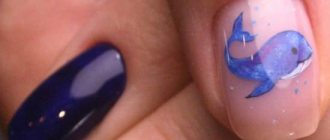
Nautical
This type of manicure is unthinkable without water droplets. Do you agree?

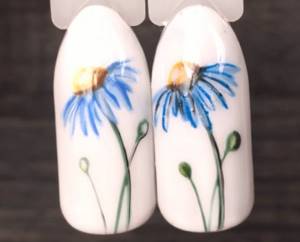
Floral
Drops of dew on beautiful flowers will add femininity and tenderness to your cover.
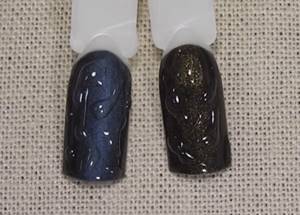
"Kitty"
Glass drops are the perfect complement to the cat eye technique. Your nails will shine in a special, more festive way.
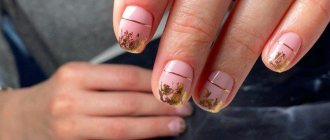
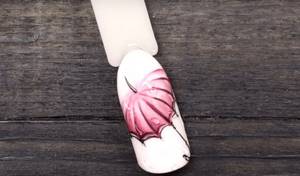
Autumn
This theme is relevant in rainy weather. Drawings in the form of raindrops on top of painted umbrellas or yellow leaves will be very appropriate.
Professionals quite often apply “dew drops” to painted nails. This way they visually expand the image on the surface and give the picture a 3D effect.
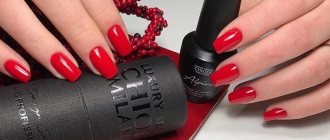
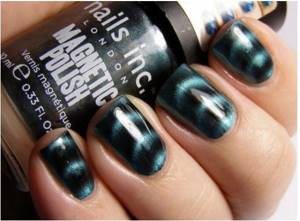
What advantages have made smart polishes so popular?
First of all, a wonderful manicure. The second plus is the affordable price. You will have to pay a considerable amount for salon design. And with smart varnish, you can change your design every day without leaving your home.
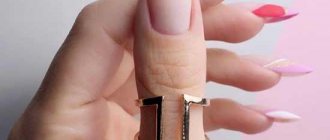
Using magnetic varnishes is not difficult. Apply it to the nail, attach the plate - and you're done. Just carefully coat the nails with varnish - that’s all the requirements. First we apply one layer, a thinner one, then, after a little while, we apply a second one.
The varnish is economical: one bottle lasts for at least a month if used every day. And the manicure will last quite a long time. The design looks amazing, and all you need to do is point a magnet at the painted nail. The final pattern depends on the magnet.
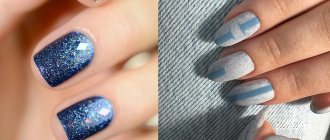
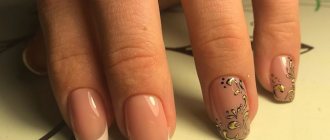
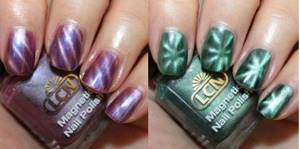
General recommendations for “Cat Eye” manicure with gel polish
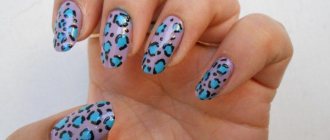
Gel polish “Cat's eye” on nails is a fashionable, stylish, and most importantly, affordable and easy-to-use design. Only a few tools are used to obtain this coating. The main one is a special gel polish with magnetic properties. Under the influence of a magnet, small particles form a beautiful pattern on the nails.
Due to the large presence of metal dust in the varnish, using strong magnets, you can create a variety of patterns that look voluminous after drying. This gives the nails a certain resemblance to the famous cat's eye - a stone that, when reflected by light, creates an optical hall.
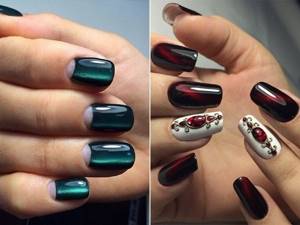
Most polishes from the “Cat Eye” collection are sold with magnets, but to create complex geometric patterns (waves, stars, clear figures, swirls, spots, pointed rays), magnets with patterns embedded in them are used, so they can be purchased separately.
Tools and application techniques can be combined by changing the angle of the magnet itself. When the tool approaches the nail, metal particles will be attracted, making the strip clear and thin, and when moving away, on the contrary, the strip will become diffuse and without visible contours.
The combination of colors in this nail art occurs due to the fact that the main color of the magnetic varnish is always darker than the particles inside it. It is because of this that the volumetric effect is formed. In this case, gold particles are most often used in combination with dark green, dark blue, purple, brown and black colors.
There are also varnishes with an almost uniform coating, when the magnetic particles are only a few tones lighter than the base color. This option is used mainly for green, blue and purple shades.
Gel polish “Cat's eye” on nails can be combined with the following colors:
| Main color/background | Magnetic particles |
| Black | Almost everyone. Mostly with gold, silver, metallic, electric, ruby, coral, wine, amethyst, violet, brown and emerald. |
| Violet | With lighter shades of purple, blue, red, pink. |
| Green | With all shades of green (most often emerald). Occasionally used with gold, silver and metallic. |
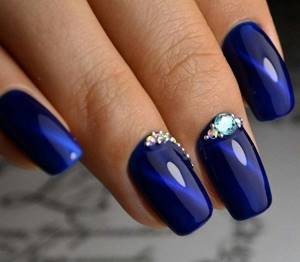
| Blue | Shades of blue, purple. |
Since magnetic manicure is an independent design in itself, it is rarely decorated with additional elements. However, to create unusual nail art, you can use rubbing, imprinted foil, rhinestones, glitter, sprinkles, and water sliders. All these elements can be perfectly combined with a cat eye due to the abundance of colors.
To decorate the design with various patterns, powerful magnets with embedded patterns or a magnetic pen are used. In the second case, the lines can be made as thin as possible and various designs can be drawn, including flowers or geometry.
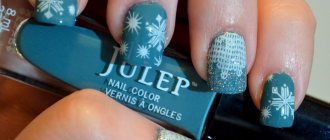
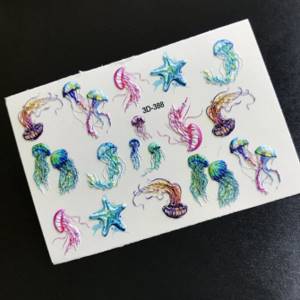
Why do 3D sliders come off your nails?
Very often, sliders simply come off the nails after a week of wear. This usually happens at the ends of the nail, when they are not treated, they get caught. This happens for several reasons:
- The slider is applied not to a wet base, but to a dry material, that is, to a layer of top or base coating. Thus, it is very difficult to distribute the sticker on an almost dry surface; it is taken up by bumps and folds, which subsequently overlap with difficulty and they very quickly lag behind the nails.
- Therefore, you should always apply 3D sliders to a wet base. Also, the slider chips off the nail due to the thin layer of topcoat. Many manicurists advise sealing the sliders with a thick layer of base with leveling, and then a layer of top.
- Please note that the ideal option would be to use a top coat with a sticky layer. This will improve the adhesion of the layers to each other and reduce to zero the possibility of the slider chipping off the surface of the nail.
How to use 3D sliders?
There are several ways to attach 3D sliders, which depend on the type of adhesive surface. The first way is to use water. Simply put, these are water transfer 3D sliders. In order to stick them on the nail, you need to apply them to a damp cotton pad. After this, with sliding movements, using tweezers, pick it up and remove it from the substrate.
But there are several subtleties of using 3D sliders, due to which they do not always stick well to the nails. This is especially true for applications, that is, not small elements that are attached to the nail, but sliders that completely cover the entire nail and turn it into a coating. In such cases, very often the sliders get caught on the end of the nail and are easily removed with the top coat. Therefore, there are several options for attaching such sliders.
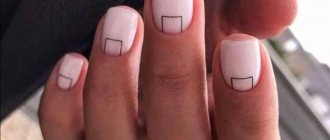
Volume sliders
Instructions for attaching 3D sliders:
- The nail is prepared in the standard way: perform a manicure, sand the nail until glossy. Next, everything is covered with a thin layer of base, after which a base coat of any of the selected colors is applied in one or two dense layers so that the natural nail does not show through. Everything is dried in a lamp.
- After this, a very thin layer of base is applied using rubbing movements. Now you need to apply a 3D slider to the wet, not completely dried base and carefully level it. This should be done using a silicone brush. This way there will be no greasy marks left on the slider, as well as lint.
- After this, the nail and slider are dried for 30 seconds. The base grabs this slider, gluing it. Next, the surface must be covered with a layer of base and only then secured with topcoat. This way the 3D slider will stay on for a very long time and will not come off even when performing daily manipulations of washing dishes and floors.
- It is also worth noting that this mounting option is ideal for sliders attached in the form of applications, that is, not on the entire nail, but only on part of it. If you have sliders that imitate a coating, they must be attached to the entire surface of the nail. Initially, they are cut out to the shape of the bed, applied to a wet disk if it is a water slider, or simply peeled off from the backing. Using tweezers, place on the applied base layer and dry.
- Next, there are several options. To remove the remains of the slider from the ends, and so that they do not get caught on any clothes or hair, you need to coat them with a primer. It contains acid that corrodes the remains of the slider. You can resort to another method. After you dry the slider, you need to cover it again with a layer of base and dry it. Now take a regular file for processing natural nails, 240 grit, and go along the ends of the nail. This way you will cut off the remaining sticker.
- It is worth covering with a very thick layer of topcoat, not forgetting to paint the ends in order to cover the places where you went through the file. This way, there will be no burrs or nicks left on the ends of the nail and the sticker will be fixed between two layers of base and also covered with a layer of top coat.
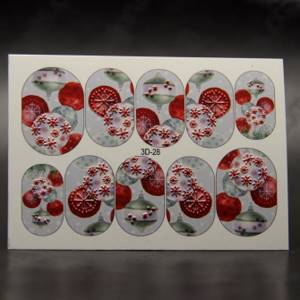
3D sliders