Do you want an original and long-lasting manicure? Then nail art using thermal film is created for you! The main advantage of this trendy manicure is that you can do it yourself at home.
Every woman strives to be beautiful and well-groomed. the original manicure plays not the least role in this . Do you want to look like Hollywood stars? Nothing could be easier! More recently, a new trend has appeared in nail salons - creating a manicure using thermal film .
This technology has already been successfully tested by celebrities, and finally it has become available to absolutely all ladies . This coating is very easy to apply , and after using an ultraviolet lamp, the manicure becomes flawless . So let's understand all the intricacies of this unique technology.
What is thermal film for nails?
The technology for applying thermal film or the minx procedure is very simple . Of course, it costs a lot of money in the salon, but the result will pleasantly surprise you. After all, a flawless manicure is worth it! You can do this procedure at home , but before doing this and not spoiling the material, you will need to at least once look at the work of the master.
Using thermal film for manicure is a new bright trend
So what is this technology? Let's take a closer look:
- To begin with, the nails are put in complete order : they are filed, the cuticle is moved back. Marigolds are treated with a degreasing agent
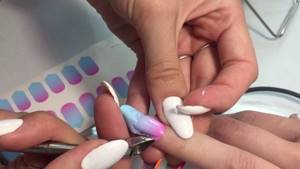
- The thermal film is heated either under an ultraviolet lamp, or a hair dryer is used for this purpose. Then it is applied to the nail and it sticks to it
- Excess material must be removed and the nail filed again.
At first glance, this procedure is quite simple , but it will take at least half an hour.
As for the advantages of thermal film , they are obvious:
- Rich palette of shades , in which you can find about 350 colors. This means that you can complement any look.
- With thermal film you can forget about the need for manicure for three whole weeks.
- Removing thermal film is quite easy , and you do not need any chemicals
- This material is not subject to any
- Thermal film is hypoallergenic
- This nail art has become a favorite among the stars, and who else if not they are known for the latest beauty and care products?
Such an impressive list of advantages deserves that you at least once treat yourself to such an impeccable manicure.
Recommendations for choosing colors for marble manicure
The very name of this design speaks of the image of a natural stone on the nails, but it does not have to be marble (blue, white, black or red stone with veins). You can also imitate other semi-precious or precious gems: lapis lazuli, opal, ruby, turquoise, jade, malachite, etc.
When you mix colors, you get eye-catching pebble nails; each finger is decorated individually and uniquely, because it is impossible to draw identical stones.
To obtain such stains and patterns, use the trend colors of 2022: blue and light blue, gold and green, beige and white, white and lilac, as well as combinations of three colors (black, white and blue).
How to make a “malachite” marble manicure? It is enough to mix different shades of emerald color on the nail.
An extravagant solution for manicure would be a mixture of rich and bright shades. In order to get a marble manicure, like in a salon, you can try using varnishes with different textures: metallic, pearl, matte, holographic, rainbow.
What you need to apply thermal film to your nails and how to apply: instructions
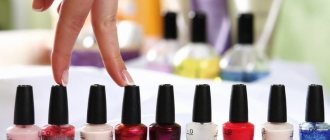
A few years ago, manicures with thermal film were only available in the salon. Now you can buy this material in any specialty store , and it will cost less than in a salon . So everyone can try to make such an original manicure on their own.
When drying with a hairdryer, the thermal film may become dull
In addition to the film, you will also need some equipment , such as a special lamp (although some craftsmen claim that you can get by with an ordinary hair dryer) and other tools.
So, here's what you'll need for minx design :
- Manicure scissors
- Wooden stick
- Sanding file
- Thermal film
- Means for degreasing marigolds
- Special lamp or regular hair dryer
Another important factor that you cannot do without is patience and at least 30-40 minutes of time:
- First, get your nails in order : remove the polish, file your nails, polish and degrease them
- Next you need to cut off the required amount of thermal film , but be sure to cut with a margin
- Use a wooden stick or toothpick to separate the sticker from the film . Then warm it up well under a lamp or hairdryer
- Apply the still warm film to the nail plate, straighten it and press it lightly
- Now dry for 4 minutes under the lamp. Make sure the thermal film dries well and sticks to your nails.
- Uneven edges should be trimmed with scissors and filed with a nail file.
- To further protect the material, coat it with a colorless fixing varnish.
A minimum of effort - and a magnificent manicure that even Hollywood celebrities will envy is ready! Flawless nails will delight you for more than two weeks .
Film for manicure around the nail and ways to create it at home
There are several other ways to create a manicure film around the nail using improvised materials:
- Vaseline can be used to protect the skin around your nails when performing a manicure. They lubricate the skin with it, and if Vaseline accidentally gets on the nail, it can be easily removed with a cotton swab.
- Finally, you can use regular tape. The main thing is to choose a thin option, it will fit better on the skin and will not lag behind. However, the use of such a tool is not very convenient, as practice shows, but in the absence of other options, adhesive tape will do.
If you want to give your nails a charming look, be sure to decorate them with an original coating. But how to do a manicure without staining the skin around the nail? You can use a liquid tape that can protect the area around the nail from contamination.
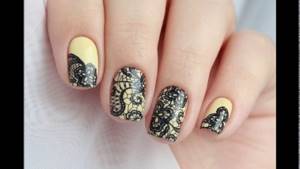
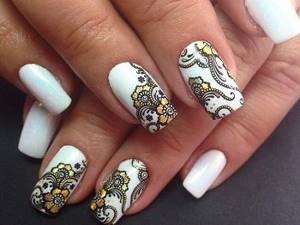
Nail design with thermal film 2022: photo
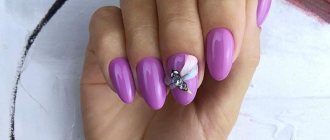
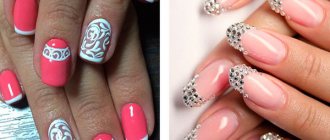
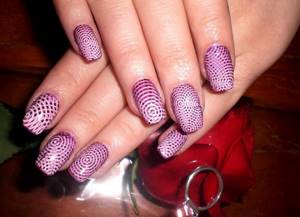
Thermal film looks great on both short and long nails . They can be placed only on one specific area, or they can cover the entire nail plate with the material . A solid coating will look good on one or two nails of one hand . But small elements made of thermal film can decorate each nail .
There are several types of thermal films . One sheet may be covered with patterns or ornaments, from which certain sections are cut out . And there are sheets that are already delimited and have areas that resemble nail plates . The main thing is to cut or select the necessary fragments correctly.
should be applied to a polished and well-aligned nail . To do this, first of all, the nail plate must be coated with base varnish . If it turns out that you cut out material smaller than the nail, then you can fix everything with the help of colored varnish that is close in tone to the color of the sticker.
When heated, the thermal film expands slightly and increases its area. However, when it cools down , it tends to shrink .
This allows it to fit tightly to the nail plate . One of the advantages of thermal film is smoothing the surface of the nail and hiding its imperfections . After applying the thermal film, the nails must be covered with a fixing varnish .
Even if the nails have minor defects, the thermal film hides them well
Thanks to a huge selection of different shades, patterns and ornaments, you can add constant variety to your manicure .
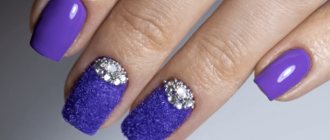
In addition, you can decorate the thermal film with various glitters, stones and rhinestones. A manicure that combines several techniques will look very beautiful. For example, half of the nail can be painted with gel polish, and thermal film can be applied to the remaining half.
CND Vinylux: why I won't go back to regular varnish
Be careful: sheet from multiple photos)
When I gave birth to a child, there was very little time for manicures. I want to tell you about a system that will help those who are under time pressure - CND Vinylux. With it you can paint your nails in 15 minutes, go to bed and wake up the next morning with a normal finish without pillow marks.
What is it, how to apply, pros and cons
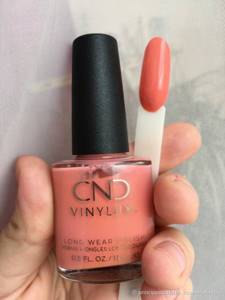
CND Vinylux - or "vinylux" for simplicity - is something between shellac and regular varnish.
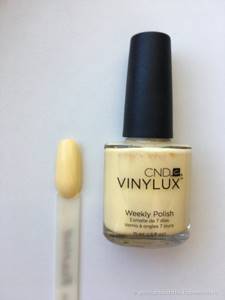
The system consists of two products - CND Vinylux Long Wear Polish and CND Vinylux Long Wear Top Coat. On the brand’s website I saw another option for a top coat with a gel polish effect - CND Vinylux Gel-like Effect Top Coat, but I haven’t tried it and can’t say how it works.
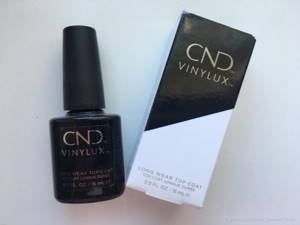
Bottle of top
As in the case of shellac, CND were the inventors of a technology that later diversified and acquired many analogues. Now many professional nail brands have systems similar to vinyllux, and even Vivienne Sabo. I tried several of them, but still came back to CND: it lasts the best on my nails.
The system works like this:
- Apply two layers of varnish to oil-free nails. I degrease with any alcohol-containing antiseptic. No base required. The manufacturer claims that the varnish also works as a base: it glues the keratin of the nails, but at the same time prevents the pigment from penetrating the surface of the nail. I don’t know how it really works, but it’s a fact: in five years of use, not a single polish has stained my nail plate, even bright and dark colors.
- After a while, apply a layer of top coat. We wait 8-10 minutes and you can go do your business. The top dries without a lamp. According to CND, the top uses Prolight technology, thanks to which the coating becomes stronger every day under the influence of UV rays. It looks like shellac in slow motion.
For me, vinyllux turned out to be indispensable when I want color on my nails, but only have half an hour to cover it. I apply two coats of polish with minimal rest, followed by a generous coat of topcoat. After 10 minutes you can safely touch things with your hands and do housework. Usually, to be sure, I wait about 20 minutes. After that, you can go to bed.
This is what the coating looks like on the third day
Vinyllux has an unpleasant feature: when applying a second layer of varnish and top coat, you can create bald spots in the color. Most often this happens if the bottom layer has dried well. Therefore, I try to apply a second layer of varnish and a thicker topcoat and not take very long pauses between applications.
After coating, you can wash your face and wash your hands: this has little effect on durability. Vinylux begins to wear off faster if you take a hot bath or wash your hands in hot water without gloves. But in general, it withstands frequent washing and cleaning of plumbing fixtures with a mild detergent.
This coating lasts an average of seven days on my nails. Usually after five days minor flaws appear. For me it’s not even frayed ends, but detachments in the cuticle area. For comparison: I wear regular polish for three to four days, but shellac starts falling off after seven days. In terms of durability I can only compare it with the Christina system
Vinyllux can be removed like regular varnish: with nail polish remover; there is no need to soften the coating separately.
For me, a separate plus is that vinyllux causes little damage to nails. The top does not dry out the nail plate like regular quick dryers. All the troubles I had were only from bad railway lines.
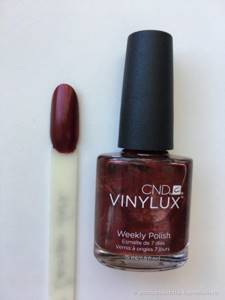
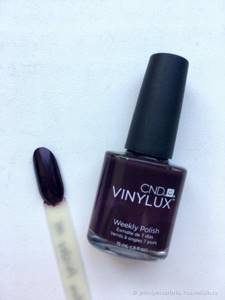
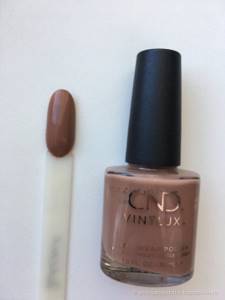
A point worth considering when choosing is the varnish version. They differ in the inscription on the packaging and the tassel: the old one is thinner with an even cut, while the new one is wide and rounded. Since the varnish can thicken over time, it is better to buy a new version: it will most likely be fresher.
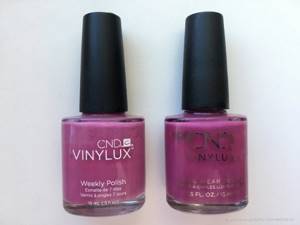
On the left is the old version of the varnish, on the right is the new one. Brushes: on the left is the old version of the varnish, on the right is the new one
Review of the shades available to me
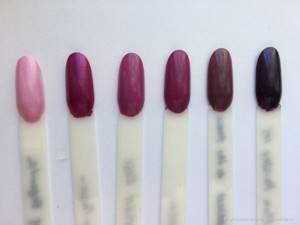
There are few vinyllux swatches online, but they are needed, since CND is now mostly purchased online. So I photographed all the shades available to me - mine, my mother’s collection and my sister’s collection.
I tried to take swatches in daylight. Swatched on milky chamomile, since my nails are not in perfect condition right now.
All shades of CND Vinylux can be divided into several groups based on texture. This is not an official classification, but based on my feelings:
- Glitters. They exist, but they are few and far between and I haven’t tried them.
- Thick cream. This is the most disgusting texture. Do you remember gouache from childhood? This is it. The color is dense, as if with the addition of thick white. Apply with difficulty, in thick layers. Over time, lumps of pigment form, making it completely impossible to paint.
- Pastel. Oddly enough, they are quite decent in vinyllux. Nothing supernatural: it can streak, most likely it will take three layers for an even coating. But I've seen worse.
- Mother of pearl and shimmers. Vinylux has a good category in this category. Quite obedient, plus CND can make beautiful mother of pearl.
- Crele. My favorite texture and the most successful. Cool, obedient. The options are different: some shades are almost glassy, others are denser. Some may be slightly runny.
Many shades of shellac and vinyllux are the same. So if you like a certain color, you can look for its analogue.
Next there will be a sheet of swatches, which I tried to divide into groups.
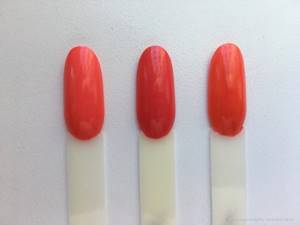
Reds
The most successful group of shades. There are a lot of reds in CND Vinylux, they are very different and almost all are good. Almost any finish and undertone can be found.
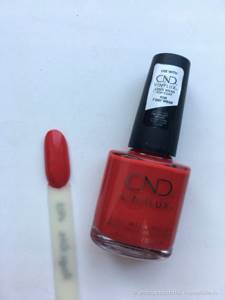
First love
- a difficult shade for photos.
Something between red and warm pink. Crele, no problem. First love
Hollywood
- lives up to its name. Classic warm red, slightly hinting at carrot. A fine, fine golden shimmer floats in the base, which gives the coating an interesting volume, although it makes the polish look completely retro. Hassle-free, festive.
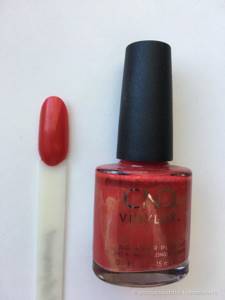
Hollywood
Wildfire
- classic bright red. Suitable for almost everyone and for any occasion. My sister has already used up about five bottles. Crelly, dense color.
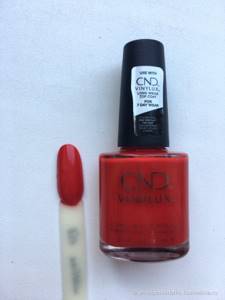
Wildfire
Rouge Red
- almost a complete analogue of Wildfire, it contains slightly more blue. Also a crelly, it applies well. I didn't find it in the list of colors on the official website, so it looks like this shade has been discontinued.
Rouge Red
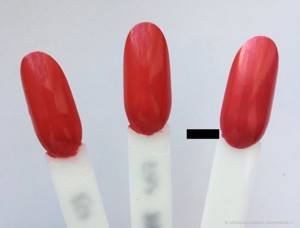
Wildfire, Rouge Red, Hollywood
Rose Brocade
- raspberry.
Cool, beautiful. Crelly, wears in two layers without problems. Rose Brocade
Rouge Rite
- this is my love. A dark red color with a blue undertone that blends well with the skin and looks very calm and appropriate. This is a red that is easier to wear than many nudes) Crele, applied without problems.
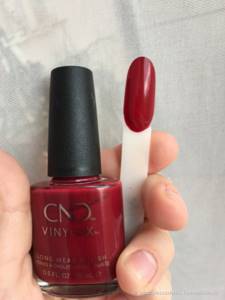
Rouge Rite
Bloodline
— who remembers the time when every food lover considered it necessary to have Chanel’s Rouge Noir or its equivalent in his collection? This is one of the rougnoir family. More jelly than previous comrades. Can streak and sometimes requires three coats instead of two. Funny coincidence: my copy of Rouge Noir had a crooked shaggy brush and Bloodline’s is also crooked and shaggy) It’s just not fate.
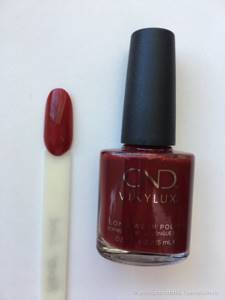
Bloodline
Leather Satchel
- red-brown with shimmer. The shimmer does not stick out, but rather gives more volume. Interesting shade, but looks a little heavy on me. Slightly runny, but easy to apply in two layers.
Leather Satchel All red: Rose Brocade, Hollywood, Wildfire, Rouge Red, First Love, Rouge Rite, Bloodline, Leather Satchel
Purple and pink
This group is in second place in the number of favorites. CND Vinylux has good purple shades, but the pinks are very different.
Beckoning Begonia
— pink with a slight purple note and large silver shimmer.
Easy to apply, no streaks. I really liked it in the bottle, but was disappointed in my hands: there is no purple note and it looks like an uninteresting pink. Beckoning Begonia
Crushed Rose
— deep pink with a hint of purple.
One of my favorites: easy to apply and versatile to wear, crelly. Crushed Rose
Brazen
- purple pink.
In the bottle it appears to be darker and more purple than Crushed Rose, but in reality they are almost indistinguishable. I know because I did a two-tone manicure with them. But most of all I like to wear it with Boheme, which is below. This polish is also a hassle-free crelly. Brazen
Tango Passion
— bright purple with shimmer.
To be honest, I bought it only because of the name, since I dance tango) At first I wanted to give it away: it is very liquid and you need three layers for a dense color. But then I fell in love with it for pedicures: it matches almost all dance shoes) Tango Passion
Married to the Mauve
- muted brown-violet.
At one time, such shades were very popular. But it is in this case that I don’t like the balance of purple and brown: there is too much of the latter, I don’t have enough gray and purple. Overall a good, working representative of dense crelly. Married to the Mauve
Plum Paisley
— dark cool purple with fine silver shimmer. It's quite dark on the nails, but doesn't look heavy thanks to the shimmer. Dense, trouble-free application.
Plum Paisley
Violet: Beckoning Begonia, Tango Passion, Crushed Rose, Brazen, Married to the Mauve, Plum
Paisley
Everything is complicated here: there are perfect nudes, and there is streaking horror.
Naked Naivette
- milky white cream with a hint of pink. It's a little hard to apply and can streak. Thickens quickly.
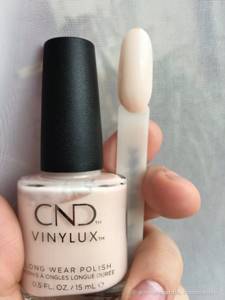
Naked Naivette
Skin Tease
- similar to the previous one, but it has more yellow and brown. It’s easier to apply: it doesn’t streak and doesn’t thicken as much.

Skin Tease
Dandelion
— not quite nude, but close to it: very bleached beige-yellow with mother-of-pearl.
It seems to be not the simplest shade, but it looks just great on nails. Can be capricious and stripe. If I'm lucky, I can do it in two layers. Usually at three. Dandelion
Soulmate
- light brownish coral. I liked it in the bottle, but it doesn't suit my skin color and turns into a nasty bleached brick color. Crelly, easy to apply.
Soulmate
Clay Canyon
- light brown with a slight orange tint.
It turned out to be the perfect nude for me, especially for the summer. Crelly, easy to apply, but can streak. Clay Canyon
Boheme
- beige with a hint of cocoa. Great base color, especially for winter. It is good to combine with other colors in manicure. Crele, easy to apply.
Boheme
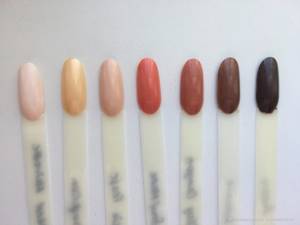
Nudes: Naked Naivette, Dandelion, Skin Tease, Soulmate, Clay Canyon, Boheme and a selection of others, Rubble
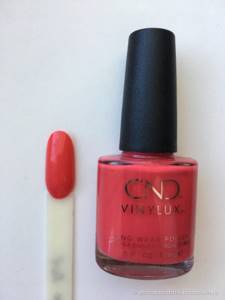
Coral
In general, I tried to find an analogue to the shellac shade, but since I didn’t ask for the name, I missed it all three times.
Tropix
- slightly bleached coral.
Bright and juicy, but I didn't have enough pink in it. Crelly, applied in two layers, but can streak. Tropix
Lobster Roll
- slightly bleached coral with that very light pink tint that I was looking for. Like Tropix, a crelly that can be slightly streaky.
Lobster Roll
Mango Beat
- bright coral red.
I left it because it reminded me of my favorite Red Lights Ahead from OPI. Jelly, easy to apply. Mango Beat
Coral: Lobster Roll, Mango Beat, Tropix
All others
There are a few shades that didn't fall into the other categories.
Sun Bleached
- pastel yellow. In two layers it is streaky, in three it is excellent and lasts a long time.
Sun Bleached
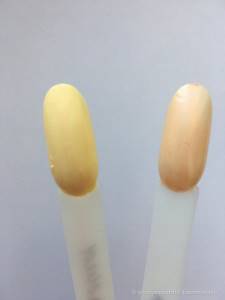
On the left is Sun Bleached, on the right is Dandelion.
You can see that the last one is more flesh-beige Sugar Cane
- pastel green.
Twin brother of Sun Bleached, although from a different collection. I wear them most often as a duo. You also need three layers for an even coating. Sugar Cane
Rubble
- dark gray, reminiscent of raw cement. Terrible polish: the color is dull gray, although according to the promo it seemed to me that there was a hint of brown and purple. Thick cream, difficult to apply. My copy is also not new; it has thickened and formed lumps. I tried it twice and threw it away.

Rubble
I've only used regular polish a couple of times over the past year. As a result, I almost completely switched to CND Vinylux. I only left two Chanel polishes, which were given to me by close people and whose color I really like. I recommend vinyllux to anyone looking for a durable and quick-drying coating.
My name is Dasha, call me first name)
Easy to apply. Dries quickly. Durability - seven days. Beautiful color palette. Easy to remove. Does not dry out nails.
Not so easy to buy. Some shades are terrible to apply. The top may cause bald spots in color when applied.
Increase
Hollywood manicure with thermal film
The history of the creation of this unusual manicure is very interesting. One day, two friends, one of whom lived in Australia and the other in America, got together to come up with some stunning manicure.
First of all, they sought to make it durable , since one of them worked in a car repair shop. And I wanted to be beautiful even in such a “dirty” job. Technical film coating technology has been known for a long time . And the ladies thought: why not apply this idea for manicure.
Protective film has begun to gain popularity in the states. Metallic shine, golden or silvery nails – isn’t this a real breakthrough in the beauty industry ! Hollywood stars impeccable nail art with pleasure .
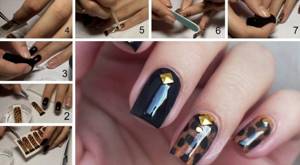
Under the spotlight and camera flashes, such an unusual manicure looked especially bright and catchy. After some time, thermal film became available to beauties all over the world .
an unusual manicure is that it can be easily done at home .
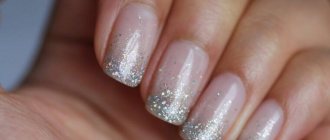
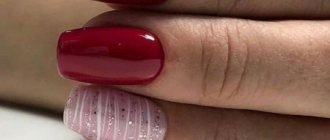
Are you going to a party or social event? Then you can safely use golden or silver tones. They will shimmer beautifully and attract attention . For everyday use, there are more muted tones of thermal film. In any case, your nails will look original and flawless .
What types of manicure stickers are there?
There are many options for adhesive films with pictures that allow you to experiment and show imagination when using them. They are classified depending on the method of fastening, whether they are based on glue or whether water is required during the process. Get to know each species and its features better.
Under gel polish
Gel polish applied over the design will allow you to firmly fix the image and walk around with a beautiful manicure for a long period. Ordinary transfer stickers, in the form of a transparent sheet and a pattern, work well under gel polish. It is separated from the substrate, applied to the prepared nail and removed after a period of time.
Sliders are also attached under gel polish. It is cut out of a paper base in the shape of a nail. Then immerse in warm water, apply and remove excess moisture with a swab. Next, a fixing layer is applied.
A film with a photo print looks beautiful under gel polish, allowing you to create a chic and mesmerizing manicure. No water is used. Photographic films can be purchased either in a ready-made form, or as a solid sheet from which a design is cut out according to the nail.
Water-based (transferable)
Water-based stickers will delight you with a wide variety, bright patterns, and photo designs. Making water images is very simple and does not take much time. In addition, this design is absolutely safe and will not affect the condition of the nails. To use, you just need to cut out the desired shape, moisten the material in water, separate it from the paper backing and attach it to your nails.
How to apply water stickers correctly
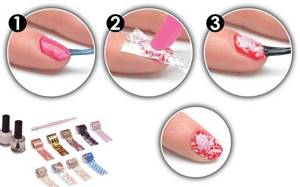
How to use water stickers
Metallized stickers
This option will allow you to create the most spectacular and fashionable manicure. Matte and glossy metallic effects can be applied to the entire plate, or can be attached in beautiful patterns combined with a colored coating.
Such stickers are also trimmed before attaching. You can warm them up with a hair dryer or near a light bulb; it is better not to do this in water, as it may not turn out neatly and with streaks.
Slider design
This sticker design is properly called slides. They are thin films with a transparent base and a printed pattern. They can be used for nail extensions, creating stunning nail art. The slider design features high-quality printed images that look realistic and bright.
3D stickers
Such options are made on an adhesive and water basis. They have convex details that create a three-dimensional image and will not interfere with everyday life when applied to your nails. The beautiful relief looks original and unusual, but during the attachment process you need to be careful not to create unnecessary folds on the sides.
Stickers with photo design
Photo stickers allow you to apply the most incredible and very realistic images to your nails. Perfect for those who don’t know how to draw themselves, as they have a finished design. All identical pictures can be duplicated on each finger, or they can have a similar theme.
How long does thermal nail film last?
It is necessary to take into account the fact that the thermal film must be applied to the base coat . Before the procedure, you must degrease your nails and lightly sand the nail plate. After the thermal film is well fixed on the nails, it is recommended to cover them on top with a fixative .
If you do the whole procedure correctly, this coating will last about 2-3 weeks . A pedicure with thermal film can last much longer.
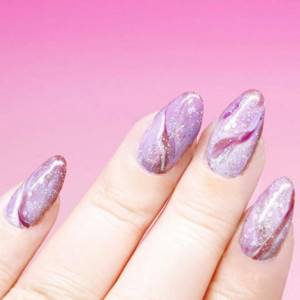
Marble design using gel polish
Transforming nails with a gel-based composition is a little more complicated. First you need to prepare everything you need: an ultraviolet or LED lamp (preferably with high power so that the gel polish dries faster), a thin brush, files and buffs, a high-quality set of gel polishes (2-3 colors, base and finish).
Let's get started with marble manicure:
- Use a soft buff to file down the glossy layer of the nail, achieving a matte and smooth surface.
- We degrease and coat the nails with a base product that protects the nail plate from the influence of chemicals.
- We seal the ends of the nails with the base.
- Dry your hands one by one in a UV lamp (or Led) for about 1-2 minutes.
- Apply the base color of the varnish and also seal the ends.
- Dry your nails for 1-2 minutes.
- All that remains is to paint your nails with marble. To do this, use a brush and a contrasting color of gel polish.
- The stains can be made in several shades, for example, on a white background of gel polish, draw gray veins of marble, then use a thin brush to paint in black. This way the design will look like it has a 3-D effect.
- You can paint your nails with acrylic paints; we’ll look at the technique below.
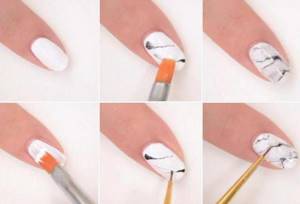
Marble painting with acrylic paints
The technique for performing this design is not particularly different from the “water” method, it’s just that acrylic paints are a little thicker than regular varnish, so it’s easier to work with them. Paints can be mixed with each other; use a palette made from a small piece of foil for this, and a toothpick will do instead of a brush. Next, use a container of water and drop the desired color of paint into the center of the liquid. Dip your nails into the smeared circles of colored paint and then wipe off the excess. Cover the result with two layers of topcoat. The chic design is ready, don’t be afraid to experiment and be inspired by the surrounding nature.
How to make shiny marble
How to make a marble manicure with a special shine? Just add rhinestones, bouillons, ribbon or kamifibuki. Marble nails themselves look like a masterpiece of nail art, so it’s easy to “overload” it, remember this when adding glitter to the design. For a successful color combination, you need to mix varnishes that are similar in shade.
Contrasting colors when mixed can give off unnecessary shades, so it is better to dilute them with a neutral color: beige, white or gray.
How to preserve thermal film for nails for a long time?
In order for nails with thermal film to please you with their perfection and beauty for as long as possible , there are several restrictions that should be avoided. Therefore, listen to the advice and try to follow them:
- In the first few days after this manicure, try not to come into contact with hot water . If you have some chores to do around the house, ask someone for help or put them off for a few days. This way you definitely won’t damage your minx manicure.
- Sometimes it happens that the thermal film begins to peel off . Don't be alarmed, this is a completely solvable problem. Use a regular hairdryer to slightly heat the film and press it well onto the nail plate.
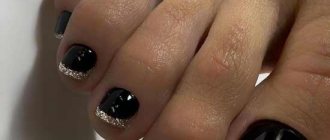
Thermal film on your toenails will last longer.
If you are tired of a manicure with thermal film , then you will only need a few minutes to remove it . To do this, fill a small basin or bowl with hot water and dip your fingers in it for a few minutes.
High temperature will allow you to instantly remove the thermal film from the nails.
Let yourself become a real star! Try a manicure using thermal film: please yourself and surprise your loved ones!
Advantages and disadvantages of minx manicure
Manicure using thermal film has a number of advantages:
Manicure with thermal film has many advantages
- Thermal film does not cause an allergic reaction and does not have an unpleasant odor.
- Withstands any mechanical damage and retains the effect for several weeks.
- A huge palette of thermal film designs makes it possible to create a manicure to suit every taste.
- The film is easily removed from nails and does not require the use of chemicals.
- The technology allows you to do a manicure no more than once every 3 weeks . Now you don’t need to paint your nails regularly and be afraid of damaging the polish.
The minx manicure has no disadvantages, except perhaps the high price for the work of a master in a nail salon and the need for some skill when applying at home.
Video: Master class on applying thermal film
- How to grow nails quickly in 2, 3, 5 days, in a week, in 2 weeks, a month?
- Toenails are thick and hard: how to soften them?
- Diagnosis of health using fingernails. How to identify diseases by nails?
- Why fingernails and toenails turn black and dark: causes and treatment.
- 10 best products for strengthening and growing nails.
- Deep, non-healing cracks and peeling of the skin on the fingers, near the nail, on the pads, phalanges, joints: causes and treatment
- Deep, non-healing cracks and peeling skin between the toes
- Lunar calendar for manicure, pedicure, nail extensions and cutting
- Is it possible and how to determine a girl’s character by her manicure?
- How to easily remove shellac at home without damaging your nails: methods.
- Nails peel under gel polish, after gel polish: reasons, what to do?
- The appearance of mold on nails after extensions. Is mold a fungus?
- Psoriasis of the fingernails and toenails: description of the disease, treatment methods
- What do you use to smear your finger around the nail when doing a shellac manicure?
- What is wild meat near the fingernail and toenail?
- An abscess on the finger near the nail - felon: how to treat?
- Which doctor treats nail fungus on the hands and feet, what is it called?
- Nail onycholysis: what is it and how to treat it?
- What is the difference between a matte top and corduroy, satin, velor?
- Why does gel polish swell and bubble on nails in a lamp?
- Deformation of fingernails and toenails: causes and treatment.
- What vitamin is missing if your nails are brittle and your hair is falling out?
- What is prosthetics of fingernails and toenails and where is it done?
- Camouflage base for nails: how to choose camouflage
- Why do white stripes appear on fingernails and toenails?
- Strengthening nails with gel polish: how to strengthen nails with acrylic, base, gel
- How to treat hyperkeratosis of fingernails and toenails
- Inflammation and redness around the big toenail and hand nail
- The structure of the human nail on the hands and feet: diagram, anatomy, functions
- Vitamin E in ampoules for the face, around the eyes, nails, heels
- How to paint your nails neatly and evenly without staining the cuticles or skin on your hands?
- How to choose the color of nail polish for a perfect manicure?
- Deformation, dystrophy, detachment of the nail plate: causes, types, photos, treatment, tips
- Primer and degreaser, dehydrator - which is better, what to use first?
- What to do if your nails are wide and short, or if your nail shape is ugly?
- How to do nail extensions with a napkin base, gel, polygel.
- Celandine for nail fungus on the hands and feet: recipes, reviews
- Dry and hard skin around the nails: reasons, what to do, how to soften the skin?
- Fiberglass for nail extensions: how to use?
- Mycoseptin for the treatment of nail fungus: instructions for use
- Alignment of the nail plate on the hands and feet
- How to give your nails an almond shape: tips, step-by-step instructions
- Mycospor solution: treatment of nail fungus, instructions for use
- Nail fungus after extensions. Risk group and treatment. Expert advice.
- Bruised toenail or hand nail. What to do if a child pinches a nail?
- Why do fingernails and toenails turn yellow: reasons. How to treat yellow nails?
- 10 ways to whiten your nails at home
- Broken, itchy, nail coming off, white spots on nails, fungus: signs
- Antifungal drugs for fingernails, toenails, skin
- Ingrown toenail: causes, prevention and treatment methods
Marble manicure with gel polish
This type of manicure is best done in professional salons, as it requires special care and perseverance. Masters perform this procedure using a special brush. The convenience of gel polish is that it does not dry, so you can use it to create any ornament.
There is no need to rush; you can correct the lines with a brush and partially mix shades.
- Degrease nails, give them the desired shape, remove cuticles.
- Apply a thin layer of base gel coat. Dry in a UV lamp.
- Paint your nails with the main color. Dry in a UV lamp.
- Pour clinser into a small container for subsequent cleaning of the brush.
- Drop the colors of the gel polishes chosen for the design onto the foil.
- Dip a thin brush into the drop and draw patterns on the nails. Curved, weak lines of any length should be applied. The pattern should imitate the structure of the stone.
- After each detail, dip the brush into a container of clinser, and then move it along the newly drawn strip. This way you can achieve blur.
- Let the drawing dry.
- Cover with gel top and dry under a lamp.
How to make a marble manicure with varnish
There is also a convenient option for creating a manicure using a spoon. This method can be compared to the water method, but there is no need to use a container of water. However, when performing this manicure, it should be taken into account that the layer of the top coating - the pattern - will be thick, so it requires longer drying.
Not everyone can achieve marble design using this method.
- Prepare and polish your nails.
- Cover with base coat. Let dry.
- Drop the varnishes chosen for the design into a spoon.
- Use a toothpick to stir the varnishes.
- Dip the nail plate into the spoon.
- Next, pull out the nail and let it dry.
- Remove excess polish from leather.
- Cover with a colorless fixative.