Acrigel or polygel appeared in the nail industry in 2022 and many masters fell in love with this material for its unique properties. Let's figure out what acrylic gel is.
Acrylic gel, acrygel, polygel - different brands have their own names, but the result is the same, this product combines the best qualities of gel and acrylic.
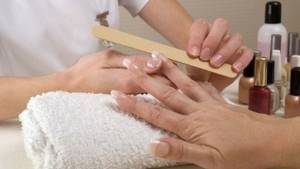
Nail care at home and in the salon
Healthy nails look great even without an elaborate design. The use of various decorative means for decoration often leads to a deterioration of their condition, so taking care of the nail plates should become a regular habit. Home care is based on several rules:
- High-quality manicure tools are the main condition for healthy nails. For natural nail plates, glass, ceramic, and crystal files are the safest. They need to be filed in one direction.
- Care products should include hand cream, cuticle oil, and strengthening product.
- Regular warm oil baths for hands made of olive, almond, castor oils with the addition of lemon juice. Dipping your fingertips into lemon pulp will help whiten your nails.
- Intake of nutrition from food containing vitamins C, D, B, A, E. Food requires a sufficient amount of zinc, iron, iodine, magnesium, calcium, biotin, folic acid.
Salon nail care procedures: professional manicure, paraffin therapy, sealing, various types of extensions.
How to wear acrylic
Manufacturers of materials for the nail industry have managed to create a material that does not cause any complaints from customers. Its elasticity and strength allow you to engage in everyday activities without worrying about the safety of your manicure.
During mechanical stress, acry-gel takes the entire load upon itself, preserving the natural nail from injury.
Due to its high adhesion and natural appearance, acrylic is popular for strengthening nails. A thin layer is enough to increase the resistance of the manicure to cracks and chips significantly.
Acrigel
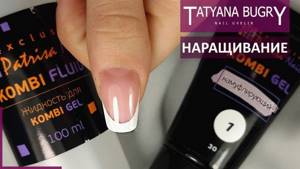
Acrigel (combigel, acrylic, polygel) - all these names belong to a universal material created on the basis of acrylic and gel. The material has absorbed their best qualities: gel plasticity and acrylic strength, and even surpassed them.
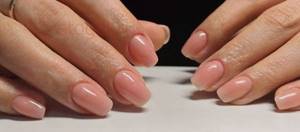
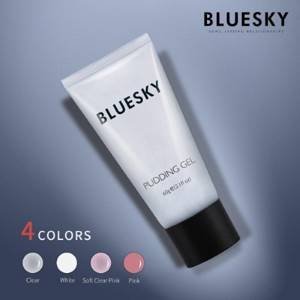
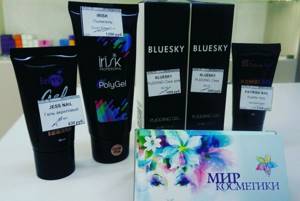
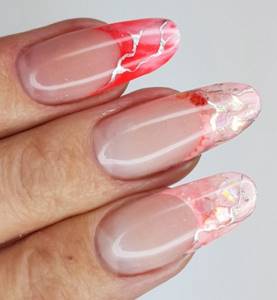
Extended nails are distinguished by their elegance, natural appearance, and effectiveness, on par with a professional salon manicure. The procedure allows you to quickly increase length. At the same time, the coating is very durable. The best polygel manufacturers are Irisk Professional, Bluesky Pudding Gel, Tnl Professional, Soline Charm.
Benefits of acrygel for nail extensions:
- The elasticity is superior to hard gels, the strength and lightness are higher than that of arkyl. There is no effect of squeezing the nail plate. Despite the high degree of density, the material is not felt on the nails and does not weigh them down, so it can be used on weakened nail plates.
- The dense and viscous consistency of the material allows you to give surfaces the correct architecture and ideal shape, thereby reducing material waste and saving time on the filing process.
- Acrylic causes 50% less burning when polymerized in a UV lamp, even when modeling very long and dense nails. There are no harmful fumes.
- Acrygel does not spread, so there is no risk of accidental contact with skin. This sets it apart from regular gel.
- The dust created when filing acrylic materials is 30% heavier than regular gel or acrylic. When working, it does not fly apart, but settles on the skin and table. This property reduces the risk of contact and respiratory allergies of the nail artist and the client.
- Unlike acrylic, acrylic does not require the artist to follow strict proportions of combining powder with monomer.
- Excellent adhesion of acrylic with primer and base, as well as any type of varnish, allows you to avoid peeling.
- Acryl Gel can only harden under a lamp. Therefore, you should not be afraid of sunlight hitting an open jar of acrylic. This is its advantage over acrylic.
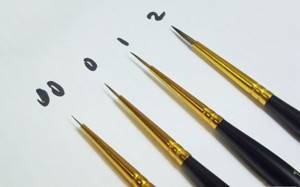
- Combigel is very economical. One layer of material allows you to obtain a uniform and dense coating. There is no need to purchase separate brushes. Those used in working with gel and acrylic are suitable. The absence of an unpleasant odor allows the master to do without a separate office.
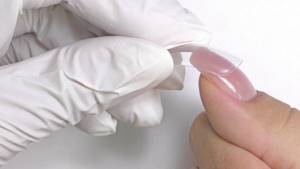
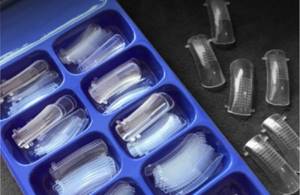
Note! The correct shape is created both by directly applying the material to the nail plate and by using accessories: regular or liquid tips, reusable forms. Combigel lasts until correction is required due to overgrown natural nails.
Precautions during operation
Despite the fact that the dust from acrylic gel sawdust is 30% heavier than from gel or acrylic sawdust, the master needs to use a vacuum cleaner to collect it. And also use a protective mask, glasses and a screen when doing polygel nail extensions.
Do not neglect the antiseptic treatment of the natural nail before applying an artificial coating. Acrylic gel is designed for long-term wear. By covering the entire nail plate, it disrupts the natural circulation of air, resulting in an increased risk of the proliferation of pathogenic bacteria.
Individual intolerance to the components of acrylic gel by the client is possible.
Polygel extensions at home
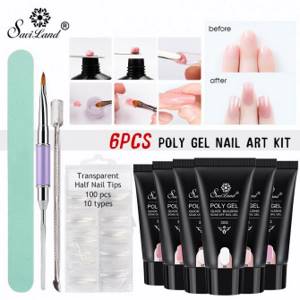
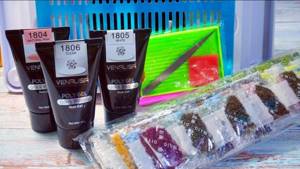
Step-by-step instructions for acrylic gel nail extensions will help you carry out the process at home. To do this, you need to purchase a set for modeling nails with polygel. Professional equipment includes all necessary materials:
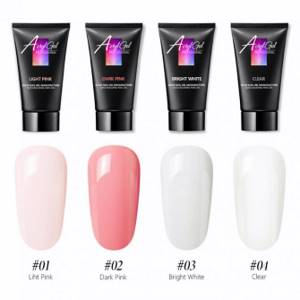
- 4 polygels (clear, white, light pink, camouflage pink);
- construction fluid for leveling acrygel;
- bonder, dehydrator;
- acid-free primer;
- classic finish gel;
- sticky layer remover;
- brush, spatula, clamps for squeezing polygel out of the tube.
Preparation consists of a thorough manicure, cleansing and dehydration of the nail plates.
How to extend onto upper forms
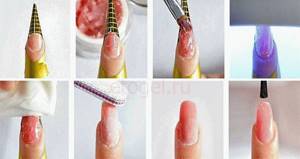
The top shapes help you to grow your nails into the perfect shape without much effort. The duration of the procedure is reduced to 40 minutes. Process algorithm:
- Forms are put on the prepared nail plates and a base coat is applied.
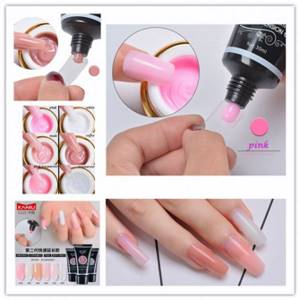
- A ball of acrygel is squeezed out of the tube, picked up with a spatula, and applied to the nail. The brush is moistened in a special anti-stick liquid.
- Begin to distribute the polygel from the cuticle, to the side rollers, over the entire surface. You can add material without worrying about noticeable transitions.
- The nail is dried in a diode lamp for 30 seconds.
- The mold is removed and the nail is clamped to create an arch shape.
- It is given the ideal shape using a file (180-240 grit) and a buff.
- Apply top coat or gel polish.
How to grow without forms
The nail is degreased, covered with a layer of primer and allowed to dry for 1 minute. If the nail plate is dry, then you can do without a primer. Step by step process:
- A little acrygel is squeezed out of the tube, a drop is removed using the flat side of a spatula. Apply to the nail.
- The brush is moistened in the construction fluid so that the bristles do not stick to the material. Acrigel is easily pressed onto the first third of the nail plate.
- The nail is formed by distributing the material according to the principle of a gel for extension.
- Dry in a UV lamp for 2 minutes or in an LED lamp for about 30 seconds. Remove the sticky layer, if any.
- The surface is smoothed using a file (180 grit).
- Before applying gel polish, the nail surface is coated with a primer. Then it is dried in a lamp, a layer of topcoat is applied, and dried again.
This is interesting: Breasts at 14 years old
Nail extension with polygel on tips
How to extend nails onto tips with polygel? For this method, you will additionally need to prepare a set of suitable tips, wire cutters for cutting them, and glue for the tips. The nails are carefully prepared, the tips are laid out in order. Procedure:
- On each frame, the edge of the contact zone is filed.
- The nail plate is degreased and glue is evenly applied to the contact zone.
- Holding the backing at an angle of 45 degrees, apply from the edge to the middle of the nail plate.
- The frame is pressed for 15 seconds until it fully adheres to the nail.
- After final fixation, adjust the shape of the tips using a tip cutter and file. The file is passed over the entire surface of the substrate to ensure better adhesion to the acrygel.
- An acid primer is applied and dried.
- Then apply an acrygel ball and distribute it evenly over the entire surface, starting from the cuticle. If necessary, add polygel again.
Further steps for acrylic extensions are similar to the previous options.
Acrylic gel extension method
Top 10 best polygels, acrygels on Aliexpress
On many websites of well-known companies that sell materials for nail services, you can find polygels that cost more than $10. This is what stops many masters. For that kind of money, a person who covers nails at home or for himself will not be able to buy the material. Accordingly, acrylics on AliExpress allow you to do this due to their low price and good quality. In fact, the materials are practically no different from the products of well-known companies, which cost an order of magnitude more.
Now AliExpress offers a huge number of polygels. It is worth noting that some of them do not correspond to the name. Many manufacturers decided to give a second life to jelly gels, due to the fact that they were poorly sold, and simply wrote “Acrigel” on the packages. Read reviews before purchasing a product.
view the catalog and prices of polygels on Aliexpress by following the link
.
Saviland
Top 10 polygels from Aliexpress:
- Some of the best acrylic options on the AliExpress market are produced by saviland . She was one of the very first to produce such materials. The polygel has a fairly dense texture, so many craftsmen note that they have to apply it not with a brush, but with an orange stick soaked in alcohol or a degreaser. Because the brush is very flexible, it is difficult to level the material with it. Therefore, this polygel is best used for extensions on top forms, as well as for prosthetic nails. It is not very suitable for strengthening, due to the fact that it is quite difficult to apply it in a thin layer. It comes off and crumples.
- Another good option is Mshare. Its price is in the middle category, but you can buy not only a small bottle, but also a large one, with a volume of 60 ml. It is worth noting that this is a fairly decent volume, which is recommended for manicurists to purchase. This saves money.
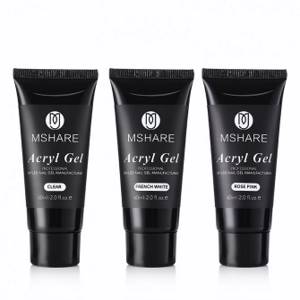
Polygel Mishare - Yinikiz polygel is quite good It has a very hard texture, absorbs well and holds the arch perfectly. One of the densest and strongest polygels. Accordingly, it is best used by professionals, not beginners. Because it will have to be cut down quite a lot if it is poorly aligned during laying out. Since it is hard, you will have to try or use a milling cutter to tidy up the area near the cuticle.
- Another good option is Modelones. It is quite thick and difficult to squeeze out of the tube. In addition, it is hardly worth using for camouflage, because when squeezed out, grains are revealed, which, after drying, are much lighter than the base itself. Accordingly, the coating turns out to be non-uniform, and with some bubbles or inclusions, white dots. It is sawed very softly, with small, heavy sawdust. Therefore, there is no dust flying in the air. This is a great option for beginners who don't have a vacuum cleaner to collect dust. The product itself lays out and applies very well. The manufacturer presented several types of material with different colors and shades. Many buyers note that white polygel polymerizes rather poorly in a lamp. Because you have to listen to it for several minutes due to its high density. The inside remains soft.
Polygel Modelones - IBCCCNDC. According to customer reviews, it is thick and easy to cut. The composition contains small grains that do not disappear after drying in a lamp.
- Elite99 . Budget and not the highest quality material. Camouflage does not dry well in the lamp, so you have to apply several thin layers and dry them. Many buyers note that this is not acrylic, but a jelly gel.
- Venalisa. This polygel is one of the available ones; it is also widely purchased on AliExpress. But buyers were initially attracted by the low price of acrylic. According to reviews, this is not a polygel at all, but a jelly. Therefore, it is quite difficult to spread it, it is thick and sticky like jelly.
Polygel Venalisa - UR Sugar . Low price, good quality. Camouflages and white polygel dry well. It is cut down not by dust, but by scales, and practically does not generate dust.
- Monja. It’s a bit runny, but the white polygel dries well and is suitable for lay-out jackets. The seller includes gifts in the package. The price is one of the lowest.
- Ellwings Builder . Buyers note that this is just a thick gel, not an acrylic. It is poorly leveled with a brush, it drags after it. White is translucent, not suitable for a French jacket.
In fact, now on AliExpress the production and sale of polygels is only gaining momentum. Almost every manufacturer of gel polishes and various gel systems is now producing acrylics. If you don’t want to buy super fashionable material for a lot of money on domestic sites, we recommend that you look at AliExpress and make your first order.
The prices are really very affordable; here you can buy a 30 ml tube of polygel for only 3-4 dollars. At the same time, the quality of the material is quite good. Many masters have appreciated the advantages of this material and have practically abandoned conventional gels and acrylic extensions, because with the help of acrylics it is possible to perform extensions, corrections, as well as strengthening and leveling of the nail plate.
Polygel
If you still have not decided to purchase this material, we advise you to do so. Almost all buyers are very satisfied. We can say that with this material the time for nail extensions, as well as nail repairs, has been significantly reduced. Polygel can be safely used by beginners, as well as by those people who decided to try to grow their nails for the first time. The most interesting thing is that many manage to do this quite well. After all, to apply nail extensions to the upper forms, there is no need to know how to correctly place the lower form or trim it.
Many manicurists note that you can build up your nails using polygel in just an hour and a half. This helps save time and therefore take on more clients. This material has also made extensions much easier, as well as manicures at home.
Advice from experienced manicurists
A novice nail extension artist has plenty of opportunities to learn independently using video tutorials or articles on the Internet. It’s better to take real master classes from professionals. They can share their secrets and valuable information. Here are some of the tips:
- To create a three-dimensional design, polygel can be mixed with gel polish.
- To avoid detachment, when applying the material must be carefully pressed against the cuticle.
- The impermeable film created by gels, varnishes, and acrylics serves as a breeding ground for bacteria and fungi. Therefore, disinfection is necessary when using decorative coatings.
- You need to file your nails after they are completely dry. A wet nail plate is very vulnerable to mechanical stress and may begin to peel off.
- Nails need to be given periodic rest to recover, and not even use nail polish.
All stages of the process, from nail preparation to extension and design, are similar to techniques for working with gels and gel polishes. If you have the skill of building extensions with these materials, mastering the use of acrygel will not be difficult.
Possibilities of manicure and nail design using acrylic gel
Combining the advantages of other polymers for nail extensions and manicure (varnish, acrylic, gel) in polygel has made it possible to expand the number of services provided in the nail field.
Acrylic gel nail extensions can be done on special forms or tips. This material can be used to strengthen the nail plate, level it, or correct a chip.
Acrylic gel for nail extensions, which specialists can work with even without the use of forms, makes it possible to prosthetize weakened or problematic nails (fungal disease, detachment).
The peeling part of the nail plate is removed, the remaining part is processed, filed and degreased. Then, polygel is applied directly to the skin. The specialist models the desired shape and polymerizes the coating.
Polygel can be applied to protect natural nails from the aggressive effects of household chemical solutions, or for further application of varnish coatings. When creating various designs, the material can be mixed with any color of gel polish to obtain the desired shade.
Strengthening and extending nails with polygel
Acrygel (acrylic, acrylic gel, polygel) - all these are different names for one easy-to-use material that allows you to create short and medium length nail extensions or strengthen the plate without preliminary mixing.
- good flexibility
- lightweight - does not compress the surface of the nail bed,
- does not have a strong odor when applied or dried,
- when filing and removing, dense heavy particles are formed, which quickly settle on the table or in the hood without floating in the air,
- Can be worn alone or under gel polish.
For artists who perform extensions using gel or acrylic materials, polygel will not create inconvenience in their work.
The application process is practically the same and therefore no new courses will be required.
Available packaging formats: tube or jar.
The best brands of acrylic gels
Today, polygel is produced in various colors, price categories and packaging formats.
Nail service specialists recommend several brands:
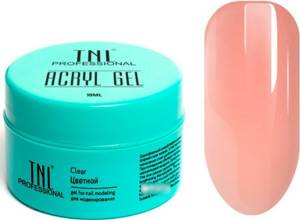
| Brand | Advantages | Minuses | Compound | Price |
| TNL Professional is mainly produced in cans |
|
Before applying the topcoat, it is recommended to sand the coating with a buffer to avoid the appearance of spots after sawing. |
| from 350 rub. for 18 ml. |
| IriskProfessional is available in both tube and can | excellent strength and plasticity consistency |
|
| from 250 rub. for 8ml |
| Pudding Gel from Bluesky Released only in tube |
|
|
| from 250 rub. for 8 ml. |
| Elpaza |
| small color range |
| from 350 rub. for 30 ml. |
| Tertio |
|
|
| from 350 rub. for 30ml. |
Acrylic gel, which is convenient, simple and safe to work with, has allowed nail extension artists to expand the range of services they offer. Girls choose polygel nail extensions because of its durability, ease of manicure creation and natural appearance when worn.
Author: Svetlana Novikova
Article design: Mila Friedan
Strengthening with acrylic - a step-by-step process
- manicure tools or apparatus,
- buff,
- clinser,
- dehydrator (optional),
- primer (optional),
- base,
- brush,
- polygel,
- liquid for polygel (if included),
- top,
- gel polish (optional).
We prepare the nail plates and cuticles well, then proceed to strengthening.
- We do a clean manicure (file, remove cuticles, clean up the eponychium, buff).
- We wipe the nails with a cleanser; if the nails are wet/oily, we then go through an additional nail prep/dehydrator.
- Next comes the primer, but with caveats:
- dry nails do not require an additional layer to improve adhesion; as a rule, any long-term coatings wear well on them,
- Apply a very thin layer of acid-free primer to damp nails and let it air dry for 60-120 seconds.
- The base line - you can use a special one for polygel, or your favorite perfectly worn top from any manufacturer will do. Apply with thin rubbing movements over the entire nail, don’t forget about the end and dry in a lamp.
To apply acrylic you will need a brush; it can be synthetic or with natural bristles; it is especially convenient to work with a flat or semicircular one.
Before spreading the acrygel, the brush must be moistened/moistened (so that liquid does not flow from it) so that the material does not stick.
Ideal: a special product from the manufacturer, or a cleanser or nail prep.
You can dip the brush into the liquid and remove the excess on a cotton pad, or wet the disc well and apply to wet the brush.
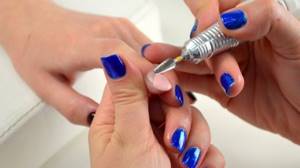
- Take a drop of polygel from a jar (squeeze out a small pea from the tube and remove it with a spatula) and apply it to the first third of the nail. We distribute it like an extension gel.
- First, we press the acrylic a little with the brush and bring it close to the cuticle, leaving a space into which you can move the brush. Next, using short strokes, we go down to the free edge of the nail, reducing the acrylic gel to almost zero. For convenience, you can first form the acrygel into a plane over most of the nail plate, and then carefully go down to the free edge.
- Working with polygel is very convenient; excess, which may form at the edge of the nail as it is distributed, can be removed with a brush and put aside (for example, on the lid of an acrylic gel container) and used on another nail. Or you can cut everything off after polymerization.
- If necessary, the brush can be slightly moistened (when the mass does not stretch well and begins to stick) and continue distributing the polygel over the nails.
- When the nail is ready, the polygel may look somewhat rough, now we moisten the brush in the cleaner a little more and, without strong pressure, move it over the polygel, creating a smooth, shiny surface.
- As smoothing proceeds, a little more excess acrylic may form from the end; they can be immediately removed with a brush or later cut off (this excess can no longer be used in further work). It is important that the material does not get under the nail and into the cavities - this will lead to chips and detachments.
- Before placing your nail in the dryer, you can let the nail sit for a while to smooth out the grain slightly.
- We send the nail to a UV lamp for 1-2 minutes, or to ICE for 30-60 seconds.
- If it was not possible to create a perfectly flat leveling surface, we saw it. Files of 180-240 grit are suitable. Next you need to buff the surface from scratches; a roughness of 180 will do.
- Next steps: you can apply a top coat and leave the nails nude, or apply the gel polish system step by step.
This is interesting: Negative Rh Factor in Women
Strengthening nails with polygel according to the described scheme takes very little time, and most importantly, with proper skill, you will not need to waste any time on final sawing.
How to use acrylic gel?
When working with polygel, the brush should be damp, but not wet, so that the material does not stick to it. To do this, the instrument is periodically dipped in a special liquid or degreaser and blotted on a lint-free cloth.
If the material is packaged in a tube, the required volume of the drop is squeezed out and removed with a spatula or other sharp object. During the formation of the nail, slapping movements are made, as when applying acrylic. The remaining polygel is pulled to the free edge of the nail plate and removed with a brush.
Acrylic gel for nail extensions, which experts recommend working with on each finger separately, so as not to touch the modeled nail when forming the next one, allows for leveling and laying out until polymerization
How to extend nails with polygel
If you need to do nail extensions with acrylic, three options are used: on forms or top forms, liquid tips.
Before any method of extension, it is necessary to do a high-quality manicure, followed by cleaning and dehydration of the nails; if necessary, an acid-free primer is also added.
VIDEO REVIEW » alt=»»>
Acrylic extension onto molds:
- We put the forms on the prepared nails. If the system has a base, we make a thin coating.
- By analogy with strengthening, we wet the brush so that the material does not stick to it.
- Let's start with polygel extensions. Place a ball of acrylic on the nail. The distribution occurs from the cuticle (we distribute it in a very thin thin layer, without driving it under the cuticle). Next we move to the side rollers - this zone also smoothly descends into a thin layer. Gradually, with short movements, we go down, building the shape and length. If necessary, the material can be added a little; it blends well and does not leave “patches.”
- Place the nail in a diode lamp for 30 seconds. Afterwards, carefully remove the form and clamp the nail, creating an arch. Then we put on the extension clip and send it to the lamp to dry for 30 seconds.
- Next, if the extension is done correctly, you can proceed to a small sawdust, take a file of 180-240 grit, no lower. We use a file without strong pressure, the material is very soft and lends itself well to filing.
- Next we buff for perfect alignment.
- For the final coating, you can apply a top coat or apply gel polish.
Acrylic extensions on top forms - video instructions » alt=»»>
Master class on extensions to upper forms, quickly and without unnecessary sawdust.
How to remove acrylic
Tools for work
To extend your nails with acrylic gel you will need:
- a router for hardware manicure or tools for trimming manicure;
- buff (special file, in the form of a rectangle, for polishing artificial and natural nails);
- files, abrasiveness 180-240 grit;
- brushes;
- clinser, primer or dehydrator (degreaser that removes excess moisture from the nail);
- base (special for acrylic gel or any top);
- acrylic gel (and the necessary liquid for wetting the brush, if included);
- top
What is polygel?
For many years, nail technicians couldn’t decide: Which is better, gel or acrylic? Each material has its own advantages, it would be nice to combine them. And lo and behold, it happened. A unique product, Polygel, was created that combines the advantages of these two materials. Everyone wanted to buy polygel! Today it is the most popular product in World of Cosmetics stores.
Benefits of Combigel
New material - new possibilities. Combigel is hypoallergenic, safe and economical. And working with polygel is a pleasure. Both beginners and professionals are eager to buy combigel. Due to its hypoallergenic nature, it allows girls who are allergic to chemicals and odors to do nail extensions.
Why should you buy polygel
- After sawdust, heavy dust is formed, which does not float in the air, but immediately settles on the table. You don't need a protective mask, glasses, a screen or a vacuum cleaner. And this is a big savings on consumables.
- During the drying process, the polygel does not form harmful fumes, so it is ideal for asthmatics and allergy sufferers.
- Combigels do not spread, and therefore the risk of polygel contact with the skin is minimal. They self-level and do not stain the side ridges and cuticles.
- You don't have to rush. With combigels you can work at a comfortable pace.
- Craftsmen do not need to spend precious minutes mixing different materials, as is the case with acrylic technology. This time can be spent creating a unique nail look.
- Acryl Gel does not dry in the sun, but only in a lamp.
- If you decide to buy Jess Nail or Bluesky polygel, you will be able to grow long nails without a strong burning sensation during drying.
- Acrylic is stronger and more elastic than gel and acrylic. It does not weigh down the nails, so it can be used on weak nails. The results are strong and elastic nails that last a long time. During wear, the polygel does not cause peeling and looks very natural.
- Combigel does not require the purchase of new tools. To work with it, the brushes that you used to work with gel and acrylic are suitable.
This is interesting: Anna Ermakova and Gauguin Solntsev
Well, how did you become convinced of the benefits of polygel? Then we are waiting for you in the World of Cosmetics stores, where you can buy Bluesky and Jess Nail combination gel at competitive prices.
Why doesn't acrylic stick to nails?
What is shellac in manicure
Polygel is a stable coating and problems rarely arise with it. However, errors in its use sometimes lead to peeling.
Partial loss of pigmentation and peeling are possible if the brush is wetted too much with a special liquid. There is no need to saturate the polygel with it, just soften it.
Acrylic does not spread, however, if you dry the finished coating for a short time, it will float. So it’s better to lay out the material, dry it according to the rules, and then admire the neat work.
To prevent air from getting into the material, it is advisable to work with small balls. You should not apply large portions of the composition, believing that this will speed up the work. On the contrary, the more polygel is applied, the more difficult it is to distribute it evenly.
How to work with polygel
We present to your attention a master class from IREN PRO NOGTI.
From this video you will learn:
- how to strengthen your nails with polygel,
- how to quickly make a design.
We wish you pleasant viewing!
How to strengthen your legs with polygel
:
- Before applying the polygel, apply a thin layer of Charme Rubber rubber base and polymerize.
- We apply the polygel to the nail and begin to distribute it with a brush. (If the brush begins to stick to the material, wet the brush in degreaser)
- We polymerize and smooth the nails with a nail file.
- Let's start covering with pastel color.
- Apply the top without a sticky layer.
* For polymerization, we recommend using 48 W LED nail lamps.
** Due to the complexity of the pigment, we recommend applying pastel shades in two layers.
You can buy polygel in our online store with delivery worldwide.
Thank you for watching.
How to remove acrylic gel
Acrylic gel for nail extensions, which most nail professionals prefer to work with, cannot be soaked with acetone or special liquids for removing gel and acrylic polymers.
The material requires cutting with 100-150 grit abrasive files or a cutter for artificial nails. It is recommended to leave about 10% polygel on the nail plates as a protective layer.
Nails extended with polygel are removed step by step:
- The length is removed with a file.
- Using a router or file, the polygel is gradually and evenly cut off. Sudden movements can damage the natural nail.
- After removing the material, the surface of the nail plate is polished with a soft buff - it seals unevenness and scratches.
- At the end of the procedure, cuticle oil or any essential oil is applied to the nail and cuticles.
Tips from professionals: Nail rub - what it is, how to use it. Instructions
New items on the site:
Nail preparation
Before the extension procedure, you need:
- Get your nails in order, trim off excess length and polish.
- Choose the right place for the procedure so that there is sufficient lighting.
- Wash your hands with soap.
- Treat the cuticles with antiseptics to prevent the gel from peeling off after hardening.
- Remove all small particles of skin from under the nail plates.
- Sand the free edges for gel extensions.
- Process with a nail file, starting from the edges closer to the center.
- Remove shine from nail plates.
- Clean your nails with a brush and sharpen them with a hard nail file.
- Degrease.
Next, you can begin to attach the stencil, apply a base layer of gel with a brush, lower it into an ultraviolet lamp to harden, and then file the nail to give the desired shape and length.
All that remains is to apply a layer of gel and the desired pattern with paints, varnishes, or you can use ready-made stickers as a stencil.
It is important to make sure that there are no contraindications for the gel procedure or allergies to gel materials.
It is not recommended to take antibiotics or other hormonal drugs the day before that can reduce the quality of work or the desired effect.
We must not forget that household chemicals are used, so it is necessary to carry out the extension procedure while wearing protective gloves.
In the future, it is necessary to carry out corrections every 2-4 weeks so that the nails always look neat and beautiful.
Preparation consists of:
- treating hands with antiseptics;
- removing the varnish coating and old gel layer;
- cleansing the surface of the nail so that air bubbles do not form under the new layer due to polymerization from exposure to an ultraviolet lamp;
- applying a fresh layer of gel;
- sawing off unnecessary parts of the stencil to give the desired shape to the nail.
The difference between the upper forms and the usual ones

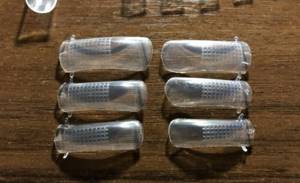
The usual forms mean tips, liquid tips and disposable templates for extensions.
- The upper ones are reusable. After polymerization, the material separates effortlessly and leaves no marks on the workpiece, so it can be used until it loses its bending. Approximate service life – 2 years;
- The upper forms do not polymerize along with the coating, but are removed immediately after the material has hardened;
- The technique of working with forms allows you to save material and create nails that are close in thickness to natural ones;
- The extension procedure is halved and takes from 1 to 1.5 hours including decoration;
- The end result requires almost no modification. After polymerization, you only need to remove excess and polish the resulting nail;
- Unlike liquid tips, where the material is applied only to 2/3 of the natural nail, top forms involve laying gel over the entire nail plate;
- There is no need to add material after removal.
Which acrylic to choose?
Before you learn how to use acrylic nails, you need to decide what type of material to use. The choice should not be random. Start from what result you need to get.
- If you need to straighten your nails, use camouflage powder. It will do the job perfectly and provide your manicure with a natural effect. Those around you are unlikely to realize that the surface is actually artificial.
- If you want to strengthen your nail plates, choose transparent acrylic.
- To create a spectacular design, choose finishing acrylic powder in combination with rhinestones, iridescent sparkles and mirror glitters. The amazing effect will pleasantly surprise you.
Types of acrylic
To understand how to use acrylic nails, you need to know what types of material are on the market.

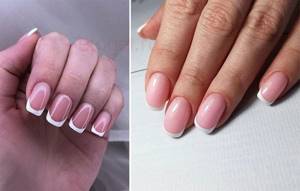
- Transparent powder is considered universal. It is used for both building and strengthening. This is also a great option for creating a classic French manicure. Nail artists use transparent powder for decoration, creating beautiful designs and sculpting. To achieve the desired result, transparent acrylic powder is mixed with glitter, dyes and other decorative elements.
- Camouflage powder is useful to disguise defects or hide unevenness. Typically, this acrylic has a beige tint, reminiscent of skin color. This allows you to imitate a natural nail. Camouflage acrylic has a denser structure. It is incredibly convenient to use due to its flexibility and plasticity. This allows you to use it even on thin or damaged nails.
- Finishing acrylic powder is recommended if a glossy top coat is desired. It's quite easy to use. After hardening, the nails acquire a mesmerizing glossy tint.
More detailed instructions for extensions
First stage
- After disinfecting the palms and fingers with an antiseptic, we treat the nail plates.
- Use a wooden stick to push back the cuticle. It is advisable to trim off the excess using special nippers or sharpened nail scissors.
- Carefully file the nails, leaving approximately 1-5 mm. Use an orange stick to remove dirt under your nails.
- The top glossy layer is removed with a buff and unevenness is removed. Use a brush or brush to shake off the dust.
- We degrease the nail plate using a special product. At home, you can use alcohol to soak a napkin.
- A primer is applied, it ensures adhesion of the material to the nail plate and protects against microbes.
Second phase
After the nails are processed, we select the upper forms of a suitable size, one by one applying them to the nail plate.
The blank should be slightly smaller than the nail plate. The free space will be filled with excess gel.
- The nail is covered with a thin base layer of gel. It should not be dried out.
- The inside of the workpiece is carefully filled with a denser layer of material in the area of the free edge, which should be dried after application (20 seconds). The gel is then applied to the area intended to adhere to the nail plate.
- The procedure can be simplified. A thin layer of gel covers the part of the plate that comes into contact with the nails. The free edge of the workpiece is compacted more tightly (0.5-1mm). At this stage of modeling, you can also determine the approximate desired length of the nail.
- The gel-filled blank is carefully pressed against the nail. There is no need to put pressure on the plate. Turning your palm over, you need to see how the gel lays down; its excess is removed with a pusher.
- Fingers with applied tips are placed under a UV lamp for about five minutes and wait for the material to polymerize. Manufacturers indicate on the packaging how long it takes for the material to harden.
- Once the gel has hardened, the top molds are carefully removed. We wipe the tip and put it back in the box. The nail is degreased. The free edge is processed with a file, which is given a neat appearance.
- To consolidate the result, this extension technology provides the possibility of applying a finishing coating. It is advisable to do this, but there is no particular need. This layer is polymerized for about two minutes.
- Degrease the nail plate. Lubricate the cuticle with special oil.
Basic terms
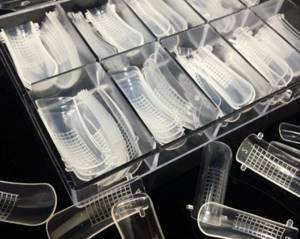
Top forms are a soft plastic product that imitates a natural nail plate and helps create an artificial nail of the desired length and curve. Unlike conventional blanks, they are installed on the nail, and not under it.
The product is odorless and has increased density, which makes it an excellent material for modeling artificial nails. Available in tubes or jars with a lid.

Depending on the bend, there are 3 types of upper forms:
- Natural. Light bend, close to natural;
- Classical. More convex in the center of the structure;
- Standard. The most convex. The result is a nail with a slightly drooping tip.
The specific type is selected based on the data of the natural nail - the bending of the transverse and longitudinal arch is assessed, as well as the desired shape of the extension.
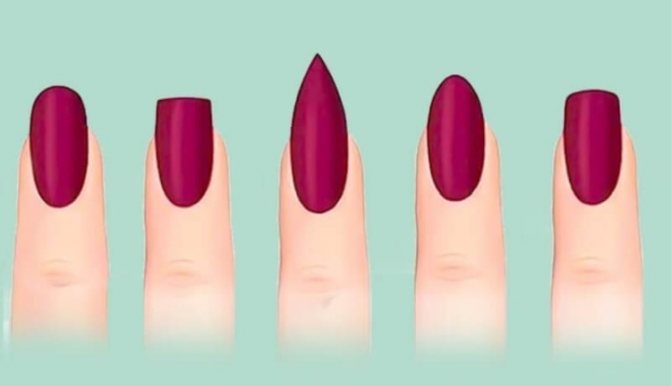
- A natural curve is used for the final result, a crisp or rounded square;
- For future nails, the “Almond” shape is standard;
- For an oval – classic.
But this relationship is conditional - you can use any bend, but in some cases this may increase the operating time.
A few important points:
- The upper forms have their own size range, which is determined by the numbers embossed on the plastic. The larger the number, the smaller its size. Depending on the manufacturer, the largest figure may vary. Common numbering of sizes is from 1 to 10;
- Depending on the manufacturer, it can be with or without printed lines. The marks on the plastic are intended to determine the length of the future nail and carefully lay out the material. Forms with markings are offered by dozens of manufacturers, for example, PNB, Formula Profi, Monami, Vogue Nails;
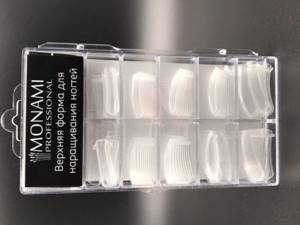
- There are small handles at the ends of the plastic blanks - they help separate the plastic without damaging the artificial nail. Find forms with handles from the brands Monami, Vogue Nails;
- On the upper forms, extensions are done with any type of gel. But most often it is polygel that is used, since it has a dense texture and does not “roll off” from the sides. When choosing a product, pay attention to the brands Canni, Vogue Nails or Patrisa Nail.
Minuses
There are surprisingly few of them. Like any synthetic material, acrylic can cause allergies. However, according to statistics, this occurs in no more than 5% of clients. However, this does not mean that you can neglect safety rules. Before you are interested in how to use acrylic for nails, you need to make sure that you are not allergic.
In addition, the material has a rather pungent and unpleasant odor, which may be unbearable for some. Not all girls are ready to endure discomfort. Even to get the nails of your dreams. You need to work with acrylic in rooms with good ventilation.
How to remove acrylic coating?
If the material was used to strengthen nails, it is easy to remove. It is enough to simply dissolve the old coating using a special liquid. Thanks to the small thickness of the acrylic layer, this is easy to do. It is enough to apply a small piece of cotton pad soaked in the product to each nail. Then wrap in foil and leave for ten minutes.
If acrylic was used for extensions, the coating will have to be cut off.
Acrylic for nails performs several different functions - extension, strengthening, decoration.