Rating: No rating
French manicure is already perceived as an unshakable, constant value in the world of nail art. The same constant as the little black dress in the fashion world . French is not just a nail design, it has become an independent phenomenon with its own history, name and long line of followers. And the first thing that beginners in the field of nail design master is, of course, French manicure.
The secret of the popularity of French
French is also known as “French manicure”. This is a fairly simple manicure technology to perform at home, but very effective. A thin “smile” is applied to the base color of the coating - an arc of a different color along the edge of the nail plate.
Beautiful French manicure
The secret of the popularity of this manicure is that the French manicure is quite universal . It suits any style of clothing and any situation, and all because the French jacket is the embodiment of naturalness.
In the process of creating a manicure, natural colors are used , which from an aesthetic point of view hides any imperfections in the nail plate. French manicure is one of the classic types of manicure, although it has very extreme variations.
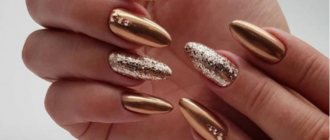
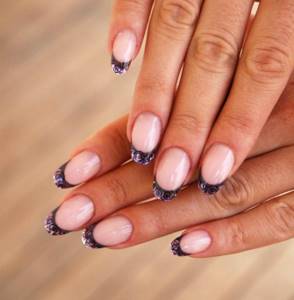
Rhinestone design
A manicure using rhinestones looks very beautiful and a little solemn, which allows you to radically transform the design with just a few stones. Rhinestones reflect even the smallest reflections of light very beautifully and are guaranteed to attract attention to your hands. When decorating a French jacket, it is better to give preference to rhinestones of the same size and type. The most current option would be Swarovski crystals. Small pebbles magically highlight the smile line or lunula, participate in the creation of patterns and can decorate each nail with a single crystal.
What are the features of French manicure extensions?
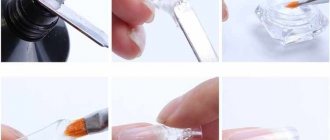
Depending on whether the French manicure is a secondary design or is done during the extension process, the technique for its creation is chosen. There are only three of them:
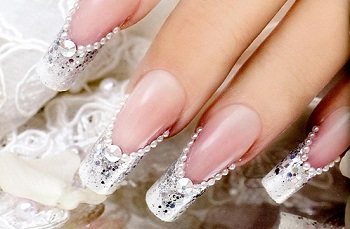
French with rhinestones
- Drawing a “smile” (white tip) with a thin brush with varnish or paint.
- Using a thin stencil to create a smile.
- Using a special French gel for extensions.
It is necessary to choose a technique depending on your goals and skills, the time allotted for manicure and the requirements for the quality of the result. For example, the easiest way to draw a French jacket is using a stencil. An experienced master will no longer use this trick.
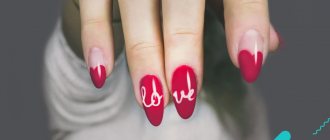
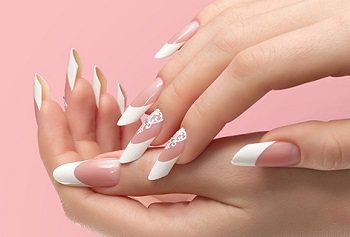
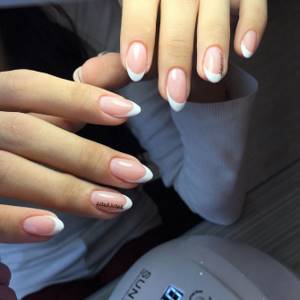
White French - a classic for all ages
The choice of manicure options is great, you can choose it to suit any look. Followers of the classics prefer French manicure. Everyone knows about him, they don’t even need to look at the photo of the Frenchman.
The white tip of the nail against the background of transparent varnish always shows off a beautiful outfit. This manicure was invented quite a long time ago; it was intended specifically for fashion models to demonstrate various dress options. This option is so loved by many women that they still don’t want to part with it. Although such a manicure will suit any look, depending on what sauce it is served with.
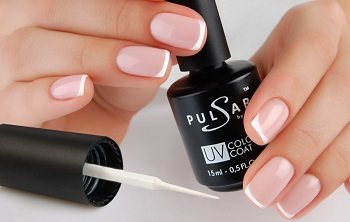
What tools and materials will be needed
For the technology of French nail extensions on a natural nail, you will need the following materials:
- camouflage gel in pink or beige depending on preference
- thick white gel
- gel remover
- primer
- dehydrator
- finish coating
- nail files and buffs
- pusher
- forms or types
- cuticle care oil
- gel drying lamp
Special gel for drawing the “smile” line
Modeling on the natural nail area
Camouflage is applied to the natural nail area in two layers. The first layer models the smile line and the bevel to the base of the nail. It is polymerized for about 4 minutes. The second layer is applied after the first has polymerized over the entire area of the natural nail. When laying out the gel around the cuticle, you need to back off a little. There should be a small gap left. “Pushing” the material into the cuticle skin can injure it. In addition, if the coating is too close to the cuticle, it will not be possible to file it down thoroughly. If you do not remove the “step” of the gel, the material may peel off over time. The worse the condition of the cuticle, the greater the distance should be. If everything is carefully filed and polished, this distance will not be visible later.
French extension methods
It is worth getting acquainted with the different methods of French manicure extensions in order to determine the one that suits you personally.
Nail extension with tips
- On tips . In the extension procedure, you can use two types of tips: regular tips, so that you can then form a French smile on top of them, or French tips, on which a white edge has already been drawn. All that remains is to attach them to your nails and cover them with appropriate products, following the extension rules.
- Drawing a French coat using white gel on camouflage . In this method, a white stripe is drawn along the finished beige or pink base of the extended nail.
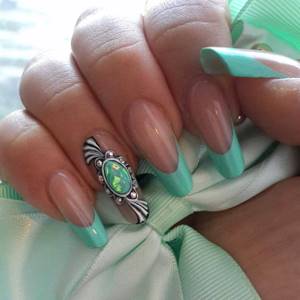
- The colored jacket is a flight of imagination of the author. The festive, bright appearance of a colored jacket is often popular in the summer. A variety of gel colors are used for the base coat of the nail and smile.
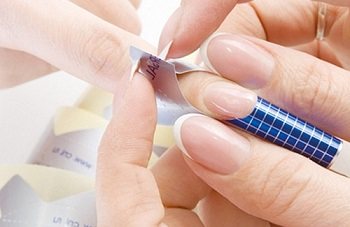
- Layout on forms . This type is similar to ordinary extensions on forms, the difference is that the main volume is laid out using camouflage gel, and the creation of a specific white edge is done using white gel butted to the camouflage one.
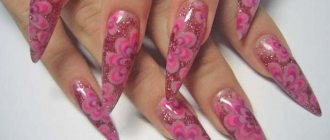
- Stained glass French manicure is done using transparent materials. As a rule, the tip of the nail is made quite long so that colored transparent gels can be decorated with sparkles, rhinestones, drawings, and microdust.
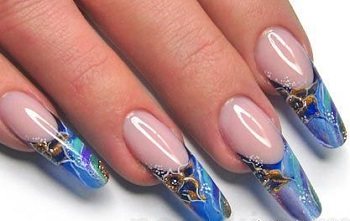
Stained glass French
There are three classic French shapes: oval, square and triangular. They are created depending on the preferences of the person who will wear them and the shape of the fingers.
A well-groomed manicure is a woman’s calling card
However, not all women can boast of healthy, strong nails. Fortunately, today it is not a problem to have a beautiful manicure.
Helium nail extensions will help to significantly improve the appearance of your nails and create an attractive French manicure. It is not necessary to strictly adhere to the traditions of French manicure; you can diversify it. If you want your nails to look healthy and attractive, get nail extensions and choose an attractive French design.
How to extend French nails: step-by-step instructions
Let's start creating your own French manicure. Prepare your work area and make sure it is well lit.
- we work through the cuticle properly , pushing it back without leaving any areas that have not been pushed back.
- a nail file to remove the shiny coating of the natural nail.
- We file down the side skin ridges , this also helps to create a beautiful nail shape.
- We coat the nail first with a dehydrator , then with a primer .
- We select the shape according to the size of the nail , place it under its free edge.
- If we are doing extensions on tips, then we glue the tips , and when the glue sets, we file off the shiny layer of the tips. If stained glass extensions are being done, then we choose only transparent tips.
- Using camouflage gel or transparent pink gel , if stained glass extension requires it, we lengthen the natural nail plate . If in-lay extensions are done, then the white smile will be applied adjacent to the beige or pink gel, and in other cases on top of it.
- Don't forget to thoroughly dry the layers in a lamp . We are waiting for high-quality polymerization of materials.
- Removing the sticky layer.
- We give the free tip the desired shape, and also check that the thickness of the nail plate is the same everywhere.
- We polish our nails with a buff.
- We cover it with a finishing coat , which we dry again in a lamp .
- Rub caring oil .
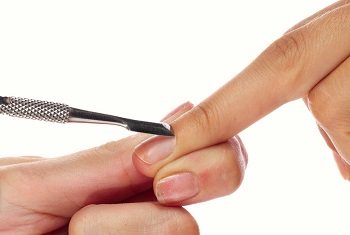
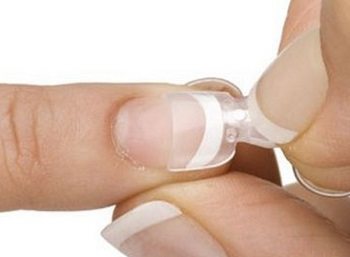
Before extensions it is necessary to treat the cuticle
Nail extension process
Manicure can be done both in a classic version and in an unusual design. Watch a master class on how to build a bright rainbow jacket:
Gel and acrylic nail extensions
First of all, we note that nail extensions can be gel or acrylic. Each of them requires certain knowledge as well as materials. In the case of gel extensions, you cannot do without a set of manicure tools, tips, gels, a UV lamp and stencils. As for acrylic extensions, you need to purchase special acrylic powder in combination with a viscous liquid. The finished acrylic can be applied to a tip or directly to the nail plate. This type of extension is more popular because it provides the most natural effect.
The presence of all these materials and tools allows the master to realize a variety of ideas. For example, if a crack appears on the nail, it is not at all necessary to radically change the length. If desired, you can create any shape and length of your nails. This allows you to try something new every time. We also note that in 2022, short and medium-length nails are the most popular. They are best suited for everyday use and generally do not cause discomfort. As for long nails, it is more difficult with them, but this does not change the fact that they are quite popular.
French manicure correction
It’s easier to re-model the French than to correct it - this is the paradox of the French. However, most women do not have free time for new extensions, so now we will talk about correction.
French manicure correction is more difficult to carry out than new extensions.
- File off the finishing gel.
- We pay special attention to the cuticle area, where detachments most often begin.
- We cover it again with camouflage gel , modeling a new apex (bump on the nail), which has already moved from its original place.
- Dry in a lamp until the material polymerizes.
- Cover with finish again .
With this type of correction, we do not affect the position of the smile on the nail. In the case of correction with white tip transfer, the procedure becomes more complicated, which requires more time and unjustified costs.
To make your manicure last longer
Extended gel nails, in addition to the nail architecture, have a stress zone. This is the part that is most susceptible to damage. Visually, the place is located between the tip of the bed and the beginning of the free edge. This is a transition zone when we lay the material joint to joint. Most often, this area has a small seal, invisible to the eye, through which the manicure lasts much longer without chips or cracks.
In order to extend the durability of the French manicure, all girls ask the masters to make the smile line slightly higher than the free edge. This will help, but only if the nail bed has an elongated shape, and not round like a button.
If you can’t draw the perfect smile line, you can resort to gel paint, which will correct the edge, and a layer of finish on top for fixing will help smooth the surface of the nail.
Manicure by hand
If you don’t know how to do a French manicure at home using gel polish, you can use various brushes. In this version of the classic design, a strip of white varnish is drawn by hand.
You can even make a French manicure with gel polish using your own brush. It will be difficult for beginners to master this method for the first time, but it is worth a little practice. If you come across a wide and uncomfortable brush, you can remove excess gel polish from it, dry it in a napkin and press it a little. The brush will become flat and will make it easier to draw a smile.
In this method, you need to rotate your finger, but the hand should remain motionless.
How to make French gel polish at home:
- Prepare your nails for work, apply a base coat and camouflage gel polish.
- Draw a line from edge to edge in an even motion.
- With any brush you can carefully remove all errors and create a smooth outline.
- Finish the design with a layer of finishing coat.
If you have lost a thin brush with long bristles in your arsenal, then this option is for you. You can buy it at any art store or on the shelves with manicure supplies. How to do a French manicure at home:
- Apply a base and camouflage layer of gel polish.
- Place 2 dots where the free edge of the nail begins and one dot in the middle of the nail.
- Use a thin brush to draw an even arc.
- Using your original gel polish brush, paint the remaining tip white.
- Apply top coat to design.
Simple markings will help create a neat and even tip. For this method it is better to use a thin brush, but others will also work. The method is very convenient for drawing a smile on long nails.
How to make French shellac at home:
- Apply base and camouflage gel polish to your nails.
- Mark the width of the smile with a dot or thin line.
- Mark points at the side bolsters where the free edge begins.
- Place three points at the very tip of the nail: in the middle and two equidistant from it.
- Connect the side points from different sides, drawing antennae.
- Paint over the remaining space.
- Apply the finishing coat and dry the layers in a lamp.
You can see how to make a French jacket at home in the video.
The round brush is well suited for designs on medium-length nails. You can do a French manicure yourself by following the instructions:
- Cover your nails with a base coat and apply a camouflage layer of gel polish.
- Using a round brush with a white tint, mark a line of thickness along the entire length of the end.
- Bring the “tails” to the desired depth in the direction of the side rollers.
- Carefully round all corners.
- Cover the design with topcoat.
A flat brush is more suitable for thick materials (for gel paste or gel paint). In order for the line to be even, there should be no excess material on the brush, just saturate it well.
How to do French nails step by step:
- Apply a base and a nude shade to your nails.
- Using a flat brush with a white coating, draw vertical lines along the sides that follow the outline of the antennae.
- Place the entire surface of the brush on the nail and form a smile.
- Make the required number of layers, drying each one.
- Apply finishing topcoat to the coating.
The round dots attachment helps create a smooth smile line for a French man. It is best to choose the smallest nozzle. How to do a French manicure correctly:
- Apply camouflage to prepared nails.
- Take support under your elbows, relax your hand and carefully transfer the white gel polish using an oval dot to the tip of the nail, forming whiskers and the width of a smile.
- Cover the design with topcoat.