Modern technologies have made the perfect nail coating available for every day. To be more precise, gel polish coating is a hybrid combination of gel and varnish, combining their best qualities. The owner of a fresh manicure done with gel polish will be able to enjoy its attractiveness for at least 2 weeks.
Is everything really so wonderful?
If you follow the rules and observe the timing of wearing the coating on your nails, then there will be no problems. And the basis for this is the correctly performed work of a nail service technician, without violating the norms.
Before we look at the reasons for problems with coating, we will tell you what manicurists may encounter.
Internal detachments of material . At first glance, the problem does not seem so important, although it is fraught with danger. If you wear the coating for more than 2-3 weeks, detachments are inevitable. In addition, detachments cause moisture and dirt to enter, which creates an environment for the development of fungal diseases.
If you see or feel that your nails are getting sick, you shouldn’t start it, consult a specialist. We recommend arming yourself with a means to relieve problems. For example, the 100% natural composition of Regeneratora from Rosi will provide first aid and provide vitamins. More details Here
If you are more interested in the controversial topic of the dangers of gel polish on nails, then we recommend our blog article on this topic. Here Gel polish spoils nails
Reasons for gel polish peeling
1. Mechanical damage to the nails and overuse of the gel polish coating 2. Conflict between the bonder/primer and the base coat 3. Insufficiently dried base on the nail, especially if the coating is applied in a thick layer 4. Poorly performed nail manicure. There are two options here, or follow the correct technique for performing a home manicure. There is more information on this topic in our Blog Here Or choose your manicurist more carefully based on reviews and available training documents from him.
And then questions arise: what to do if the shellac on your nails chips?
First you need to find out why shellac chips.
There are 3 main reasons:
- a specialist who does manicure;
- the products he uses;
- susceptibility of nails to shellac.
You need to be sure that the master is a qualified specialist and uses high-quality products.
How to maintain a manicure
There is also a personal intolerance to shellac. This is quite rare and is most often caused by various diseases.
Let's look at how you need to work to ensure that the adhesion to the nail plate is as strong as possible.

Our nail plate consists of 3 layers
A1 – dorsal layer
It is this layer that gives the best adhesion to the material. That’s why it’s so important to be careful when removing. If you removed more than necessary with a cutter, you will apply the coating to the next layer of the nail plate.
A2 - intermediate layer
Every master has encountered thin, bending nails when the coating holds very weakly. The adhesion to this layer of the nail plate is much lower; detachments and chips may appear even with a perfectly executed manicure and adherence to application technology. Often bases are fired in a lamp on this layer. Therefore, we recommend that you carefully approach the removal of material with a cutter. Important! Inform your customers that under no circumstances should they remove the coating themselves, much less tear it off.
When and how can you save your manicure?
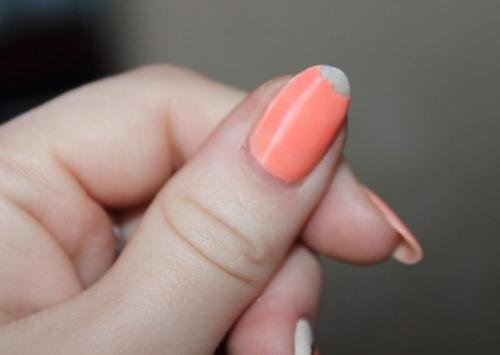
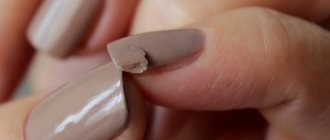
If a piece of gel polish breaks off on the side, it’s not a problem. You should not immediately blame the master and call him with complaints about poor quality work. This usually happens for two reasons:
- Due to the negligence of the woman herself, who can catch the nail and accidentally damage it. Any scratches spoil the coating and make it more fragile, causing chips;
- In case of improper manicure care before and after the procedure. It is recommended to avoid contact with water for 3-4 hours after applying gel polish. And before going to the specialist, do not use aggressive chemicals, or do housework with gloves. On softened nails, the adhesion to the coating is worse.
So, if just a piece breaks off due to your own negligence, don’t worry, we’ll tell you how to save the situation.
See also...
✅ Why stylish women choose boring manicures
✅ Stylish girls don’t wear manicures like this
✅ Mistakes in wearing gel polish, due to which it does not adhere well
✅ 10 ways to draw a Christmas tree on your nails
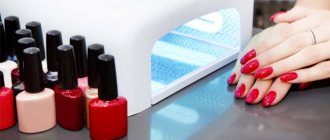
Method 1: restoration if there is a lamp
If you did the coating yourself, without visiting a beauty salon, it will not be difficult to fix the broken piece. There is no need to completely redo the manicure; just file off the top layer of the damaged nail, then degrease the nail plate and cover it with a base coat.
Dry the transparent layer in a lamp. Then we apply the color:
- If it is dense over the entire surface at once;
- If it is translucent at the beginning, chip it and dry it, then onto the entire plate.
Cover with top coat and don’t forget to seal the end. We dry it in a lamp, remove the sticky layer and enjoy the result.
If the manicure was done in a salon, but you also have everything you need to cover your nails at home, repeat the procedure. If the desired shade of gel polish is not available, file the color down to the base. Then we repeat the sequence:
- degrease;
- apply base and dry;
- two layers of any color (you will get a new design, because today it is fashionable to paint nails in different shades);
- top
Method 2: glitter
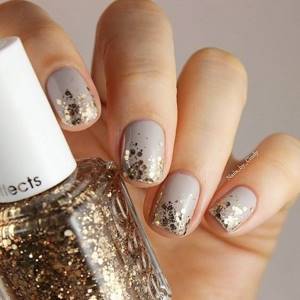
You can hide a chip at the tip of your nail using glitter. This is a gel polish with a lot of glitter.
If you apply glitter in a dense layer, nothing will be visible from below. It needs to be dried in a UV lamp. If it is not there, choose a regular varnish with a lot of glitter and perform the same procedure.
To make the design look harmonious, you can cover only the top part of the nail with glitter, simulating a “flowing glitter” design. On the adjacent nail you can do the same, but in the opposite direction: from the cuticle to the free edge of the nail.
Method 3: French
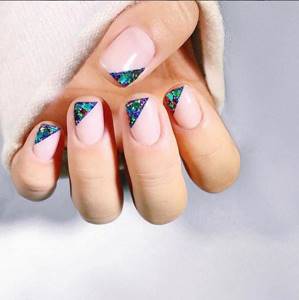
You can save a nail on which a chip has formed using any varnish. Carefully draw the French coat and let it dry thoroughly. This way, a monochromatic manicure will turn into a fashionable design - a colored French manicure.
Method 4: Nail stickers
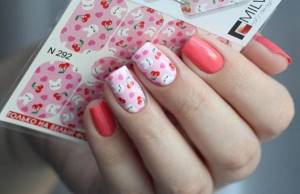
Today, a large variety of nail stickers are sold that completely cover the plate. Choose a beautiful design and stick it on your nail. You can fix the sticker with clear varnish or topcoat if you have a UV foot in which you can dry it.
Method 5: patch
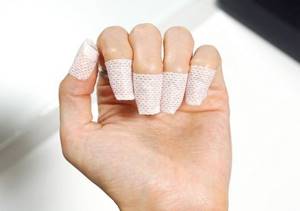
The latter method has nothing to do with nail restoration. This is a little trick to avoid ending up at an important event with ragged nails. We put a band-aid on the problem finger and pretend that we cut ourselves. and now you are no longer the one who doesn’t know how to take care of your manicure, but a lady who accidentally injured her finger.
Tools and materials for nail repair
Often, materials for gluing damaged nails are sold as a set, like a professional kit for repairing nail plates. It includes:
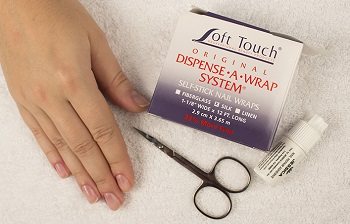
The main materials for nail repair are silk and special glue.
- Silk for nail repair on an adhesive basis.
- Glue for natural and artificial nails.
- File and buffer for natural and artificial nails.
- Any disinfectant : hydrogen peroxide, medical alcohol, or even better - a professional manicure product.
- Orange sticks for manicure.
All these tools and materials can be selected separately, depending on availability in the store and personal preferences. It is worth noting that although the special nail repair silk is self-adhesive, its adhesive base is not enough to glue the crack, nail glue is required.
In the absence of silk for nails, it can be replaced with a piece of natural or synthetic silk, a paper napkin, a tea bag, filter paper or a paper plaster - whatever you have at hand at home.
Why does the nail peel off if everything is done correctly?
In fact, peeling fingernails is not always a master’s problem. Often the root cause is the customers themselves.
So, why problems with extensions may arise:
- If the client is pregnant or suffers from diabetes. In this case, the processes in the body occur differently, so the gel from the manicure is rejected;
- If a client sweats excessively, such people’s hands are always wet. Therefore, before starting the process, it is worth degreasing the plate at least seven times;
- If the client is undergoing any course of treatment that includes antibiotics;
- If the client bites her nails when stressed;
- If the client has a complex nail structure by nature or due to certain diseases: irregularities and humps. In this case, you need to come for correction much more often in order to restore the extended coverage;
- If the client decides to take care of the manicure himself. It is prohibited to cut the cuticle and file the plate in that area without the influence of a cosmetologist.
Pregnancy
While carrying a child, a woman’s body behaves differently than before. Often girls observe accelerated nail growth. This leads to rapid cracking of the varnish. The body may react to the gel coating as a foreign component, which will also negatively affect its appearance.

Experts do not recommend that women use gel coating during pregnancy, especially in the first and last trimester, as well as after childbirth - the first 6 months. Due to hormonal imbalance, expectant and new mothers react quite unpredictably to strong odors and chemicals. During the procedure, headaches, weakness and nausea may occur.
Natural nail repair
Most often, the nail plate breaks at the point where it attaches to the finger. This line is called a "smile". The repaired nail loses its strength, but retains its appearance. The repair technology is as follows:
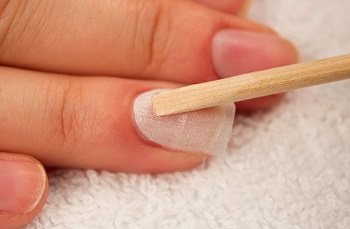
Nail repair process
- Remove the polish and treat the nail with an antiseptic .
- Apply a buff to any uneven areas on the broken nail.
- Prepare a piece of fabric - cut it so that it covers the crack by 2-3 mm on each side.
- Apply glue and place a piece of fabric over the nail , pressing it carefully. To level the patch, use a toothpick or an orange stick with a pointed end.
- After the glue has dried, smooth the edges of the fabric with a buffer .
- Similarly, glue another 1-2 layers of fabric on top of the first, depending on the size of the breakage, carefully filing each layer
- Cover the nail with varnish to completely disguise the crack.
Nail extension repair
Extensions are done with acrylic tips . They do not have a living structure, so if they break off, they can be glued with synthetic glue for plastic (superglue, “Moment”). The fastening materials are the same - filter paper, silk strips, paper plaster.
The technology for gluing the extended plate is as follows:
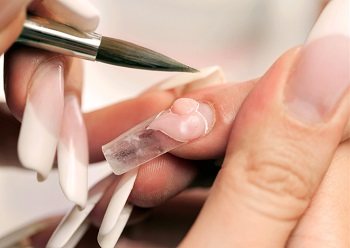
If repairing the extended nail is impossible, you can replace it with a new one.
- Apply glue to the nail and place paper strip on top of it .
Place another drop of glue . the third layer of glue on top of the dried second.
- Treat the repair area with a nail file .
- Apply varnish on top .
Another repair option is to replace the broken tip with a new one.
Selection of low-quality materials
Using products from different brands or of questionable quality can also lead to chipping or peeling of your manicure. When buying materials from different manufacturers, you cannot be sure that they will be “friendly” with each other. The most common reason is a chemical reaction between the components of the products. It can appear in the form of bubbles, bald spots or discolorations. That's why you should give preference to one brand and use the base, gel polish and top coat in a harmonious tandem. Only then can you guarantee the client full compliance between the idea and the final result. In the Lunail catalog you can find brand materials for each stage of work.
Materials must be stored in accordance with the manufacturer's recommendations indicated on the packaging. They are sensitive to UV radiation, so it is best to keep them away from sunlight. Be sure to keep an eye on expiration dates.
Broken nail: what to do
What to do next with a broken nail depends on how it broke: slightly cracked or completely torn off. An uneven edge or crack will cause trouble - scratching and clinging to clothes.
Possible actions in case of a broken nail are as follows:
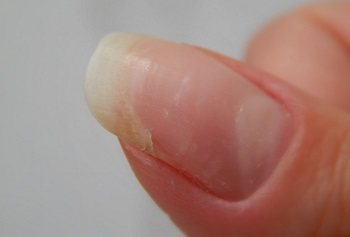
Nail broken at the edge
- Trim or file the nail.
- Glue the crack yourself.
- Seek help from a specialist.
If you want to solve the problem yourself and save a broken nail yourself at home, then you need to choose the right gluing technology. It depends on where the crack is: in the overhanging part of the nail or in the middle of it. The size of the crack is also important.
- If the damage is minor , then you can seal the problem area with a special patch made of natural fabric or paper plaster. This repair is used for any cracks on the side of the nail, along the “smile” line or along it.
- When the nail is completely broken off, an acrylic artificial material is applied tips .
- Tips are also applied when a crack appears along the axis of the finger, in the middle.
It makes sense to repair a broken nail if it is cracked no more than 1/3 of its length. Otherwise, the repair will be short-lived.
Sometimes the crack goes so deep that it injures the finger under the nail. In this case, it is better to carry out treatment and recovery in the salon.
What not to do :
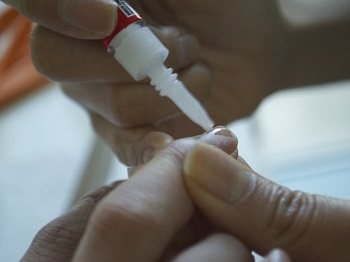
Do not apply superglue to an uncoated natural nail.
- Glue a living natural nail with superglue . The synthetic composition corrodes living cells of the nail plate. Only extended acrylic plates can be repaired with synthetics.
- Do not treat the nail with acetone or other nail polish remover when breaking it off to the “meat”. Aggressive chemical solutions should not get into the wound.
- Don't delay repairing your nail if you have a crack. The nail may crack further and break off completely. The sooner you start fixing the problem area of the nail, the smaller the crack that needs to be repaired.

