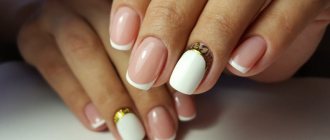
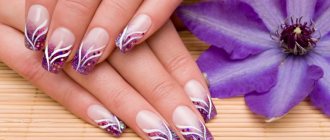
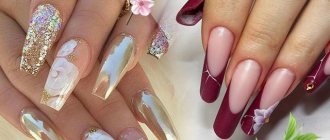
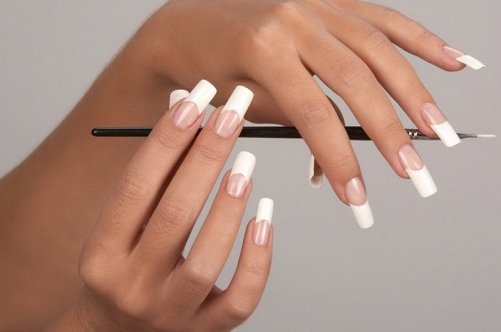
Some people believe that nail extensions are a thing of the past, but often it is extensions that allow you to achieve the desired length and shape of your nails, which cannot be achieved with regular growth. Extravagant stilettos, classic almonds, elegant pointe shoes - you can choose absolutely any shape.
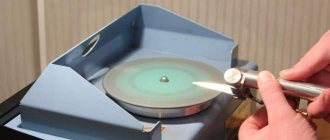
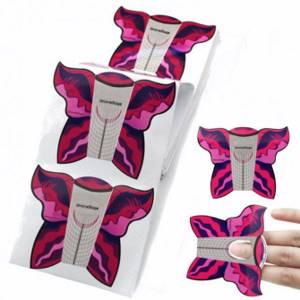
Forms for nail extensions are special templates on which gel or acrylic is laid out. Using these stand templates, it is convenient to lay out modeling material on the nail, creating the desired length and shape. Nails are extended on upper and lower forms, as well as on tips (special plastic plates glued to the nail plate).
What is the difference and how to choose the right form - read in our material.
ARTEX
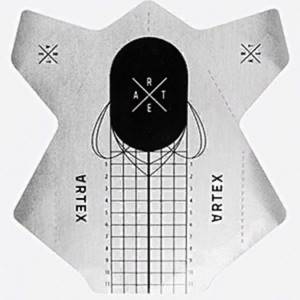
Rectangular universal forms for nail extensions from the Russian company ARTEX are made of medium-hard paper and are suitable for gel or acrylic extensions. The shapes are gray, opaque, suitable for modeling nails of any length and any traditional shape.
Due to the fact that the material itself is quite strong and elastic, extension forms can be used without a metal template that forms the arch. The form itself has excellent adhesiveness, so it fits perfectly along the entire length of the phalanx of the finger and does not lose its stickiness even after repeated trying on. The markings on the forms are medium, suitable for any nails - even injured, short-cut or non-standard anatomical shapes. There are also side markings to release the side bolsters.
Using nail extension molds from ARTEX is very simple: first you need to cut it according to the markings individually for each nail, then place it and secure it along the entire length of the phalanx, and you can start modeling the nail.
Advantages and disadvantages
Suitable for nail extensions of any traditional shape and any length; excellent adhesiveness; can be purchased in sets of 300 and 500 pieces
It is better to purchase on the official website so as not to run into a fake; high price
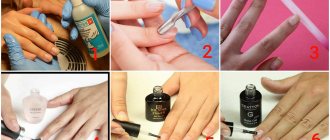
Extending the nail plate will take a matter of minutes if you use special auxiliary elements, with which even a beginner can do the modeling, and most often we are talking about tips (false nails truncated along the midline) or special paper forms with a sticky base.
Before applying extensions using reusable forms, you should familiarize yourself with the advantages and disadvantages of this method of modeling, because unlike tips, paper forms allow you to make your nails thinner and more natural in appearance and eliminate the peeling of the inner false nail due to its absence, at the same time time being more fragile and brittle. As for the method of using this aid, there is absolutely nothing complicated in how to use reusable nail forms; in the vast majority of cases, you can correctly attach the paper backing to the “native” nail the first time. Such forms are sold in unfolded form, representing a kind of cone pattern with a hole for a nail in the middle and two sticky ends. You can purchase the product at any store that sells products for nail modeling, although many masters order it via the Internet, where prices are more favorable.

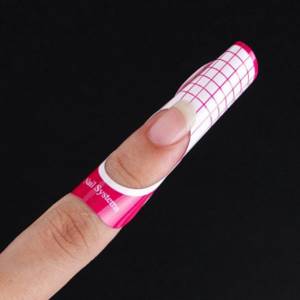
The paper form is fixed in the following way: a finger is inserted into the hole in such a way that the form closely extends beyond the free edge of his nail, as if closing with it, after which the ends of the form are carefully brought towards each other and tightly fixed together using an adhesive base. At this stage, the nail can be considered ready for extensions, and in order to check that the form is attached correctly, it is enough to simply look at its profile, since the free edge and the paper backing from this angle should form one continuous line. In addition, the natural nail plate must be fully prepared at this point. We are talking about its complete grinding, removal of cuticles and keratinized side areas of the skin, degreasing and coating with an adhesive acid-free gel with mandatory drying. In order for the shape to fit correctly under the free edge of the nail, it is recommended to completely grind it (the edge itself) with a file with high abrasiveness (grit size no less than 100 to 100).
As for the extension procedure itself, with paper forms it is greatly facilitated, because in addition to their other advantages, they have auxiliary markings of lengths, which make it easier to model a new free edge without wasting excess polymer material. It is noteworthy that there is no need for additional processing of the paper form (antiseptic, degreaser, etc.), which allows it to be used for reusable use. The adjustment of the base layer of polymer (both pastel-colored camouflage for nail pigmentation and a sculptural transparent gel base is suitable) is carried out with a brush No. 6 from the middle of the nail to the edge and from the base to the middle in two stages. Each applied layer needs to be dried in a UV lamp for two minutes. During this procedure, a sticky dispersion layer is formed on the surface of the nail plate, which must be removed with a swab. After the base has finished drying, you can remove the auxiliary paper form and begin filing the free edge to give it the desired shape.
Having figured out how to use reusable forms for extensions, you should remember that decorating and artistic painting of nails extended in this way is carried out only after removing the backing and final filing of the new free edge.
TOP 5 rating according to KP
PNB Clear Pro
![]()
The Clear-Pro Nail Forms from PNB are made from super thin, durable, yet ultra flexible vinyl plastic and are suitable for all modeling materials: gel, acrylic and acrylic.
They are resistant to creasing, do not deform or crack, and also have increased adhesiveness and will not fall off at the most crucial moment. Due to the elongated side surfaces, Clear-Pro Nail Forms are very convenient for arch modeling. Special markings for the side rollers are designed for fitting on nails of different widths.
It is also worth noting that vinyl plastic transmits ultraviolet rays well, so even the most capricious, densely pigmented modeling material can be used without a backing, and it dries completely much faster than other forms.
Advantages and disadvantages
Do not deform or crack; suitable for any modeling material
Not very comfortable if the nail plate is too wide
show more
Entity
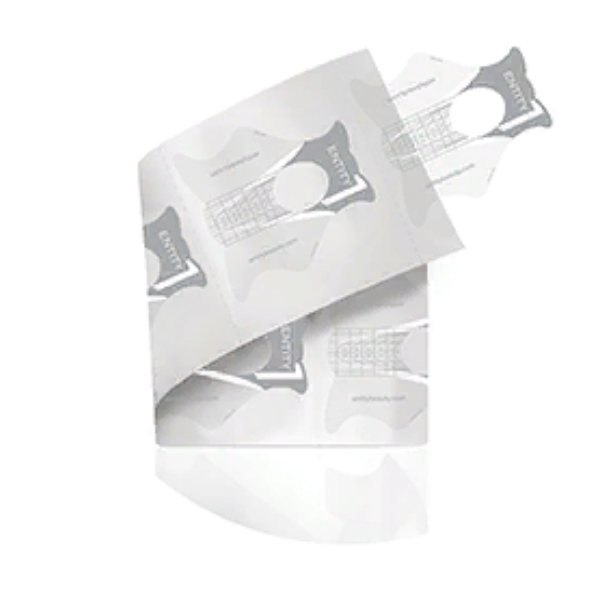
Forms for nail extensions from the American brand Entity are suitable for those who do not like to bother with cutting out forms. The brand produces two types of forms: silver and pink.
Silver ones are traditional in shape, have a standard cutout, are suitable for those who do not have a very pronounced “smile” shape, adhere well and have a comfortable line. The pink shapes have two different sides: on one side there is a flat cut that is ideal for straight eponychium lines, flat, wide or bitten nails. On the other hand, there is a deep neckline; such shapes are suitable for oval nails or with overgrown eponychium.
Advantages and disadvantages
Suitable for a variety of nail shapes, even problematic ones
Not always available for sale
show more
Lunail

Lunail's reusable plastic molds come in rolls of 120 and 500. They are made of special plastic that is resistant to mechanical and chemical influences during the modeling process, do not deform or break, therefore they allow you to easily create a nail arch without the use of metal tubes.
Convenient markings allow you to cut the shape to fit any shape of the nail plate. Thanks to the “ears,” the forms can be conveniently attached to a finger of any size, and the reinforced central part makes the form stable during nail modeling. It is also worth noting the economical consumption of reusable forms - using 2 forms, you can grow up to 10 nails, even taking into account the “adjustment” to the size.
Advantages and disadvantages
Do not deform or break during modeling; high-quality adhesive base
Not enough glue, may come off during modeling
show more
PINK HOUSE
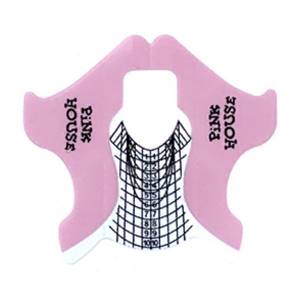
The lower forms for nail extensions from PINK HOUSE are made of pink plastic. They differ from the previous purple and black versions by having a width of 22 mm, which corresponds to the average width of a nail and allows you to work end-to-end.
The forms themselves are translucent, which is very convenient when laying out and distributing the gel, they are evenly and conveniently printed, and most importantly, they have “ears” cut out right away, which saves time. The forms for extensions are quite durable, do not deform, do not wrinkle, and do not peel off, as if adapting to a natural nail. Another difference from other forms is that the packaging is not made in a roll, but in folds of 100 and 300 pieces.
Advantages and disadvantages
No need to trim; thanks to the translucent shade it is easy to lay out modeling material
You can only order on the official website, otherwise there is a risk of getting a fake
show more
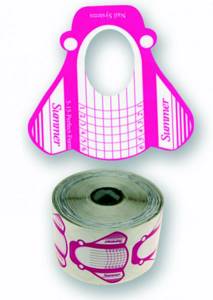
Summer

Universal forms for nail extensions are suitable for most types of nails and for modeling with both gel and acrylic. The shapes are easy to press, have a dense solid base, stick together well and do not come apart.
Thanks to convenient markings, the forms are easy to use, and due to their width, they fit both wide nails and nails with high side ridges. The strong adhesive base prevents the form from falling off during modeling, even if your fingers are slightly damp. There are 500 pieces per roll, which means it will last a long time.
Advantages and disadvantages
Suitable for wide nails; do not peel off or peel off
No tear line; may seem too thin
show more
How to choose the right forms?
Depending on what type of forms was chosen, you will need to pay attention to different criteria when purchasing. If we talk about the top templates, you should pay attention to the following important nuances:
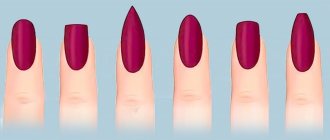
- if the client wants the nails to have a square shape after extensions, then those templates that have lines intersecting at right angles are best suited for this;
- templates that have curved transverse lines are ideal for softening the square shape and giving it a slight roundness;
- templates with a strong bend in the lines are more suitable for creating an oval shape;
- If you need to create a stiletto shape, it is best to use a template with lines that meet at an acute angle.
When choosing the upper templates, it is necessary to correctly determine the size that will suit the client. Of course, forms are not tips that will remain on the nail.
But all craftsmen are well aware that if you choose the wrong template size, there is a high probability of creases appearing. After all, the gel polish will be distributed incorrectly over the surface. This is what will cause creases to appear. And, as a result, the client will be forced to contact the salon to correct the defects.

Of course, experienced craftsmen can work with one type of template. The video tutorial on nail extensions on forms proves this. Thanks to their work experience, they will be able to create any form without any problems, regardless of which templates are used. They most often use the bottom templates.
These templates can be called universal because they are oval in shape. And therefore they are ideal for giving nails both oval and square, pointed shapes.
What types of nail extensions are there?
In the process of nail extensions, the master can use both tips (plastic overlays that repeat the shape of the nail) and forms, which in turn differ into lower and upper ones. Forms for nail extensions are templates that are placed on or under the nail plate, and on which an artificial nail is modeled. Depending on the material, the forms can be disposable or reusable (plastic or metallized). There is a special marking on the surface of the form that allows you to determine the length of the modeled nail.
— Nail extensions can be done on top forms, on bottom forms and on tips. I prefer to do extensions on the lower forms - it’s more familiar, and the arch turns out neat and beautiful,” notes nail artist Anastasia Garanina .
Top forms - basic questions and answers to them
The top forms are the main questions and their answers.
Dear masters, this section contains frequently asked questions about the “Upper Forms” technology and detailed answers to them.
1. How to make correction with “Upper forms”?
It is best to do the correction using the classical method. And only if you really want to use the upper forms, then you can use a liquid material to make a “tightening” along the entire length of the nails, after filing the old nails
2. How to choose “Upper forms”?
The upper forms are selected taking into account the amount of space available for laying out the material. The most reliable way to ensure the size of the selected form is when a manicure hatchet is placed in the space between the nail and the form
3. How and why to cut a step on the “Upper Forms”?
The step is cut along the factory crease in the cuticle area using nail scissors
4. How to work with “Upper Forms”?
Not a single distance learning will teach you how to work correctly with the upper forms, the most important thing in this science is the positioning of the master’s hands, which can be learned directly from the teacher, and rather than going through trial and error, wasting money on materials and precious time, it is better to take a two-day training course in an educational Formula Pro center
5. What are “Upper Forms”?
These are reusable forms for express nail extensions. A salvation for novice nail artists, because by using the upper forms, all nails turn out equally smooth and proportional, the phase of filing the surface of the artificial nail is eliminated and the amount of consumables is reduced. Using this technology, the time for nail extensions is reduced to 40, 50 minutes
6. How to make a French coat on the “Upper Forms”?
Video presentation: French on Upper Forms
7. How to make a design on the “Upper Forms”?
All materials for the design are placed in the upper form in the reverse order from the classic extension, polymerized, a free edge and a stress zone are formed, the form is polymerized. After this, using a small amount of gel, the form is “glued to the nail”
8. How to work with gel in “Upper Forms”?
We prepare the nail plate as standard
Apply the preparatory liquid “Profi Prep”
We apply the ultra-coupling primer “Profi Bond”
select the size of the upper form
put the gel in the upper mold and polymerize it a little
Apply a small amount of Elegant gel to the nail plate and fix it under a turning lamp for 15 seconds and move into a tunnel lamp for 2 minutes.
remove the top form
remove the dispersion layer from the inner surface of the free edge of the nail
file the free edge
9. How to work with acrylic in “Upper Forms”?
We prepare the nail plate as standard
Apply the preparatory liquid “Profi Prep”
We apply the ultra-coupling primer “Profi Bond”
rub a small ball of acrylic into the nail plate and let it dry
select the size of the upper form
put acrylic in it and let it dry a little
Using a liquid bead of acrylic, we apply the form to the nail
After 5 minutes, remove the top form and file the free edge
10. How do “Top Forms” differ from “Liquid Tips”?
The main difference between the technologies: With the upper forms we model the finished nail, and with liquid tips we model only the tip - the “substrate”
11. What materials can be used for “Top Forms” extensions?
Only Formula Pro materials, otherwise you won’t achieve lasting results. For 5 years the company has been developing materials for working with upper forms
12. How do “Upper Forms” differ from other forms?
The Formula Pro company has a patented plastic formula for making molds to obtain lasting results.
13. What kind of lamp is needed for “Upper Forms” extensions?
Turning lamp and tunnel lamp
14. What gels are needed for “Upper Forms” extensions?
For design in the upper forms it is better to use low-temperature (cold) gels, and for applying to a natural nail you can use only a certain range of materials: elegant gel, caramel gel, vip-formula gel, led gel
15. How long do nail extensions with “Top Forms” last?
If everything is done correctly, your nails will look much better than with classic extensions.
16. How many times can “Upper Forms” be used?
No one has yet established the exact service life of the upper forms. After 40-50 extensions they will simply stop leaving the desired gloss on the nails, but this is not a problem because there are top coatings applied to the surface of artificial nails to add gloss.
17. How much does “Upper Forms” extension cost?
It all depends on the rating of the salon and the qualifications of the specialist. But it is not cheaper than extensions on paper forms, although less material is spent.
18. Cost of extension with “Upper forms”?
The cost of nail extensions with upper forms, including depreciation of tools, is approximately 200 rubles
RECOMMENDED
TO VIEW EACH MASTER:

To view the course, follow the link.
Options for replacing standard templates
Instructions for nail extensions on forms often contain clarifications regarding the possibility of using homemade templates. Most often, the question of creating such forms arises if the master is just mastering the technology and does not want to spend money on purchasing expensive forms.
Of course, such a replacement has some disadvantages. Firstly, you will have to do the markings on it yourself, and this is not easy. Secondly, if the material for the template was chosen incorrectly, then nail extensions will take longer and the result will be disappointing.
However, sometimes experienced craftsmen experiment, preferring homemade forms. For example, you can find step-by-step building on forms, the description of which will be tailored to the use of homemade forms.
This is explained by the fact that sometimes such templates are more convenient to use. The most optimal solution is to create forms from several layers of foil. It has the necessary density and elasticity, so it can well serve as a replacement for purchased forms.

What can you replace at home?
The most versatile materials for creating templates for extensions at home are plain paper, tracing paper or foil. When creating shapes at home with your own hands, pay attention to the shape of natural nails. It is also advisable to mark the desired length of the nails to be extended on the homemade form.
Thanks to nail extensions, every girl and woman can have the perfect manicure – regardless of the shape and condition of natural nails. Templates can be made from different materials, have certain features in their application, and can be disposable or reusable. With their help you can create nails of classic and avant-garde shapes and any length.
More interesting articles: