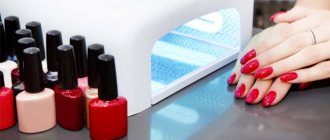
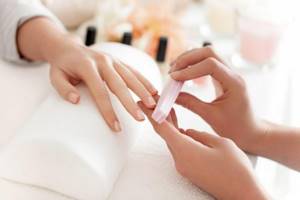
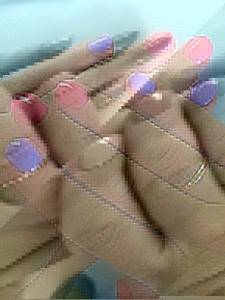
How to apply gel polish evenly and without bald spots
I know that for many people the problem is APPLYING colored gel polish. After all, it may lie unevenly, with bald spots or gaps, as well as streaks, and may streak. Therefore, here I want to share my life hacks on this matter, developed over many years of using different gel polishes, and also analyze the reasons for such capricious behavior of materials.
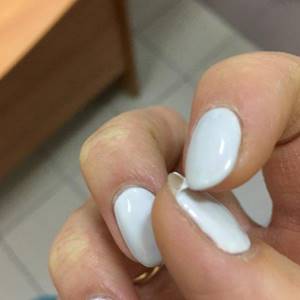
Gel polish chips off the ends: what to do?
Causes:
- Chips in the end area appear as a result of improper processing or the use of low-quality materials.
- At the ends, chips appear if you did not seal the free edge, that is, you did not coat the cut with base, gel polish, and then top coat. At each stage it is necessary to coat this area, that is, seal it.
- Most often, chips and cracks at the end are formed due to the low ductility of the material and excessive softness of the nails. There are very soft nails on which gel polish does not last more than a week, but you can use high-quality, professional materials, following all the rules and techniques.

Chips at the ends Strengthening with acrylic powder:
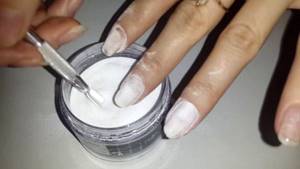
Strengthening nails with acrylic powder
Another life hack
The reasons have been decided. But what should you do if the gel polish just doesn’t want to lie flat? Here I will suggest one life hack:
– try applying the color to a white or black base, depending on which one your problem shade is closer to. Of course, this may change the color a little, but sometimes it’s even beneficial!
That's all, my friends! I hope the article was useful to you and will solve all your problems with varnishes :)
If you found this page useful, please recommend it to your friends:
Source
Content
- Choosing a matte manicure coating
- Execution Features
- Basic options for applying velvet or matte manicure
- If there are no professional tools
- If you have professional tools and tools
- Performing a manicure - step-by-step instructions
- Fashionable matte manicure ideas
[ads-pc-2][ads-mob-2]
Real happiness for a girl is when her nails have a beautiful coating, and when you can admire it for a month or even longer. But what to do when, for example, you got a fashionable matte manicure in a salon, and a week later the varnish began to peel off, and you no longer liked the color of the coating and the shape? The answer is obvious: learn how to do a similar manicure yourself.
Top 7 common mistakes when applying gel polish at home
In the process of learning to apply gel polish, fashionistas most often make typical mistakes, which are best avoided because if you make them constantly, then such a manicure will no longer look as impressive as our fashionistas would like. Therefore, let's take a closer look so that your home experiments and creativity bring only positive results and impressions!
TOP 7 rookie mistakes
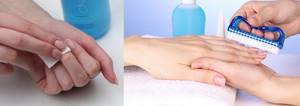
As you know, before applying gel polish, you need to carefully and efficiently prepare your nails for coating. It is necessary to give the nail the desired shape, then apply a degreaser, and only then all the other steps.
Mistake #1
If your gel polish base is sagging. The main reason for this is the incomplete removal of the old coating. You need to carefully file away all layers of the previous design with a nail file or filer so that the layer of the new base for gel polish lays perfectly flat on the nail.
Mistake #2
Microbubbles and mini-voids are visible in the layer of the polymerized base. This situation most often happens when the cuticle is removed; it has not been completely removed. And thus, when baked in the lamp, microgaps formed between the nail layer and the particles of skin remaining on the nail. If this situation occurs to you, then your manicure will not last very long.
Mistake #3
The color coating has peeled off the nail. This situation is due to the fact that our beautiful ladies skipped the stage of removing the top keratin layer with a buff. Damn the nail, it’s important not to damage it. Do not apply significant force when pressing the tool on your nails and follow the correct direction of movement. Correctly buff from the cuticle to the free edge, with light movements.
Mistake #4
The coating cracks and breaks off in small pieces. This situation occurs if it is not enough to clean the nail from dust (sawdust), dirt and sebum.
Mistake #5
The gel polish peels off as a whole plate. This situation occurs most often, and all because particles of the pterygium went unnoticed on the nail, and the delaminations on the free edge were not removed. With subsequent regrowth and peeling of the pterygium from the keratin of the natural nail, the gel coating also comes off. The continued delamination of the natural nail in depth (under the gel polish) leads to detachments of the manicure already from the end.
The subtleties of manicure, if the gel polish rolls off when applied
To ensure gloss on the tone coat, the varnish must cool to room temperature.
In this case, the gel polish does not roll off on the base. The brush with which the gel polish is distributed is sometimes not suitable for applying it along the cuticle. In this case, a thin and elastic brush is used.
When drawing a clear pattern, do not try to apply it on top of the dispersion layer of the base. The pattern will shift. You can achieve accuracy by removing the sticky base layer. To prevent this from affecting the color scheme, spread the top coat over the base and dry each layer well in a lamp.
Using low-quality brushes leads to difficulties in drawing. Use branded brushes in your work. It is better to use natural material or a high-quality brush made from synthetics.
ADDITIONAL INFORMATION! To seal the edge of the nail, use a thin brush.
Applying the base in two layers will even out the nail. To prevent the gel polish from wrinkled when drying in a lamp, the first layer is made very thin and dried thoroughly. The next layer is slightly thicker and spreads evenly. The finger is turned with the nail down, parallel to the floor. This will allow you to get perfect coverage and prevent the gel polish from shrinking in the lamp. The dried gel nail, when small wrinkles form on it, is covered with a glossy top. The top is applied quickly, immediately fixed under the lamp for a few seconds and only then dried. This will allow the gel polish to not curl up when applied.
Polymerization of the top in an LED lamp contributes to strong heating of the surface, since hardening occurs quickly. The thickness of a matte tone is always thicker than a glossy one. The heating temperature depends on the thickness of the layer. To prevent the client from experiencing discomfort and to prevent the gel polish from shrinking when drying, try to make the layer as thin as possible and prepare the client in advance for possible unpleasant sensations.
Sometimes gel polish curls up due to poor-quality polishing of the surface of the nail plate; when drying, the gel polish begins to shrink, which affects the quality of the manicure. If gel polish is applied multiple times, then curling of the gel polish on the nails may occur as a result of poor drying of each layer.
NOTE! The varnish may curdle after its expiration date.
If the top coat applied to the colored gel polish is distributed unevenly, then cover the nail in two layers. Applying the tone in one thicker layer will not correct the situation, but will only lead to shrinkage of the gel polish after drying.
Transporting gel polish can lead to uneven distribution of the product over the nail. You need to wait for the product to settle. The composition in the bottle must not be shaken. Before starting work, roll the bottle between your palms. This simple trick will prevent the varnish from curdling.
Gel polish is available in bottles with darkened glass, since the composition is very sensitive to sunlight, so that it does not shrink when drying, store it in a dark place, away from sunlight.
Manicure professionals apply gel polish with smooth movements. This allows you to apply the product in an even layer and avoids shrinking of the gel polish.
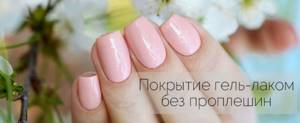
How to apply gel polish evenly: tips for a quality manicure for beginners
Looking at the precise movements of the master in the salon, everything seems simple. We remove the cuticles, file the nails, consistently apply the required coatings and dry it all in a lamp. Gel polish manicure is ready!
The utopian perception leads to the decision to take care of their nails themselves, and women buy everything they need for a shellac manicure.
Disappointment sets in almost immediately: the compositions refuse to go on smoothly, the nails remain bald, and the designs don’t turn out well.
It's too early to get upset! There are many nuances in a gel polish manicure, but knowing about them, you can create the perfect finish. Where does the path to perfection begin?
Gel polish wrinkles in the lamp: eliminating application errors
Not so long ago, modern women were able to feel the convenience of manicure using gel polishes. This product not only has unique properties for long-lasting preservation of its original appearance, but also provides additional protection of the nail plate from aggressive environmental factors. Gel polish is applied like regular varnish, but to acquire additional durability of the coating, it must be dried in lamps using UV or LED rays. Manicurists often ask a question. Why does gel polish wrinkle in the lamp? In this article we will try to cover this issue in detail.
How to paint your nails evenly with gel polish
The first difficulties arise with the base. This simple manicure layer often causes a lot of frustration for beginners. Why does the gel polish base apply unevenly ? What are the difficulties?
Most often the problem lies in the degreaser. When using a gentle fresher or its alcohol analogues, particles of moisture and fat remain on the nails, and this creates bald spots when applying the base. Changing the composition solves the problem.
Smooth application of the base is possible by following several rules:
Few beginners know that gel polish doesn’t last very well on wet nails after a trim manicure. Do not apply gel polish after nail polish removers or products with oils.
The task of hygienic manicure is not just to give the nails the desired shape, but also;
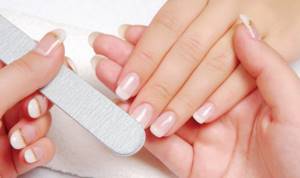
The biggest danger at this stage is not being able to polish the nail. Here are two tips: when using cutters, position them along the nail and work without pressure, and when choosing a buff, avoid a hardness of more than 240 grit.
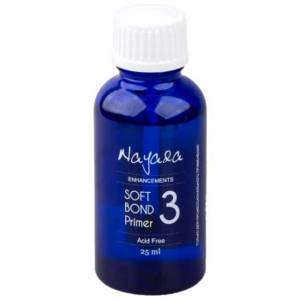
Auxiliary products will not only clean the surface of the nail from invisible particles of dust and grease, but will also increase the adhesion of the nail plate to the base. First use a dehydrator, then an acid-free primer.
The main secret is that the base should not get on the skin. But where the color will subsequently be applied, a base is needed. According to the primary classical scheme, the base is applied to the nails in a thin, thin layer.
Also, beginners should remember that the base spreads when drying, and leave a small distance to the skin.
In the new format, masters prefer to apply the base in a thicker layer, but not too thick: to level the nail plate and provide a high-quality base for the subsequent layering of gel polish.
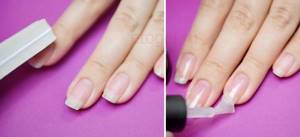
The brush is placed vertically and the cut is covered with a thin layer of base.
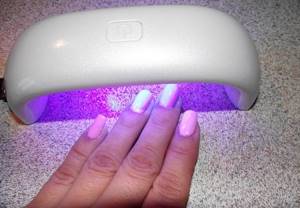
Base coated nails are placed under a UV lamp for 60 seconds. If the lamp is LED, then for 10-30 seconds. In order for the base to set in an even layer, you need to dry either one finger at a time, or first 4, and then the thumb separately.
What to do if gel polish does not apply evenly
Gel polish does not apply evenly - a typical problem for beginners.
The reasons may be the following:
The last point can be eliminated either by very good master classes from the pros, or by strictly following the advice below:
If bald spots appear during the process of applying gel polish, there is no need to be alarmed: the second or third layer will solve this problem.
Peeling or chipping of the coating is rare and is either a consequence of using a base/gel polish/top coat from different manufacturers, or ignoring the correct manicure and primer at the preparatory stage of work.
VIDEO INSTRUCTIONS » alt=»»>
How to apply gel polish evenly at the cuticle
There are no particular difficulties here.
If all manipulations are performed correctly, even the first time you will be able to apply gel polish butt to the cuticle .
When all the layers have been applied, the nails are covered with topcoat - the edge is sealed, polymerized in a lamp and the sticky layer is removed. A beautiful home manicure with gel polish is ready!
Source
Dazzling shine, long wear, but again BUT. What to do to prevent TOP from leaving bald spots.
Hello, Beauties
Oh, this manicure. An activity that forces gel polish maniacs to spend a lot of money on materials, glitter, tools, and other new items in the nail industry. And it seems like you have everything. and you seem to be satisfied with your supply of necessary materials, but curiosity and excitement force you again and again to acquire something new that you have not experienced))))))))))
So I, starting small (having purchased a starter kit on Ali), realized that I wanted MORE, MORE, MORE. )))) The soul rushed to heaven (namely, to the “beauty pro” store). There I saw the TOP for Lianail gel polish for French manicure. The manufacturer assured on the label that this top is durable when worn, does not turn yellow over time and does not lose its shine. Well, I couldn’t pass it up, especially since the price was delicious, something like 350 rubles.
The bottle for the top (as well as for the base and gel polishes) is nice, smooth, black with a laconic brand inscription. The smell is quite decent (it doesn’t irritate the eyes, it doesn’t sting the nose)))))). The content is completely transparent. The consistency is closer to liquid.
My first experience with TOP Lianeil was, to put it mildly, not very good. I was really impatient to try it out and I broke my rule of testing everything on myself first and immediately applied it to my client’s nails (good thing it was a girl I knew). The coating was done and it was time to remove the stickiness from the top coat. And here I was, culturally speaking, freaked out. All the nails had large and small bald spots! I had to top my nails again. but even after the second layer the bald spots didn’t go away! Having tortured both myself and the client, I took out my old top and finished this ill-fated manicure.
Since I encountered SUCH a surprise for the first time (nothing like this ever happened to me, not even with the Chinese TOP), I immediately went to study this issue (as they say, “Google to the rescue”))))) Having turned to the “beauty pro” site for advice , I was advised to try to remove the stickiness from the gel polish before applying topcoat. So I did.
The TOP lay down perfectly, evenly and smoothly. BUT . here it is BUT. I just got tired of getting the bubbles out when applying it. You may not notice them on dark tones of gel polish, but on light ones you can. this is some kind of nightmare
I've been using this top for almost a year (exclusively on myself because of this feature) and every time I fight blisters. Sometimes more, sometimes less, but they appear and make you nervous.
Manicure stages and possible mistakes
Today there are 3 main types of manicure:
Combined and hardware manicure must be done using a special manicure apparatus, but before using it, it is better to undergo training, since improper operation of the apparatus can lead to damage to the nail plate, for example, cuts. For beginners, it is better to do a classic manicure at home.
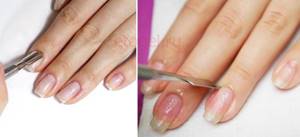
Stage 1. Shape filing, cuticle processing
Before applying gel polish, you need to put your nails in order: treat the cuticle, file the shape.
What do we do at this stage?
Stage 2. Preparing the nail plate for coating
What do we do at this stage?

Mistakes at the nail plate preparation stage
Mistake #1:
Typically, people with oily skin or those prone to excessive sweating have a moist and oily nail structure. When preparing such nails for coating, it is necessary to use a dehydrator (nail prep) to deeply dry the nail plate, remove excess moisture from it and improve the adhesion of the natural nail to the artificial coating.
Mistake #2:
The free edge of the nail is one of the most vulnerable places: if you do not pay proper attention to it, chips and detachments may appear. To improve the adhesion between the nail plate and the artificial material, it is necessary to use a primer. Primer is translated as “primer”. There are acid-free and acidic primers.
The acid-free primer acts as double-sided tape and ensures strong adhesion of the natural nail to the artificial nail.
The acid primer lifts the keratin scales of the nail plate for better adhesion to the artificial material. Since the acid primer contains aggressive components, you must be careful not to get it on the skin and cause a burn. It is recommended to use it before extensions for girls with wet or oily nail texture.
Stage 3. Covering the nail plate
What do we do at this stage?
Errors at the stage of covering the nail plate
Mistake #1:
You used the wrong base for your nails.
The condition of the nail plate is different for everyone: for some it is strong, while for others it is thin, soft and plastic. You cannot use the same base for all nails. It is necessary to analyze the condition of the nail plate and pay special attention to the choice of base coat.
Today there are 3 main types of base coatings: hard, elastic and camouflage. What are their fundamental differences? Which one to choose? Let's figure it out.
Hard bases
Elastic bases
Elastic bases are great for beginners: they are easy to work with, as they do not spread, and the alignment is perfect. Using elastic bases you can extend your nails. Elastic bases are great for soft, highly flexible nails. But on long nails they sag over time, that is, after a while a “dip” appears across the nail.
Why is this happening?
Bases are soft gels, and they, in turn, as we said above, can be elastic or not.
Elastic bases perfectly strengthen the nail plate when leveling, because they are flexible, tenacious, and when the free edge moves, they, like an elastic band, move with it. But this is precisely why shrinkage occurs.
There are bases that contain solid plasticizers. Solid materials do not move with the nail and, accordingly, do not shrink. But keep in mind, UNDER HEAVY LOAD, almost any base will give minimal shrinkage.
What to do?
Strengthening with acrylic or hard gel, but this is a completely different procedure. In addition, the harder the material, the worse it soaks and the more difficult it is to cut.
ADVICE! Sometimes it is not very clear from the name of the base whether it is hard or elastic. To determine the type of base, you can do the following: apply a small drop or strip of base to the surface of a transparent plastic bag and put it in a lamp to polymerize. If after polymerization the drop (strip) bends, it means you have an elastic base in your hands. If you can’t bend the drop and it cracks, then the base is solid.
Mistake #2:
You held your hand in the lamp incorrectly and the coating did not dry well.
How to hold your hand in the lamp correctly?
Mistake #3:
You stored and transported the gel polish incorrectly, it has thickened or air bubbles have formed in it, which is why the coating does not adhere well and is difficult to work with.
How should you store and transport gel polish?
NOTE! The application of color coating most often occurs in close proximity to the polymerization lamp. Place the bottle of gel polish so that the light from the lamp does not fall on it, otherwise the gel polish may thicken.
ADVICE! If bubbles still appear in your gel polish, you need to do the following. Open the bottle, but do not remove the brush. Let the material stand in this state in a dark place so that it is not exposed to daylight for a couple of hours. After this, mix the composition with a brush, close the bottle and twirl it between your hands.
Why does the top coat curl up on gel polish?
I had the worst day at work today! I was giving the girl a manicure as usual, and suddenly the gel polish began to curl up and curl up. This has never happened before! I almost burned out of shame! I want to understand why this happened, what did I do wrong?
There may be several reasons. Let's look at them, and you analyze what could have happened in your case. Collapse often occurs when using bright varnishes with a large amount of pigment. Each layer of such a product requires longer drying. Normally, light polymerization takes about 3 minutes in a UV lamp and at least a minute in an LED lamp. As for the lamps, they must be in good working order, have good power (for a UV lamp it is 36 W, for an LED lamp it is 20 W), all the lamps must be in working condition. If you have been using the lamp for a long time, replace the bulbs as they lose efficiency over time. Their shelf life with constant use ranges from three to six months. No matter how long you try to dry the varnish, if the equipment is faulty and the light intensity is not controlled, the coating will not be able to cure properly and the varnish will begin to wrinkle.
For a perfect manicure, use only proven products. Be sure to follow all stages of the technology. Buff your nail thoroughly. Do not forget about applying the base - it will level the surface of the nail plate, and the colored polish will lie more evenly. Do not remove the tacky layer after applying the base coat. This will also prevent the gel polish from curling. Cover the nail with two layers of base. Dry the first thin one, make the second thicker, carefully distributing it. Maybe you applied too thick a layer and that's why the gel polish started to curl. According to the technology, the nail is covered with a thin layer of varnish from base to edge. Make sure that each layer of coating is distributed evenly. Only such a manicure will lie smoothly, without wrinkles and will be worn for a long time.
Please also note that gel polish must be dried in a lamp immediately. If you leave it without drying it, it can also go into waves. To prevent the coating from deteriorating under the rays of the lamp, place your hand palm up, parallel to the table surface. To ensure that the tone coating retains its gloss and does not roll off on the base, let the varnish cool. The right thing to do is to use all manicure products from the same manufacturer so that the layers are even and there is no conflict between the constituent components of the liquid. Use only high-quality brushes, taking into account their features. To distribute the polish over the nail plate, take a wider brush; to cover the area around the cuticle, use a smaller and more elastic one. When the gel dries and micro wrinkles appear on it, apply a glossy top coat with quick movements, fix it by holding it under the lamp for a few seconds, and then dry it completely.
The varnish will not adhere well if it is not allowed to settle after shaking. Remember: in order for the product to lay down evenly, the container with varnish should not be shaken. You just need to gently roll the jar between your palms. Follow the storage instructions for all manicure products and keep them away from direct sunlight.
What else can cause problems when applying artificial turf?
Have you tried all kinds of bases, but your nails still appear chipped and peeling? There are several explanations for this, for example:
What to do? Do you want to part with your long-lasting, flawless manicure forever?
Of course not! You can take the webinar “Complicated cases in base coating of nails” from the teacher of the ParisNail school Velmitina Zaitseva.
You will receive a detailed algorithm for applying and fixing the material, learn all the secrets of the teacher and be able to avoid material detachments!
Choosing a matte manicure coating
Matte manicure is not new. This coating was invented back in the 90s, but in recent years it is the matte coating that has become popular among fashionistas. You can highlight its advantages: luxury and elegance, softness, with it you can come up with an original design, and also versatility (this coating fits many looks). But this manicure also has its drawbacks: microdamages are visible on matte nails; if you use light colors, your nails will quickly get dirty. Such nails or glossy - the choice is individual. But if you still made a choice in favor of a matte manicure, then this article is for you.
How to remove artificial material correctly and why is it important?
You've probably heard that gel polish spoils your nails, making them thin and brittle. It is a myth! It's not the material that ruins your nails! One of the reasons for damage to the nail plate is improper removal of the artificial coating, so this procedure must be approached with special responsibility!
Is it possible to remove gel polish yourself at home without damaging your nails? What materials and tools are needed for this? Let's figure it out.
How long can you wear gel polish?
First, let's figure out what period of wearing the coating is optimal. Often girls wear gel polish for a month, or even longer. However, they do not understand that they can damage the nail plate.
Technologists advise walking with the coating for no more than 2-3 weeks. Prolonged wear puts stress on the tip of the nail plate, its root suffers from the weight of the coating. All this can lead not only to breakage, but also to deformation of the nail plate.
How can you not remove gel polish?
RULE 1: Under no circumstances should you pick at the gel polish or tear it off the surface of the nail plate, because this can cause serious injury! If you are careless, you can remove the top layer of the nail along with the material, and this can lead to thinning and, at a minimum, painful sensations when in contact with water and various surfaces.
RULE 2: do not file away partially peeled off gel polish. In this case, you also risk cutting off the top layer of the nail and ruining it.
What other consequences might arise?
We hope these reasons are enough to convince you not to peel off the coating from the nail plate and do the gel polish removal according to the rules!
By the way, the peeling process itself is quite painful, it’s hardly worth it!
How to do shellac gel manicure at home
For some time, nail extensions remained the only alternative way to quickly get a beautiful manicure so that the varnish or design retains its attractive appearance for a long time. With the advent of gel polishes, a lot has changed, but the main thing is that even without much experience, you can create a bright manicure at home that will last for several weeks. Here are step-by-step instructions on how to do a shellac gel manicure without resorting to a salon:
- Before the main stage of the procedure, you need to take care of your hands and tidy up your nails, choosing a classic or European manicure according to your preferences.
- Following the technology step by step, the next stage will be shaping and polishing the top layer of the nail plate. For these purposes, among the tools there must be a nail file, preferably a buff.
- Next, the nail surface must be degreased and not touched with your fingers. The importance of this stage is that if you follow the recommendations correctly, it will help the shellac coating last longer. For degreasing, use medical alcohol or liquid with acetone, which is intended for nail polish remover.
- A thin, even layer is how to apply gel polish when starting the main stage of the procedure. The base coat strengthens the nail, the colored gel gives the desired color, and the fixative protects the shellac from damage. Therefore, when purchasing, it is better to give preference to a set that contains everything you need. But the secret to successfully applying shellac to nails at home lies not only in the step-by-step application of each product in a thin, even layer. To make your nails smooth and acquire a beautiful glossy shade, polymerization requires a UV lamp, which will reduce drying time and prevent the appearance of bubbles. Experienced nail art masters advise applying the base coat and colored gel polish in a thin layer twice, and each time be sure to let them dry thoroughly.
- The final stage is the application of a top transparent coating, which seals the entire nail plate. Residues of the product can only be removed with a lint-free cloth soaked in alcohol.
- Life with diabetes after 50: duration, types of disease
- How can a pensioner get 2,000 rubles for purchases at Pyaterochka?
- Beard trimmer
Gel polish removal methods
There are two ways to remove artificial turf: using sawdust and by soaking it with a special liquid or napkins.
To remove the coating using sawdust, a special apparatus and removal cutters are required. Therefore, this option is suitable only for those girls who are familiar with hardware manicure.
Perhaps someone will have the thought: “Why not try to remove it with a rough file?” But we’ll immediately answer that this method is quite problematic, takes too much time and can damage the natural nail. It is necessary to try very hard to treat the area near the cuticle, and there is a risk of rubbing the skin. Therefore, at home, the easiest way to remove it is by soaking.
If you want to master sawdust removal, then sign up for basic courses at our licensed school “ParisNail”! After training, you will not only do a flawless manicure for yourself, but will become a real professional in the nail industry and will be able to work as a manicurist!
Maceration
This method involves soaking the gel polish with a special acetone-containing liquid. You will find a list of materials required for this procedure and detailed technology for removing gel polish in the article “How to remove gel polish (shellac) at home?”
NOTE! Not all base coats can be soaked, so ask the seller to select the base that is suitable for this type of removal.
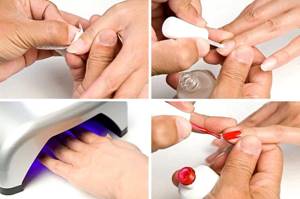
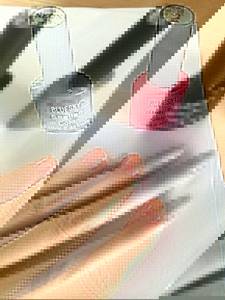
Gel polish. Application instructions from a beginner
It's my birthday soon. I thought and thought about what to ask for a gift from my loved one and ordered myself a set for the home procedure of applying gel polish to my nails.
And today I received my treasure! I watched a few videos on YouTube, put my son to bed and decided to try it.
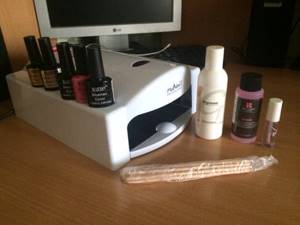
So, this is my set. Lamp with (from left to right): top coat, base coat, color coat (3 colors). The white bottle below is a 2 in 1 product, a degreaser and a liquid for removing the sticky layer. The red liquid is a gel polish remover. Small bottle - cuticle oil. Well, there are orange sticks.
You will also need cotton pads and a container for garbage.
The first thing you need to do is get a manicure. With a device or with your hands, it doesn’t matter. It is also recommended to cut your nails shorter. I don’t remember why exactly, but they write on the Internet, I trimmed it down, saying it was too early for experiments and cut it off, as requested.
Actually, this is what we had BEFORE.
First of all, we wipe the nails thoroughly with a degreaser. On the Internet, some videos, by the way, simply wipe with alcohol. But I didn’t take any risks and bought a special thing. After wiping, the nails should not be touched. My liquid smelled nice, I noted this as a plus, of course. So I was preparing for the familiar smells)
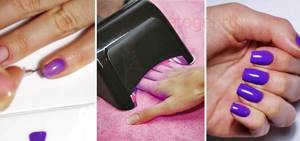
After wiping, take the base coat and apply it to the nails in a thin layer.
After application, place your hand in the lamp for one minute. The lamp must be 32 Watt. I have ultraviolet. But there are some others that generally seal quickly, I don’t remember the name.
Light bulbs need to be changed every 3-6 months, as stated in the instructions. Depends on frequency of use.
I chose a lamp with a timer of 1,2,3 minutes. Very comfortably.
I didn't really like being in the lamp. It’s warm, but it feels like it’s dry. By the end of the procedure, the hands asked for cream.
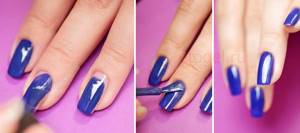
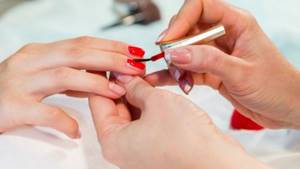
After the base layer has dried, apply colored gel polish.
The first layer is recommended to be very thin, otherwise it may swell in the light bulb. Here is my first layer - almost transparent.
Dry in the lamp for 2 minutes.
Apply a second layer of colored varnish.
Dry for two minutes.
We can stop here.
My soul requested a third layer. I did. I dried it for 2 minutes.
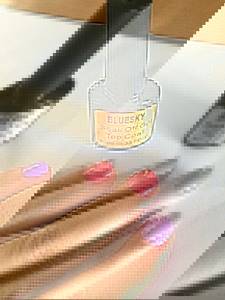
The gel polish itself has almost no smell compared to regular polish. It has a fairly thick consistency. One dip of the brush was enough for me to paint 2-3 nails. I really liked the brush, it’s comfortable. The gel polish spreads well and evens out. And it doesn't air dry. Therefore, if, for example, you applied too much, you can remove the excess from the brush, then use it to remove the excess from the nail and not worry that the manicure will suffer. My gel polish is from BlueSky. I have nothing to compare with, I will only say that it is the cheapest of those that were on the site. The well-known Shellac company costs twice as much.
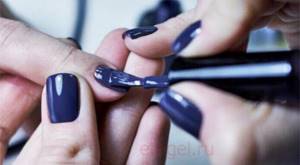
The last layer is the top coat.
Apply to nails and dry in a lamp for 3 minutes.
Then the nails need to be wiped with a sticky layer remover. This may be a separate tool. But as I already wrote, for me it’s two in one.
Well, then I also anointed it with hand cream.
This is what happened.
By the way, I took the last photo by placing the phone on a bottle of degreaser, holding it with my chin, and pressing the “take photo” button with my lip)) What can I do for you, girls))
In general, I'm satisfied. The nails are smooth, even, without any streaks.
By the way, they wrote about cotton pads that it is better not to wipe them, as lint may stick. But I didn't notice. So, if you're careful, it's possible.
The entire application procedure took me about 40 minutes. I think it will get faster over time.
Well, there are flaws, of course. But they don't catch the eye. Compared to a regular manicure, I painted my nails with regular polish - much neater...
In general, I am very pleased and recommend it to everyone.
UPD: What and how much does it cost: Lamp 1950, Varnishes all for 239, the rest are small items, all together 3750
How to make matte nails?
The matte coating is applied as the last step, when all preliminary procedures have been completed:
- removal of old coating;
- hygienic manicure;
- applying primer;
- base;
- color and design if needed.
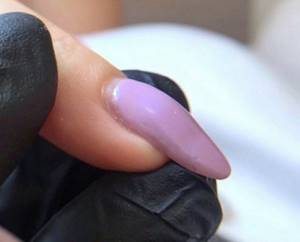
A matte top coat is applied to the selected color. It looks like a regular clear topcoat. However, when exposed to ultraviolet rays, it becomes matte.
The lifespan of a manicure with this finish is identical to a glossy one, but in reality, most women come to redo non-shiny nails much earlier. We suggest you find out why.
See also...
✅ How to make long nails so that they don’t look repulsive
✅ Spring manicure: 10 stylish new products
✅ Unconventional red nails: how to complement them to make your hands look simple and tasteful
✅ Fun neon nails for spring-summer. Ideas for those who want to be not only bright, but also stylish
Types of matte top
There are two types of matte top: with a satin effect and with a corduroy effect . The first creates a light matte finish on the nails, which to the touch is hardly distinguishable from gloss and may begin to shine over time. The matte corduroy top not only looks like velvet, but also feels very similar to this fabric. The downside is that it can get a little dirty.
It is recommended to use a matte top on dark gel polish colors, since on light colors the velvet effect is barely perceptible. The matte finish also looks interesting on gel polishes with cat eye effects, glitter or shimmer. It muffles their shine, making it more restrained, but at the same time unique.
Video
Educational video identifying the causes of cracking gel polish and options for eliminating the problem
Today shellac is the best way to maintain the beauty of your nails. But those coated with gel polish need special care, otherwise both the nail plates and the manicure itself may be damaged. Premium care, rich color - Mary Kay lipstick.
To definitely avoid cracking of the gel, it is better to avoid doing a manicure yourself and contact a certified specialist who will competently prepare the plates for gel coating and carry out the entire procedure using high-quality materials.
Why do natural nails crack under gel polish?
The constant “presence” of gel polish on the nails becomes invisible to a woman and does not cause any discomfort at all. But it has a negative effect on the condition of the nail plates, since the coating itself is a complex chemical compound, fixed through ultraviolet radiation that aggressively affects living cells. Nails are exposed to another aggressive solution during correction or complete removal of the gel. The Maybelline Color Sensation lipstick color palette will help you transform in 5 minutes for any occasion.
The hydrated collagen present in the formula is “sinked” into the top layer of the nail, after which it is deprived of oxygen and moisture for quite a long time. Under the coating, the native nail begins to thin out and becomes much more brittle and dry. In particularly advanced cases, delamination of the plate occurs. What is special about Pupa lipsticks is described in this link.
The process of thinning the plates occurs taking into account associated factors and individual characteristics of the body, and can take from several hours to several weeks. Sometimes cracks in the nails under the gel may appear after the first coating procedure, more often after several systematic procedures. Therefore, it is extremely important to give your nails time to recover after every 5th manicure. This material will help you choose a L'Oreal Color Riche lipstick palette for brunettes.
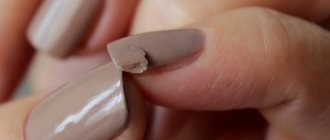
Why doesn’t gel polish stick well and crack on the tips of your nails?
In the first two days after a manicure, the coating may crack at the very tips of the nails. Most often this is due to incorrect or insufficiently competent preparation of the nail plates for the procedure. How Maybelline lipstick has earned the love of millions of women and how it can please them is described here.
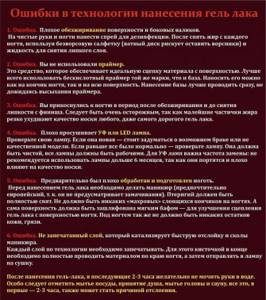
Gel polish may not adhere well to the ends if there have been violations of the technology of this type of coating. For example:
- The nail plate was not thoroughly buffed and dried.
- Immediately before the procedure, a greasy hand cream was used (leads to partial or complete peeling of the shellac). This article will tell you how to choose pigments for microblading.
- The degreaser was applied to the plate, and not to a napkin, followed by treating the nail with a moistened napkin. Reasonable price, fashionable shade, delicate texture - Max Factor lipstick.
- The manicure was carried out using expired materials, or special products of low or questionable quality.
With proper care, the gel polish coating lasts at least 21 days, after which it is necessary to carry out correction. It is not advisable to carry out more than 5 procedures in a row, since the condition of natural nails can significantly deteriorate.