Home / Articles / Cosmetology
January 6, 2022 |
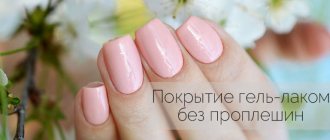
One of the most common problems in manicure is difficulty applying gel polish. Depending on the specific situation, we may be talking about uneven shade, the appearance of gaps, streaks or streaks, as well as slow or insufficient polymerization. Both beginning nail artists and people who prefer to do manicures at home may encounter similar things. In most cases, the problem can be solved relatively simply; the main thing is to understand the reason why the gel polish streaks when applied and follow the instructions.
How to apply gel polish evenly and without bald spots
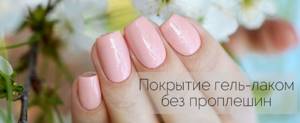
I know that for many people the problem is APPLYING colored gel polish. After all, it may lie unevenly, with bald spots or gaps, as well as streaks, and may streak. Therefore, here I want to share my life hacks on this matter, developed over many years of using different gel polishes, and also analyze the reasons for such capricious behavior of materials.
Another life hack
The reasons have been decided. But what should you do if the gel polish just doesn’t want to lie flat? Here I will suggest one life hack:
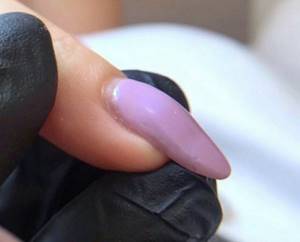
– try applying the color to a white or black base, depending on which one your problem shade is closer to. Of course, this may change the color a little, but sometimes it’s even beneficial!
That's all, my friends! I hope the article was useful to you and will solve all your problems with varnishes :)
If you found this page useful, please recommend it to your friends:
Source of the article: https://moi-manikur.ru/dizajn-nogtej-gel-lakom/gel-lak-bez-propleshin.html
Types of uneven nail plates with photos
The problem of deformation of the nail surface becomes noticeable immediately. In some cases this is a symptom of pathology, and for other reasons it is a cosmetic defect . There are several types of irregularities. Next, you can read the description of such defects of the nail surfaces of the big and other fingers and toes, such as bumps, waves and ribs, learn about the reasons for their appearance and see photos.
Ribbed
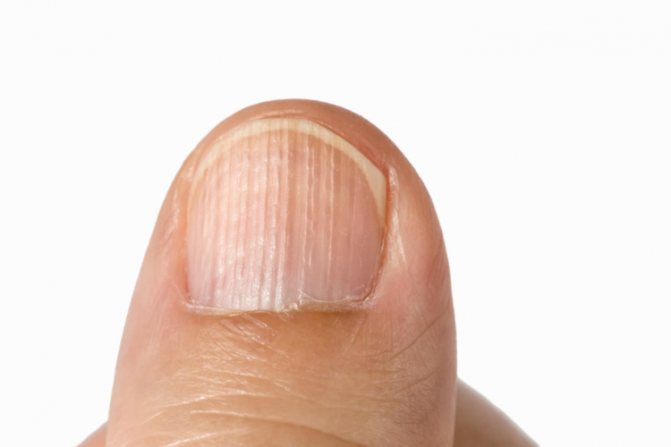
They are distinguished by longitudinal stripes along the length of the entire nail. And this can threaten human health. The only reason not to worry is old age. Treatment will not be needed because this problem cannot be solved. If a young person encounters such a problem, it is recommended to immediately consult a doctor.
- Ribbing may be the result of an incorrectly performed manicure or impaired blood circulation.
- Ribbing appears due to chronic skin diseases, gout, arterial hypertension. The listed diseases invariably make themselves felt in the form of symptoms. If you start treatment and achieve recovery, the nail will soon regain its previous healthy appearance.
Important! If there is only one symptom - uneven nails, then it is recommended to undergo an examination of the digestive and cardiovascular systems.
Wavy
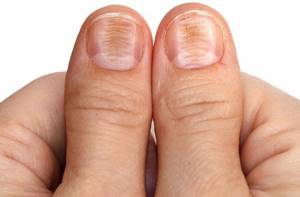
This defect cannot be hidden even with a manicure, since protruding transverse stripes attract attention, and the varnish lies crookedly, which looks ugly and careless. Wavy stripes not only create difficulties in nail care, but also indicate malfunctions of internal organs .
Reference . Vegetarianism is often the cause of this problem. After all, giving up meat entails negative health consequences, creating a shortage of necessary components for the normal functioning of the human body.
If the waviness is accompanied by detachment of the nail, this indicates a fungal disease , which will require long-term treatment under the supervision of a dermatologist. The specialist will prescribe all the necessary medications indicating the dosage.
Lumpy
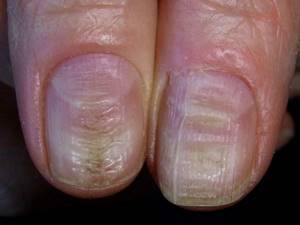
Lumps do not appear on the nail surface for no reason. Experts say that in most cases there is certainly a factor that provokes the consequences and development of this phenomenon.
Lumpy nail plates on the thumbs and fingers and toes directly reflect the problem of nutritional deficiency. It also signals the onset of hormonal changes.
Hormonal dysfunction leads to disruption of the full functioning of the internal system, which affects not only the health of the nails, but also the skin and hair.
Why does gel polish on nails swell and wrinkle in the lamp?
There may be several reasons for this phenomenon.
The most important of them:
- This is insufficient defatting. Most likely, on the nails, in the place where the bubble appeared, there is a layer of fat that got in when applying hand cream, before applying the coating, or if the technique was not followed.
- Perhaps the surface of the nail is not completely degreased. Swollen areas appear after applying primer or touching lips, hair or facial skin with nails. This caused particles of fat to appear on the nails.
- The cause of blisters on nails is pigmented compounds. Typically, varnishes that contain a lot of pigment cannot dry in a lamp within a certain period of time. Such compositions must be applied in very thin layers, carefully listening one by one.
- Insufficient lamp power. This usually happens with ultraviolet devices in which the bulbs are not replaced in a timely manner. That is, if your lamps are dim and don’t shine well, then highly pigmented varnish can easily swell. The lamp power is simply not enough to dry the coating.
- Incorrect placement of the nail in the lamp. Most often this happens on the thumbs, when all five fingers dry out at the same time. This way, the thumb is at an angle, and at the beginning of drying, a drop of gel polish simply rolls into the area of the inclination. This results in a large accumulation of gel polish that simply does not have time to dry. As a result of this, swelling on the nails appears.
Beautiful coating
Problems when covering nails with gel polish: to help beginners - Naomi blog
Gel polish is a modern coating, very durable and quite easy to use. Professionals successfully work with gel polishes from various manufacturers and never tire of admiring their versatility, beauty and excellent properties during wear. However, many representatives of the fair sex want to learn how to perform such a manicure on their own, which, in principle, is not without meaning and is quite logical. At the same time, not knowing many specific nuances, amateur craftsmen, when applying gel polish, encounter a number of problems and often associate them with the fact that the purchased decorative product is of low quality.
This may be true if the product was purchased anywhere, was stored in violation of the necessary conditions, is expired, has strange-looking packaging, or is simply passed off as an original by an unscrupulous seller, being just a third-rate counterfeit. Branded gel polish, as a rule, fits perfectly, and its wear life corresponds to that stated by the manufacturer. If nuances do arise, they are usually associated with a number of very real and easily explainable reasons. So, here is the TOP 10 most common problems that you may encounter when working with gel polishes.
The most common problems in questions and answers
French gives off a yellowish tint.
Here it is important to understand exactly when this unwanted shade appeared and what provoked it. Very often, yellowing of the gel polish jacket is observed during the drying stage of the manicure. This is caused by the proximity of the fingers to the sources of ultraviolet radiation, that is, to the light bulbs themselves inside the UV device. Conclusion: the best option for applying and polymerizing gel polish is when each nail is coated and dried separately. In any case, your thumbs should definitely not be sent to the UV lamp along with the rest, because, due to the anatomical structure of the hand, they will be positioned differently, and this means problems with drying. If yellowness appears already in the process of wearing a manicure, then it could be caused by several reasons, for example: visiting a solarium, using self-tanning products, applying coffee bean-based scrubs to the body yourself (without gloves), and so on.
In some cases, yellowing of the jacket can occur even with an excess of natural ultraviolet radiation, especially for those girls who, in pursuit of an intense tan, abuse their exposure to the sun. A similar phenomenon is observed as a result of the appearance of microcracks on the coating, invisible to the human eye. Air begins to penetrate into it, causing yellowing of the white gel polish, as well as the appearance of stains on the colored one.
The gel polish does not apply uniformly, leaving bald spots.
But you shouldn’t be afraid of this at all. The technology for applying gel polish is multi-stage and includes 3-4 mandatory decorative layers. They must be thin, so it is not unusual that the first and second coats do not achieve the required degree of density and uniformity of coverage. Two subsequent layers will successfully correct the situation.
Gel polish is too liquid.
This applies to a greater extent to coatings with a low pigment content, that is, light pastel shades. To make, for example, light pink or nude color look beautiful, you need to paint your nail several times. Often the manufacturer deliberately makes the consistency more fluid to make application easier. After all, it is very difficult to cover nails with gel polish in 3-4 layers if it is thick.
Running onto the cuticle.
This situation is most often associated with a deviation from the correct technology for working with gel polishes. Many beginners, trying to apply a decorative layer as close to the cuticle as possible, do not maintain the required one millimeter indentation. But we are talking about a gel-based coating, which expands slightly in a UV lamp and, as a result, can flow onto the cuticle and skin. Also, bleeding onto the cuticle occurs in those who try to speed up the process and paint all their nails at once, and not one at a time, as recommended by professionals. Conclusion: applying gel polish at home will turn out no less beautiful than in the salon, if you do not neglect the rules.
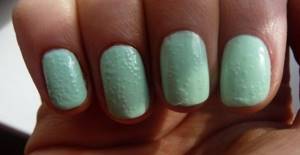
Gel polish wrinkles, gathers towards the center, and forms bubbles.
If the gel polish wrinkles or gathers towards the center of the nail, then most likely there is a problem with the application. The layers were not thin enough and did not have time to dry thoroughly. Conclusion: it is better to apply 3-4 thin layers than two dense ones. Take your time and work on each nail separately. If bubbles appear when applying gel polish, there is also an explanation for this. This happens when the bottle is shaken (during transportation, as a result of improper mixing of the pigment). If the gel polish has been transported, wait and let the product settle before using it. For good pigment distribution, do not shake the bottle, but lightly roll it in your palms. Such problems could also be caused by improper storage, as a result of which the product lost its original properties. Have you ever wondered why many manufacturers produce gel polish in darkened glass bottles? The fact is that this material is susceptible to ultraviolet radiation and therefore must be stored where the sun's rays do not penetrate. But here’s one secret from the professionals: when applying, do not make sudden movements with the brush, otherwise small air bubbles will also remain on the surface. Work smoothly.
Gel polish does not dry.
Too thick gel polish layers do not polymerize well, and also if the master overdid it with their quantity, trying to hide the shortcomings of unprofessional application. It would be a good idea to pay attention to ultraviolet light bulbs. Over time, they lose their original properties and therefore must be replaced regularly, at least once every three to six months (depending on the intensity of use of the device).
Another reason for poor polymerization of gel polish is that some shades, regardless of the manufacturer, tend not to dry at all (for example, there are products that do not harden in LED lamps) or are characterized by a longer drying period. No advice will help here. If you come across such a capricious product, then this is a matter of chance and there is no need to blame the seller, because he cannot predict which shade will behave this way.
By the way, very often novice masters complain that the gel polish has not dried because it feels sticky to the touch. In fact, residual stickiness is a standard phenomenon during the polymerization of these coatings. Also, one should not talk about poor polymerization if you use gel polishes with a high degree of pigment saturation (dark, very bright shades), which I paint on a napkin when removing the sticky layer. This is a variant of the norm and does not mean at all that the coating has not dried. By the way, such complaints most often arise from beginners, who complain that the pigment reaches behind the brush of the top coat and, accordingly, then gets into the bottle, spoiling the top coat itself. Experienced masters always know how to work correctly with pigmented gel polishes and apply the top coat with a different brush than the one that comes with the bottle. Sometimes a slight deviation from the technology is allowed, when the residual stickiness is removed from the pigmented gel polish before applying the top. In general, there are many subtleties and nuances, and to learn about them, you need to undergo training.
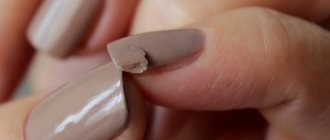
The gel polish is removed with a film and chips off.
There are many reasons for this phenomenon. It is impossible to list everything, so we present the most common ones. In some cases, masters experiment (or save money) and perform gel polish manicure using a decorative coating from one manufacturer, a base from another, and a top coat from a third. In general, they sculpt from what is at hand. And the most surprising thing is that very often such a varied “pie” wears very well. But there are exceptions. Don't want any unpleasant surprises? Then listen to the basic recommendations and do not mix products from different brands in one manicure.
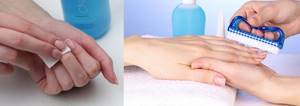
Another reason for poor wear of gel polish may be that the master neglected to use a dehydrator or primer (ultrabond), limiting himself to just one thing. This is fundamentally wrong, because these tools perform completely different functions and do not replace each other. The use of a dehydrator is especially important in case of hyperhidrosis (wet hands) and after performing the classic “wet” manicure procedure. The effect of the drug is expressed in the elimination of excess moisture from the top layer of the nail plate, while the deeper layers are not affected, the water balance does not disturb, and the nails do not suffer from brittleness and drying out. As a rule, the dehydrator contains no flavorings or dyes and does not cause allergies. It is important to understand that the dehydrator removes excess moisture, and the primer (ultrabond) is responsible for adhesion of the nail plate to the decorative material. For those with naturally wet or frequently sweaty palms, it is recommended to use both a dehydrator and a primer. A third reason for chipping and peeling may be due to improper sealing of the end. This should be done at the stage of applying each layer of all coatings.
Before decorating your nails, you should not use oils and hand creams, because it is quite difficult to remove them from the surface of your nails. The traditional trimmed manicure with soaking the nails in a bath, performed immediately before applying gel polish, is also a gross violation of technology. Remember - no wet procedures associated with prolonged exposure of marigolds to water. Only dry cuticle processing, best with a milling cutter. Also, gel polish does not wear well on improperly processed nail plates (the eponychium has not been pushed back, the overgrown cuticle has not been removed), on peeling or bumpy nails, and in the presence of other problems with their health. It is impossible not to mention another reason for the poor wear of the gel polish coating, which is the use of non-acytone liquids. Let’s say that before applying gel polish, the client independently removed regular polish from her nails using such a gentle product, supplemented with oils, vitamins and various other special ingredients. Of course, the master will be able to level out most of them with a modern degreaser, but some will still penetrate deep into the nail and may well negatively affect the durability of the gel polish manicure in the future.
The gel polish coating is difficult to remove and has to be cut off.
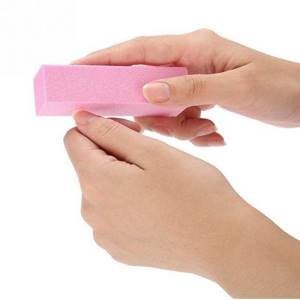
Perhaps the master overdid it with the primer, treating the entire surface of the nail plate with it, and not the area near the cuticle, on the sides and end. By the way, in order to quickly remove gel polish, before applying a special product you need to work with a buff to remove the gloss. This is a mandatory condition and cannot be neglected. It should also be taken into account that the longer the gel polish remains on the nails, the more difficult it can be to remove. And you will certainly have to tinker if you do not immediately ensure the tightest possible fit of a napkin soaked in a special product to the entire surface of the nail plate.
Gel polish on nails is cracking.
As a rule, some owners of long manicures encounter a similar phenomenon. The fact is that the nails are constantly experiencing various loads - they get caught here, hit here, and so on. And the longer they are, the more susceptible to deformation. And even if the nail plate itself accidentally bent and did not break thanks to the gel polish, this means that it was the decorative layer that took the blow and therefore may well crack. For example, working at a computer, when you constantly tap on the keyboard with overgrown nails, is stressful and can also cause cracks. In addition, the end of the nail plate, when interacting with the surface of the keys, gradually loses the protection of the top and finish, which subsequently leads to chipping and peeling of the gel polish.
Chips and cracks are common when using topcoats without a sticky layer. These coatings have low elasticity and give the effect of glass. When bending the nail plate, a top coat without an adhesive layer may not withstand tension and crack. As a rule, such tops are intended for design and decoration.
Gel polish lasts on the nails for only a couple of days, even with strict adherence to the technology.
In fact, such cases are quite rare, but they still exist. And the reasons should be sought in the characteristics of the female body. Sometimes the problem arises due to the presence of autoimmune diseases and diseases of the central nervous system, hormonal imbalances, and the use of antibiotics and vitamins. Even simple stress can affect the durability of a manicure. Everything is very individual and it happens that a small error during application, which could go unnoticed, coincides with some processes in the body and the gel polish wears much less than usual.
Duller than the top.
The problem of top coat fading is often related to improper removal of residual stickiness, for example, using the wrong liquid. Also, you cannot remove stickiness from all nails with the same napkin; it is better to provide separate napkins for each nail or choose new areas from a common one. Do not rush and remove the stickiness immediately after drying in the lamp; it is best to do this after the top has cooled.
Useful tips
If you want a bright, amazingly beautiful, fashionable and spectacular gel polish manicure to stay on your nails for two to three weeks and at the same time not lose its original appearance, aesthetics and integrity of the coating, then take note of a few very simple, but extremely effective advice.
Lovers of traditional French hairstyle using white gel polishes should refrain from visiting the solarium. The fact is that intense ultraviolet radiation can cause a change in the original shade of the gel polish, causing the appearance of yellowness. By the way, ordinary household processes also lead to a similar effect, for example, peeling vegetables with bright natural colors (beets, carrots). Therefore, when working in the kitchen, it is better not to neglect the use of gloves, which will protect not only your hands, but also the gel polish on your nails. Self-tanning creams, various detergents and other household products can also cause yellowing of the jacket. By the way, many masters successfully use a little trick, applying a top-finish coating not only to the front surface of the nail plate, but also to the back. In this way, it is possible to achieve relative tightness and prevent natural dyes from entering the nail from the outside.
Those representatives of the fair sex who love to soak in a hot bath will also have to make certain adjustments to their habits. Manicurists unanimously say that the nail under gel polish is reliably protected from the influence of the external environment. This is true, but only partly. What happens to the nail plate in hot water? It seems to expand and heat up, transmitting all these changes to the gel polish, which, being an artificial material, is not able to adapt to such temperature changes as successfully as a natural nail. As it cools down, your nail regains its normal shape, but gel polish, despite all its elasticity, finds it increasingly difficult to return to its original state each time. Therefore, if you want your manicure to look for a long time as if you just left the master, do not overuse bathing in hot water. Keeping your hands in cold water for a long time also does not help maintain the ideal appearance of your painted nails.
Forget about correcting the shape of your nails throughout the entire period while you are wearing your manicure. The gel polish coating will simply lose its integrity. No nail files - this rule must be followed strictly, otherwise you are guaranteed chips after a very short time. Why? The answer is obvious - by filing, you violate the protection of the gel polish “pie” at the end of the nail (the highest risk area). As a result, what in the language of professionals is called “end sealing” is completely leveled out and the manicure quickly loses its durability.
In other words, despite the obvious advantages of gel polish over other decorative coatings, its beauty and long service life, we must not forget that good results are achieved only if they work with high-quality material using the correct technology, without breaking anything or missing out. We hope this article will be useful and answer questions that concern many novice craftsmen.
naomi24.ua
Why do nails crack under gel polish?
The nail cracks under gel polish also for several reasons:
- the plates are thin and brittle;
- there is a lot of material on them, especially on the free edge;
- there are cuts on the nails with a milling cutter, that is, thinned areas;
- the plates were given the wrong shape (they were too narrow, the required volume was removed at the growth points);
- the coating was performed despite the nail disease, although this should not be done;
- their length is too long, and the strengthening was not carried out;
- mechanical damage was caused during a hygienic manicure or after;
- the coating wears out.
Treating grooves on nails with proper nutrition
Proper nutrition. To keep your immune system strong, eat only healthy foods: less fatty foods, foods without chemical preservatives, dyes, etc. Drink more water and take a course of vitamins, eat vegetables high in fiber.
- Vitamins E, A: pork and chicken liver, eggs, cheese, beans and cereals, milk, nuts. Vitamins E and A enhance each other's effects. Therefore, they are taken together.
- Iodized foods: fish, pineapple, spinach, seaweed, milk, shellfish and other seafood.
- Magnesium: nuts, cheese, beans, blackberries, bananas, poultry, seeds, plantains.
- Vitamin B5: nuts, mushrooms, seeds, eggs, cereals, chicken, bran, mushrooms.
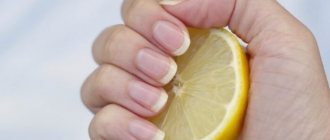
- Vitamin C: tomatoes, berries, citrus fruits, greens, fruits. A slice of lemon can saturate your nails with vitamins; just gently wipe the nail plate.
- Calcium: figs, dairy products, legumes, spinach, eggs, meat and cabbage.
- Zinc: greens, legumes, seafood, cereals, nuts.
What to do if the gel polish is wrinkled?
How to fix the situation? There is no need to completely redo your manicure. It is enough to cover normal nails with a top coat to complete the design. And those nails on which bubbles and swellings have appeared must be treated and the lesions removed. This is best done with a pusher or file. Please note that the cutter may become clogged with this sticky substance.
Next, you need to remove any remaining dust with a brush and wipe the nail with a degreaser. After this, gel polish is applied. There is no need to re-prep the nail, apply primer, degreaser and base. Gel polish is immediately applied, and after drying it is covered with a layer of top coat.
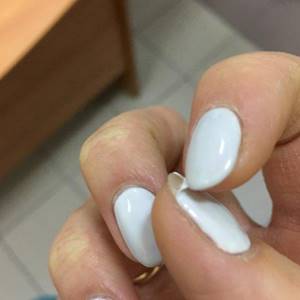
Why does gel polish peel off at the cuticle?
There are several reasons, they are the fault of the master and occur when the technique of applying gel polish is not followed.
Causes:
- Incomplete removal of pterygium from nails. That is, when the base is located on the pterygium, it gradually grows and a pocket or detachment is formed
- A little gel polish got on the cuticle. Thus, detachments cannot be avoided
- The shine was not removed from the nail using a file or router
- The nail was not degreased or primer was applied. Because of this, there is no normal adhesion between the nail and the artificial material, so it peels off
Gel polish did not dry out
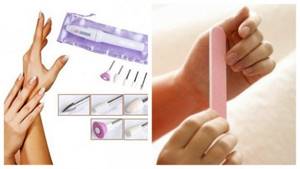
Manicure stages and possible mistakes
Today there are 3 main types of manicure:
Combined and hardware manicure must be done using a special manicure apparatus, but before using it, it is better to undergo training, since improper operation of the apparatus can lead to damage to the nail plate, for example, cuts. For beginners, it is better to do a classic manicure at home.
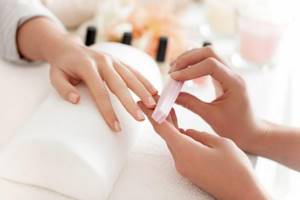
Stage 1. Shape filing, cuticle processing
Before applying gel polish, you need to put your nails in order: treat the cuticle, file the shape.
What do we do at this stage?
Stage 2. Preparing the nail plate for coating
What do we do at this stage?
Mistakes at the nail plate preparation stage
Mistake #1:
Typically, people with oily skin or those prone to excessive sweating have a moist and oily nail structure. When preparing such nails for coating, it is necessary to use a dehydrator (nail prep) to deeply dry the nail plate, remove excess moisture from it and improve the adhesion of the natural nail to the artificial coating.
Mistake #2:
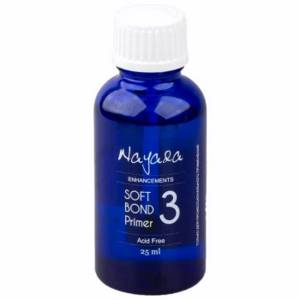
The free edge of the nail is one of the most vulnerable places: if you do not pay proper attention to it, chips and detachments may appear. To improve the adhesion between the nail plate and the artificial material, it is necessary to use a primer. Primer is translated as “primer”. There are acid-free and acidic primers.
The acid-free primer acts as double-sided tape and ensures strong adhesion of the natural nail to the artificial nail.
The acid primer lifts the keratin scales of the nail plate for better adhesion to the artificial material. Since the acid primer contains aggressive components, you must be careful not to get it on the skin and cause a burn. It is recommended to use it before extensions for girls with wet or oily nail texture.
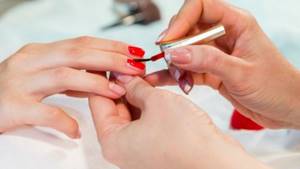
Stage 3. Covering the nail plate
What do we do at this stage?
Errors at the stage of covering the nail plate
Mistake #1:
You used the wrong base for your nails.
The condition of the nail plate is different for everyone: for some it is strong, while for others it is thin, soft and plastic. You cannot use the same base for all nails. It is necessary to analyze the condition of the nail plate and pay special attention to the choice of base coat.
Today there are 3 main types of base coatings: hard, elastic and camouflage. What are their fundamental differences? Which one to choose? Let's figure it out.
Hard bases
Elastic bases
Elastic bases are great for beginners: they are easy to work with, as they do not spread, and the alignment is perfect. Using elastic bases you can extend your nails. Elastic bases are great for soft, highly flexible nails. But on long nails they sag over time, that is, after a while a “dip” appears across the nail.
Why is this happening?
Bases are soft gels, and they, in turn, as we said above, can be elastic or not.
Elastic bases perfectly strengthen the nail plate when leveling, because they are flexible, tenacious, and when the free edge moves, they, like an elastic band, move with it. But this is precisely why shrinkage occurs.
There are bases that contain solid plasticizers. Solid materials do not move with the nail and, accordingly, do not shrink. But keep in mind, UNDER HEAVY LOAD, almost any base will give minimal shrinkage.
What to do?
Strengthening with acrylic or hard gel, but this is a completely different procedure. In addition, the harder the material, the worse it soaks and the more difficult it is to cut.
ADVICE! Sometimes it is not very clear from the name of the base whether it is hard or elastic. To determine the type of base, you can do the following: apply a small drop or strip of base to the surface of a transparent plastic bag and put it in a lamp to polymerize. If after polymerization the drop (strip) bends, it means you have an elastic base in your hands. If you can’t bend the drop and it cracks, then the base is solid.
Mistake #2:
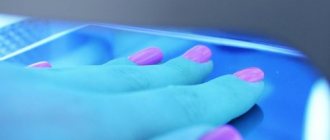
You held your hand in the lamp incorrectly and the coating did not dry well.

How to hold your hand in the lamp correctly?
Mistake #3:
You stored and transported the gel polish incorrectly, it has thickened or air bubbles have formed in it, which is why the coating does not adhere well and is difficult to work with.
How should you store and transport gel polish?
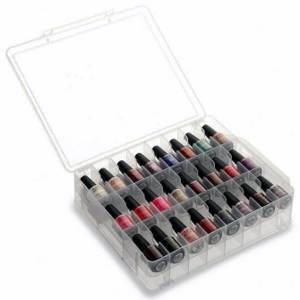
NOTE! The application of color coating most often occurs in close proximity to the polymerization lamp. Place the bottle of gel polish so that the light from the lamp does not fall on it, otherwise the gel polish may thicken.
ADVICE! If bubbles still appear in your gel polish, you need to do the following. Open the bottle, but do not remove the brush. Let the material stand in this state in a dark place so that it is not exposed to daylight for a couple of hours. After this, mix the composition with a brush, close the bottle and twirl it between your hands.
Mistake #4:
During polymerization in the lamp, the gel polish shrunk.
One of the reasons may be the insufficient power of the lamp you are using. Perhaps your gel polish is well pigmented and the lamp power is simply not enough to dry it. It is advisable to use a lamp with a power of at least 48 W. For information on how to choose a lamp, read the article “How to choose a lamp for drying gel polish?”.
Also, the gel polish could shrink due to the fact that you applied it in too thick a layer.
Mistake #5:
The brush turned out to be defective, making it inconvenient to work with or making it impossible to make a coating at all.
Sometimes the brush hairs may stick out in different directions or be completely absent, so before purchasing gel polish, ALWAYS check the brush for defects!
TIP: in order not to buy a “pig in a poke,” buy gel polishes in professional stores that are official representatives of brands and give you the opportunity to test gel polish for free before purchasing. In such stores you can apply gel polish to the tip and see if you like its thickness, density, and brush shape.
You can take advantage of this opportunity in our “ParisNail” stores!
Gel polish chips off the ends: what to do?
Causes:
- Chips in the end area appear as a result of improper processing or the use of low-quality materials.
- At the ends, chips appear if you did not seal the free edge, that is, you did not coat the cut with base, gel polish, and then top coat. At each stage it is necessary to coat this area, that is, seal it.
- Most often, chips and cracks at the end are formed due to the low ductility of the material and excessive softness of the nails. There are very soft nails on which gel polish does not last more than a week, but you can use high-quality, professional materials, following all the rules and techniques.
Chips at the ends Strengthening with acrylic powder:
- This is due to the fact that the coating is not so plastic and does not adhere to the nails, it shrinks, and along with it, it chips. In this case, it is necessary to make the nail more rigid. Several options can be used for these purposes. This is strengthening with acrylic powder, acrygel or polygel.
- The fact is that the gel itself is a fairly soft material and mobile. That is, it can shrink along with the nail. Nothing will happen if the material is sufficiently plastic. If the plasticity is low, cracks and chips appear.
- To avoid this, it is necessary to carry out strengthening. The simplest method, suitable for use at home, is strengthening with acrylic powder. To do this, you need to prepare the nail, do a manicure, remove the pterygium, cuticle, and clean the area of the side ridges.
- After this, apply dehydrator, primer, bonder, base. Before placing it in the lamp, you need to sprinkle the undried base with acrylic powder without color, that is, transparent. After this, the nails are dried in a lamp, the remaining powder is removed with a brush and covered again with a base.
- This layer of acrylic powder is a reinforcing frame that will hold the gel polish on the nails and prevent cracks and chips. Of course, the quality of materials matters, so we recommend using products from well-known brands that have proven themselves well.
Strengthening nails with acrylic powder
Top 7 common mistakes when applying gel polish at home
In the process of learning to apply gel polish, fashionistas most often make typical mistakes, which are best avoided because if you make them constantly, then such a manicure will no longer look as impressive as our fashionistas would like. Therefore, let's take a closer look so that your home experiments and creativity bring only positive results and impressions!
TOP 7 rookie mistakes
As you know, before applying gel polish, you need to carefully and efficiently prepare your nails for coating. It is necessary to give the nail the desired shape, then apply a degreaser, and only then all the other steps.
Mistake #1
If your gel polish base is sagging. The main reason for this is the incomplete removal of the old coating. You need to carefully file away all layers of the previous design with a nail file or filer so that the layer of the new base for gel polish lays perfectly flat on the nail.
Mistake #2
Microbubbles and mini-voids are visible in the layer of the polymerized base. This situation most often happens when the cuticle is removed; it has not been completely removed. And thus, when baked in the lamp, microgaps formed between the nail layer and the particles of skin remaining on the nail. If this situation occurs to you, then your manicure will not last very long.
Mistake #3
The color coating has peeled off the nail. This situation is due to the fact that our beautiful ladies skipped the stage of removing the top keratin layer with a buff. Damn the nail, it’s important not to damage it. Do not apply significant force when pressing the tool on your nails and follow the correct direction of movement. Correctly buff from the cuticle to the free edge, with light movements.
Mistake #4
The coating cracks and breaks off in small pieces. This situation occurs if it is not enough to clean the nail from dust (sawdust), dirt and sebum.
Mistake #5
The gel polish peels off as a whole plate. This situation occurs most often, and all because particles of the pterygium went unnoticed on the nail, and the delaminations on the free edge were not removed. With subsequent regrowth and peeling of the pterygium from the keratin of the natural nail, the gel coating also comes off. The continued delamination of the natural nail in depth (under the gel polish) leads to detachments of the manicure already from the end.
Mistake #6
You cannot make a mix of different gel polishes. And all because each brand of varnish contains different components that may be incompatible with another varnish. And if you combine two polishes together, the manicure may not work out at all. In particular, a primer that serves to degrease a nail can easily come into conflict with another varnish from a different manufacturer.
How to restore a cracked nail
A cracked nail can be repaired, no matter where it is damaged, with:
- polygel, biogel, gel-jelly of thick consistency, base with acrylic powder for small cracks;
- acrylic;
- fiberglass;
- silk or fiberglass.
The repair procedure looks like this:
- Remove the old coating, possibly down to the base layer or in such a way that there is no artificial material left on the nail (the crack should be visible).
- The plate is wiped with a degreaser.
- Then a primer is applied and after it dries in air, a thin layer of base product is applied, which is polymerized.
- Using an orange stick, take a portion of the gel and apply it to the place where the crack is located.
- The material is leveled with patting movements, using a flat brush dipped in degreaser and lightly wrung out.
- The material is dried in a lamp.
- If there is a sticky layer on it, remove it.
- The nail needs to be filed to remove excess material.
- Dust is removed with a lint-free cloth and further coating can be applied as usual.
Why does gel polish peel off at the base and cuticle: what to do?
It often happens that after applying gel polish, you end up with a beautiful manicure that is not particularly soft. But after a couple of days it peeled off from the base. The main reason is insufficient drying. Perhaps you did not withstand enough time or the lamp power was low. Therefore, when using pigmented coatings that are quite dense and viscous, we recommend using a 48 W hybrid lamp. This device dries absolutely all gels, gel polishes, shellacs, as well as substances that dry under UV rays.
Please note that some gel polishes do not dry well in ice lamps or, conversely, do not dry in ultraviolet devices. Therefore, you should carefully read the information on the packaging, you may have come across just such a product. If this happens and you feel empty inside when you press on the nail, this means that the material has peeled off from the base. This happened due to the fact that it did not dry out completely, and only the top layer of coating was baked.
Grown-out gel polish
The bottom layer remained sticky and not dry. In this case, it is necessary to soak the coating using a special product or remove it using a file or cutter. Once the coating is completely removed, it will be necessary to restore it again using all the technology. In order to prevent peeling next time, we recommend applying the product in very thin layers and drying it in a lamp for a longer period of time. Only then apply the next layer.
Another reason why gel polish may come off the nail plate after a few days is the use of very hot water. After visiting the salon for 24 hours, many masters recommend refraining from washing dishes, going to the bathhouse, or sauna. If you have a general cleaning the next day after you have done your manicure, you should wash and clean with gloves so as not to expose the gel polish coating to aggressive substances. Because it remains fixed on the nail within 24 hours.
Removing the sticky layer
Benefits of gel polish
If you want to have beautiful nails, natural and well-groomed, but you don’t like repainting them every other day, then the beauty industry is ready to offer two options: gel polish and Shellac coating. Similar concepts have some fundamental differences. When applying shellac, you do not have to pre-sand the nail plate; you just need to degrease it. The desire to use gel polish to create a beautiful manicure will require a mandatory step - polishing the nail, but it lasts longer, mixing bases and palettes gives an unlimited number of design options.
The next fundamental difference between the two types of coatings concerns removal. You can remove Shellac using a special product, but to remove the polymer coating, which combines the strength of gel and varnish paint, you will first need to destroy the top layer. Damage-resistant coating is safe if certified materials are used and application technology is followed.
The gel polish was dried little or sloppily
Do you know the main law of meanness in manicure? As soon as you put your hand into the polymerization lamp, even the most distant relative will call you to chat. Naturally, you already took your hand out (for a second!) and, while talking, forgot to dry it. Even if the next layer is dried perfectly, the coating risks cracking. A common mistake when drying gel polish is carelessly placing your hand in the lamp. The relaxed palm lies unevenly: the fingers lean slightly to one side. As a result, polymerization will affect those places that were under direct lighting, and the “blind spots” will begin to peel off over time. Keep your hand straight, watch the position of your fingers - and the coating will be flawless.
A manicure that lifts your spirit every day can be created at home. We are sure that the gel polish coating on your nails will turn out no worse than in a beauty salon. To do this, you just need to know the “pitfalls” in the technique of applying it. MAKEUP will always advise and support you in your pursuit of beauty!
Why does gel polish peel off at the side rollers, what should I do?
The main reason is that you did not prepare the nail plate correctly.
Reasons for the appearance of detachments on the side ridges:
- The base did not get into this area and part of the nail was left bare. Accordingly, when gel polish gets on this area, it simply peels off.
- The base got on the cuticle, so a detachment appeared due to the growth of the pterygium.
- The area near the side ridges was poorly treated during the manicure and the pterygium was not removed, so the base and gel polish fell directly on it.
- Incorrect selection of material. Please note that some manufacturers make base and gel polish, as well as top coat, specifically for artificial turf. That is, for acrylic and acrygel. This type of coating has an excellent mirror effect and creates beautiful highlights. But the coating is not very plastic, that is, hard, something like glass. This way, the coating will come off the nails during housework and cleaning. After all, the nail in these areas, due to its natural softness, becomes deformed and bends. But the material, due to lack of plasticity, does not move with the nail and chips off it. Therefore, choose the right varnishes for coating, and do not purchase a product for artificial nails.
- Insufficient drinking. Perhaps in this area you did not reach with a file and did not process it well, and did not remove the shine from the nail. In this case, there will definitely be detachments. Therefore, in the cuticle area, we recommend using a bullet or flame cutter, which does an excellent job of removing the cuticle, pterygium, as well as the upper shiny layer of the nail in the area of the side ridges. Where it is quite difficult to get to with a file.
The gel polish did not dry out and chipped. To avoid peeling on the nails after applying gel polish, it is necessary to use high-quality materials, properly treat the nail, and apply the coating in thin layers. With a little practice, you can create the perfect manicure without chipping or peeling at home.
How to remove artificial material correctly and why is it important?
You've probably heard that gel polish spoils your nails, making them thin and brittle. It is a myth! It's not the material that ruins your nails! One of the reasons for damage to the nail plate is improper removal of the artificial coating, so this procedure must be approached with special responsibility!
Is it possible to remove gel polish yourself at home without damaging your nails? What materials and tools are needed for this? Let's figure it out.
How long can you wear gel polish?
First, let's figure out what period of wearing the coating is optimal. Often girls wear gel polish for a month, or even longer. However, they do not understand that they can damage the nail plate.
Technologists advise walking with the coating for no more than 2-3 weeks. Prolonged wear puts stress on the tip of the nail plate, its root suffers from the weight of the coating. All this can lead not only to breakage, but also to deformation of the nail plate.
How can you not remove gel polish?
RULE 1: Under no circumstances should you pick at the gel polish or tear it off the surface of the nail plate, because this can cause serious injury! If you are careless, you can remove the top layer of the nail along with the material, and this can lead to thinning and, at a minimum, painful sensations when in contact with water and various surfaces.
RULE 2: do not file away partially peeled off gel polish. In this case, you also risk cutting off the top layer of the nail and ruining it.
What other consequences might arise?
- There is a possibility of tearing not only the gel polish from the nail, but also the nail plate from the nail bed.
- You peel off the artificial coating, and the nail plate becomes thinner and thinner each time.
- Those with thin nails may feel unbearable pain during coating - the base will burn strongly in the lamp. They can also get a burn to the nail plate, which in turn can lead to onycholysis - separation of the nail plate from the nail bed. It will take quite a long time to treat onycholysis.
- You will have to strengthen the nail plate, and this will require additional time for the manicure procedure.
- You will have to buy materials to strengthen the nail plate: acrylic powder, gel or polygel. And these are additional financial expenses.
- Thin nails become mobile and weak, so the coating may be worn less than usual. You will have to try very hard to avoid detachments and chips.
We hope these reasons are enough to convince you not to peel off the coating from the nail plate and do the gel polish removal according to the rules!
By the way, the peeling process itself is quite painful, it’s hardly worth it!
How to paint your nails evenly with gel polish
The first difficulties arise with the base. This simple manicure layer often causes a lot of frustration for beginners. Why does the gel polish base apply unevenly? What are the difficulties?
Most often the problem lies in the degreaser. When using a gentle fresher or its alcohol analogues, particles of moisture and fat remain on the nails, and this creates bald spots when applying the base. Changing the composition solves the problem.
Smooth application of the base is possible by following several rules:
- Excellent nail preparation - best with a manicure machine
Few beginners know that gel polish doesn’t last very well on wet nails after a trim manicure. Do not apply gel polish after nail polish removers or products with oils.
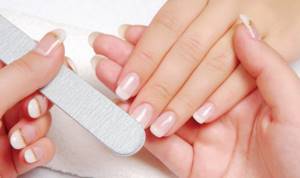
The task of hygienic manicure is not just to give the nails the desired shape, but also;
- remove scales from the split tip - the edge of the nail should be perfectly smooth;
- slightly remove the top glossy layer from the nail plate and the old “absorbed” coatings;
- gently remove the cuticle skin and the pterygium underneath;
- remove dead cells from the side ridges.
The biggest danger at this stage is not being able to polish the nail. Here are two tips: when using cutters, position them along the nail and work without pressure, and when choosing a buff, avoid a hardness of more than 240 grit.
- Degreasing and “priming”
Auxiliary products will not only clean the surface of the nail from invisible particles of dust and grease, but will also increase the adhesion of the nail plate to the base. First use a dehydrator, then an acid-free primer.
- Correct application of base
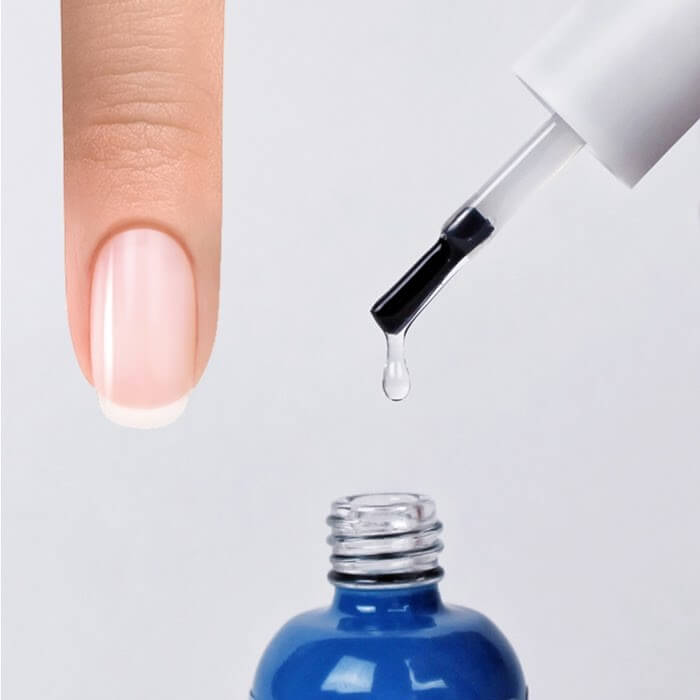
The main secret is that the base should not get on the skin. But where the color will subsequently be applied, a base is needed. According to the primary classical scheme, the base is applied to the nails in a thin, thin layer.
Also, beginners should remember that the base spreads when drying, and leave a small distance to the skin.
In the new format, masters prefer to apply the base in a thicker layer, but not too thick: to level the nail plate and provide a high-quality base for the subsequent layering of gel polish.
The brush is placed vertically and the cut is covered with a thin layer of base.
Base coated nails are placed under a UV lamp for 60 seconds. If the lamp is LED, then for 10-30 seconds. In order for the base to set in an even layer, you need to dry either one finger at a time, or first 4, and then the thumb separately.
What to do if gel polish does not apply evenly
Gel polish does not apply evenly - a typical problem for beginners.
The reasons may be the following:
- Shellac is of poor quality - it is better to use formulations from trusted manufacturers;
- Unlucky color in the collection - in almost any brand of gel polishes you can find a couple of unsuccessful bottles in the collection, why this happens is not clear, but the gel polish can streak and you will have to apply additional layers
- The pigment has sank to the bottom - roll the bottle in your palms, but do not shake;
- An unevenly applied base can be corrected with a properly applied coating;
- A UV lamp is turned on nearby - the composition spontaneously polymerizes, hardening in waves;
- Gel polish is not applied correctly.
The last point can be eliminated either by very good master classes from the pros, or by strictly following the advice below:
- You need a little shellac. Exactly as long as the brush “holds”. If the composition tries to drain, carefully remove the excess on the edge of the bottle.
- Gel polish is applied by “stretching” the drop. Not with three strokes, as in a regular manicure, but with a large drop, which is carefully stretched with a brush in all directions - under the cuticle, on the sides, to the cut of the nail. Gel polish does not dry out spontaneously, and you can work slowly.
- Three thin layers are better than one or two thick ones. It is the thick layers that cause bubbles and waves on the gel polish when drying.
- Seal the edge of the nail during the last applied layer - with light movements of the brush along the cut.
- Dry for sufficient time. In a UV lamp 120 seconds, in an LED lamp 30 seconds.
- Remove the sticky layer with special degreasing compounds, and not with alcohol or acetone-containing liquids. Violation of this rule can lead to any unpredictable consequences - up to a change in the color of the shellac or the appearance of bald spots on it.
If bald spots appear during the process of applying gel polish, there is no need to be alarmed: the second or third layer will solve this problem.
Peeling or chipping of the coating is rare and is either a consequence of using a base/gel polish/top coat from different manufacturers, or ignoring the correct manicure and primer at the preparatory stage of work.
Why does gel polish not apply smoothly? Questions and answers on odiva.ru
There may be several reasons why gel polish may not lie smoothly when applied - from defective coating, expiration of its shelf life and loss of textural unity to unevenness of the natural nail plate.
Since shellac lies on the surface of the nail, completely repeating it, it is very important to completely level the nails before applying the coating. If the surface of the nail is uneven, has grooves, bumps and irregularities, then all of them will be clearly visible on gel polish. What to do if your favorite light color (white or pink) streaks and lays out in waves? We suggest you try the following options to solve the problem of applying a capricious coating:
- prepare a good substrate for the color coating by leveling with a rubber base, and then any of your gel paint and gel polish will fit perfectly;
- Before applying the coating, try gently rolling the jar in your palms - perhaps the color pigment has simply settled in it, and a slight shake will help you solve the problem;
- before applying color, try to remove the sticky layer from the base with a special liquid and only then apply the selected color;
- Another proven method is to apply the base and color coating in a very thin layer, each product in 2 layers, thoroughly drying each layer in a lamp;
- One trick used for varnishes also works with gel polishes, namely, apply the product with a drop, stretching it parallel to the nail with a brush (hold the brush parallel to the nail).
In addition to cream shellacs, the problem of uniform application is also typical for neons.
To apply them beautifully and uniformly, experts recommend using one layer of a thin white base coat (applied to the base). And apply neon shellac itself to the substrate in 2-3 very thin layers. In this case, your favorite bright color will fit without problems and will last its intended time without chipping. Buy gel polishes Discounts on gel polishes odiva.ru