Rating: 4.66/5 (50)
A manicure set is a desired gift for every woman. Our mothers and grandmothers, having received one, took care of it, were proud of it, and passed it on to inheritance. But sometimes they used only a few tools, because they did not know the purpose of the others . Today we have more opportunities to familiarize ourselves in detail with all the necessary tools for manicure.
Differences and advantages of professional tools for manicure and pedicure
Tools for professional manicure and pedicure must be reliable and of high quality. The convenience and effectiveness of nail treatment depends on their characteristics.
Distinctive features of professional tools:
- They are made of expensive medical steel, which is not susceptible to moisture and corrosion.
- The cutting blades are sharply sharpened and do not have chips or irregularities.
- They do not require frequent sharpening and remain sharp for a long time.
- All connections are strong and reliable.
- The tools fit comfortably in the hand and are easy to use independently.
- The smooth stroke allows you to work with your fingers carefully.

The article discusses in detail all the necessary tools for a professional manicure.
Good tools have an attractive appearance. Some manufacturers produce kits made of metals coated with color.
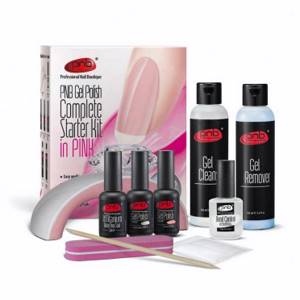
Varnish or gel polish?
You should definitely buy starter kits: they are already equipped with everything you need. The sets come in a variety of varieties, but the more and better the material it contains, the higher the price. First of all, you need to decide what kind of manicure you plan to perform: varnish, gel polish, gel, acrylic, men's, using a special device or a classic edged one, and then you can choose the set itself or make a list of what you need yourself.
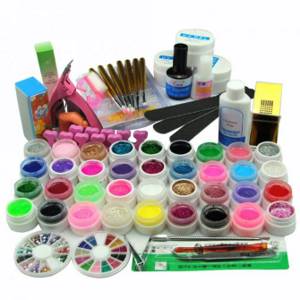
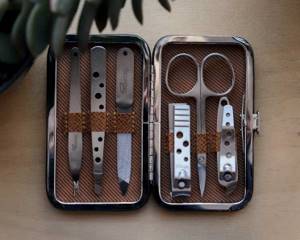
Professional manicure sets
Tools for professional manicure and pedicure can be purchased in a set. Experienced nail technicians recommend purchasing sets from well-known manufacturers. The table below describes the most popular brands with content and estimated price.
| Name | Content | Price |
| ZINGER | Straight tweezers, double-sided scraper, cuticle nippers, metal file, universal scissors. | From 1900 rub. |
| Metzger MS-3957 | Metal file, nail scissors, tweeter, straight tweezers, pusher with hatchet, trimmer with plastic handle. | From 1200 rub. |
| QVS | Tweezers for manicure and pedicure, metal file, straight tweezers. | From 300 rub. |
| Zinger zMs Z-3 S-PVC | Leather scissors, metal file, straight tweezers. | From 500 rub. |
| Staleks Multi | Universal scissors, cuticle nippers, tweeter, metal file, straight tweezers, pusher with a hatchet. | From 2500 rub. |
The kits come with sturdy storage cases.
List
The most convenient and fastest nail care is a neat manicure and varnish. What should you pay attention to when choosing a starter kit or purchasing all items and tools separately? What do you need for a manicure with varnish? A list of all materials and consumables is given below. First of all, study the market and decide on the amount that you can spend on everything you need. Thus, based on your budget, choose the brands of tools and other items that will suit you best.
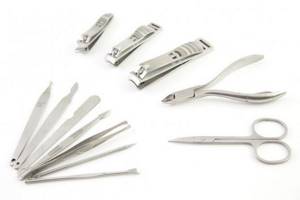
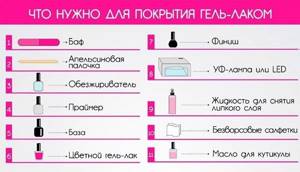
So, what do you need for a manicure for beginners? Let's look at the list of tools:
- manicure scissors;
- files of different abrasiveness;
- scraper or pusher;
- trimmer;
- nippers (cutters);
- polishers.
This is what tools are all about. We will look at each of them in more detail later in the article.
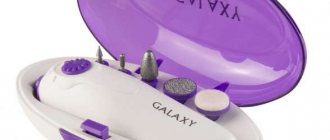
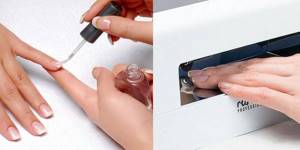
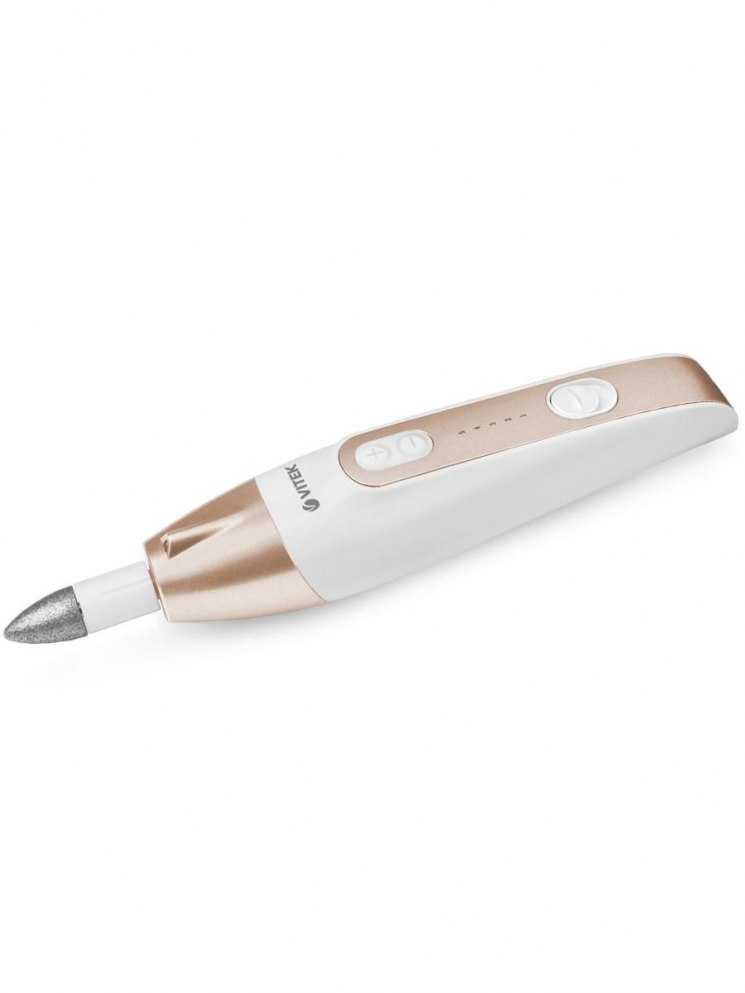
Cars and other devices
Manicure tools can be hardware. Special machines are used by professionals in salons, but for home use there are special devices with minimal equipment.
You can purchase devices with either a built-in battery or a mains-powered power supply. All attachments are replaceable and can be used for different purposes.
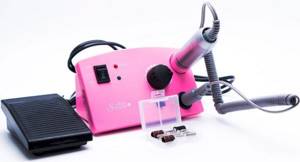
The standard set includes:
- Buffs for polishing.
- Cuticle removal tip.
- Brushes for removing dust after sawing.
- Soft nozzle for removing burrs.
Professionals advise paying attention to 3 trusted manufacturers of manicure equipment:
- MAXWELL.
- Scarlett.
- VITEK.
These machines have all the necessary components to design nails at home. Prices from 2000 to 5000 rubles.
Operating principle: the nozzles are placed on a special shaft. After turning on the machine. The shaft begins to rotate and rotate the attachments clockwise at the speed chosen by the master. The work is faster and more efficient than manually.
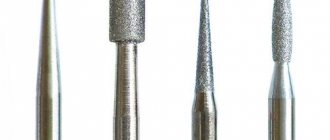
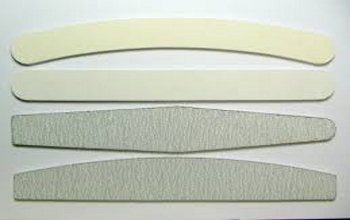
Files
Files come in different shapes and they can even be made of different materials, however, they are all needed for filing nails.
Choice
Metal files should be avoided because... they contribute to brittle nails.
When choosing a file, rely on the condition of your nails. If they are very sensitive, then feel free to buy a crystal file. A glass file is suitable for both artificial and natural nails. In addition, it is also important to consider:
- Abrasiveness. Particular attention should be paid to the numbers indicated on the files. For example, a file with an abrasiveness of 900-1200 grit is suitable for natural nails, and with 140-180 grit for extended nails;
- According to the shape of the nail plate. If your nails are long, then it is better to choose an oval file. For other forms, any nail file will do.
Disinfection devices
Cleaning instruments with alcohol is not enough. It is important to have a special device that will help completely disinfect the entire set.

The following devices are suitable for home use:
- Dry heat cabinet.
- Autoclave.
- Glasperlene sterilizer.
In a dry oven, instruments are processed at high temperature for 30 minutes. Using tweezers, iron out all the devices on a special tray and set the temperature from 110 to 180 degrees. All microbes die.
The autoclave operates on the basis of hot steam. The tools are placed in a tray in the same way, and the master sets the temperature to 150 degrees. Treatment lasts 30-40 minutes.
The Glasperlene sterilizer is filled with small glass beads that heat up to 250 degrees in 20 seconds. This device is convenient because it is mobile. You can easily take it on a trip. When using, it is important to ensure that all parts that need to be disinfected are completely lowered into the balls. It is believed that such a device is most suitable for working with clients at home.
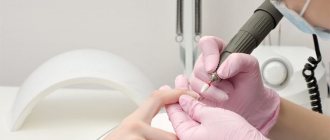
Requirements for hardware manicure in a salon
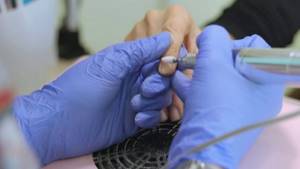
A salon hardware manicure procedure will differ slightly from a home one in the following ways:
- Before the procedure, the master must treat your hands with a disinfectant.
- The master must wear gloves
- Instruments must undergo mandatory disinfection and sterilization and be stored in craft bags or a UV sterilizer
- The master works with a large number of attachments, changing them for each stage of work
- Handpieces should also be sterilized before visiting a new client.
- The master uses the reverse mode when processing the right and left parts of the nail (depending on the preferences of the master)
- The procedure will take 30-40 minutes on average
- Before the procedure, the master can make a hygienic bath for 2 minutes to cleanse the skin, but prevent steaming
- If the master uses forceps and scissors, then this procedure is called combined
Other accessories and tools
Tools for professional manicure and pedicure must contain all the devices described above.
In addition, the nail kit includes:
- Tools for creating nail art.
- Oils and creams for moisturizing the skin of the hands.
- Container for baths.
- Degreasers, top and base coats.
- Gel polishes and regular polishes.
- Paint brushes, stickers, rhinestones and more.
- Wipes soaked in alcohol.
- Cotton swabs and disks.
Each master chooses a manicure technique that is convenient for him: manual or machine. The contents of the manicure kit depend on the choice of technique.
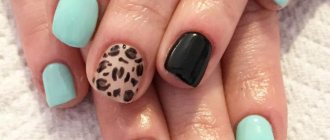
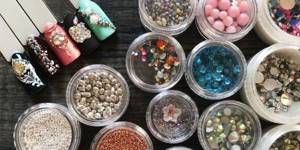
Accessories for design
The choice of materials and tools for nail design - creating patterns and decorations - is huge. Conventionally, all these funds are divided into 2 categories:
- To create a flat manicure. This group includes foil, stickers, ribbons and other materials for nail extensions that do not rise above the main coating.
- Tools for 3D design. These are voluminous beads, rhinestones, bouillons, intertwined threads. They may protrude above the surface of the nail.
Stickers, ribbons and foil
The most popular design accessories:
- Stickers are drawings on a durable adhesive base. They are applied to dry varnish and covered with a quick-drying transparent layer.
- Ribbons. There are different textures (from fabric to metal) and colors (plain, patterned, fabric design). They also have a sticky base and are applied to a dry coating.
- Foil. This is a special film with amalgam coating. The master applies it to the painted nail and presses lightly. The foil print is secured on top with transparent varnish.

- Wen on the eye
- Pizza dough: recipes
- Why do women and men dream about snakes?
Glitter powder
It is not necessary to have a shiny polish in your arsenal - you can always add a little brightness to your nails with the help of a special powder. Small glitter comes in small plastic packages and can have different shapes: round, square, triangular, diamond. Glitter is applied to the top coat of varnish using a brush.
You can also add shine to your nails using special rubs. This is a fine powder with different shades. It is applied to a painted and dried nail and rubbed in using a sponge. Remaining powder can be easily removed with a brush.
The most popular rubbing effects are metallic, holography, chameleon.
Beads and rhinestones
Colored glitters and films can be used alone or mixed with other design components. The most popular accessory for decorating nails is rhinestones. They are attached to a small drop of varnish, acrylic or embedded in gel. Rhinestones give a manicure design a special charm.
The beads are slightly larger than rhinestones and will rise noticeably above the surface of the nail plate. Professional masters use them only for decorating manicures that will be worn for no longer than 7 days. Beads are attached to acrylic or topcoat. There is also a smaller version of beads on sale - broths. They are used in the “Caviar manicure” design.
Stamping
If you don’t have the skills of an artist, you can always use ready-made drawings.
Stamping is a method of applying patterns to nails that does not require additional painting.
This is a nail art tool kit equipped with a stamp, stencil and scraper. Before applying the design, coat your nails with polish of the desired color.
Apply some paint to the stencil. Holding the scraper at a 45° angle, remove excess varnish. Press the stamp firmly onto the stencil with paint and roll it back and forth and on the sides a little. Use the stamp to create decorations on your nails by pressing it onto the desired area. Remove any remaining polish from the skin with a lint-free cloth.
Base and top coat
To ensure that the gel polish sticks well, a base coat is used. This is the first transparent layer that evens out the nail plate, hides minor imperfections and bonds the polish to the surface.
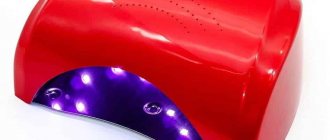
It is better to apply the base coat with a flat brush and dry it in an LED lamp for about a minute.
The top transparent coating is called topcoat. Its purpose is to fix the entire manicure and protect the varnish from external damage. The top can be matte (creates a coating without shine), with a sticky layer (this must be removed with a lint-free cloth) and without stickiness. It is recommended to apply the topcoat after creating the design. It is advisable to purchase the top and base from the same company.
Nail restoration products
With frequent use of gel polish, nails can peel off, become brittle and dull. The following tools will help fix the problem:
- Keratin masks. They contain liquid keratin, medicinal oils and vitamins. The base should be applied to clean nails and left for 5-7 minutes. Rub in the remaining mask with light movements.
- Strengthening varnishes. They contain calcium, wheat proteins and other beneficial substances. The varnish is applied once every 2-3 days to clean nails. The treatment course is 10–15 days.
- Restorative oils . They additionally contain vitamins and minerals. Such products not only strengthen the nail plate, but also make the cuticle softer and more pliable. The oil should be rubbed into the surface of the nail every day. The treatment course is 7–14 days.
Tips for choosing tools and devices for manicure and pedicure
In order for tools and devices to serve for a long time, purchasing them you need to follow several rules.
- Before purchasing, you need to inspect the device or the entire set of tools. Check for chips or scratches. Low-quality devices will quickly become unusable.
- Check the sharpness of the blades and the quality of the steel; the lower it is, the more often you will have to sharpen the tool.
- When choosing a device for manicure, you need to check how smoothly the attachments rotate. It is important that the rotating shaft does not deviate to the sides.
Tools for manicure and pedicure must be of high quality. Don't skimp if the price is a little too high. Cheap and unknown manufacturers rarely produce reliable devices. Using a good tool, even a novice master can create a professional manicure.
Trimer
This tool has sharp edges so care must be taken.
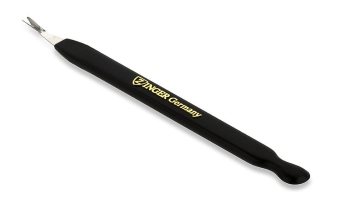
A trimmer is a manicure tool that is necessary for removing cuticles and hangnails. The working part of the device looks more like the letter “V”.
Choice
Under no circumstances buy a cheap tool, because... it will become dull very quickly and begin to tear the skin!
- Quality. Expensive models, as a rule, are made only from high-quality materials;
- Plastic, on the other hand, can crack under strong pressure and then you will have to get rid of such a tool.
By purchasing a high-quality trimmer, you save yourself from going to the store again 1-2 weeks later.
Flaws
The biggest disadvantage of mechanical sets is the high risk of skin injury if the tools are handled carelessly.

In addition, the procedure takes a long time, and the removal of corns is difficult, as is the treatment of hard (or artificial) nails.
The main disadvantage of the devices is their high cost. Disadvantages include a short service life, the need for frequent sharpening of attachments, and operation only on electricity.
Almost all devices are large, heavy, and are used only permanently.
What you need to know about the structure of the nail to use a milling cutter
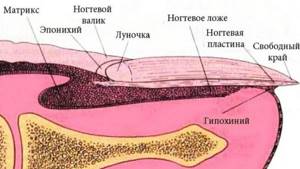
Knowing the structure of the skin and nail apparatus is important for correctly performing a manicure, extending its duration, and to avoid excessive dryness at the cuticle line and the appearance of hangnails the very next day after the procedure.
Nail structure and growth: what healthy nails and skin should look like, care rules
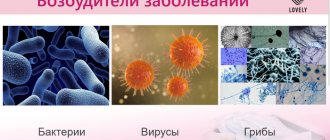
The most common problem for most clients is dry, overgrown pterygium. Knowing the peculiarities of its formation, as well as the subtleties of treating the areas where it grows, the master in his work strives not to disrupt the natural processes of renewal of the epidermis.
Key points about the structure of skin and nails in connection with hardware manicure:
The skin consists of three layers:
- Dermal - the deepest, which cannot be touched, otherwise blood will bleed;
- Epidermal - consists of living cells, but without nerve endings. It performs a protective function, so it also cannot be cut down by a master. Often this layer is damaged during a combined procedure, when cut with scissors or nippers;
- Horny - dead white cells. This layer, in turn, consists of several layers, the last of which, shiny, also cannot be cut off by the master, so as not to trigger the processes of intensive healing and renewal of the skin;
- The nail bed contains capillaries, nerve endings and blood vessels that connect the nail plate to the skin and ensure its growth and nutrition;
- If the epidermis is sawed through, the body begins to intensively overgrow these areas, and we get an overgrown cuticle and pterygium;
- Blood capillaries are located in the matrix zone and in the dermal layers - in the proximal ridge zone. If a wound appears in your pocket, it is due to an incorrectly placed instrument;
- On the back side of the roller, which we see after opening the pocket, there is a delicate epidermis. This layer cannot be processed with milling cutters.
Considering the protective function of the epidermis, the master can cut down and clean only the stratum corneum. You should not do excessive scrubbing, otherwise intensive restoration processes will start.
To understand whether the cuticle flap is horny or not, you need to take a lamp, bring your fingers close to the lamp, and look at the cuticle in the light. If it is pink or reddish, this piece cannot be filed or cut off. Otherwise there will be separation, excessive growth and peeling.