- August 4, 2018
- Nail care
- Maryia Lazurnaja
If the technology and sequence of applying gel polish are followed correctly, your manicure will delight you for a long time. But to create perfect, beautiful nails, you should first thoroughly study the information if you have previously used regular nail polishes. As in any business, there are nuances and important points that should be taken into account so as not to be disappointed with the result.
Required materials and tools
Many girls are accustomed to the simplicity of regular polish: apply, dry and enjoy your manicure. The downside is that this beauty doesn't last long to wear, especially if you do a lot of housework or the like. Cracked nails and tears from the tips of the nails are normal.
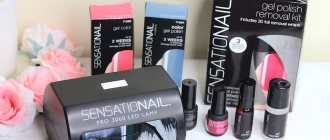
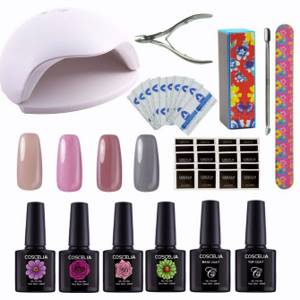
In the modern beauty industry, excellent alternatives have appeared: shellac, gel polish. Wonderful options for long-term wear and a fresh manicure look. But if you want long-lasting results, you will have to get a separate cosmetic bag for all the necessary tools and materials. If you do not touch the gel polish manicure sequence for now, then the following items should be present among your supplies:
- cuticle scissors;
- cuticle oil;
- orange sticks;
- lint-free wipes;
- nail degreasing agent;
- base or varnish base;
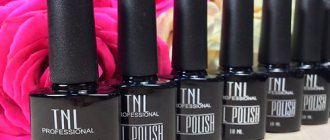
- gel polish in the colors you need;
- top or top coat;
- means for removing the top sticky layer;
- remover for any gel polish and shellac;
- primer and bonder optional;
- any decoration materials such as rhinestones, stickers or the like;
- UV, LED or combination lamp;
- polishing block.
Depending on the condition of your cuticles and nails, the list may vary. But the main items are given above. There are already ready-made gel polish manicure kits in stock.
Now it’s worth learning about the basics of the sequence of applying gel polish at home (after all, you hardly need such information if you go to nail salons).
Miniature care
After designing, you need to treat your nails with care, especially when using a kitchen grater and when working at the keyboard. Additionally, the oils add shine to the nail plate, and the polish begins to look better. Regular cuticle care is also important. It needs to be moisturized with natural oils. Ideal nutritional compositions of oils:
- jojoba;
- castor;
- olive;
- almond
If there is shellac on the nails, then they cannot be filed or given a different shape. If there is dirt, you can remove it with an orange stick. If the shellac chips, you should not try to paint over the nail. You will have to remove the cover completely and re-do the design. The process of removing nail polish occurs using a special liquid that can be purchased at a professional store.
Almost like in construction stores
We are talking about two bottles: a primer and a bonder. Why are they needed and how important are they? Let's look at everything in order.
Primer is a product that is applied to a natural nail. It serves for preliminary preparation, like a primer for repairs before wallpapering. The primer degreases, cleans and dries the nail plate for better adhesion to artificial turf. It is applied in a thin layer and does not require separate drying in a lamp. Most often used in combination with a bonder.
In turn, the bonder is like double-sided tape. Due to its sticky surface, it improves the adhesion between the natural nail and the artificial surface. The bonder helps prevent the varnish from peeling off. After application, dry in a lamp for about three minutes.
We've sorted out these components, now it's time to apply the gel polish and all its components.
Why does the base burn?
When applying the first layer of polymer coating, the client may experience a burning sensation. What caused it?
- During polymerization of the base, a chemical reaction occurs with intense heat release. The heat spreads in all directions, penetrating into the nail plate.
- Thin and dry nails are more sensitive to the thermal reaction of the polymer. It is also worth considering the initial sensitivity of the nail plates.
- The thicker the base layer is applied, especially when leveling architecture, the stronger the burning sensation may be.
All the steps to a perfect manicure
Coating your nails with gel polish is a procedure in several simple steps. By performing each step in turn, you end up with a neat manicure and a great mood from the result of your efforts.
The entire sequence of applying gel polish comes down to the following steps.
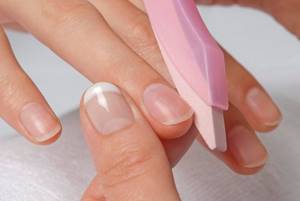
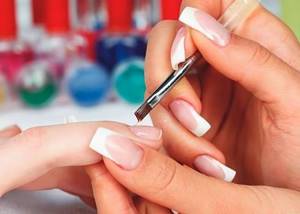
1. Process the cuticle and create the ideal nail shape for you with a file. This is a fairly important step, since the appearance of the final result will depend on your thoroughness and accuracy. Don't forget, gel polish can be worn on your nails for about a month. To ensure that your manicure remains presentable as your nails grow and does not peel off, pay enough attention to this point.
2. Polishing the surface of the nail plate with a special stone. This does not mean that you will cut off the entire thickness of the nail; a couple of movements with the bar are enough. This is done so that there is better adhesion between the natural nail and the artificial coating.
3. Degreasing the nail plate. Nails, like our entire body, release particles of fat to the surface; this is a natural process of the body. To prevent the coating from peeling off, do not forget to treat each nail.
4. Apply primer and natural drying. You have already read about this tool above. If you purchased it, then use it before the next steps of manicure.
5. Applying bonder. As in the previous paragraph, it is not worth repeating. Just use it and dry it in the lamp for enough time.
6. Base coat, or base. Serves as a barrier between the living nail and the gel polish so that the coloring pigment does not penetrate the structure of the nail plate. In addition, the base levels the surface. Apply to the nail plate and seal along the open edge of the nail. For perfect application, many artists use an additional thin brush. It is more convenient to distribute the base to fully cover the entire nail. Apply and dry in a lamp.
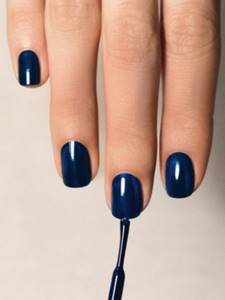
7. Queue of colored gel polish. The application procedure is exactly the same as the base coat. If you decide to make several layers, then each of them is dried in a lamp separately.
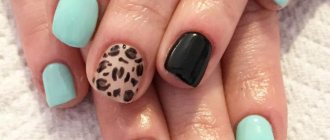
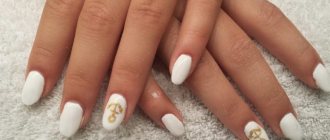
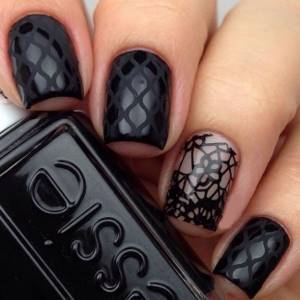
8. You can decorate the colored coating in various ways. Rhinestones, water-based, adhesive or other stickers, special adhesive tapes, glitter and many other materials are great for this.
9. The final stage is applying the top coat. It is no different from applying the base; the ends of the nails are sealed in the same way. The top coat serves as a protective top layer from external influences and keeps the visual appearance of the manicure ideal for a long time. Today there is a glossy and matte topcoat. Combining them to create interesting gel polish manicure options is quite popular.
The sequence of these steps will lead you to excellent results for a long time.
Removing old coating
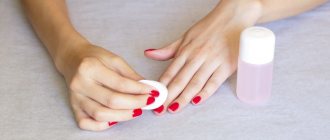
The coating is removed when the manicure no longer looks neat and the nails have already grown a lot. Cotton pads soaked in nail polish remover are not enough to remove stubborn nail polish. The process of getting rid of manicure coating is quite labor-intensive and long, and it will take 15-30 minutes. Here everything depends on the experience of the master, the number of layers of varnish on the nail surface, and the time of wearing the manicure.
Removal is performed as follows:
- Using a nail file, remove the shiny surface from the base and end of the nail, i.e. glossy layer;
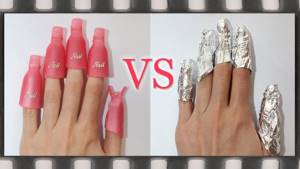
- The remover is applied to a cotton pad cut into 4 parts. Each nail is covered with a moistened piece, which is fixed firmly on top with foil;
- After 10-15 minutes, the foil and cotton wool can be removed from the nails. After this, the polish swells and comes off the nail on its own. You can use a pusher to remove any remaining gel. Everything must be done carefully, since at this stage the surface of the natural nail is exposed;
- If the varnish has hardened while other nails were being processed, then the procedure is carried out again.
A freshly done manicure is much easier to remove than one done a few weeks ago.
Three types of lamps
Choosing a lamp is a fairly popular question and has its own nuances. Three types can be distinguished.
First, LED (or light-emitting diode) lamps. Compact, lightweight and long-lasting, characterized by a high polymerization rate. Of the minuses: some types of varnishes can take a very long time to dry or may not dry at all.
Secondly, UV (or ultraviolet) lamps. The cost is significantly lower than the previous ones, but the polymerization time increases.
Thirdly, hybrid lamps that combine the positive aspects of the above-mentioned units.
An option for beginners so as not to get lost in the mass of bottles
In other words, we will talk about single-phase gel polish. And in this case, the sequence of applying gel polish will be reduced. An excellent option for those who prefer plain painted nails without any decoration. On the other hand, you can decorate it, but in this case you will still have to use a top coat to protect the decorative elements of the manicure.
A single-phase gel polish combines a base, or base, a pigmented layer, and a top coat. Thus, you have three different bottles in one. But, like any barrel of honey, there is a fly in the ointment. When you use all products individually, the top coat creates a surface that is protected from external influences. In the case of single-phase varnish, all chips and scratches will be more visible.
So the choice is yours. In any case, you can always try, experiment and choose the most optimal option for you.
Additional decoration for your nails
With the correct sequence of applying gel polish to your nails, your manicure will delight you for many days. Therefore, you often want something “a little different” for a bright accent or an original look. The following materials are most often used as additional decoration for the nail surface.
Shiny thin adhesive tapes that are convenient for creating striped manicures. This can be one pasted line or a line, an interweaving of stripes. Such tapes are convenient because they have a sticky base, are easy to use and perfectly complement any background. They are glued to a dried colored layer of varnish and covered with a layer of top coat.
Rhinestones of any sizes and colors. They can be used to lay out various compositions that will shimmer with all the colors of the rainbow in the sun. For reliability, some craftsmen use special glue for reliable fixation. Despite their voluminous appearance, they are comfortable to wear.
Water-based or adhesive-based stickers and applications. This is a great alternative to painting with brushes. It’s quite convenient when you have a finished design on your nail in a couple of seconds. Good quality stickers are crisp, even realistic looking. The sequence of application is on gel polish and under the top coat.
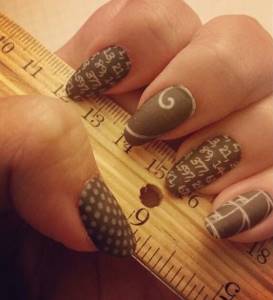
Stencils for painting, when you use a varnish that is different from the background color. There are reusable and disposable ones, but the essence does not change. You don't have to draw every element of the pattern, thereby saving time and your nerves.
Something new and interesting is constantly appearing in the assortment to decorate your manicure. Therefore, if you are interested in the topic of nail design, try to keep track of new items and fashion trends.
Advantages of gel polishes over regular ones
Even a multi-step sequence of applying gel polish should not be distracting because it is complicated and painstaking, because the final result will last for about a month. This is the most important difference from ordinary varnishes.
In addition, it is convenient to work with gel polishes while creating a design on your nails. Due to the fact that your nails dry under the lamp, you have enough time to get the desired design.
Also note the implicit savings. After all, although regular varnish is cheaper, it can be used almost every two to three days. So the benefits of such varnishes are questionable.
After polymerization, gel polishes are more resistant to external influences from environmental factors: washing dishes, working in the ground or other activities.
Another significant advantage is the drying method. The gel polish has already dried after the lamp, and there is no need to be afraid to wipe it on something. Conventional varnishes, especially in two or three layers, require a long time for final drying. Otherwise, you can ruin a perfect manicure with unnecessary scratches or abrasions that ruin the glossy surface.
Nail preparation
Gel polish is applied only to prepared nails, otherwise all efforts are useless. It is necessary to remove the old coating, if any. Be sure to get a manicure: edged, European, hot, hardware, at your personal discretion. The cuticle is completely removed - the varnish should not get on it. Without a pre-made manicure, the color coating will look tacky.
Sand the nail surface with a buff, remove grease and dust with a degreaser (a solution of pharmaceutical alcohol is suitable). If shellac is used, there is no need to polish your nails. After these procedures, refrain from washing your hands and using care products.
Applying the base
My eyes just run wild
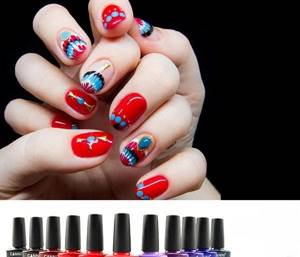
The huge range of colors and types of gel polishes can make even an experienced manicurist’s eyes run wild. To date, the following types have earned their popularity:
- thermal, when the color of the varnish changes depending on the temperature of the nail;
- magnetic, due to the incoming particles of metal shavings, you can create a cat's eye effect;
- plain matte and glossy, although more often the degree of surface smoothness is created by a top coat;
- with glitter - ordinary multi-colored varnishes with glitter already added.
Therefore, with such an assortment you can satisfy even the most fastidious fashionista.