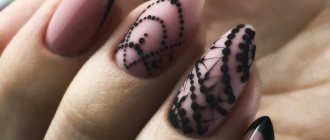
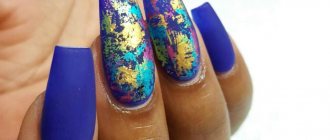
Fashionable broken glass manicure
Broken glass manicure is a new and unique type of design. Original and eye-catching, broken glass manicure is very popular. Despite the visual unusualness, this design is quite simple and even a non-professional can do. In this article you will learn step-by-step creation techniques, as well as be inspired by beautiful photos of design ideas.
Fashionable broken glass manicure: design options
The “Broken Glass” manicure design photo, which can be seen on our website, attracts with its original design, which cannot be repeated. No, the work does not use glass, as one might think based on the name of the technique. Bright highlights and iridescence are created using pieces of holographic cellophane that are glued to the nail plate. Today, without any problems, you can purchase holographic stickers in specialized stores that will help you quickly and easily achieve the desired result. If you don’t have time to visit stores, you can get by with mica left over from a flower bouquet, a wrapper from a chocolate bar, or irregularly shaped rhinestones.
Mesmerizing nail design: gel polish and broken glass
Like any other manicure, “broken glass” can have various design options. To create an unusual effect, multi-colored foil, mirror cellophane, holographic stickers, etc. are available.
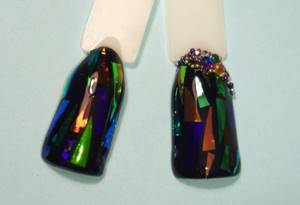
A fashionable manicure looks impressive when using a black background with silver or golden fragments. This nail design creates a three-dimensional pattern that is mesmerizing and eye-catching. You can admire them for an eternity. Nowadays geometric manicure with broken glass is also in demand.
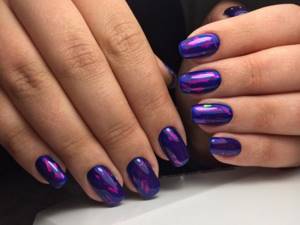
Shiny pieces look interesting against the background of deep shades of the base varnish. Especially this season, dark blue, purple, and cherry colors are relevant.
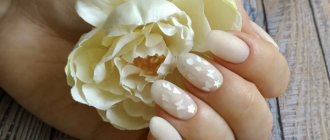
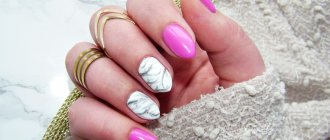
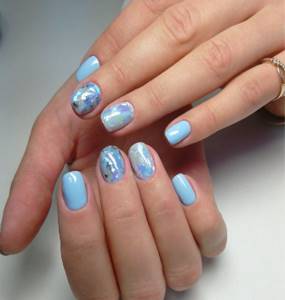
In order for the manicure to look laconic, but at the same time have its own unique flavor, you can decorate only a few nails in the “broken glass” style, and cover the rest with a plain gel polish. Of course, it’s hard not to mention the romantic and delicate version, which uses pastel-colored varnishes or a completely colorless coating, on top of which foil pieces are placed in a chaotic manner.
You can also play with not only the color, but the shape of the pieces. They can be in the form of triangles, diamonds, squares. Sizes start from smallest to large.
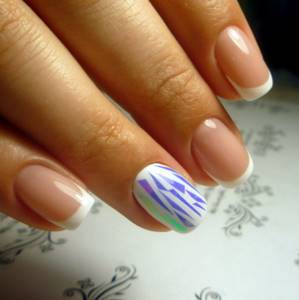
Manicure with broken glass goes well with other types of designs. It can often be seen in a duet with a French jacket.
You can make a traditional French design, and decorate two (ring and index) nails with fragments similar in color to the main color.
How to do a broken glass manicure with gel polish at home?
If you want to learn the “broken glass with gel polish” technique, then you are recommended to familiarize yourself with the photos step by step, and also get various manicure ideas on our website.
So, how to make a manicure with the effect of broken fragments. It is created using a special material that can be purchased in the store. This can be holographic polyethylene or foil. Moreover, the foil can have a 3 D effect. You can also use chocolate foil.
To work you will need:
- Colorless base;
- Gel polish of any desired shade;
- Top coating;
- Foil or stickers;
- Thin brush or tweezers.
Before you start decorating your nail plates, you need to carefully prepare them. Cut the cuticles, remove the old coating, and give them the correct shape using a nail file.
You need to prepare the decorative elements in advance, and if necessary, cut the foil pieces into the desired shape and size.
Next you can start designing:
- A base coat is applied to the nails and cured in a UV lamp.
- Next, the nails are coated one by one with colored or transparent gel polish and dried thoroughly in a lamp.
- Without waiting for the varnish to dry, use tweezers to grab the pieces and place them in the required order.
- At the end, a top coat is used, which also needs to be dried. At the end, the sticky layer is removed.
- It is recommended to treat the area where the cuticle was cut with nourishing oil.
That's all, the original and stylish nail design is ready!
Broken glass manicure ideas, photo
Manicure effect of broken glass is a current trend that has won the hearts of millions of girls. He is unusual, bright and creative. It looks appropriate in a festive look. A correctly selected color scheme with fragments will look impressive and solemn.
Often girls use this type of design in the summer. After all, glare and shimmer in the sun look very unusual! With the help of skillful combinations of colors and iridescent fragments, you can create a real kaleidoscope.
Fragmentation design has no limitations. It is suitable for both young ladies and adult women.
Black manicure with rubbing
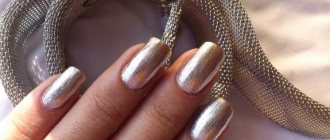
For girls who love to look bold and unusual, you can also choose a design with rubbing. It is applied to a completely different manicure base. A distinctive feature of this manicure can be called incredibly beautiful transfusions in the light. This design looks incredibly beautiful and is suitable for every day. Rubbing allows the nail plate to look more festive, but the black color keeps the manicure calm and elegant. A rub-in manicure with peas looks especially impressive.
Fashion trends
The bright and sparkling fragment design can be made in a variety of variations. Let's look at the most popular of them:
Geometric patterns stand out among the most current trends. They usually cover the nail plate completely. Particularly held in high esteem are fragments of different sizes and shapes, but of the same color. They fit together like a puzzle into one picture, but have gaps between them.
Stylish manicure
Interesting: Manicure with a geometric pattern
The triangle shape is most often used in fragmentation designs. Fashionable manicure with broken glass actively welcomes strict geometry and futuristic designs.
A manicure with broken glass on a black background looks very expressive and resembles a stained glass effect. You can also use other shades of dark color. By filling the black background completely, you will get a stunning optical illusion effect.
Interesting: Black manicure for the most fashionable!
Life hack - the sparkle of the glass design is enhanced by the matte finish.
Lunar manicure with broken glass. The smile line in this version will not be entirely ordinary, but trends will only welcome it. A triangular-shaped hole is held in high esteem. The remaining part of the nail can be covered with a single-color base varnish, or also laid out with pieces of glass - but so that the colors contrast.
As an option, in principle, do not paint over the hole, but cover the remaining part of the nail with a splinter pattern.
French on fragmentation technology. The tip of the nail is laid out in shiny pieces. It can be made in a classic style according to the shape of the nail, or it can be created in an even more original version.
You can make a triangular French manicure, which is especially stylish for square-shaped nails. Another stylish option is to make a bevel in one direction at the tip of the nail.
Interesting: French manicure with a pattern
In the latest nail art, a non-standard “toothy” French manicure has appeared - a combination of a series of triangles with the sharp end down.
Individual elements laid out on a base varnish. The nail is not filled completely, but only according to the shape of a certain figure. It could be geometry, hearts, anything. For convenience, it is necessary to prescribe the outline of the selected pattern in advance.
One of the stylish designs is to place a triangle on the nail, and on the next finger there is also a triangle, but in the opposite direction. Fashionistas are also actively resorting to creating animalistic figures using geometric lines. Use diamonds, squares, experimenting with colors and sizes.
Manicure with broken glass and rhinestones. Pieces of shiny foil combine well with other decorative elements. Irregularly shaped rhinestones are especially popular
It’s just important not to forget about the moderation of the “shine” effect on the nails
Festive manicure option
Important! Rhinestones should be applied to the final coating, and not to a layer with foil or cellophane. To fix it, you can walk around the rhinestones with a thin brush and dry it again in the lamp.
Loading …
In the selection of photos on our website you can get many ideas for such a manicure and successfully combine it with other techniques. Despite the fact that this design is not new, manicure with broken glass remains among the most original and trendy options for your nails!
Matte manicure with rubbing
Don’t think that rubbing is always something glossy. Nowadays, you can also choose matte powder, which will simply have a certain shine. In what case is such a choice relevant? When a girl wants to use manicure every day, but remain elegant and discreet. The matte finish does not look too festive, so it is great even for an office worker, especially on black, gray and brown colors.
How to do a “broken glass” manicure with gel polish
There are a lot of materials that allow you to create a manicure with the effect of broken glass. These are all kinds of films with pigment, foil, mica of different shades. It is absolutely not necessary that the selected material is intended strictly for nail design. When this style first appeared, they used exclusively a special ultra-thin film, which was secured with gel polish. Master craftsmen began to use cheaper and more accessible materials that created the same effect without extra effort.

The advantage of specialized material is that it is most often sold already cut and all that remains is to distribute the trimmings over the surface of the pre-treated nail. An alternative is uncut strips, which can be chopped at your own discretion into pieces of a more suitable size and shape. Such rainbow “shards” look equally attractive on a dark or light background.
Using foil
If you decide to use foil, then you should choose non-transferable one. It should be taken into account that any foil is thicker than a special film and its distribution over the sticky surface of the gel polish can cause some difficulties. The most natural option is “broken glass” on clear varnish.
Alternatively, you can use shiny foil and a color base in the form of gel polish of the same tone. A manicure looks attractive where the pieces of foil are arranged chaotically and are represented by “shards” of different sizes.
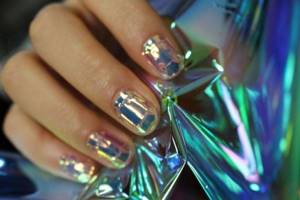
Manicure technique:
- The nail plate and the area around it are first prepared. The simplest hygienic manicure will do.
- A base layer is applied to the nail and dried under a lamp.
- Colored varnish is applied as desired in one or two layers, each of which must be dried separately. For this type of manicure, the selected varnish must have a dispersion layer.
- Pre-cut foil is fixed to the partially polymerized gel polish and each piece is smoothed along the edges. At this stage, you can also dry your nails briefly under a lamp.
- The final coating is applied in two layers. This will help hide any unevenness and bulges created by the thick foil. The entire structure is dried under a lamp until completely hardened. If there is a sticky layer left on top, it needs to be removed.
Using specialized film
Working with film is not much different from manipulating foil. Gluing it is much easier, since the thin layer merges with the base and does not require additional coating with a second finishing layer. You can create an abundance of shards on your nails or simulate just one piece of broken glass. Decorating with rhinestones in this case can add additional zest to the manicure. In this case, rhinestones are attached directly to the top layer.
If the film is used for manicure with regular varnish, then everything must be done very quickly, before the substance dries
In this case, you need to attach the film especially carefully, since the varnish layer is more delicate than its gel counterpart and even when dried it can be damaged by intensive manipulation of the film
Pearlescent rub
The combination of powder and manicure fades into the background, and foil joins them. The combination of three elements is a special style.
For evening and holiday outfits, we recommend red broken glass manicure. Deep hues add intrigue to the look, while the placement of the shards on the ring fingers adds a sparkle. The style can be done using either the French or matte technique.
Knowing the basic techniques for creating a cool design, you can easily create your own nail art at home
Please note that it is better to use gel polish coating for an even coating of the nail plate
We recommend reading:
- Water manicure - step-by-step instructions for doing it at home. 120 photos of new exclusive manicure designs
- Ombre manicure - the most fashionable new items of 2022 -2020. More than 200 photos of exclusive design, execution technique, step-by-step instructions + reviews
- Glossy manicure: review of new products, features, fresh design ideas, choice of color and style of manicure with a glossy tint (130 photos)
Abstraction using shiny foil
Brilliant ornaments have always been very popular. A classic French jacket combined with broken glass looks great and elegant. The photo of the broken glass manicure shows a design that imitates a “tear of a unicorn.” Foil with a mirror coating is glued in a chaotic manner. Outwardly, it bears some resemblance to a diamond.
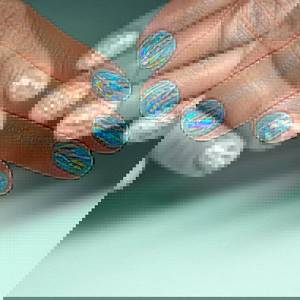
Application technology
The advantage of this manicure is that it is very easy to do at home. There is a basic technique that you can replicate at home.
Let's look at the features of this procedure. For it you will need all the materials that you use for a regular manicure and a few additional ones. For special things, it is worth stocking up on pieces of foil or a more professional tool - cellophane, which can reflect light. And for its correct location you will need ordinary tweezers.
You will learn more about creating a “broken glass” manicure in the following video.
The process of preparing nails for a gel manicure with a broken glass effect is not much different from the usual one. You also need to correct the shape of your nails, sand them well and degrease them. You need to apply a layer of base and colored varnish to the nail plate. But after the nail plate is covered with the main color, there is no need to dry your nails immediately.
At this stage it is worth applying holographic cellophane cut into small pieces. You can position it the way you like
To obtain the desired pattern, it is important to be extremely precise and accurate. After all, if you start moving pieces of cellophane over the gel surface, you will only ruin the base.
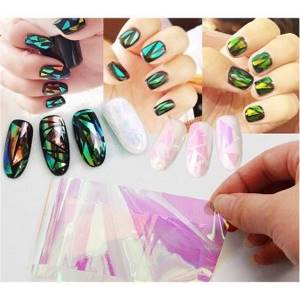
Individual “shards” need to be placed on the nail plate using tweezers. Without it, you will not be able to form beautiful designs so accurately and accurately. When applying individual parts, they can be placed either in a random order or trying to form some kind of three-dimensional patterns.
When the manicure is ready, all this needs to be secured with a special finishing coat. And just at this stage it is worth moving on to drying your nails under the rays of an ultraviolet lamp. This manicure lasts from several days to a couple of weeks. Since the foil covers the base of the nail, it is not damaged as much and looks attractive longer.
Gentle manicure with rubbing
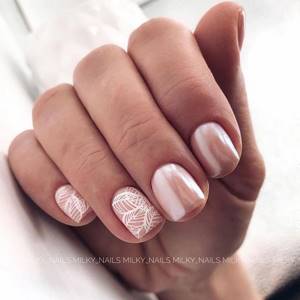
Some girls mistakenly believe that rubbing makes their nails incredibly unusual, so it is difficult to wear such a manicure in everyday life. A gentle rub will be an excellent option for those who want to look stylish and simple. A gentle manicure with rubbing is rather a hint of shade. Because in this case, an exclusively pastel shade is chosen, which will begin to have a metallic gloss and can shimmer in the light. Beautiful delicate shades are perfect for different seasons, so the manicure can be called quite classic.
Performing a “broken glass” manicure at home
The broken glass manicure is magnificent and easy to perform, not only for a qualified master. How to do a “broken glass” manicure at home, the answer is very simple, the main thing is to follow the recommendations for implementation.
The following materials are needed for work:
- base;
- gel polish of any color;
- top;
- foil, stickers;
- orange stick or brush with fine bristles.
We treat the nail plate, degrease and paint the tip of the nail with a low-acid primer with a sticky layer. After applying the base, to get a smooth surface, turn your hand, fingers pointing down and hold it this way for about a minute. Then dry your hand in the lamp.
The next step is coating the nail with gel of the chosen color. The first layer must be applied more carefully, but not very thick. Dry under a UV lamp for about three minutes. Dry the next layer for no more than a minute.
We cover the resulting picture with topcoat and send it for polymerization in a UV lamp. Don't forget to remove the sticky layer. Apply oil to the cuticle, and our masterpiece is ready.
If the work is carried out with regular varnish, the following materials will be required;
- foil or mica;
- base varnish;
- fixative
We apply the varnish, choose the color based on color preferences, so that the layer becomes even, cover the plate with another layer and wait five minutes. Without waiting for the varnish to dry completely, lay out the foil, modeling the picture. Let it dry a little more and apply the sealer.
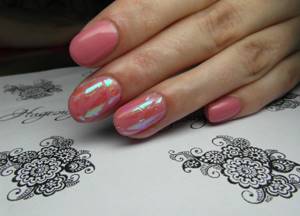
Doing the job at home will not be difficult, you need to do it carefully and with love, the manicure will delight you for a long time.
Dismantling
Beginners have a lot of questions about glass manicure. We have already figured out how to make such an unusual coating, and now let’s talk about how to get rid of it when the time comes. After all, there is nothing worse than unkempt and partially peeled nails!
In order to remove the coating, we need cotton wool and a liquid that dissolves the varnish. It is better to choose one without acetone.
Apply the liquid to a bunch of cotton wool, apply it to the nail, press and leave for a while. Regular wiping may not be enough. Allow the solvent to soak in. When the coating softens, remove it.
Broken glass manicure: design features
The technique of creating a “broken glass” manicure involves applying holographic pieces of foil, mother-of-pearl or mirror polyethylene to the nail plate. Thanks to the rich color range of manicure cellophane, you can realize all your romantic and fantastic decisions.
The shimmering effect on nails decorated in this way is due to the reflection of light and sunlight on the material. The design is reminiscent of kaleidoscope patterns, which fans of the Fantasy style will especially appreciate.
Various uses of material
It can be applied to the entire area of the nail - then the coating will be perfectly smooth and mirror-like.
If cellophane is placed in layers, you will get colorful shimmers.
You can emphasize the design of your nails with the help of minor accents by placing individual “shards”.
The popularity of this type of manicure is also explained by the fact that there are no age categories for it. This design will decorate the nails of both very young girls and mature ladies.
The next advantage of glass manicure is that there is no need to repeat patterns or use stencils. Some girls do not cover their nails with colored varnish at all. They simply apply clear varnish and then apply holography. The result is an original and unobtrusive design option.
If you do not have holographic foil, then it can be replaced with a material such as colored mica. Since it is sold ready-made and does not need to be cut, creating such a manicure is even easier.
Today, in specialized stores you can easily buy holographic stickers, thanks to which the desired result is achieved very quickly and easily. If, for some reason, you cannot purchase the necessary material, then we recommend that you use the mica left over from the flower bouquet, irregularly shaped rhinestones or a chocolate wrapper.
Shiny pieces will look quite beautiful if the base is varnish of deep shades. Cherry, purple and dark blue colors will be especially relevant this season.
To make your manicure, having its own unique flavor, generally look laconic, you can create “broken glass” only on some nails, and simply paint the rest with a single-color varnish.
Naturally, we cannot help but recall the gentle and romantic option using a colorless coating or pastel-colored varnishes, on top of which foil pieces are placed in a chaotic manner.
Not only the color of the varnish can be different, but also the shape of the pieces. They can be made in the shape of squares, diamonds, triangles. In size they can be either small or large.
Glass design goes well with various other types of manicure. This is especially true for a duet with a French jacket.
As an option, you can create a traditional French manicure, and decorate two nails (usually the index and ring) with fragments that match the main color in shade.
Necessary materials
The effect of broken glass is created using multi-colored mica, foil and shiny films. The classic version is a thin translucent iridescent film attached with a sticky layer of gel polish. It is sold both in the form of a thin film, which you need to cut yourself, and already cut. Its rainbow tints look great on both light bases and dark gel polishes.
Professional tips for creating a beautiful mirror manicure
It would be a good idea to listen to the advice of experts:
- The rubbing powder should be as fine as possible. Large particles will not lie as smoothly on the nail surface as small ones.
- It is not at all necessary to apply powder to the entire nail plate. You can modify absolutely any manicure by adding a “metal” effect to it. The main thing is to be creative.
- Do not use hard brushes to apply pigment. Their structure should be loose.
- The metal surface of the nail is used in different ways, but the scheme is simple. To create such a manicure there is no need to undergo special training. As a rule, all women succeed immediately, just 1 time.
It is important that the mirror rubbing is of high quality.
“Broken glass” on nails: how to do it step by step
Looking at a photo of the “Broken Glass” manicure on nails, it can be difficult to figure out how to do it and what you will need for it. In fact, there are two main methods on how to create such nail art without putting in much effort or skill. Having an idea of the correct application of gel polish, the necessary equipment, and also having conducted one or two experiments, you can learn how to do everything quickly and efficiently.
Equipment and materials
- Tools and products for hardware or edged manicure. All this is necessary and it is not advisable to start coating without first taking steps. For example, there is already an article on our website about how to remove cuticles correctly and safely.
- Primer and bonder for preparing nail plates.
- Base coat for gel polish.
- Gel polish of the desired shade.
- Foil, mica or special polyethylene pieces that have a holographic effect to create a “Broken Glass” manicure.
- Dots and tweezers.
- Thin varnish brush.
- Top finish (glossy or matte to choose from).
Important
When starting any work with marigolds, you should follow all the rules of hygiene and sanitary protection against infection. Otherwise, you can get unpleasant consequences, for example, inflammation or irritation, even with a home manicure. How to properly disinfect instruments is worth reading in a separate article.
Method 1
Take a bath in warm water with the addition of essential oils, sea salt or a special product and remove the cuticle using a method convenient for you. If you have the appropriate equipment, this can be done in hardware. Treat your nails with a primer, and then, after it has completely dried in the open air, also with a bonder, which needs to be dried in a lamp. Apply your chosen shade of pigmented gel polish and dry. Repeat the action if necessary. Cut out triangles or other geometric sharp-angled shapes from holographic foil. Apply top coat
Grabbing each decorative element with tweezers or a moistened brush, carefully place them on the nails in a chaotic order or according to a pattern. It is important to ensure that there are approximately even spaces between the “shards”, so the overall picture will look more aesthetically pleasing. Dry the laid out drawing under the lamp. Apply the top coat again, paying special attention to the decor joints. Make sure that the product lays down in an even layer. Dry it again in the lamp and, if necessary, remove the dispersion layer.
Method 2
- Perform all the steps as in the first method described above to make a trimmed or hardware type manicure.
- Apply primer, and after it is completely dry, apply bonder, which is dried with ultraviolet light.
- Carefully paint your nails with your chosen gel polish with a mirror or holographic effect, for example, “Cat Eye”. The action can be repeated if you need to make the color more saturated. Dry under the rays of a lamp.
- Using a thin brush and black paint, draw a grid of “shards”. Repeat if necessary, drying each layer well.
- Apply top coat and dry again.
The first option is suitable if you have suitable material, for example, foil or ready-made pieces of factory-made film. The second is good because you don’t need to purchase anything special, and among the arsenal of almost any beauty there will definitely be at least one “Chameleon” or “Hologram”.
For regular varnish
Despite the fact that gel polish has already proven its worth, not everyone knows how to work with it and has the opportunity. Therefore, it makes sense to also consider the method of making “Broken Glass” using conventional acetone compounds.
- Do a manicure according to all the rules and file your nails according to the chosen shape.
- Apply the base, and after it dries, apply the pigmented coating.
- Immediately, without waiting for the composition to dry, carefully place the pieces of holographic foil in the desired order.
- Wait until it dries completely, then apply a final coat of glossy topcoat. If necessary, to thoroughly level the surface, you can repeat the application of the glossy top twice.
Do not forget that it is best to dry acetone compounds outdoors, where there is good ventilation but no draft. Usually, depending on the varnish, the coating dries in about 15-30 minutes, so it’s better not to rush. The varnish finally dries and completely polymerizes only after 12 hours. Therefore, it is better to handle it carefully and carefully, avoiding mechanical damage, sudden temperature changes and contact with abrasives.
Design “Broken Glass” – option 2
My second design option is made in light colors and using a special thin film to create a glass effect.

As a base I use Patrisa Nail gel polish from the Avangard collection number 320 - pale pink, delicate and soft color:
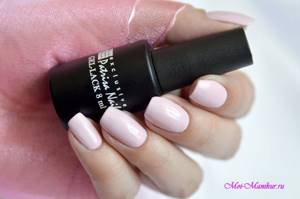
I used it in the design with shells. I demonstrated the design creation process in the video:
In general, it is not much different from the first one: the film is glued in the same way, and working with it is much more convenient than with foil. But here I complemented the design itself with white chaotic lines, adding emphasis to the broken effect. You can trace pieces of foil in the same way, or you can simply create a broken pattern on top of it. On the ring finger, I also diversified the design, depicting only one fragment in the center and complementing it with rhinestones attached to a transparent top (read how to securely attach rhinestones to gel polish here).

You can make such a design on regular varnish, but you will need to have time to lay out pieces of film before the varnish has dried and cover them with top varnish. Here you should also be especially careful when attaching the film so as not to damage the varnish layer underneath.
Interesting ideas
The glass shards already look impressive, but, nevertheless, in addition to the monochrome color base, try using the ombre, French and moon manicure techniques. Thus, the design will become much more impressive. Moreover, there is an impressive series of holidays ahead. You can also fold multi-colored pieces of foil on a neutral background so that you get a gradient transition from one color to another (as in the photo).
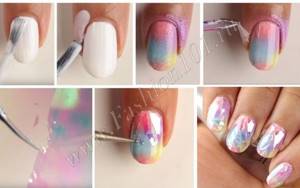
From the presented photo you can see how to create a combination of ombre + splinter effect. In this option, in addition to foil, you will need a sponge and water, but ideally it is better to buy a special sponge. With the help of the necessary materials, your manicure will be more neat.
The next photo shows a slightly different technique step by step. The film is glued to a neutral base, and then each piece of glass is outlined in a contrasting color. The stroke should be made as even as possible.
