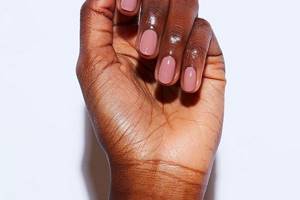
Durability, bright shades and even ease of application. Yes, it's all about gel polish. And thanks to these advantages, many beauties can no longer imagine a manicure without using shellac. A few years ago, such a procedure was possible by default exclusively in the salon. But today everything can be done quite easily and relatively quickly on your own at home. MAKEUPSTORE has laid out all the nuances of applying and removing gel polish.

Required materials and tools
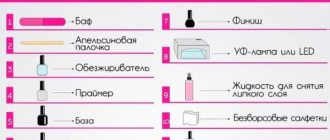
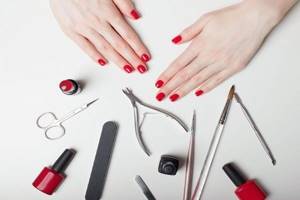
For a high-quality manicure with shellac coating, the following materials and tools are required:
- base;
- colored gel polish;
- fixative or top;
- degreaser or alcohol;
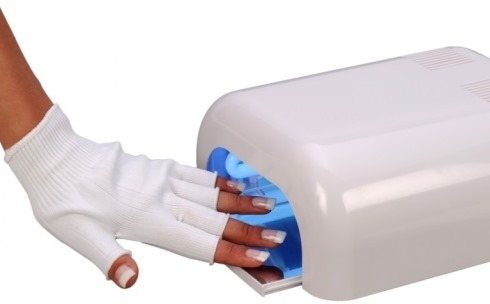
- Ultraviolet lamp;
- cuticle remover oil (jojoba, castor, almond)
- buff file;
- scissors, nippers;
- orange stick (it is soft and at the same time durable, and also has an anti-inflammatory effect);
- primer;
- bondex;
- klister;
- cotton wool;
- foil;
- nail polish remover;
- lint-free wipes;
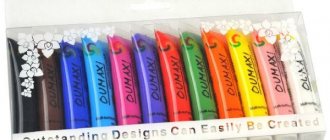
- brushes and decorative products.
Finish coating
If you just do a manicure with gel polish, the coating is unlikely to last long. To avoid discoloration and other troubles, the surface of each nail is coated with a finish.
The topcoat seals the material, protecting it from moisture and cracks and preventing peeling.
The surface of each nail is covered with a finish
There are 2 types of finishes on sale:
- glossy;
- matte.
The choice depends solely on the design. The top is applied in a thick layer, carefully treating the edges of the nails and areas in the cuticle area. Drying in a UV lamp takes about 2 minutes, and for an LED lamp 30-60 seconds are enough.
Primer, bondex, clinser: differences
There are a lot of words in gel polish terminology that are difficult for a beginner to understand. A primer is a product that prepares the nail for joining, but does not itself participate in this process. It degreases the nail plate and restores pH. The primer does not need to be dried under a UV lamp.
Bondex is a gel that is used to connect the nail to silk. It does not allow the nail plate to peel off, and allows the coating that is applied to it to hold firmly.
Klinser is an alcohol solution containing some oils. Used to remove the last sticky layer from the surface when the manicure is completely finished. Sometimes it can be used instead of a primer, as it disinfects well and is a good antiseptic.
Experts recommend buying products from the same brand. This will avoid chemical incompatibility, and, consequently, the durability of the coupling.
A little about the subtleties
That's probably all about how to apply gel polish at home. The technique is quite simple, you can read about it on many resources. There are a lot of videos devoted to this topic. So why do problems arise? One of the most common mistakes made by beginners is combining products from different brands, when the top, base and gel polish belong to several manufacturers. The fact is that both decorative and auxiliary coatings are developed as one system. An impeccable result can only be guaranteed if all products are used comprehensively and belong to the same TM. Of course, very often you can observe good compatibility of nail products from different brands, but it is impossible to predict the result in advance. Therefore, at first you should not experiment.
You can make sure you follow the step-by-step instructions by watching a video on how to apply gel polish at home. The video, prepared by a professional master, is always meaningful and informative. If you want, it’s easy to find a special master class or a good article. But it’s best to undergo training, and then you will be able to comprehend all the intricacies under the guidance of real professionals. Good luck!
What it is
Nowadays you can see a huge variety of beauty products for nails on the shelves. But which one is more modern and holds up best? Anna Shevchuk, the owner of one of the Wax & Nails chain salons , told us, gel polish differs from regular gel not only in composition and density. As it turned out, it is considered a more elastic material, which, when applied, lays down in a thinner layer. That's why everyone chose gel polishes, and the gel is used exclusively for extensions.
In addition, gel polish is much easier to remove. For this purpose, special products are used that soften the coating in a few seconds, after which it is easy to clean off the nail. But with gel, things are a little more complicated, because in order to completely clean the nail plate of it, you will have to file it down with a special device. Otherwise, self-removal can result in severe damage and even suppuration.
So we can conclude that gel polish is a cross between the usual gel and regular nail polish, and at the same time it has a lot of pleasant bonuses:
• durability;
• perfectly smooth coating;
• glossy shine;
• large color palette;
• the opportunity to make an interesting design on your nails.
We also asked an expert how to choose a good gel polish that does not have an unpleasant odor and does not cause allergies.
“Gel polishes do not differ much in composition; even Chinese manufacturers make them well. Of course, as elsewhere, there are more premium brands, they may even be hypoallergenic, but their price is correspondingly very high. So, China can be bought for 300 rubles, while a premium brand will cost 1,500 rubles for one jar.”
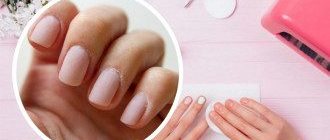
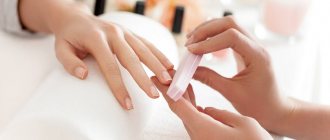
Preparing the nail plate for coating
The application of gel polish should begin with degreasing the prepared plate and applying the base. But before this, the nails are finally put in order: they are trimmed, filed and, if necessary, extended.
Shaping
Each nail is smoothed with files, giving the desired shape:
- round;
- oval;
- almond-shaped;
- square;
- "ballerinas".
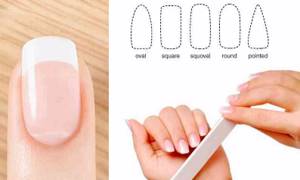
Shaping
Irregularities and the glossy layer of the plate are carefully filed away. The dust is brushed off and the surface of the nail is degreased.
Applying the base layer
You can apply the gel polish itself correctly, but without a quality base it will quickly peel off. If the natural nail is weak, the main part and edge are pre-treated with an acid-free primer.
The base is applied in a thin layer, not forgetting to seal the end. You need to distribute the product from the cuticle area and downwards, without touching the skin: it should not flow onto the side rollers. Nails are dried in an ultraviolet lamp, the duration depends on the power - from 10 seconds to 2 minutes.
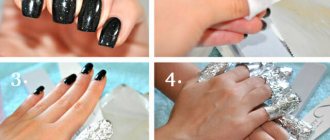
Step-by-step instructions for gel coating
- A drop of varnish is placed just above the center, which is pushed as close to the cuticle as possible without touching the skin;
- Next, apply a stroke in the middle of the nail plate to the free edge. Two more strokes lead from the base of the nail to its edge, but on the sides, left and right;
- The last step is to seal the end. They simply go over it with a brush, painting over the gaps;
- Turn on the lamp with a timer for 2 minutes, dry the nails. Each new layer of varnish must be dried, so it is made the thinnest. To make the gel polish look noble, it is applied in at least 2 layers;
- After obtaining the desired color saturation, you can complete the manicure. To do this, cover the nail with a top coat, not forgetting the ends. The application technology is the same as for the base. The finished work is dried well in a lamp;
- Finally, you need to get rid of the dispersion layer using a degreaser or alcohol. Apply cuticle oil to the skin around the nail.
How to choose a UV lamp for home use?
When choosing a UV lamp, first of all you need to decide what it is needed for and how much money you can afford to spend on its purchase.
Lamps are divided:
- Size: Can be held with one or two hands.
- By type: LED or fluorescent.
- According to the ignition circuit.
- In terms of power: the more powerful the lamp, the shorter the polymerization (drying) time of the coating.
For home use, a lamp with a power of 9 W to 54 W is sufficient. The power of the lamp depends on the number of 9 W bulbs that are in it. So in a 36 W lamp there are 4 of them, in a 54 W lamp there are 9 of them. And you need to dry your nails after applying each layer. If the lamp is 36 W, then the drying time for the base is 30 seconds, the color coating and top are 2 minutes.
With a lower lamp power, the polymerization period is increased; with a higher lamp power, the polymerization period is reduced.