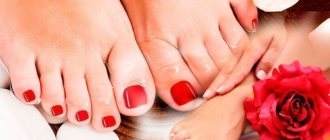
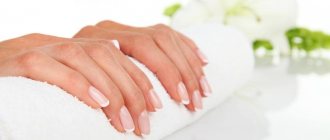
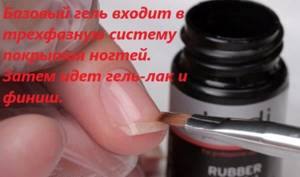
The advent of gel polish and a fundamentally new coating technology made a real revolution in the art of nail art. Quick and easy application to the nail, impeccable beauty and durability of the coating that does not lose its attractiveness for two to three weeks, complete safety for the natural nail plate - these are the main advantages of a manicure using gel polish. Read on to find out what you need to do for it at home.
Having appreciated all its advantages, many of our contemporaries are beginning to master the technique of applying gel polish and shellac at home.
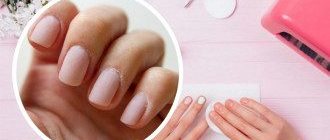
What you need to professionally cover your nails with gel polish for beginners
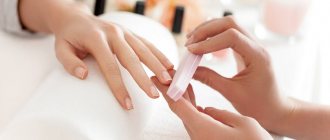
Before we begin listing everything that a beginning craftswoman needs to purchase, let’s make a reservation: for the opportunity to create such beauty on her own hands, she will have to part with a fairly round sum. It’s also better to get your manicure done in advance with professional cuticle nippers or special gels to remove it.
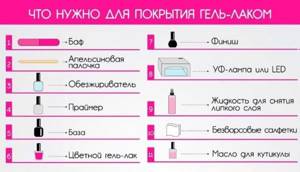
What is included in the starter kit for painting nails, what materials
- The most expensive (but necessary) piece of equipment is the ultraviolet drying lamp. A fundamentally important characteristic of this device is its power. Beginning cosmetologists can purchase a 9-watt UV lamp. It is compact and when folded does not exceed the size of a tablet. The drying time for the gel in this type of device is up to six minutes. Its cost ranges from six hundred to eight hundred rubles;
- Some novice cosmetologists prefer to purchase professional models of UV lamps with a power of 36 watts. The polymerization speed of varnish in them is much higher: about two minutes. The cost of a professional device is more than two thousand rubles;
The disadvantage of UV devices is the relatively short service life of the bulbs (they will have to be changed twice a year). And although replacing them will not be difficult even for a girl, this procedure will require additional investment: the device has four light bulbs, the average cost of each is one hundred and fifty rubles. Thus, an annual set of light bulbs will cost the craftswoman 1,200 rubles.
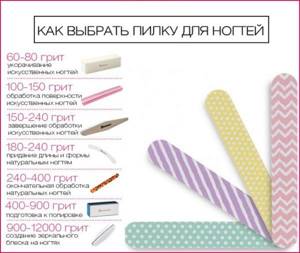
- polishing file - buff with an abrasiveness of at least nine hundred grit. The file is necessary to prepare the nail plate for applying the base coat and for better adhesion to the gel. The cost of the cheapest buff is about fifty rubles;
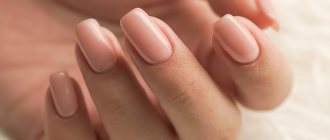
- The base gel is designed to smooth the surface of the nail, to ensure a molecular bond between its keratin layer and the gel coating. The base also prevents pigments from entering the structure of the nail plate. Cheap brands of base coating can be bought for 120 rubles, the cost of expensive ones starts from 300 rubles;
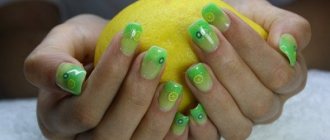
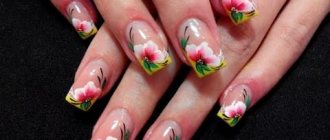
- colored gel polish . Modern manufacturers produce it in a wide range. A novice cosmetologist can limit himself to a set of three to five colors. Drawings will help improve your manicure. The price of colored varnishes is about the same;
Find out how to do a gel manicure on short nails here.
- top (finish) coating. This gel gives the manicure either gloss or matte velvety. Giving the coating completeness, the finishing layer protects it from external factors (water, household chemicals, mechanical damage). It is thanks to the top coating that a manicure can last on the nails for up to three weeks without forming cracks or chips. The price starts from 125 rubles;
- nail degreaser. This product is designed to remove natural deposits of fat and dust from the surface of the nails. This procedure is performed to improve the adhesion of nails to the base coat. A bottle of degreaser can be purchased for one hundred rubles. A 70% alcohol solution can be used as a degreaser;
- file for filing and shaping nail plates. Files equipped with four surfaces are very convenient: such a tool can be used both for sharpening nails and for polishing their surface. The cost of a good file is one hundred rubles;
- After drying the top coat in the lamp, a sticky layer forms on the surface of the nails. When removing it, it is convenient to use thin lint-free wipes. Unlike cotton pads, they do not leave lint on the surface of the nails. After soaking them in alcohol, wipe each nail plate. A large package of 900 pieces will cost 320 rubles;
- cuticle oil. Providing comprehensive care for this strip of skin that performs protective functions, the oil should complete the procedure of any manicure. Having finished removing the sticky layer, you need to rub it into the base of each nail with massaging movements. For this purpose, you can use castor, burdock, apricot or almond oil. The cheapest oil can be purchased for 70 rubles and can be used to remove cuticles at home.
The huge selection of manicure products often confuses even non-novice people. In our article you can find out which gel polish is better.
The materials indicated in this list belong to the category of mandatory components of the starting kit for a novice home cosmetologist. The absence of at least one of these materials will lead to a violation of the technology and poor-quality coating, which will either begin to peel off quickly or lead to the formation of cracks or chips on its surface.
Watch the video: starter kit for manicure, its approximate cost.
Trimmer
This device is able to remove cuticles and hangnails, which in turn prevents the appearance of the latter. The working surface of the trimmer resembles the Latin letter V, its edges are very sharp. With slight pressure, the cuticle is cut off. A cheap tool quickly becomes dull, so it is important to pay attention to the quality of the material from which it is made. A dull trimmer can easily tear the skin, resulting in hangnails and wounds. The handle, for example, should not be made of thin plastic, otherwise there is a risk of cracks, and the tool will have to be replaced in the future.
List of additional products for manicure at home yourself
In the extensive arsenal of nail care products, there is a whole group of materials that you can do without, but their use is encouraged by experienced cosmetologists. These include:
Why do you need a dehydrator, which brand should you choose?
This product is designed to remove excess moisture and deeply dry the nail plate. A dehydrator, in principle, performs the same functions as a degreaser, only it does it more thoroughly. Knowing the differences in the purpose and quality of processing, each craftswoman can choose exactly the product that is more suitable for the individual characteristics of her body. A dehydrator is best used by girls who have oily skin and a tendency to sweat excessively. In the absence of these features, it is better to use a degreaser. The cost of a bottle of a good dehydrator is about 250 rubles
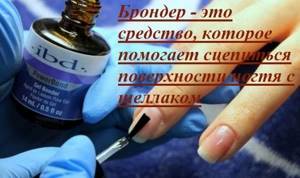
Bonder (or pre-primer) for applying varnish yourself
Among nail art masters, this product is called “double-sided tape.” It is usually used to better adhere the surface of natural nail plates to the base coat. Its gel structure has increased stickiness and after application requires three minutes of drying under a lamp. This is an expensive material, the price of which starts from 260 rubles.
Acid-free primer for doing manicures at home
This product can be applied to nails as a base coat, since, while performing almost the same functions, it also has a number of additional useful properties. The primer combines the qualities of three products at once: a dehydrator, a degreaser and a base gel. In addition, it is able to protect the nail plates from the appearance of nail fungi. The absence of acid in the composition makes it possible to use it on nails with a fragile structure.
Acid primer for beginners
The big advantage of this product is its ability to provide high adhesion of the nail plates to the gel coating due to the softening of the horny nail scales. This quality is ensured by the presence of fairly active methacrylic acid. Acidic primers should not be used on thin or sensitive nails.
Read reviews about ice lamps and find out how to choose an Ice lamp for nails
View the Orly varnish color palette and read reviews here
It's easy and simple to do a manicure in 5 minutes with hard polish. Find out how
What is needed to remove gel polish, what devices and accessories
Any (even very durable) varnish sooner or later has to be removed from the surface of the nail plate. In the case of using gel polish, which does not lose its decorative appearance for quite a long time, this is due to the regrowth of the nail plates.
There are many unusual techniques for applying gel polish. Read about ombre nails with shellac in this material.
Materials needed to effectively remove durable varnish:
- Shellac remover. Any liquid containing acetone will do. If you use a special gel polish remover, the procedure will take much less time.
- Regular food foil (before removing the gel polish, you need to cut it into small pieces).
- A set of orange sticks or a special metal pusher.
- Glass file.
- Sanding file.
- Cotton pads.
- Any fatty cream.
- Cuticle oil.

Sometimes it’s such a shame when you especially value some varnish from your collection and it suddenly thickens. For more information on how to dilute nail polish that has thickened, read this article.
How to remove gel polish at home - sequence
- If the coating was done with gel polish, the surface of the gel coating must be processed using a sanding file, slightly removing the gloss from the nail plates. If shellac was used for coating, this step is skipped.
- After this, each finger is treated with a warm soapy solution and blotted with a napkin, and any greasy cream is applied to the skin surrounding the nail plates. This precaution will protect the skin from the aggressive effects of acetone-containing products.
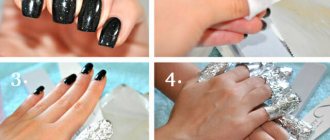
- A small (corresponding to the size of the nail) piece of cotton pad is soaked in nail polish remover and, applying it to the prepared surface of the nail, together with the finger, is wrapped in a piece of food foil (chocolate foil is also suitable for this purpose). The exposure time of the liquid is seventeen minutes (when using a special product no more than ten).
- To shorten the softening time of the varnish or make the procedure more effective, you can perform a light massage of the nails wrapped in foil.
- After this time, the fingers are one by one freed from the foil and, using a pusher or an orange stick, the remaining varnish is carefully removed. If the coating layer was not too thick, sometimes it is removed along with a piece of cotton pad.
- If the varnish coating is difficult to remove, under no circumstances should you pick it out with force. You need to wrap your finger in foil again and wait a little longer. Under the influence of acetone, the polish will soon soften and be easily removed from the nail.
- Having freed all nails from varnish, use a soft file to sand the surface of each nail plate.
- After that, arm yourself with a regular file and give your nails the desired shape.
- To complete the procedure, cuticle oil is rubbed into the base of each nail.
The procedure for removing gel polish should be performed first on one hand and then on the other. Do not apply nail polish remover to both hands at the same time.
Bottom line
- Antifungal varnish, which is described here, can help with nail fungus.
- Don’t be intimidated by calculating how much a starter kit for a novice cosmetologist will cost.
- Firstly, the purchased products will last for a long time, and secondly, the cost of a home manicure, regularly performed at home, is not comparable to the cost of salon procedures.
- The purchased materials and equipment will soon pay for themselves. In addition, it is better to buy a lamp so that it is suitable for covering and designing toenails with rhinestones.
We also recommend that you read in more detail about materials for gel nail extensions at the link.
Brushes
Nail art brushes also come in different shapes and qualities, but are smaller in size than other types of body art.
Brushes are made from a variety of materials, due to which there is a range of elasticity: from very soft to very hard, but synthetic brushes are used for working with water-based paints.
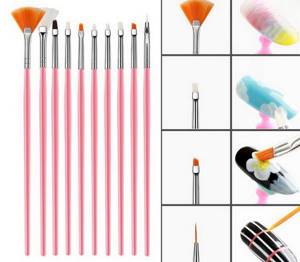
For painting on nails, it is usually better to choose smaller brushes.
For manicure design, it is fundamentally important to do nail painting.
There are specially selected brush sets for this, but it is recommended to start with a limited palette of paints and a small set of brushes to learn the basics without getting overwhelmed by additional tools.
As your artistic abilities develop, you need to expand your set of brushes.
What brushes are used for painting nails:
- Fan brush - professional fan brush for nail design is designed for painting medium-length nails.
- The Stiper brush is used to paint stripes on your nails.
- An angular painting brush allows you to create designs on your nails with high precision.
- kolinsky hair brush
- “Dagger-shaped ” - a synthetic brush for design, the working part of which is a beveled corner, allows you to create both thin drawings and more voluminous design options.
- “Petal” is a type of flat brush with a cut corner that allows you to create a fancy design on the nail.
- “Flat” is a wide brush used for making patterns such as Gzhel painting; it can be used to apply glitter and colored powder.