How to make a vertical gradient on nails with gel polish at home - step-by-step tutorial with photos
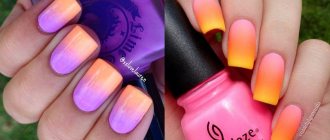
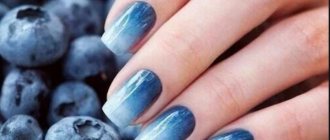
A vertical gradient on nails with gel polish can be done at home in several ways. In the next step-by-step lesson with photos, we offer you the simplest and most affordable option. At the same time, the color transition itself in this technique will not be as smooth as if you use a sponge. Read more about how to make a bright vertical gradient with gel polish on your nails at home below.
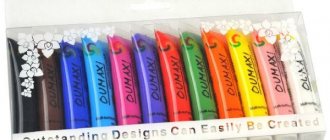
Necessary materials to create a vertical gradient on your nails using gel polishes at home
- gel polishes white and blue colors
- primer
- buff
- palette or sheet of cardboard
- base and top for gel polish
- lamp for drying gel polish
- flat brush
- toothpick
Step-by-step instructions on how to make a vertical gradient with gel polishes at home
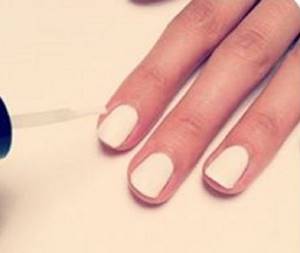
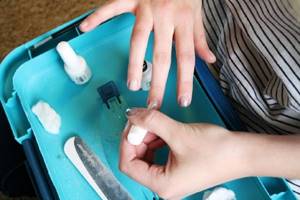
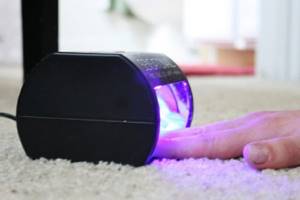
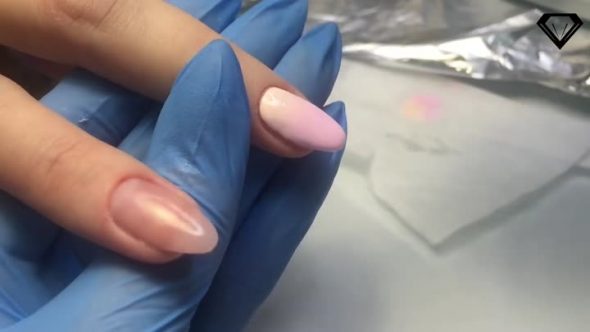
- The first step is to prepare the nail plate. To do this, you need to go over your nails with a buff, remove the resulting dust and apply a primer. Then it’s time for the base coat, which must be thoroughly dried in a lamp. After the base, you can apply white gel polish to your nails, which will be the ideal base for our design.
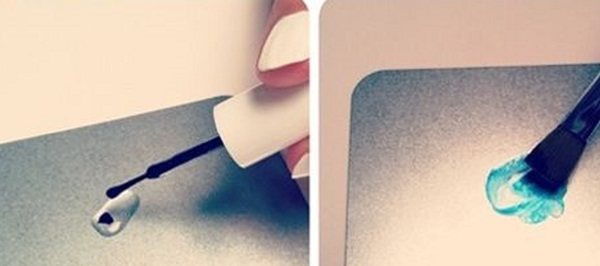
- The colored coating also needs to be dried in a lamp. Then you can proceed to forming the gradient. To begin, dilute a drop of blue gel polish with two drops of top coat and mix thoroughly with a toothpick.
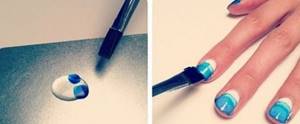
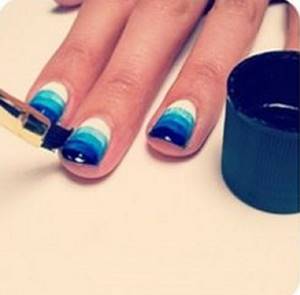
- Using a flat brush, apply the resulting color to ¾ of the length of the nail plate. Dry it in a lamp.

- To form the next level of gradient, mix a drop of top coat with two drops of blue polish. Mix again and apply to the nail, stepping back a few millimeters from the edge of the previous color layer. Let's dry it.
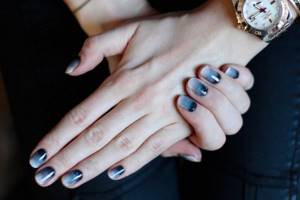
- The transition is completed with blue gel polish, which should be applied with a brush to the very tip of the nail plate. Dry the new layer of varnish.
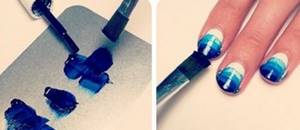
- Finally, apply a thin layer of top coat for gel polish and send the manicure to dry in the lamp. Ready!
Preliminary stage
Preparing the nail plate
The key to a successful manicure is a carefully prepared nail plate. It is necessary to treat the cuticle and perform all stages of manicure with gel polish before applying the base layer, inclusive: lightly sand the nail with a buffer, apply a dehydrator and primer, and then a thin layer of base coat, which must be dried in a UV or LED lamp.
It is advisable to apply a layer of light-colored varnish on top of the base coat. Against this background, the colors of the manicure will appear better, and the transition will be as successful as possible. If the colors used are quite intense, this step can be skipped.
Required Tools
In addition to the standard set for performing a gel manicure: a manicure set, nail files and a buff, you need to prepare additional equipment. This includes aluminum foil, lint-free wipes, a sponge or sponge, and a set of special brushes for nail design.
Original gradient on nails with gel polish with glitter and brush - step-by-step photos, video tutorials
An original and bright gradient on nails with gel polish can also be created using a brush with glitter. To make a manicure using this technique truly spectacular, it is better to take glitter in a contrasting color to the gel polish. Find out how to achieve an original gradient on your nails with glitter gel polish and a brush from the following master classes with photos and videos.
Necessary materials for an original gradient on nails with gel polish with a brush and glitter
- base and top
- gel polish neutral shade
- bright dry glitter
- tassel
- lamp
- buff
Step-by-step instructions for an original design with a gradient on nails with glitter gel polish and a brush
- Before applying gel polish, treat the nails with a buff and apply a base coat. We dry the base in a lamp and proceed to applying gel polish of a neutral shade.
- Dry the colored varnish well in a lamp.
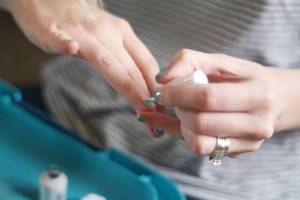
- Let's move on to creating a gradient. To do this, apply a thin layer of base coat to half the nail plate. Using a brush, carefully transfer a fairly dense layer of glitter from the jar over the base.
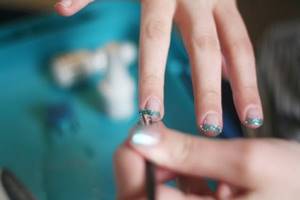
- We wipe the brush and take just a little glitter to form a smooth transition from the gel polish to the tips of the nails.
- Gently press the glitter with your fingers so that they are evenly distributed over the base coat and do not stick out.

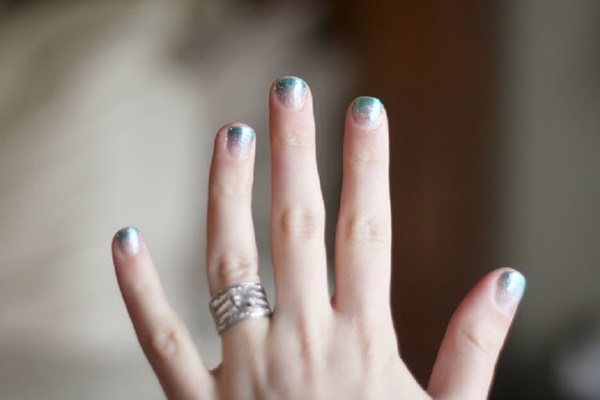
- Apply a thin layer of topcoat and dry the nails in a lamp. Ready.
You can see a more clear version of the technique of applying a gradient to gel polish with glitter in the following video tutorial.
Gradient manicure and its varieties
There are many names for this manicure technique. The most common are ombre, stretch and degrade. Depending on the method of execution, a vertical and horizontal gradient are distinguished, but the essence remains the same - it is a gradual transition from one color to another.
To perform such a coating, you need at least two colors, between which there is a smooth transition in most cases. The great advantage of ombre manicure is its ability to visually lengthen nails, as well as its unusual and attractive appearance.
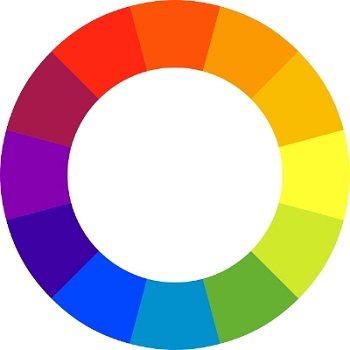
Color circle
Sometimes several tones are used in a gradient, and their choice can be arbitrary. To make the transition as natural as possible, you need to select close “neighbors” along the color wheel.
Contrasting tones look no less attractive, especially when chosen correctly. The big advantage is the ability to use this design even on short nails, on which a manicure of this kind looks no less stunning.
Secrets and tips
To avoid staining the skin around your nails, you need to protect it. There are several ways:
- Before starting the procedure, stick the tape on and remove it after use;
- spread with thick cream, then remove it with a cotton swab;
- use specially produced products for performing manicures with a gradient.

To eliminate bubbles:
- change the sponge to a finer-grained one;
- make 2-3 prints as a test on paper or foil;
- increase the number of layers. Then the points merge more strongly.
Problems with the transition are solved as follows:
- if the colors are contrasting, it is difficult to smooth out the border between them;
- treat the final layer with finishing varnish. It gives smoothness and levels the surface;
- use the base.
Types of gradient manicure
Gradient manicure 2022 is one of the most popular among modern fashionistas. After all, it can be implemented on nails of any length. In addition, you can combine many shades, which allows you to experiment and create completely different effects on your nails. There are a lot of gradient options, so let's look at the most popular ones.
A classic or horizontal gradient is the easiest to create. A smooth transition of shades is performed along the width of the nail plate. That is, the shades mix with each other horizontally. This option can be implemented at home, but we recommend practicing on paper first.
An alternative option is a vertical gradient. It is not difficult to guess that the transition of the shadow will occur vertically.
For those who love the classics, we suggest adding a little variety to the design. To do this, you need to choose a base of a neutral color. In turn, the smile line or hole should not be clear, but blurred. This design looks impressive and will definitely not leave you without compliments.
Chaotic gradient has become very popular recently. It allows you to give free rein to your imagination and realize your ideas. That is, you can decide for yourself which part of the nail will be shaded. In this case, you will definitely be sure of the uniqueness of the design. And, of course, a gradient manicure is ideal for complementing it with an interesting or even unusual design.
Photo
The photographs show examples of manicure design using a gradient transition. They can be dark, light, sharp or smooth.
In order to create a gradient with gel polish yourself, you can currently purchase many different products and devices in stores. Due to its durability, gel polish will stay on your nails for a long time, so you don’t have to worry about the safety of such an unusual manicure. The gradient must be applied very carefully, avoiding contact with the skin. After several sessions of this manicure at home, applying a gradient color to your nails will not cause any difficulties.
Linear ombre
- Clean and trim nails , push back cuticles and wipe with nail polish remover to remove grease and unnecessary substances that affect the durability of the manicure.
- Cover with base.
- Cover with the main shade closer to the base. At the ends, the opposite color will cover any imperfections. Dry with a lamp.
- Take a small portion of the contrasting shade with the end of a cosmetic sponge. Smear it all over the tip, moving the opposite color down towards the center, allowing for a softer transition.
- Add contrasting colors in parts , going deeper towards the ends.
- Once finished, use nail polish remover to remove excess coating.
- Apply protective coating. Because it can pick up polish with each stroke, cover the nail horizontally with it so that there is no blending of the contrasting shade throughout the base.
Rhinestones and glitter
For a wedding celebration or evening reception, stylists use these elements. The shine of stones and the shimmer of gold foil will add grace and luxury to the overall festive look. Select a few fingers, decorate everything - as you like. It is important to practice moderation. Ombre design for long and short nails with a color transition stretches the sparkles over the entire surface and requires a little time to execute. The end result is great.
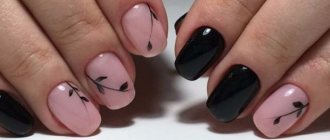
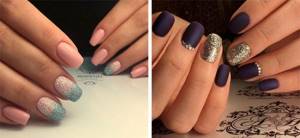
Matte milky gradient with black flakes
A matte top with black flakes perfectly completes a milky gradient nail design in a minimalist style. And also if the gradient is made in bright colors. And the technique of splashing black paint would be appropriate. In any case, the manicure will be a stylish and fashionable nail solution.
Milky gradient manicure with foil or rubbing
This year, rubbing is becoming the most desired nail decoration. With a gradient it creates an amazing holiday feeling. Of course, gold leaf is held in special esteem; thin foil has also become an integral decoration of new manicure ideas. It is not surprising, since the foil is easily attached to the nail, it is used both for ornaments and for decorating the entire nail.
Nail design options with glitter
A manicure with glitter can be very different, because human imagination is limitless! Bright festive, stylish minimalist, black, red, white, pink manicure with sparkles - any options that you like will become a brilliant addition to your look.
Glitter on one nail
Glitter can be used to create a bright accent on one or two nails, while the rest of the nails will only be covered in a single color. Highlighting the ring finger is an undeniable timeless trend; combine it with popular decor and you will become the owner of a fashionable and stunning nail design!
Glitter Gradient
Another popular technique in nail design is ombre or gradient. Apply different amounts of glitter to the top and bottom of the nail, you will see how your manicure will transform and add a festive touch to your look.
Glitter on short nails
This glitter nail decoration looks equally good on both long and short nails. You can cover one or several nails with glitter, partially or completely, use a base of different colors, endlessly experiment with the size of the decor and patterns... Here are some examples of designs with glitter on short nails.
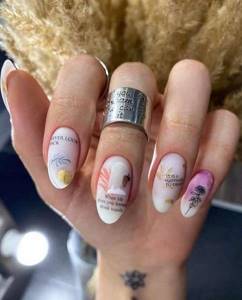
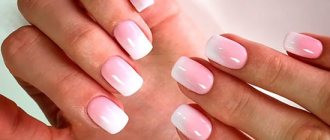
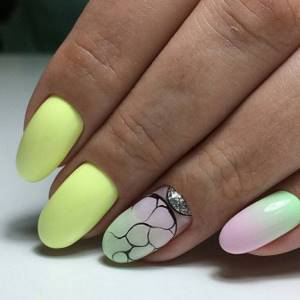
French with milky gradient
If you are closer to the classics, the gradient design can be combined with a French jacket. For example, in the photo, the tips of only three nails are decorated in bright yellow, and the gradient is in milky pink shades. The rest of the fingers have a stamping design, which creates the feeling of a carefully thought-out individual manicure. However, any combination of colors and techniques can be used. But the idea of combining a gradient and a colored jacket is interesting.
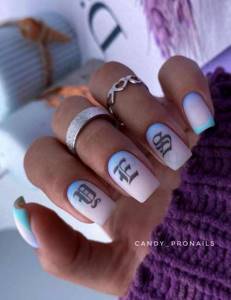
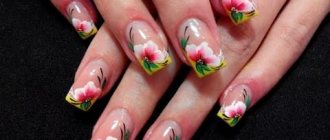
Milky gradient with pattern
In nail design, elegant designs made by hand or using sliders or stamping always look trendy. They definitely evoke sympathy and interest. When choosing, rely on inscriptions, geometry, natural textures, seasonal pictures: butterflies, leaves, twigs, flowers, birds.