In acrylic extensions on tips or forms, the French is laid out with two balls: first, a camouflage is formed from pink powder, then a smile is formed from white powder. The higher the professionalism of the master, the less sawdust the finished nail requires.
For those who work with acrylic, we have prepared a selection of three training videos. From them you will learn the secrets of quickly laying out acrylic on tips and forms with minimal cutting, and also see how professionals lay out a smile the first time.
How was French manicure invented?
Let's delve a little deeper into history and find out where this design even came from.
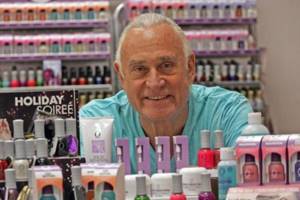
The idea was born in the 1970s, not in France, as one might think, but in the USA. The founder of the famous brand ORLY, Jeff Pink, received a request from a Hollywood director asking him to come up with a manicure for actresses that would match all outfits.
At that time, ORLY produced special white pencils that were used to paint the area under the free edge of the nail so that the nail plates looked clean and tidy. The problem was that after each hand washing, not a trace remained of the product. Then Pink came up with the idea of applying a white stripe not under the nails, but on them - on the tips. And to achieve durability, do it with white varnish. As a result, Jeff soon presented the director with an innovative manicure - a white stripe on a natural-colored base. He called it natural look. And what better fits absolutely all images than naturalness? The director was delighted and said that Pink should be given an Oscar for his invention.
French with a brush
Have you decided to make a French look with a brush? This means you are already an experienced user. There are several tips for creating such a manicure. For a French brush, choose a brush with long and elastic bristles. When drawing a smile, move your finger, not the brush. With this method, your smile will become clearer. The curve of the line should follow the curve of the cuticle, this will create a more natural looking design. To avoid chipping or cracking your design, use a brush to seal the edge of your nail. Use a brush with synthetic bristles.
Why is manicure called French?
Soon, Jeff Pink went to Fashion Week in Paris, where he offered a new manicure to models, who had to change their outfits even more often than actresses. The models and couturiers really liked this nail design, it was a triumph for Pink.
Returning to the United States from Paris, right on the plane, Jeff decided to rename his brainchild “French manicure,” because France is a symbol of fashion and the cradle of fashion ideas.
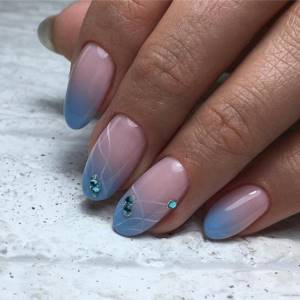
Fashionable gradient colors
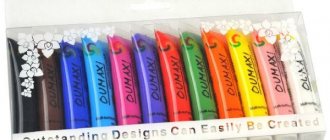
The modern fashion industry offers girls a huge selection of a wide variety of nail polish shades. Calm nude and pastel shades (milk, coffee, pink, mint, blue, sand, yellow) and their combinations do not lose their relevance. Bright colors of varnishes, play on contrast and the most unusual combinations look interesting and stylish - for example, rich green tones, black, blue and different shades of red. To meet the latest fashion trends, don’t be afraid to experiment and feel free to combine a wide variety of shades, getting an unusual and bright manicure that will definitely not go unnoticed.
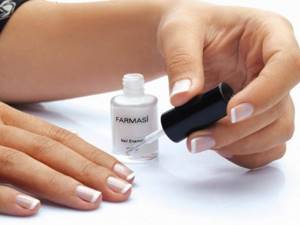
Pastel
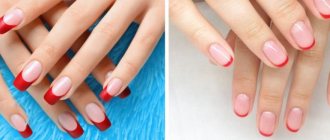
Bright
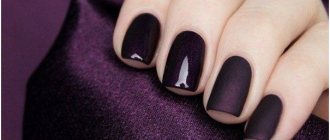
Dark
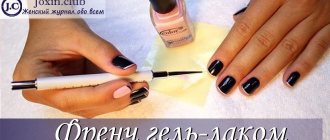
How to do a French manicure at home: technology
Although it seems so simple, French is actually not so in the process of execution. Drawing an even and clear smile line is a rather difficult task. Let's look at the step-by-step technology for creating a classic French manicure with gel polish at home. Is it even possible to make the perfect French jacket at home? Spoiler: quite real!
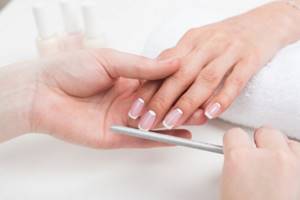
Stage 1. Nail preparation
- We prepare nails for a French manicure in the same way as for any other type:
- Remove the old coating from the nails. Nail plates must be absolutely clean.
- Using a remover, soften the skin.
- Use a pusher to push away the skin. If necessary, we trim it with scissors if the cuticle is very overgrown or too dry.
- We soak an orange stick in water and use it to clean off the pterygium.
- We treat the surface of the nail with a soft file, removing the natural gloss, which will subsequently prevent the nail plate from adhering to the artificial coating. We brush away traces of sawdust.
- We wipe our nails with lint-free wipes soaked in degreaser to get rid of harmful bacteria and contaminants.
- If your skin is prone to oiliness, then use a dehydrator - apply it to the entire surface of the nail and leave it in the air for about a minute.
- The next stage is the primer, a special preparatory coating that acts as double-sided tape and promotes excellent adhesion of the gel polish to the nail. Apply it to the entire surface and air dry for a minute.
Voila, your nails are ready for French!
Stage 2. Applying gel polish
- Select the color of the base from among the camouflage bases. Apply 2 layers to the nail, dry each one in a lamp, do not remove the stickiness.
- Take white gel polish and use a thin brush to draw a smile line. After this, paint over the entire free edge. Dry it in a lamp.
- Cover with top. Let's polymerize. If the product has a sticky layer, then wipe the nail with a lint-free cloth with a degreaser.
French with stripes
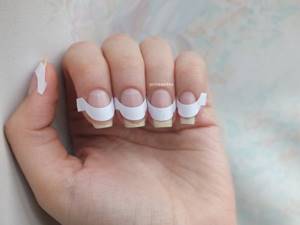
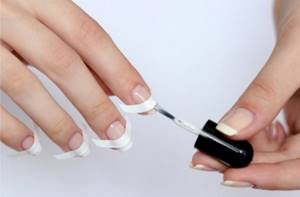
The easiest way to make a French jacket yourself is to use strips. If you've never done a DIY design, use stripes. The process of creating a French jacket can be divided into the following stages. The first stage is applying a transparent base or nude varnish to the plate. Next, glue a strip to the edge of the nail, moving 2-4 millimeters from the edge. The empty part of the nail is painted with a white or milky shade, after waiting for it to dry, remove the strip and then cover the entire nail with a glossy topcoat.
How to draw a straight smile line?
It’s great if you know how to draw the coveted thin French line exactly, but what if not? Don't worry - there are ways to make this task easier!
Stencils for French
The simplest and most ready-made option is self-adhesive stencils for creating a smile line. You need to carefully place the stencil strip on the polymerized camouflage base, leaving a few millimeters of free edge. Paint it with the desired color and polymerize it. Then remove the stencil and proceed with further technology.
Special brushes for French manicure
There are also special brushes for French manicure with a cut out core - you need to apply a coating to them and simply apply it to the nails, imprinting it.
Stationery eraser
You will be surprised, but an ordinary rubber band is a very popular way to create an even smile line. Pull it over the nail, leaving a free edge, which you can paint with the chosen color.
French with simple varnish
French, made with simple varnish, has its disadvantages, such as fragility, but it also has its advantages. One of these advantages is that you can adjust the design at any time, while spending a minimum of time and materials. The first stage when creating a French manicure with a simple varnish is giving the nails a shape, removing the cuticle and polishing the nails with a buff. Then apply the base coat to the nail and let it dry completely. Make the base a soft pink or beige color. If you use a stencil, simply glue the strip and paint the space with white varnish. If you prefer to draw a smile, follow the rule that you don’t need to make the smile very thick, this will visually “eat up” the length of the nail. Secure the result of the manicure with a transparent top coat, treat the cuticle with oil, which will moisturize and slow down growth.
White gel paint
This color is ideal for snowflakes, monograms, and jackets. Don't forget to stock up on white for the holiday season. Excellent pigmentation and consistency. For the wedding season, this shade is as relevant as ever.
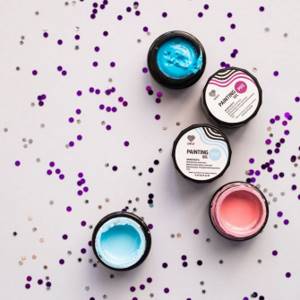
Features of Lovely gel paints:
- Bright palette. Gel paints have rich colors that can be perfectly mixed together to create new shades.
- Consistency. The gel paint has a dense texture and color, they fit perfectly when applied.
- Versatility of use. Gel paint is used not only for painting, but also for completely painting nails or, for example, designing a French smile. The coating is easy to apply and does not weigh down the manicure.
- Sticky layer. Lovely gel paints have residual stickiness and are perfect for craquelure or casting techniques.
- The dense and rich colors of gel paints make them very easy to work with and allow you to get the desired shade from the first layer. Polymerization: hybrid lamp - 30 seconds, UV lamp - 2 minutes, LED lamp - from 30 seconds (depending on power).
Black gel paint
The color is rich and well pigmented. Ideal for drawing lines, outlining pictures and inscriptions.