Home — Articles about manicure
How to make a matte finish with gel polish? To get a matte shellac manicure, you don’t have to go to a salon – you can easily do this procedure yourself. To do this you will need:
- Base coat
- Gel polish of the selected color
- Degreaser
- Sticky layer remover
- UV or LED lamp
- Matte top for gel polish.
It is the use of a special top that allows you to make matte shellac nails. It is useful to know that there are products with a satin effect that provide a slight matte finish - the coating retains a slight shine, as well as with a velvet effect, which is also called velvet. The second option makes the surface slightly rough to the touch and provides a perfect matte finish.
Gel polish: benefits
Gel polish, unlike regular polish, lasts on nails for 2-4 weeks without damage.
It has a number of advantages:
- does not wear off at the ends;
- retains shine during wear;
- strengthens the nail plate;
- no unpleasant odor;
- the composition does not contain the harmful component formaldehyde;
- You can create volume effects and decorate your nails with rhinestones and bouillons.
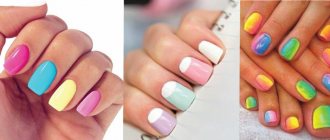
Manicure trends are moving toward nail motifs such as rainbow, amber, lace, geometric and floral patterns, and gradients.
Modern shape of short nails
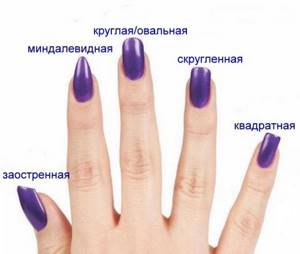
The main trend in manicure shapes for 2022 remains short nails up to 3 mm, sometimes up to 5 mm from the edge. Oval, almond and soft square shapes are preferred.
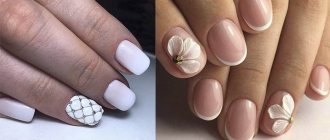
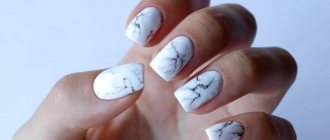
Matte gel polish for short nails (the photos clearly show and perfectly confirm this) visually lengthens the fingers by manipulating contrasting colors.
Tags
is a matte manicureFeatures of a matte shellac Matte manicureusing a matte topFeatures of a matte shellaceven a matte manicure Matte manicuredo a matte manicureget a matte finishperform a matte manicureDrawings with shellac on Shellac matte shellac matte shellac Shellac performing shellac inmanicure with shellac.nails with shellac. Shellac under the coating own when covering the nail your manicure Manicure Matte manicure matte manicure consists of Matte manicure This manicure looks like matte manicure matte manicure with Matte manicure with Matte manicure is ready.
ways nail hair simple minutes sticky special remove color care removing top pair technology volume nail
Fashionable shades of matte manicure
Deep, rich tones are in fashion. Black and white colors serve as both the main tone on the nail plates and an additional design.
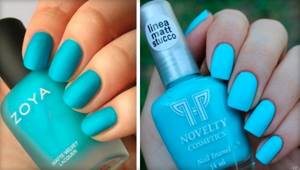
The fashionable color of manicure 2022 will be blue and all its shades:
- ultramarine;
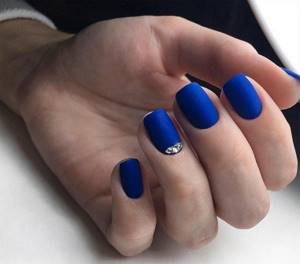
- sea wave;
- cobalt;
- cornflower;
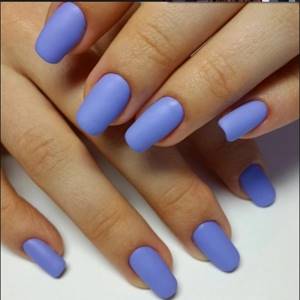
- sapphire;
- turquoise;
- azure.
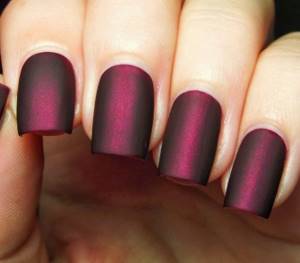
Red tones - burgundy, cherry, chocolate and marsala - are also at the forefront of the fashionable color path. Matte gel polish for short nails (the photo shows such options) in muted colors is very popular in 2018. In spring and summer 2022, sunny and diamond shades will be in demand.
Don't miss the most popular article in the section: How to draw monograms on nails step by step for beginners. Instructions with photos.
Choosing nail polish color
The choice of product color for a woman’s outfit is of enormous importance. Stylists advise applying a shade that matches the color of the outfit. Also, when choosing, you should focus on the woman’s skin color.
For the fair sex with golden-brown skin, black, orange, copper, beige, and purple colors are suitable. Stylists recommend that women with skin of this shade experiment with their look; as practice shows, ideas for combinations of shades exceed expectations.
For women with fair skin tones, it is better to apply clear, beige, black or gray colors. For pale skin, cosmetologists recommend using burgundy shades and other color combination ideas. Beige color is still at the peak of popularity this season.
Methods for matting the surface of the nail
There are several ways to obtain a matte surface on gel polishes:
- Top with matte effect. A thin layer of matte top is applied to nails coated with gel polish technology (base + 2 layers of colored varnish after polymerization + top layer) and ends. Polymerize in a UV lamp. Removes stickiness.
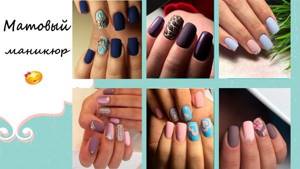
- Nail grinder. Surfaces covered with gel polish, as in the first method, are wiped with a liquid to remove stickiness. Using a sander, lightly sand the entire coating, including the end, removing only the shine. Disinfect and dry.
- Matte gel top. Prepared as in the first two cases, the nails are covered with a matte top coat of varnish. Dry it.
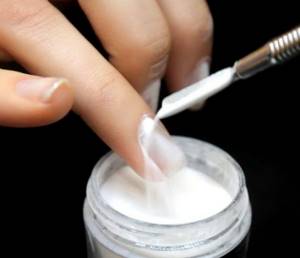
Matte gel polish for short nails can be made using acrylic powder. - Acrylic Powder. Gel polish is applied to nails coated with gel polish technology and to the ends. Acrylic powder is sprinkled on top. Polymerize in a UV lamp. Remove excess powder with a fan brush.
Decor options
If it is possible and possible, then matte nails are additionally decorated. The following techniques are suitable for this:
- monograms - using acrylic;
- casting - using foil;
- rhinestones;
- stamping - a variety of patterns that are applied with acrylic paint;
- liquid stone.
Note! Sliders cannot be applied to a matte manicure - they are used only with gloss. The same goes for broken glass.
Even without additional decor, matte manicure looks stylish. At the same time, the girl looks strict, just what is needed in an official business style. During parties, this will emphasize the seriousness of the girl. Matte shellac is easy to apply; several techniques can be used. Even with glossy varnish they create a matte finish.
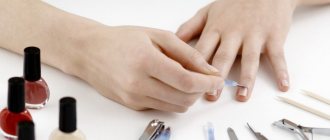
How to make a matte manicure at home
Those who prefer to save time and money on visiting a salon can do a matte manicure at home.
Tools and materials needed:
- UV lamp;
- pusher (scraper), for moving the cuticle and removing the pterygium;
- file;
- gel polish;
- base;
- antiseptic or primer;
- acrylic Powder;
- cuticle softening oil.
To soften the cuticle, soak your fingers in warm water with a few drops of oil. Wipe with a napkin.
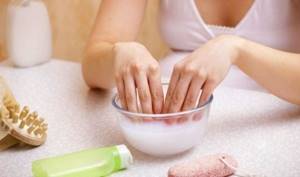
Then the process is as follows:
- give the selected shape to the nails, move or remove the cuticle with a scraper;
- use a coarse file (bafa) to remove the keratin layer;
- clean the surface and degrease it, cover it with primer;
- Apply a thin layer of base using rubbing movements and dry;
- apply 2-3 thin layers of gel polish, each layer is dried in a UV lamp;
- perform a top coat (gel polish), dry in a UV lamp;

- apply gel polish and seal the ends;
- Apply acrylic powder and dry it with a lamp, remove excess powder.
Matte nail design
Plain coating
A classic manicure that will suit any look. For short nails, it is better to choose dark, rich colors of varnish; light colors look better on long nails
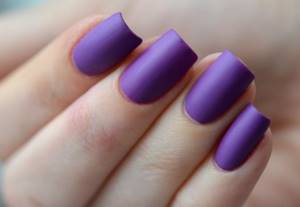
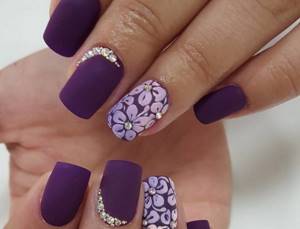
Focus on one or more nails
Once the freshest trend, now moving into the category of classic varieties of manicure. A manicure with an accent is a great way to refresh and diversify a plain finish.
Gradient
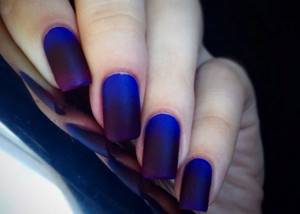
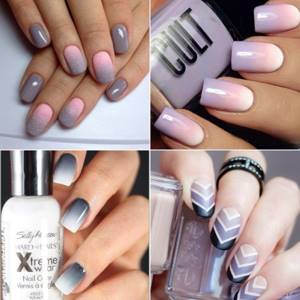
A luxurious manicure with a smooth transition from one color to another looks great not only in a glossy version, but also in a matte one.
Rhinestones
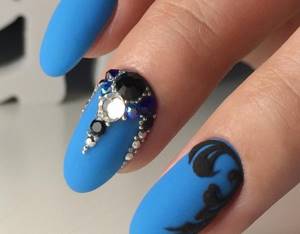
A manicure with rhinestones or stones emphasizes the play of light, creating an impressive effect.
French manicure
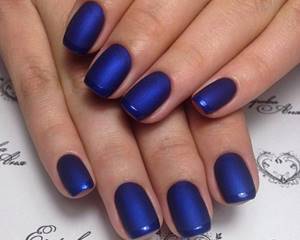
Matte French manicure can be done in both a combination of colors and a combination of textures.
Water effect
If you add a few drops of glossy varnish to the matte finish, you get the effect of rain. The most convenient way to perform this manicure is with a dot – a metal stick with a ball at the end.
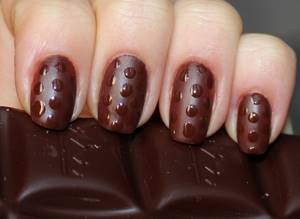
Patterns on nails
The combination of matte and glossy allows you to create incredibly spectacular patterns on your nails. You can use stencils or paint with a brush, toothpick or dots. This type of design looks especially beautiful with dark varnish colors.
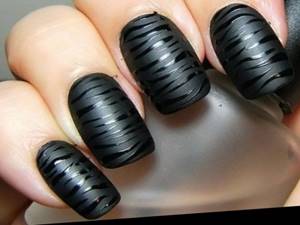
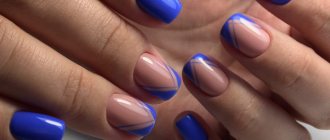
Geometric patterns in a matte design look impressive on nails. Choose rich contrasting tones for your manicure.
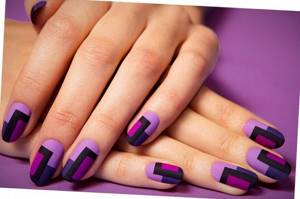
Watch the video master class on creating a matte manicure with glossy patterns:
A manicure with matte varnish can be easily done at home. If you don't have a matte varnish on hand, there are several ways to turn a glossy finish into a matte one. And fashionable nail design ideas can turn any manicure into a small masterpiece.
More interesting articles:
Lace design
Lace design is done using different methods. It is applied to one, two or all fingers.
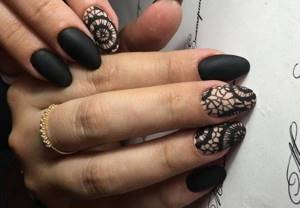
Brush drawing:
- Nails are coated with gel polish in 2 layers and topcoat in 1, dried in a lamp. Removes stickiness. A little gel paint of a contrasting color to the main one or close to it is dripped onto the palette.
- Using a thin brush (no. 5.0 is possible), grab a drop and successively create a lace pattern. Dry and remove stickiness.
- A layer of primer and base are applied to degreased surfaces and dried in a lamp.
- Cover with 2 layers of gel polish, successively dry in a lamp.
- A lace sticker or openwork ribbon is placed on the nail and pressed.
- Trim off the excess and cover with a layer of transparent varnish.
- Dry and remove stickiness.
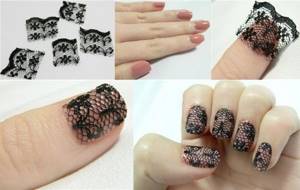
When using simple lace without impregnation, the nail is pre-treated with a layer of glue.
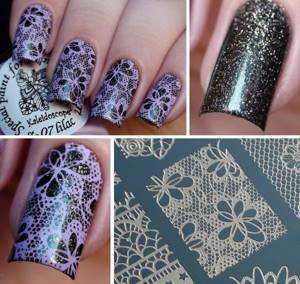
Stencil:
- A stencil is applied to the prepared nails (1 layer of primer + base + drying in a lamp + 2 layers of gel polish, dried in a lamp).
- Apply gel polish or acrylic paint and dry it in a lamp. Remove the stencil and cover with a layer of transparent varnish.
- Sliders:
- The slider with an openwork pattern is placed on a damp cloth to soften.
- Prepare the nails as in the first case.
- Remove the slider from the base and apply it to the nail with a slight deviation from the cuticle.
- Any bulges that arise are trimmed.
- Grind off the excess and cover with top coat 2 times.
- Removes stickiness.
Additional options for creating a matte shade

Using a matte top. Apply a base, then a coat of the desired color, and then a matte top.
- The finished varnish is matte. Beauty stores sell a large amount of ready-made gel polish with a matte finish. Professionals advise fixing the gel polish with a topcoat - this way the coating will last longer.
- Corn starch. The base is applied, but the matte finish is created by mixing the varnish with a small amount of starch. The prepared mixture is applied to the nails.
- Steam bath. Its disadvantage is that water and high temperature affect the coating. As a result, it loses its tenacity. The applied top is placed in a steam bath. A few minutes is enough - after drying the coating will become matte.
Note! The use of a steam bath will worsen the durability of the coating - it will quickly become unusable. This radical method is used only as an experiment.
The presented options for creating a matte texture will allow you to get out of situations where the necessary tools or materials are not available. Some will like it, some will not - every girl will find the ideal way to create a matte finish. This is not to say that you need to use a steam bath every time, or use cornstarch. These methods are radical.
Patterns and ornament
Monograms and patterns are made with thin brushes. There are other techniques: stamping (using stamps) and dotting (with a dot, needle or any sharp objects).
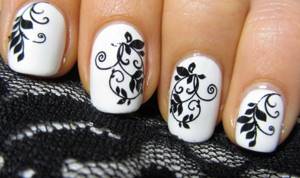
For stamping you need a stamp, a metal plate with patterns, a stamp with a rubber surface, and a scraper for cleaning the disc.
Process of creation:
- Shape the nails with a file, degrease the surface and cover with a base.
- Apply gel polish of the main color and dry.
- A stencil on a metal plate is coated with varnish of a contrasting color.
- Remove excess from the stencil with a scraper, without touching the varnish in the recesses.
- Capture the image with the rubber surface of the stamp, pressing it tightly against the stencil.
- Using the stamp, the image is applied to the nail, pressing them tightly against each other.
- Dry and cover with topcoat.
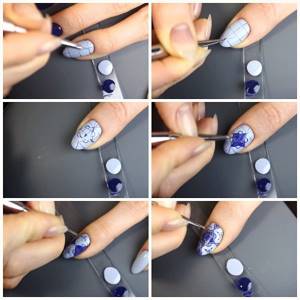
In the dot pattern technique, the basic tool is dots. They also use improvised materials: needles, hairpins, sharp wooden sticks.
Creations:
- Nails are shaped, degreased with a primer, a base is applied, and dried.
- Cover the gel with varnish of the main color, dry for 2 minutes in a lamp.
- Using a dotz or other tool, a dotted pattern is made with gel polish in contrasting colors. Dry with a lamp.
- Apply topcoat, dry, remove stickiness.
Don't miss the most popular article in the section: How to extend nails with gel polish. Nail extension instructions for beginners. Photo.
Some tips
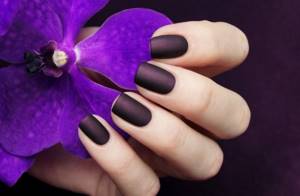
- For matte nails, it is recommended to use dark varnishes - the effect is best visible on them. Looks very nice under matte black varnish.
- If you are using a matte topcoat to make your nails matte, then pay attention to the edges of the nail when applying it, otherwise you may end up with unsightly glossy bald spots.
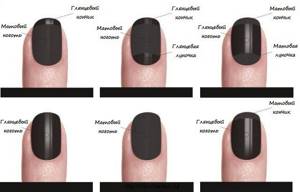
- If you are bored with a completely matte surface, you can make an additional design glossy. To do this, it is enough to have a transparent varnish, or you can use the varnish that you made matte. Here are some of the schemes:
Matte French
Matte French is done with matte gel polish. But you can do it with regular varnish, using matting methods and using a different range of colors.
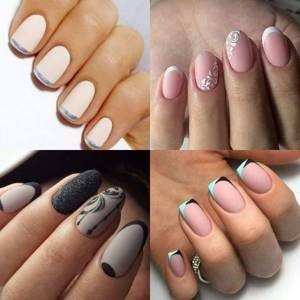
It is done like this:
- Shape the nails with a file and remove the cuticle.
- Buff No. 240 removes gloss, degreases and applies ultrabond.
- Cover the nail and edge with a thin layer of base and dry.
- Apply gel polish and dry.
- Using a brush, paint a French (smile) pattern along the edges of the nails with varnish of a contrasting or white shade and dry.
- Apply the top coat and cure it with a lamp, removing the stickiness.
Characteristics of matte varnish
Matte varnish is a nail coating without the glossy shine characteristic of varnish . The varnish was created back in 1992, but became famous only in 2009. Nowadays, matte varnish has long ceased to be a novelty and has firmly taken its place among the most popular nail coatings. And it is already difficult to find a manufacturer who would not include matte varnishes in their line.
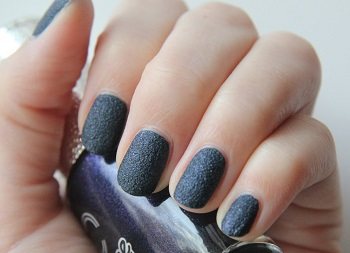
Matt grain varnish
Most matte polishes have a pleasant silky surface , but there are polishes with a velvety , sandy and grainy effect on the nails. Matte finishes with such an unusual texture are often complemented with large or small glitter. Such textured varnishes are tricky for girls with short and wide nails - they significantly make the manicure heavier and further emphasize wide nails, making them look like shoulder blades.
For short and wide nails, choose polishes with a silky surface and predominantly dark colors; sandy and grainy polishes are more suitable for those with narrow nails.
disadvantages of matte coatings common to all manufacturers is the unpredictability of matte varnishes and their tendency to streak if applied carelessly . If a glossy finish can visually smooth out an uneven finish, then a matte varnish, on the contrary, emphasizes all the flaws in the manicure.

Men's manicure with matte varnish
As for men's manicure, matte varnish has found one of the best uses here. The main reason is that it helps to emphasize the well-groomed nails and corrects their color.
To solve these problems, colored matte varnishes in beige or light tones are often used, thus giving the nails a healthier look.
Lunar manicure
On short nails, a special decoration of matte gel polish are the holes at the root. Example in the photo:
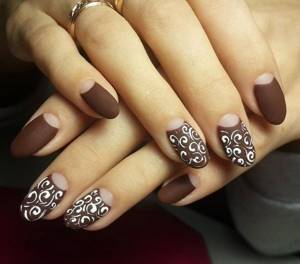
The holes are designed in a semicircle, arc or triangle. Lunaring is performed with a brush, stencil, or foil.
For the moon design with a brush:
- On prepared nails (decoration with a file + removal of cuticles with a scraper + disinfection + base + UV lamp + 2 layers of gel polish + drying for 2 minutes in a UV lamp), a contrasting shade is drawn with a brush at the root of the nail, and dried.
- A fixative is applied and dried in a UV lamp.
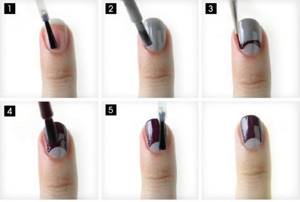
Stenciled holes:
- A stencil is attached to the prepared nails as in the first case and a contrasting color is applied to the hole.
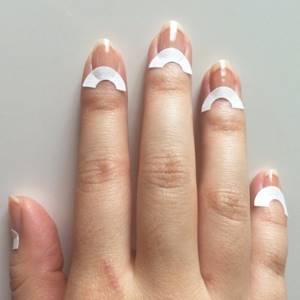
- Remove the adhesive components, dry it, secure everything with topcoat and dry it.
Wells with foil:
- On prepared nails (1 layer of primer + base + drying in a lamp + 2 layers of gel polish, dried in a lamp).
- Use a brush to draw holes with special glue and place foil on top of it.
- When the glue dries, remove excess foil.
- Fix with finish and dry in a UV lamp.
Sometimes the hole at the base of the nail is not painted over with a contrasting varnish or a colorless gel polish is used.
Performing a manicure - step-by-step instructions
Step 1 . Hygiene procedures. Cuticle treatment and removal. Before removing, push back the cuticle using a spatula. To remove we use scissors/device or special gel.
Step 2. We correct the shape of the nails, get rid of hangnails, and level the surface of the nail. To do this, we use nail files, scissors or a machine and nippers.
Step 3. Degreasing, applying base coat. We dry our nails in a lamp. This coating will help not only preserve the design for a long time, but also improve the quality of the nail plate.
Step 4. Applying gel polish.
- Apply polish at the base of the nail in the middle.
- We stretch it with a brush to the bottom edge, then stretch it along the sides from top to bottom.
- We fix the tip of the nail with varnish.
- Drying the coating
The color coating can be applied in one layer or in several. It depends on what color you want: light or more saturated and bright.
Step 5. Securing the coating.
Apply the last layer of varnish using a lamp dryer. In our case it is a matte top. The last layer of varnish will preserve the coating and protect your nails from scratches and damage. A fashionable manicure will delight you for several weeks if everything is done carefully and correctly according to the instructions!
Particular attention should be paid to the processing of tools; it is also necessary to follow the rules for storing them!
- We use acrylic powder
Matte-velvet beauty on nails can be created using acrylic powder. As a rule, one jar of such powder lasts for a long time. The manicure is performed according to all the rules, but after applying the top, we do not dry our nails. Gently pour powder onto the coating, and only then place your fingers in the lamp. Remove the remaining powder with a brush.
- We use matte dust
Apply to the sticky layer at the end of the manicure. Dust is applied with a brush! Afterwards, the marigolds are also dried in a lamp.
- We use a fluffer
After the gel manicure procedure, you need to carefully remove part of the top layer with a cutter or buff. Then the coating will no longer be glossy, but matte. Afterwards we wipe the nail with a sponge and disinfectant. However, you should be extremely careful here so as not to damage the nail plate.
Geometry
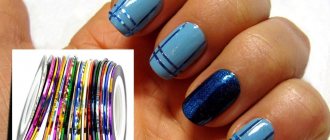
There are several options for this nail art using tape, shiny stripes, stencils, and brushes.
Geometry using tape:
- After standard nail design, base coating and drying in a UV lamp, the adhesive tape is applied to the nails.
- Paint over the tape with a layer of gel polish, remove the tape, and dry in a lamp.
- Cover with topcoat, dry and degrease.
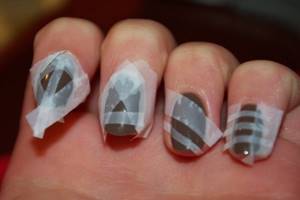
Technique with shiny stripes:
- After standard nail design, base coating and drying in a UV lamp, shiny strips are glued on. Apply several layers of colorless gel polish on top, drying each layer in a UV lamp.
- Apply a closing topcoat, dry and degrease.
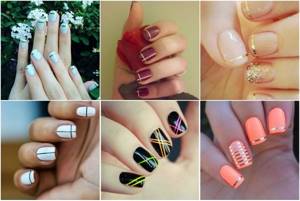
Geometry stencils are tape, paper with adhesive backing and manicure tape.
You can make a pattern with construction tape in the form of “shreds”:
- Nails are decorated, a base is applied, and dried.
- After coating with gel polish and drying, apply tape at different angles to the surface, painting open areas with gel polish of different colors.
- Finish with top coat and dry.
The geometric manicure brush is a classic.
Technique for creating a gradient in contrasting shades for one of the nails:
- Nails are shaped, covered with base, and dried.
- White gel polish is applied and polymerized in a lamp.
- Apply 2 drops of white and burgundy varnish on the foil.
- Add a burgundy shade to a drop of white and mix with a brush.
- Draw diamonds at the base, making a jagged fence in a mixed tone, and dry it.
- Enhance the burgundy color in a mixed drop on the foil and make a second row of diamonds with a brush, dry.
- Make the color darker from row to row, drying each one in a lamp.
- Cover with finish and dry.
The top new products of matte gel polish for short nails include its combination with a glossy finish. The photo shows some versions of combining different techniques.
Matte Finishing Techniques
A little history
Once upon a time, the definition of a quality furniture finish was a “piano finish”: thick and glossy. Matte and flat finishes didn't really take off in the US until Danish modern furniture became popular in the 1960s.
Most Danish Art Nouveau objects had a flat or matte surface. Because they were often made from walnut, marketing experts dubbed the finish "oiled walnut." In fact, the vast majority of these commercial items were not oiled or treated with so-called Danish oil.
Many of those that came from Europe were made in a very thin film of very low gloss conversion varnish or catalyzed varnish. Others were simply given several thin coats of matte or matte varnish. The look has stuck, but these days many woodworkers use Danish oil to create it.
This is definitely true and you are free to use it if you wish. However, there are other options, so let's look at a few.
Erasing
The same high-gloss varnish used on both sides of this cedar plank provides a shine when brushed and a matte finish when wiped.
Most brushed finishes make them thick and shiny. In contrast, wipe-on coatings remain thin and do not develop much shine. By the way, I prefer to call them cleaners because how you wash them is much more important than how you apply them.
There are any number of rubbing finishes that can be used to achieve a smooth, rich appearance, including boiled linseed oil, the aforementioned Danish oil, and a tung oil finish. They are terribly easy to apply, but they build up quite slowly. Oil-based varnish is just as easy, but faster and more durable.
Do not dilute the polyurethane, but rub it directly into the wood using white or gray Brite tape.
Take any alkyd or polyurethane oil-based varnish and apply it to the wood without thinning. Don't worry about the gloss level indicated on the can. The process of wiping the finish will make it even, and it will stay that way when it dries. So you can use gloss, satin or flat polish and still get the same look.
Then dry it evenly with blue paper towels.
To make the fairly thick liquid easier to handle, I rub it across the wood using white or gray Scotch-Brite™. After you apply the coating, wipe it off evenly and thoroughly.
It may seem like you're removing all of the polish you just applied, but in reality you'll be leaving behind a thin, even layer of coverage. You will find that this method gives you a finish in fewer coats and less time than conventional oil, but still maintains the almost clean, natural look of the wood.
Shellac and wax
Reduce the shine of shellac to matte by lightly rubbing it with #0000 steel wool and wax paste. Wipe off the wax immediately before it dries to ensure the surface remains smooth.
For a quick, subtle matte finish, apply shellac to the wood, then wipe off the excess while it's still damp.
Let it dry for a few hours, then apply paste wax with #0000 steel wool. While waxing, the steel wool will smooth the wood surface. Immediately wipe off all wax; Let it dry and polish to add shine, which we don't want.
Spray
Two coats of sprayed gloss varnish on the left compared to two coats of sprayed matte flat varnish on the right.
If you've sprayed a lot, you know that flat varnish spreads and levels out much better than gloss. The chances of getting a perfect high gloss finish straight out of the gun without washing it are slim, but with a matte or flat finish the chances increase.
For the varnish, spray three or four very thin but wet coats, sanding very lightly with 400 grit sandpaper only after the first coat is applied to knock down any raised grains. This should give you an even look and, if your gun is set up correctly, a smooth finish.
Spraying a matte finish? Keep this down to two coats of conversion varnish and about three coats of varnish.
Conversion varnish or varnish sprays with catalyst in the same way. Even if you need to thin it a little to get good flow, you'll probably only need two coats to get an even sheen and adequate structure because these varnishes typically have a much higher solids content than nitrocellulose or acrylic varnishes.
Clear Flat water based
General Finishes creates an excellent water-based flat finish. Apply with a paint pad, a synthetic brush or, as in this photo, a foam brush.
One of the newest materials is a transparent, smooth, water-based coating. It's ready to spray straight out of the can without thinning or reworking, or you can apply it with a paint pad, foam brush, or synthetic bristle brush. As with varnish, you'll notice that it flows somewhat better than its glossy counterparts. It also has a higher solids content than varnish, so two coats should be sufficient on unfinished wood, while painted surfaces should only be coated one layer.
Even flat varnish (left) will discolor both the white paint and the maple sapwood, but the clear water-based Flat Out Flat will not distort the color.
One of the great advantages of water-based flat surfaces is that they are transparent to water. This means that it will not discolor or yellow white or light paint, which often happens with both varnish and varnish. This makes it ideal for white or pastel colored finishes; an ultra-light wood such as white maple or holly; and pickled or limed oak trim.
When to use it
The flat finish is ideal for any item where the appearance of natural wood is of paramount importance. They're easy to apply, look great, and don't show minor scratches from everyday wear as quickly or visibly as gloss finishes. The best thing is that in most cases you can remove the rag or gun without wiping it.
The water-based flat coat is also ideal as a topcoat over rustic looks such as antique white, milk paint or distressed chalk paint. You can seal any secondary paint step, such as dry brushing or glazing, and give the entire surface the same uniform shine while adding extra protection.
In short, flat surfaces are discreet, natural-looking, hide minor signs of wear, and require less effort than a high-gloss finish. It's a win-win in my book.
