Preparing tools
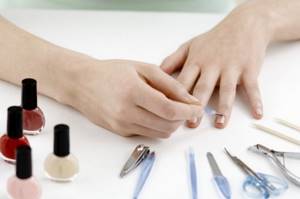
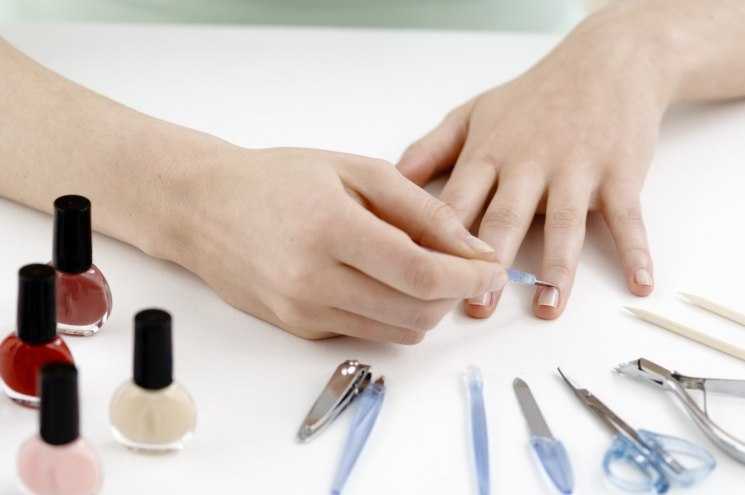
Before you get a quality manicure at home, you should prepare the following tools:
- manicure scissors made of high quality stainless steel;
- wire cutters;
- knipsers;
- cuticle spatula (for independent purposes, it is advisable to use a wooden one);
- nail file;
- polishing buffs;
- bath or bowl;
- a product for softening and removing dead skin around the nail plate;
- cream, hand mask;
- nail degreasing agent (you can use pharmaceutical alcohol or face cream).
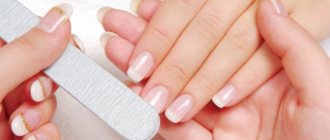
In order to master the art of creating a manicure yourself, you need to pay due attention to the preparation process. First you need to get rid of the old coating, then the dead skin near the nail plate is removed, and the process is completed by filing and leveling the surface. For those with thin and brittle nails, it is better to use a crystal file; for extended nails, a glass file is suitable. Everyone's favorite metal file is only suitable for strong and healthy nails. The oval shape of the tool takes care of long nails, shortens them and processes the edges.
A boomerang file rounds the nail plate, while a rectangular file is suitable for any purpose. Polishing buffs are used at the final stage to level the surface and help get rid of small grooves. In addition to hand tools, you can use a special device (milling cutter) to facilitate the preparation process.
Before use, instruments should be thoroughly treated with disinfectants; you can use alcohol wipes at home. In case of using an orange file to get rid of cuticles. The instrument is disposable and does not require disinfection.
Creating a manicure at home, step-by-step instructions:
- The first thing you need to do is treat your hands with antiseptic . Then remove the old varnish. It is better to use products that do not contain acetone, or special wipes; they are more expensive, but do not dry out the skin. Place your hands in a bath of water, to which add a little sea salt or iodine. This solution strengthens the nail plate.
- After five minutes, check the condition of the cuticle ; if it is easily deformed, it can be trimmed. Using a wooden spatula or the blunt side of an orange file, carefully move along the hole, moving it to the edge and cut it off. For trimming, you can use a trimmer; for beginners, it is better to use tweezers. If there are hangnails on your fingers, you need to remove them with nail scissors. It is prohibited to pull them out. In cases where removing the cuticle leads to cuts, hydrogen peroxide can be used. Apply the product to well-steamed skin and remove with manicure tools after five minutes.
- After removing the cuticle, apply a special oil or nourishing cream.
- Each manicure option, classic or European, must be given the desired shape. Before starting the procedure, you must dry your nails thoroughly . The shape of the future manicure is chosen based on the individual structure of the plate, as well as personal preferences.
- After completing the procedure, remove excess oil and degrease the nails.
- At the end of the preparatory stage, all instruments must be sterilized in Chlorhexidine medical solution. If a special device was used, it is disassembled and each part is disinfected in a special solution.
Tools and materials for manicure
For a classic edged manicure you will need:
- a bowl or bath to soften and steam the skin;
- wooden or metal stick for removing cuticles;
- sharp nippers;
- nail scissors;
- nail file for shaping nails;
- polishing file;
- degreasing liquid or wipes;
- antiseptic;
- base coat for nails;
- colored varnish;
- finishing coating;
The tools can be replaced with a special manicure apparatus, the various attachments of which can handle the cuticle, shape and polish the nails.
The prices for such sets are affordable, and the benefits of use are enormous, especially for sensitive skin, if a classic edged manicure is not suitable.
Trimmed manicure with regular polish
It is advisable to do a manicure on short nails , as it will look more attractive on them. All preparatory procedures are carried out in the same sequence as described above. With a simple varnish you can create such varieties of manicure as: artistic, gradient; ombre, patterns on water.
Regular coating at home is not difficult to do and will save time. After the base is completely dry, coat the nail plate with varnish. If the shade is not too saturated, apply a second layer, but after the first has completely dried. On top of the dried varnish, the nail is covered with a fixative. It sheds the life of the varnish, strengthens the plate, and the fixative also enriches the nails with nutrients.
How to choose your nail shape
Everyone chooses their own length and shape of nails. It depends on many factors, such as the client’s work and home activities, individual characteristics and the health of the nail plate.
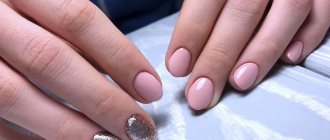
There are 4 nail shapes:
- Square shape. Popular because of its easy execution. It is made by removing the length, then each side is filed into a square shape;
- Soft square. At first, everything is done as above. The only thing that changes is the nail corners, which are rounded. The result is a smiling line;
- Oval shape. It is not always possible to do it. Since the nail should initially be square in shape. An oval is cut out of the square by smoothing out the blunt corners;
- Almond form. It is also made from a square; the file is placed at an angle of 60% while working. Getting smooth corners. This form is recommended only for those with long nails.
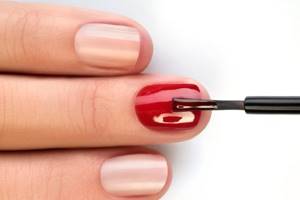
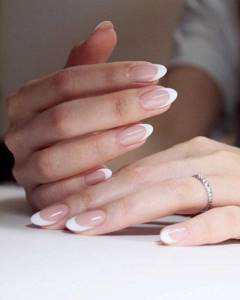
Creating a French manicure yourself
Making a French jacket at home is quite easy without any special skills. All you need to purchase is varnish with a thin brush; you can also use ready-made stencils.
Step-by-step instruction:
- A base coat is applied to the degreased After complete drying, a layer of the main color is applied. To create this type of manicure, pastel colors are used (pink, cream, beige, peach).
- As soon as the base polish dries, a “smile” is created. You can use ready-made stencils, but they have their drawbacks: they peel off and let varnish through.
- A white stripe resembling a “smile” is drawn on the edge of the nail plate Depending on individual preferences, it can be of any shape (triangular, oval, square). The optimal strip thickness for a French jacket is 2-4 millimeters.
- After the “smile” becomes dry, coat the surface with a sealer. Thanks to it, the manicure will not crack and will give your nails a natural shine. Instead of a regular fixer, glitter varnish with sparkles is sometimes used.
Design you can do yourself
In the photos of the masters' manicures you can see real masterpieces of manicure design, but some of them can easily be repeated.
French manicure
French manicure, both classic and using non-standard shades, can easily be done using a special varnish with a thin brush for painting the edges of the nail and a stencil, which are available not only in a standard, round shape, but also in a triangular one.
In order to make a French manicure, you need to cover the nail with the main color, dry it, stick a stencil and carefully paint the tip of the nail, and then cover it with clear varnish.
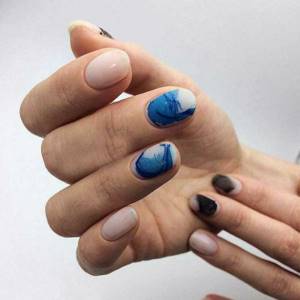
Lunar manicure
The opposite of French is moon manicure. Here, it is not the tip of the nail that is painted with a contrasting color, but the base, the so-called hole. It is also done using special stencils for lunar manicure.
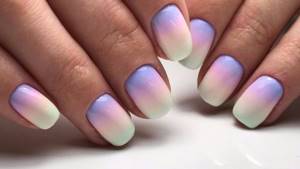
Gradient manicure
A fashionable gradient manicure can be done using a foam sponge. To do this, you need to apply varnishes of several shades in stripes, slightly overlapping one another for a smooth transition, and then lightly press the sponge onto the nail, the main thing is not to press too hard, otherwise the gradient effect will not work, and remove excess varnish from the skin with a cotton swab soaked in nail polish. nail polish remover.
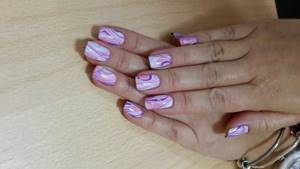
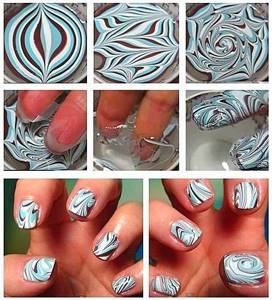
Water manicure
Water manicure is perhaps the most complex and time-consuming to perform, but at the same time the most effective. The pattern obtained with its help is unique and never repeated.
It is done like this: warm water is poured into a dish that you don’t mind spoiling, after which several shades of varnish are added one by one, on which a pattern is then drawn with a needle, after which the nails are lowered into the varnish one by one.
To protect the skin from varnish, before manicure, you can apply PVA glue to the skin around the nail and wait until it dries.
And you don’t have to wipe off excess varnish from the skin; you just need to peel off the adhesive film. It is better to remove it after the varnish has completely dried.
There are several nuances. If you use regular varnish for a water-based manicure, then all actions must be performed very quickly, otherwise the varnish will quickly thicken in water and the manicure will not work.
You can also use acrylic materials, which do not harden as quickly. It is better to do a water manicure for beginners with them, because in the absence of proper dexterity, without filling your hand, it is very difficult to get the desired effect from such a design.
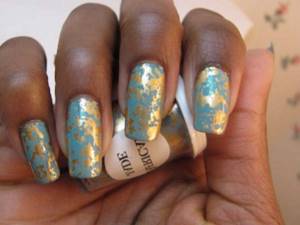
Manicure with foil
A manicure with foil or a mirror one looks stylish and futuristic, and it’s also not difficult to do.
Aluminum foil is placed on the base coat immediately after application, while it is still wet. After the base has dried, the excess foil is carefully removed; this is not difficult, foil is a soft and pliable material.
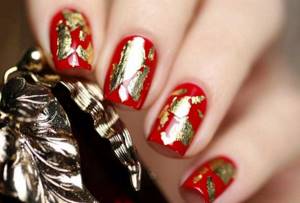
Nails are covered with a finishing layer of transparent varnish. You can also cover the entire nail with foil, but by tearing it into small pieces you can create a crackle effect.
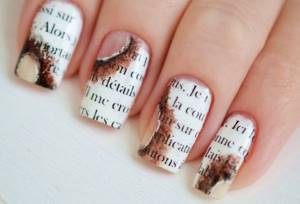
Newspaper manicure
A newspaper manicure looks very original and bold on your nails, and is done quickly and not difficult. First you need to apply a base color, contrasting with the color of the letters of the newspaper, a pre-cut piece is applied to the nail.
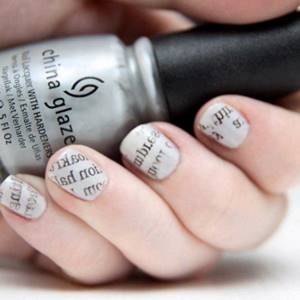
Using a cotton pad soaked in alcohol, rub it over a piece of paper, and if it is very thick, then the disc should be pressed against the nail for a few seconds.
The letters from the paper will be imprinted on the nail, after which they should be covered with a fixative. If desired, you can add small stickers with designs to the letters on some nails.
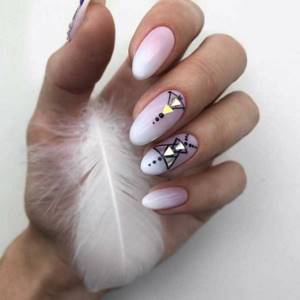
Drawings and patterns on nails with varnish
Not everyone can draw pictures and patterns on their nails with varnish, but even in this case there is a way out. There is a huge variety of nail design stickers on sale, ranging from delicate floral designs to abstract patterns and thematic pictures.
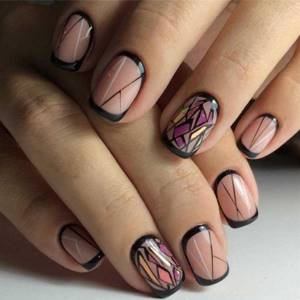
The procedure is standard: first the base, then, if desired, colored varnish, then a sticker is pasted and covered with a fixative.
Before applying each subsequent layer, you must completely dry the previous one, otherwise the varnish will easily smudge and you will have to start all over again.
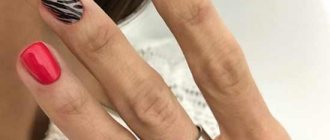
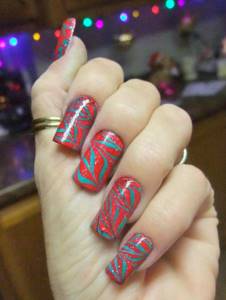
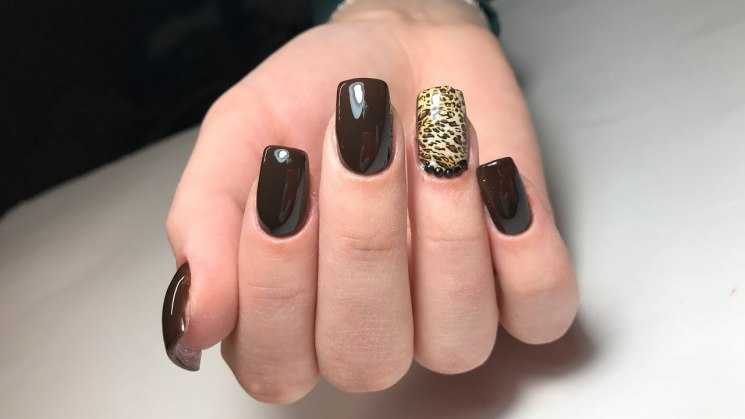
This season, eye-catching animal prints are still trending. It is easy to paint an imitation of zebra or leopard skin on your nails using varnishes with thin artistic brushes.
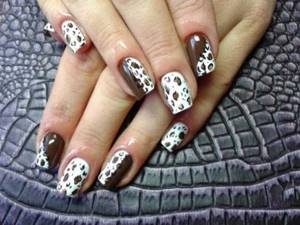
Leopard print
For a leopard print, the nails are covered with a basic tone, it can imitate the color of the skin of a leopard, or it can be absolutely any color, then the spots are applied with an artistic brush.
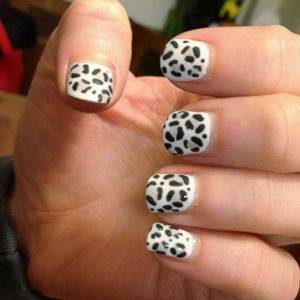
The main thing is not to make them the correct round shape, otherwise you will end up with a polka dot manicure. He looks great too, but that's not what we're talking about right now.
The spots should be irregular in shape. A zebra manicure is done in a similar way. You just need to decide whether it will be black with white stripes or white with black.
In order to make a fashionable matte manicure, you don’t have to buy a matte polish, especially if you already have a suitable glossy shade. To give a matte effect, the varnish must be dried over steam, and voila, a fashionable matte manicure is ready.
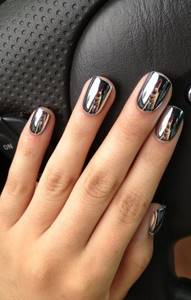
How to do a mirror manicure correctly?
There are several ways to create a beautiful mirror manicure. It is made using foil, reflective film or nail art varnish.
The easiest way at home is to use foil:
- cover the surface of the nail with varnish of any shade;
- without waiting for the polish to become dry, stick foil on top and tear along the contour of the nail plate;
- cover with fixative.
Which file to choose
You simply cannot do without a file when creating beautiful nails. This tool is the basis for nail care, creating a neat nail shape. Files differ in the abrasive (grit) applied to 1 square centimeter of this object. Types of nail files:
- Tool 80 grit. Necessary for extended and false nails;
- Tool with abrasive up to 150. Necessary for giving shape to extended nails;
- File up to 240 abrasive. Suitable for natural nails;
- File 400-2000. It is a tool for polishing the nail plate.
Important! When purchasing a file, you should pay attention to its abrasiveness. The health of your nails depends on the right choice.
How not to use the tool
Experienced manicurists strongly advise against manipulating your nails if they are wet. This will quickly cause the nails to become flexible, which will cause the nail plate to break off. File nails only in one direction. Otherwise, their edges may be damaged.
Nail polishers are used only for dry manicures. If you do it using the wet method, all the work on creating beautiful nails will “go to waste.”
Elegant moon manicure
Creating a lunar manicure yourself is not difficult. The technique is reminiscent of a French manicure. Unlike French, only the holes are covered with white varnish. You can paint your nails with either regular or gel polish.
Stages of creating a moon manicure using gel polish:
- When working with gel polish, special products are used for degreasing; alcohol and regular tonic are not suitable. Professionals use preparations enriched with minerals and silicone.
- Next, the surface of the nails is painted over with gel polish, and holes are drawn. To obtain an even image, it is advisable to use acrylic brushes. The holes can be decorated with rhinestones, for reliable fixation, pressed gently with a stick. Nails are dried for two minutes under an ultraviolet lamp.
- Then the entire plate is painted with gel polish, then placed under a lamp for two minutes and dried. To obtain a rich color, apply a second coat.
- Completes the process of wiping the nail with a special product to remove stickiness.
To create a lunar manicure, you can use both contrasting shades (green and yellow) and pastel shades (cream and white).
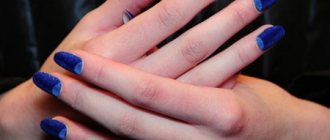
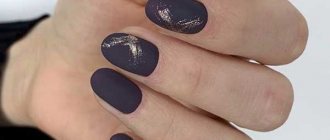
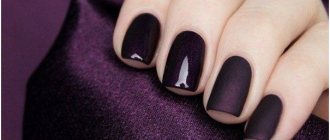
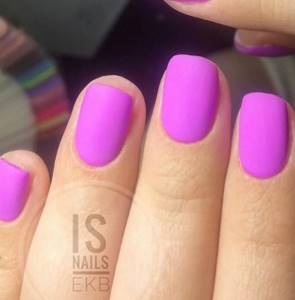
Velvet or matte manicure
In recent years, matte manicure has become especially popular. You can use both special velvet varnishes and regular ones.
Step-by-step instructions for creating a velvet manicure:
- When using regular varnish, apply it in several layers. Dry your nails over steam for a few seconds, keeping a distance of ten centimeters, so as not to burn yourself. After drying, the nails become matte.
- A quick and simple option is to apply matte varnish.
- Using a special sand coating, after drying, it turns into powder.
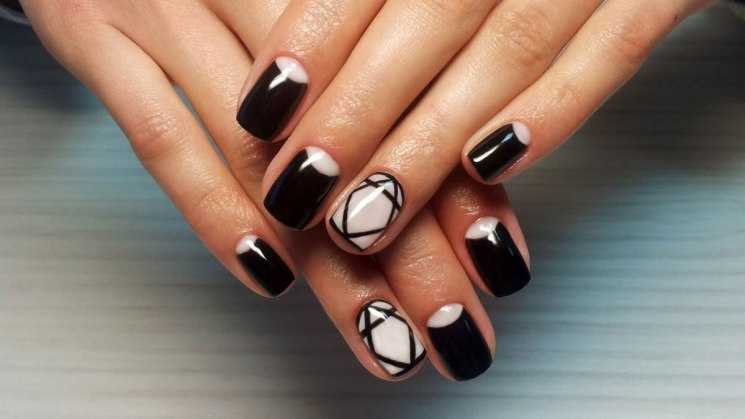
Matte manicure will look impressive using different textures. For example, you can cover your nails with a dark color, put dots or draw lines. A velvet leopard manicure will look beautiful. Cover the nail plate with light varnish, draw glossy dots on top, and outline them with matte varnish of a different shade. For example, a dot can be put in black and outlined in brown.
Stages of Japanese manicure technology:
- Diagnostics;
- Disinfection;
- Massage;
- Application of specialized serum materials to normalize the health of nails and skin of the hands (determined by a specialist);
- Applying a cuticle softener;
- Removing dead skin with a stick made from Tachibana boxwood;
- A detailed description of the means and materials used to carry out manipulations on the client’s hands;
- Rubbing in moisturizing oils;
- Carrying out water massages with pebbles;
- Applying mineral pastes to nails;
- Polishing the nail plate with a special powder based on beeswax;
- Final massage using silk bags filled with aromatic herbs, salt, and essential oils.
The result of an hour-long procedure will be well-groomed, smooth nail plates and well-groomed hands.
Water manicure
Doing a water manicure is not so easy. This method allows you to create unusual designs; for this you need to purchase high-quality varnishes, show accuracy and dexterity.
Step-by-step instruction:
- The nails are painted with white varnish, this is necessary so that the colors look rich and bright.
- Add varnish drop by drop into a container with warm water, at intervals of a few seconds. You need to act quickly, otherwise the varnish will dry out, which will complicate the process.
- Using a toothpick, draw the desired design.
- There are several schemes. The easiest one is to start from the center and draw circles.
- Once the pattern is ready, lower your finger into the container perpendicular to the liquid for a few seconds.
- Using nail polish remover, remove excess polish.
Water manicure is interesting and original; it takes very little time to create. For a quick effect, it is better to give preference to acrylic paints.
How to do an ombre manicure
Gradient manicure holds a special place in the hearts of many girls. Smooth transitions from one shade to another look fashionable and elegant. In the salon, an airbrush is used to create ombre. Due to its ease of use, a simple sponge will do just fine at home. It should be smooth and dense.
Stages of creating a gradient manicure:
- Apply base and white polish to the prepared nail plate.
- Cut out a small part of the kitchen sponge and apply varnish of different shades over the surface in strips. You can combine cherry with white, sand or gold.
- Lightly blot the nail with a sponge. With strong pressure, a smooth transition will not work.
- Apply glitter and fixative to help hide sponge marks.
Gel polish coating at home
- Preparing nails for coating: doing a trimmed or untrimmed manicure. First, apply remover to the cuticle to soften it. Then we push back the cuticle with a pusher or an orange stick, after which we treat the skin at the nail folds and remove the cuticle.
- We file the nails to the desired shape and polish them with a buff. This is necessary for strong adhesion of the nail to the base.
- We wipe the nail plates with a degreaser. We recommend using lint-free wipes, as lint can make your finish uneven.
- Apply primer (ultrabond), avoiding the skin around the nail. The primer is needed for strong adhesion of the base to the nail plate: it is something like double-sided tape. If you have naturally strong, non-brittle nails, then you can skip this step.
- We cover the nails with a thin layer of base, seal the ends, dry in a UV-LED lamp for 2 minutes/30 seconds. If you have an uneven surface of the nail plate, you need to level it.
- We apply colored gel polish, seal the ends and place them back in the lamp.
- The final stage is applying the finishing coat. Don't forget to seal the ends with topcoat, otherwise the gel polish will quickly chip. Dry the top coat in a UV-LED lamp for 2 min/30 sec.
- If you have a top with a sticky layer, you need to remove it with a cleaner.
What types of gel polish are there?
Soft gel polish. The key difference between soft and hard gel polish is the level of porosity and removal methods. The soft variety does not adhere to the plate as strongly as the hard one. The soft gel is usually removed with a special liquid, soaking the plates in the product for several minutes. The advantages of soft shellac are that it hardly damages the plate when removed correctly.
Some people notice how the varnish begins to come off and tear it off. This is a big mistake - you can remove part of the nail plate, which will damage your nails for a long time. Disadvantages - nails become dry after soft gel polish, in addition, the product is not suitable for lengthening.
Hard gel polish. It is not completely porous, which means it stays on the nails longer and stronger. But there is a minus - the varnish cannot be removed without a special device. Hard gel polishes are not much different from acrylic nails. If you don't take care of your nails properly, you will face skin irritation problems. Also, improper removal will cause long-term damage to natural nails.
Pros - with the help of hard gel polish you can lengthen your nails, and this type lasts up to 4 weeks.
Many people think that long-lasting gel polish is definitely evil. But it's not that simple.
How to make designs on nails with gel polish?
Nail art is a type of manicure in which, in addition to the standard classical treatment of nails, various designs are also reproduced on them according to the technique. Shellac quickly gives freedom to decor, which is why there are entire trends in nail design where images are applied to a ready-made coating.
You can make absolutely unimaginable pictures on your nails, it all depends on the artist’s imagination, but you need to understand that individual bright patterns will look more impressive on long nails, and their use on short nails is unacceptable. Examples are shown below.
Nail painting techniques.
There are many techniques for painting with gel polish professionally, but only a few of them can be used at home:
- painting technique with a thin brush;
- dotting technique (a special tool with a small ball at the end);
- dot manicure technique (somewhat reminiscent of children's drawing using dots with the described order);
- “wet” technique: the varnish moves freely on the nail plate using a toothpick or needle;
- liner manicure technique.
Before starting to use any of the techniques, you should observe the master and his manicure sequence. If you can’t go to a salon, you can get the necessary tips from videos on manicure lessons on the Internet. But to gain experience, you still need to work and improve yourself.
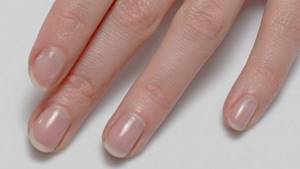
How to properly care for your cuticle?
The most important condition for the beauty and health of hands and nails is proper cuticle care. Experts strongly recommend removing the cuticle body, because often this area not only becomes rough and unsightly, but can burst, causing significant pain. In addition, cutting the cuticle lengthens the nail plate, so it is recommended for those with short nails.
- To make it easier to work with cuticles, nail experts recommend hand baths. At home, you can remove the cuticle using nail clippers.
- You can also move and lift the edge of the cuticle with an orange stick and trim with sharp, rounded scissors.
- At home, the cuticle can be softened with fruit acids, which greatly facilitate the further process of removing the cuticle body.
- Today, hardware manicure has become very popular. This manicure is very easy to do at home.
- Using cutters, you can painlessly and non-traumatically make the cuticle perfectly smooth. On sale there are not only professional devices for salons, but also small kits for home care.
- Do not forget that the cuticle area requires regular care and nutrition with oils. Special oil-vitamin cocktails are widely available, sold in an ergonomic tube-handle with a brush.
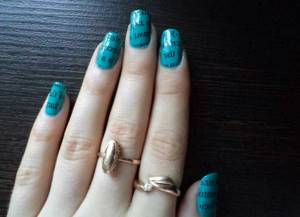
Newspaper manicure
Letter or newspaper manicure is a fashion hit in recent seasons. Created using newspaper, in just a couple of minutes. For printing, ink is used that can be easily erased with alcohol. If you turn the newspaper over and rub alcohol on the back side, the letters will come off to the other surface.
Stages of creating a letter manicure:
- Prepare the nail plate in advance. Then apply the base and varnish in any shade except black.
- Apply a small part of the printed publication to the nail with the reverse side.
- Go over the newspaper a couple of times with a cotton pad soaked in alcohol.
- Once the letters are on the nail, apply a sealer.
Anyone can create a beautiful and unusual manicure on their own; all you need to do is put in a little effort and care.
Simple unedged manicure: step-by-step instructions
Have you prepared everything you need? Then make sure that your workplace is properly lit - and follow our instructions exactly.
Wipe your nails with nail polish remover
The first step is to remove any remaining old polish using cotton wool or a lint-free cloth moistened with nail polish remover. By the way, it is better, if possible, to do this with a napkin: cotton pads often leave small fibers, due to which the varnish is then distributed unevenly. And even if there is no polish on your nails, still wipe the nail plate with nail polish remover to degrease it.
Trim your nails to the desired length
Use scissors or clippers to trim your nails. If your nails are not too long, or you do not plan to shorten them significantly, you can skip this step and immediately proceed to using a nail file.
File your nails
Use a natural nail file with an abrasiveness of 180-200 grit. You can find out how to choose the right tool here, and our detailed guide will help you choose the right nail shape. Do not move the file in a “right-to-left” pattern, this can lead to splitting of the nails: move in one direction, with smooth movements.
Round your nails very carefully and do not overdo it: if you file your nails on the sides too actively, this can lead to ingrown nails in the future. Do not use a nail file immediately after taking a shower; the nail plate must be completely dry!
Sand the edges
Use a buffing file to smooth the edges of your nails to avoid splitting and lightly buff the surface. But, again, do not try to achieve a mirror shine: it will be difficult for nail polish to “fix” on a perfectly smooth surface.
Push back the cuticle
Using an orange stick or a special pusher, carefully push back the cuticle and pterygium - the lower layer of the cuticle, which is a thin film.
Apply remover
Apply a special cuticle softener (remover) and wait 20-30 seconds.
Push back the cuticle again
Using an orange stick or pusher, gently push back the cuticle again, trying not to press too hard on it. If you don’t have a special remover on hand, you can use a rich cream instead.
Trim the burrs
If necessary, remove burrs with pliers or scissors. Treat the skin of your hands with cream.
Wipe your nails again with nail polish remover.
After removing cuticles, use an alcohol-based solution or nail polish remover. This will help remove any remaining remover and degrease the nail surface. By the way, some beauty brands produce special nail degreasers; they are also very effective and easy to use.
Apply base coat
Be sure to use a base coat: it will prevent yellowing of the nail plate and provide better adhesion to the polish. Distribute the base in a thin layer, slightly retreating from the cuticle. Don't skip this step, even if you plan to paint your nails with a light polish later.