02/04/2016 / Manicure and pedicure
Nail design is performed using various techniques, of which there are many now. Back in the 30s, lunar manicure was invented, which is now at the peak of popularity. Christian Dior introduced this type of manicure at his fashion show. Performing this nail design at home is not difficult if you have some tools for a French manicure.
1934 is the year the Revlon brand of water-insoluble varnish was founded. At that time, women did not apply varnish to the entire surface of the nail, as this was considered bad manners; as a result of this coloring of nails, moon and French types of manicure appeared.
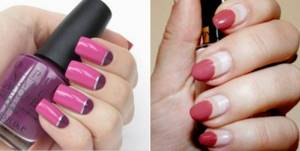
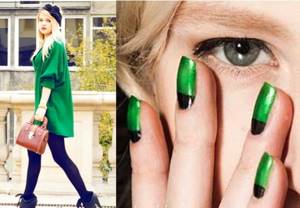
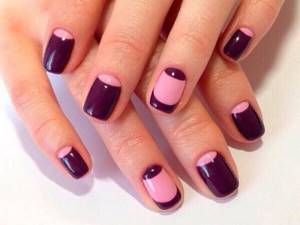
Lunar manicure is also called “anti-French”, “reverse French”. These names come from the coloring technology: in the classic French version, the free tip of the nail is painted, and in the lunar version it is lunula, from which the name of this design comes. Lunula is a section of the nail at the base, shaped like a month or moon.
This technique can be performed using various materials: ordinary varnish, paint, gel polish. The unpainted area of the nail can be decorated in a contrasting color or a color that supports the overall style, and the lunula itself can also be of any shade. The choice of colors depends on the imagination of the master and is based on the compatibility of tones.
Performing a moon manicure with gel polish (shellac)
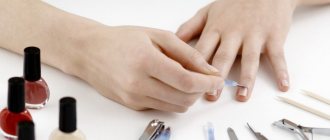
Performing a manicure using the “reverse French” technique with gel polish involves the use of a certain list of tools:
· base and top coating; · UV lamp for drying nails; · two gel polishes of different colors; · orange wood manicure sticks; Remover – liquid for removing the sticky layer from the nail plate; · stencils of round or semicircular shape; · beveled gel brush; · file for nail modeling; · degreaser (can be replaced with remover).
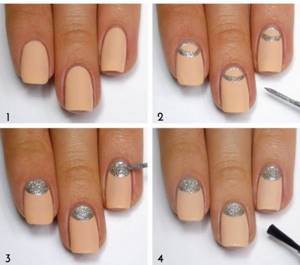
Step-by-step instructions for moon manicure with shellac
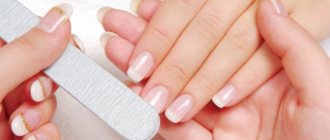
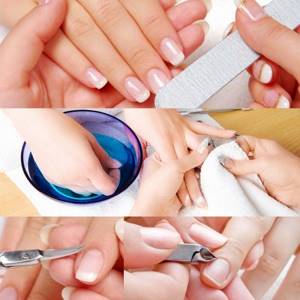
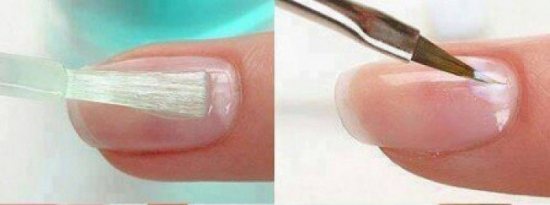
First, give your nails the desired shape using a nail file and remove the cuticle. If necessary, the cuticle is removed with special means, such as gel or professional scissors. Remover removes the oily layer from the nail. After this step, you can no longer touch your nails, as you can disrupt the further adhesion of the gel polish to the surface of the nail plate. Irregularities in the nail are polished with a buff.
Applying base coat
Once your nails are prepared, you can proceed directly to application. First, apply a thin base coat. It is a thick transparent nail polish. It dries in the same way as gel polish in a UV lamp exactly as long as it should according to the instructions. For example, the company CND, which produces gel polishes and manicure bases, recommends drying its base for 30 seconds. It is most convenient to use Shellac when painting, since careful preparation of the nail is not required before application, which significantly saves time.
First stage
After drying the base, apply a thin layer of the main color, which will be the color of the lunula, to the entire nail plate and dry. To obtain a more saturated and dense shade, the gel is applied again.
Second phase
You need to wait until the gel has completely dried, after which you can attach the stencil. This is done at the bottom of the nail cuticle.
Third stage
Then the free edge of the nail plate is covered with the desired shade. If the lunula turns out darker than the main color, then this situation is corrected with an angled brush dipped in remover. Color gel usually takes longer to dry than base. Drying takes 1-1.5 minutes. If the master has sufficient experience, then it will not be difficult for him to draw the lunula “by hand”.
Fourth stage
When all layers of gel have dried, you can safely remove the stencil. Next, the resulting result is secured with a top coat, which adds shine and durability to the manicure. It dries as quickly as the base, about 30-40 seconds.
If the design requires it, then before applying the top coat, the nail can be decorated with rhinestones, stickers, painting, stamping and other decorative elements.
Rhinestones in nail design >>>
If you came to this web page looking for interesting ideas for home manicures, then it will be useful for you to know that EL Corazon®
offers customers a huge selection of rhinestones for nails - glass and acrylic, there are even nail stickers made of rhinestones.
home manicure
enthusiast can handle them You can buy rhinestones for nails wholesale and retail (in the online store) from us right now.
Rhinestones for nails. How to place rhinestones on nails watch video >>>
Moon manicure step by step with photos (other options)
Do-it-yourself lunar manicure can be easily done at home; just become familiar with the technique.
Advantages of gel polish over regular coating
Gel polish has a great many advantages, which is why most girls love it. The first thing worth noting is its durability, which allows you to forget about refreshing your manicure for two weeks. The second is strength, which prevents the coating from cracking or chipping due to mechanical damage. Third, it is absolutely harmless; shellac compacts and strengthens the nail plate.
It is thanks to these qualities that many masters use gel polish when performing lunar manicures. However, it is not suitable for every nail painting technique. At home, it’s still easier to use regular varnish, and there’s no need to buy a UV lamp separately.
The essence of design
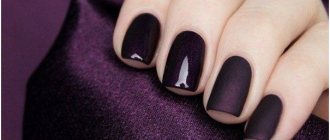
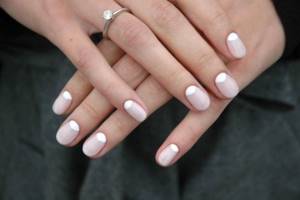
Looking at the photo of the lunar manicure, you can understand that the design feature is the highlighting of the lower zone of the nail surface in a tone that contrasts with the main color. Sometimes it can be done with a clear varnish or gel.
The shape of the design resembles a crescent moon, which became the basis for the name. In Europe, this design is usually called Hollywood French.
Lunar manicure is popular among people who design their nails with gel polishes. Thanks to this, your hands retain a well-groomed appearance longer.
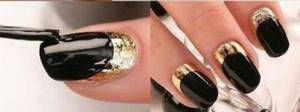
Moon manicure using foil
Manicure using foil appeared relatively recently, but has already become popular. This type is characterized by average complexity of execution if all the necessary tools are available:
· base coat; · cotton buds; · foil for nail art (can be replaced with thin food grade); · varnish of the desired color; · fixative; · wooden sticks for manicure.
How to do a moon manicure with foil
Step 1
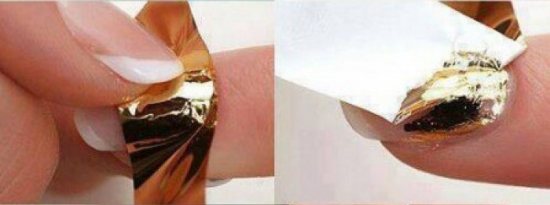
First you need to treat the cuticle - remove it or simply move it aside. For better adhesion to the material, the oily shine is removed from the nails, but this step is not considered mandatory. The foil is cut to the size of the lunula or divided into small rectangular strips.
Step 2
A thin layer of base is applied to the nail plate and dried, but not completely. The foil is pressed to the base of the nail and leveled so that it lies in an even layer. When the foil sticks to the base, the excess parts are cut off. The foil is positioned so that cracks and bumps do not form, otherwise the result will be far from the desired one.
Step 3
The surface of the nail not occupied by foil is painted over with varnish; you can also touch the foil, but be sure to leave a clear joint line. The quality of the material for such a manicure is very important, because if it is at its best, then problems, as a rule, do not arise. The applied layer of varnish is dried and a fixative is applied. You can admire the resulting beauty for 3-4 days.
Combination with other types of design solutions
Nail art is a part of your image, so try to make it look elegant not only on its own, but also with other things that create your style: clothes, accessories, makeup.
Many women like to paint their nails to match the color of their clothes. And it looks quite harmonious.
The situation is the same with matching the color of your manicure to accessories and makeup. If there is a similarity, it looks very stylish.
If your moon manicure is neutral shades, then you can safely wear outfits and accessories of any color.
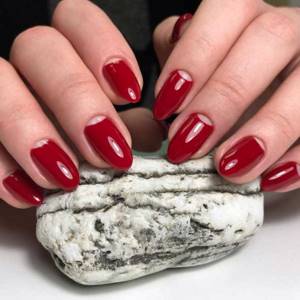
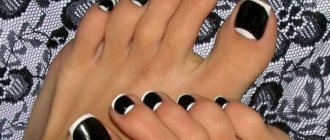
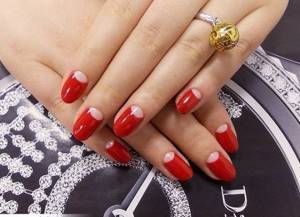
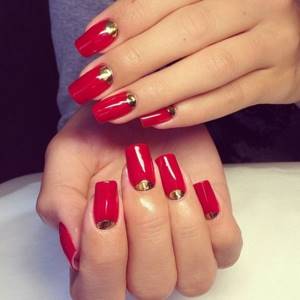
There are also colors that, although different from each other, look very beautiful together, for example, red with black, white, gold and silver shades.
Well, now you know the most popular ideas for lunar manicure and the technique for creating it. You can stick to the standard versions of this nail art, when the hole is painted in light colors, and the main part of the nail plate is painted in darker colors, do the opposite, combine with other techniques. Be that as it may, always remember to combine the shades of your manicure, not only with each other, but also with the colors of your clothes, accessories, and makeup. Dear fashionistas, do you like manicures with holes? Are you conservatives or reformers in this nail art? Share your opinion in the comments.
Moon manicure design options and ideas
An unvarnished lunula looks advantageous in combination with a bright nail surface. This painting is carried out in only three stages: preparation, application of a transparent base and a color base. The stencil must be attached directly to the base; the lunula is not covered with color. The free end of the nail is highlighted with an accent color.
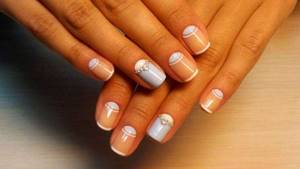
Moon manicure with a transparent hole
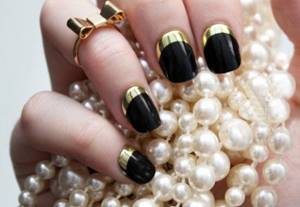
A manicure done at home according to all the rules looks no worse than a salon one. To perform a lunar manicure with foil, you need to acquire special foil in advance, since food foil will not look good with all types of varnish. It is also worth choosing a color scheme for your manicure in advance; gold or silver foil with black, dark red or purple varnish is at the peak of popularity now.
Fashionable moon manicure
The lunula can be bent in both directions and both options will be correct. To get the desired result in the salon, you should explain to the specialist what should be the result.
Reverse moon manicure
In addition, you can make the lunula not round, but triangular or straight, and you can also draw it with a brush; such options will make the moon manicure beautiful and unusual.
Beautiful moon manicure
Reverse French manicure is popular among celebrities, which is why it is called Hollywood French all over the world. Only the Russians gave it the name lunar manicure. A subtype of this manicure is the image of several crescents on the nails. They are located at the base of the nail, at the tip and in the middle. The technology is the same as for classic anti-french, except that the stencils are glued not in one, but in several places.
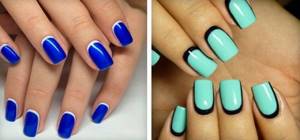
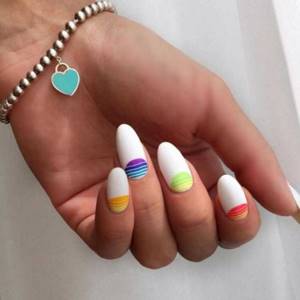
Moon manicure with stripes
Decorate already decorated nails with a lunar manicure with various designs on the nails, rhinestones, stickers, and decorative elements. Moon manicure on short nails looks just as elegant as on long nails.
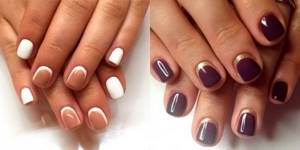
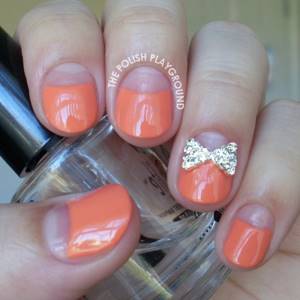
Moon manicure with a pattern
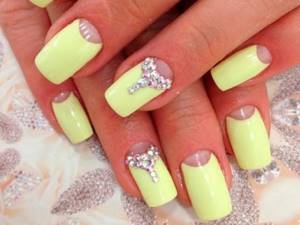
Moon manicure with rhinestones
Color combinations
It is believed that for a classic Hollywood French, the lunula area should be lighter than the rest of the nail. Therefore, transparent, beige, white, and soft pink tones are often used at the base. Often the moon area is done in black, gold or silver.
The rest of the nail is done in a brighter color that harmonizes with the base. The overall design style also matches the season.
So, a New Year's lunar manicure will look optimal in red or blue tones. Rhinestones or snowflakes can be used as decoration.