When a beautiful manicure appears on our nails, we have an irresistible desire to photograph it! And masters generally need to constantly replenish their portfolio and shoot their work on clients. But for some reason, photos often not only do not convey this unearthly beauty, but distort perception: nails on a phone or camera do not look attractive. Why is this happening and what to do? How to properly photograph a manicure for a master and a client? Let's find out in the article! We also talk about the main mistakes when photographing nails.
What should newbies know?

When starting to work on a presentation, you need to carefully think through the concept, select ideas and style. Once you have decided on the overall picture, proceed to the following steps:
- Clearly define the target audience, taking into account that there may be several of them.
- Select photos of works that most accurately reflect a possible solution to customer problems.
- Process all images in a single unique style.
- If templates are used, they are selected so that the portfolio fits into one overall picture.
- Use only photographs of impeccable quality.
The most convenient option is a presentation of works sorted by thematic headings.
Why do you need a photophone to shoot a manicure?
A manicurist will need a stylish and original background to create his own personal portfolio, with examples of finished work. A portfolio is an important element of promotion, which allows you to achieve various goals:
- Demonstrating a level of professionalism;
- Drawing attention to your own services;
- Getting new clients;
- Promotion of an account on any social network;
- Attracting the interest of different target audiences.
The quality, style and clarity of your portfolio photos are extremely important, so to create images you will need a powerful phone or camera, models with original works, daylight, unusual backgrounds and contract accessories, programs for additional photo processing.
What does a good portfolio look like?
Since a manicurist’s work is assessed not only by reviews, but also by images, well-thought-out content is selected for the portfolio. Therefore, photographs taken on purpose, rather than randomly taken frames, are suitable.
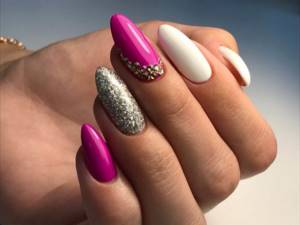
Reference! Monotonous, albeit high-quality manicures will quickly lead to boredom. The presentation reflects all the techniques in which the master works, his ability to process nails of different lengths and shapes. Be sure to include sections with the embodiment of interesting ideas and unusual designs.
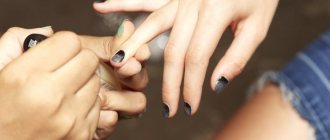
How to photograph a pedicure
To create a beautiful photo of legs, the same rules apply as for arms. There are just a couple of small nuances:
- you can photograph a pedicure in shoes, choosing open sandals in a style that matches the design of your nails;
- use the principle of combination by placing arms on legs. Thus, you get a whole “set” that perfectly demonstrates your skill;
- In the case of a pedicure, the background plays an important role, so stock up on several options from the list above.
Posing
Beautiful, harmonious images are an important factor in helping to build a personal brand. The recognition and style present in every photo will help to implement many more successful projects.
How to take beautiful nail photos:
- set the right light - bright but diffused sunlight is best;
- props will enliven the shooting, but if there are a lot of them, then the work will be lost in the frame;
- unusual angles often make even simple photographs look great;
- You can’t photograph only one nail, it looks unnatural;
- beautifully and softly intertwined fingers enliven the frame, even if the manicure is classic, ordinary;
- a cup of coffee, some kind of fruit, a bottle of nail polish in your hands sets off the color and texture of your nails and adds interesting details.
Even if there is no beautiful background or unusual props, the pictures are attractive if the model maintains a natural pose. To do this, relax your hands and do not spread your fingers.
Reference! To prevent the veins on the model’s arms from standing out, they are held raised above the head right before shooting. 15–20 seconds is enough.
Why is it important to photograph your nails correctly?
Taking winning nail photos is very important because:
- beautiful works will help the artist attract new clients;
- with their help you can get a correct idea of the high quality of the master’s work;
- images will contribute to building the image and personal brand of the master;
- they will distinguish the master from his competitors;
- if you are not a nail artist, then beautiful photos of a manicure will add attractiveness to your social networks and serve as an indicator of your excellent taste;
- also beautiful photos often serve as a source of inspiration and new ideas for other users;
- As a bonus: once you learn how to take high-quality photographs, you can go further and become a professional photographer.
Background and details
To keep attention on the master’s work, background details are selected so that the eye does not linger on them. It is important to come up with a harmonious combination. Make sure that the bright manicure is not lost on the colorful background, and that pastel shades of varnish are clearly visible, even if the background is light.
Some ideas for creating a background:
- minimalism is always in trend, so it is better to avoid excess details;
- a matte surface is an ideal option, even if it is a regular gray desktop, but clean and empty;
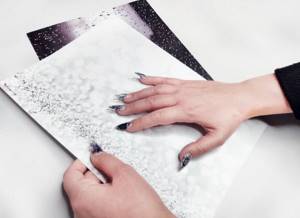
- an interesting effect is obtained if you lay a beautiful fabric or textured plain paper on the work surface;
- if you need the master’s logo in the frame, order personalized photo backdrops with different images in the same style;
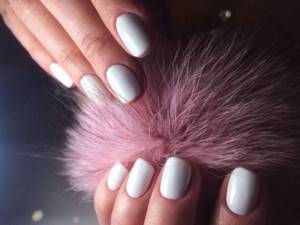
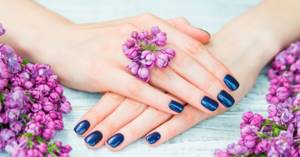
- A bright manicure is set off with light accessories in the hands, and for a classic manicure, contrasting accents are selected: dark glass perfume bottles, large flower buds.
An empty background is a boring solution; details in matching tones help out.
Suitable:
- delicate lace;
- twigs or feathers;
- fruits and berries;
- discreet bouquets.
The main condition is the harmonious distribution of main and secondary items.
Lighting
The best way to set the lighting is to sit the model near a window on a sunny day. Direct blinding rays should be avoided. Select a place where bright but diffused light falls. If only lamps are available from light sources, choose very bright ones, with a cool tone, without yellowness. Select two lamps and install them on both sides of the subject.
Backlight options:
- a sheet of white Whatman paper located as a reflector opposite the window;
- photo boxes for macro photography that fit the palm of your hand;
- a large piece of foil next to the work surface to reflect artificial light.
It is not recommended to use flash as the result with harsh shadows and lots of white highlights will not please or impress anyone.
Perfect highlight
A beautiful reflection of the light source in the form of a shiny speck of reflection adds vitality and glossy chic to the photo. This detail is obtained if you use a bright white light lamp. It is placed directly above the hands, very close.
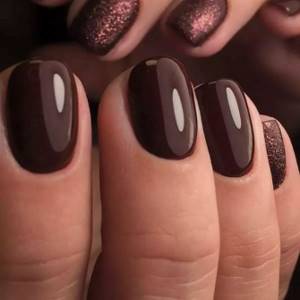
A few tips for getting the perfect highlight:
- smooth, carefully processed surface of the nail plates;
- the varnish is not matte, but shiny, glossy;
- lamp shape is round or oval;
- fingers are located parallel, in the same plane.
Beautiful highlights can also be made using Photoshop . To do this, choose a photo processing program with a special tool or a filter with highlights.
Features of shooting with a camera
The shots taken with the camera are distinguished by their depth and saturation. To ensure professional-quality images, set the correct settings on the camera.
- The digital value in the settings scale, indicated by the letter F, regulates the intensity of the light flux falling on the object. The higher the number, the stronger the brightness and higher the contrast.
- Photosensitivity is responsible for the presence of noise in the finished image. The higher the ISO number, the more noise-like visual “junk” will appear in your photos. These are fuzzy contours, a lot of unnecessary dots and blurry lines.
- The shutter speed is set short, since fixing motionless hands does not imply the appearance of blur. If the shooting is done dynamically, trying to capture fingers in motion, then the exposure time is increased.
Reference! It's easy to take good shots using the automatic Macro mode.
Basic rules for manicure photos on a smartphone
The smartphone is now the most popular “photo camera”, it is always at hand and the shooting quality of modern devices is excellent! There are some rules on how not to ruin a photo with a manicure:
- It is better for the subject to be photographed in the center. To do this, set the framing mode to grid;
- the most advantageous light is daylight;
- We advise you not to use a flash - it will make the frame either too white or yellow and certainly does not contribute to the natural transmission of light;
- missing props? Follow the rules of minimalism and remove all unnecessary objects from the frame;
- Be sure to wipe the camera glass before shooting; do not forget to moisturize the skin of your hands and cuticles with a special cream or oil before shooting.
How to take beautiful pictures on your phone?

Modern phones have high-quality cameras. Therefore, many people collect material for a portfolio without using cameras. To make your shots attractive, follow these recommendations:
- lighting is either natural or artificial, without mixing sources;
- use grid-like framing so that the nails fall exactly in the center of the frame, in focus;
- the shiny coating is removed from the side, and matte nails are placed directly under the camera so that the highlights and texture look attractive;
- To take a high-quality close-up photo, they move the phone closer rather than using zoom.
If your phone camera has minimal settings, download one of the applications that allows you to take good pictures:
- Open Camera;
- HD camera;
- Procamera.
How not to take pictures of a manicure
After reading this article, the number of your mistakes will be reduced to zero. The main thing is to avoid overexposure or, conversely, poor artificial lighting, forget about taking photos “under a lamp” or using your desktop as a background. We won’t rant too much, we’ll just show examples of what NOT to do.
All the secrets of how to best photograph your manicured fingers have been revealed. All you have to do is pick up your smartphone and run to put your newly acquired knowledge into practice, collecting compliments and likes on Instagram.
See also: Original nail design (85 photos)
Instagram account as a master's portfolio
To ensure that your social network feed attracts attention and evokes positive emotions, follow the following rules when creating:
- think through the order of photographs in advance to maintain a harmonious overall style;
- avoid monotonous pictures in which hands are in the same poses and angles;
- make clear and readable inscriptions, use no more than two types of fonts;
- ugly pictures from the “Before and After” series are hidden in the image carousel under a beautiful cover.
The Instagram format uses not only photographs, but also video files that record interesting moments of work processes.
Reference! Photos are edited directly in the application when it was not possible to obtain a clear, color-saturated image.
Treatment
What is changed in the pictures:
- insufficient lighting is corrected using brightness settings;
- remove the yellow tint of artificial light;
- remove skin defects and unnecessary details;
- add contrast.
Using various applications, processing can be easily done right on your phone. Most popular:
- Snapseed (wide functionality);
- AirBrush (for whitening);
- Light (with color processing effects);
- Enlight (many filters).
Common mistakes
In order for a portfolio posted on the Internet to attract clients, it is necessary to avoid mistakes that often spoil the reputation of even good professionals:
- too strong correction of pictures, due to which colors and shades become completely different from real ones;
- the oily sheen of a heavily oiled cuticle looks sloppy;
- a cloudy camera lens from which dust has not been erased, greasy fingerprints.
Models are selected without damage to the skin and nails, with well-groomed hands.
Common mistakes when photographing nails
You need to know the enemy by sight! Let's identify the most common mistakes when photographing nails and try to avoid them:
- don't tense up - this applies to any pose you choose! The hands and fingers that look the worst are those that are “toned,” and besides, the veins are clearly visible on them, which obviously does not decorate the picture;
- do not press your hands too hard against the surface on which they lie; do not photograph your nails from the tips (tips towards the camera) - this can distort their shape;
- do not clutter the background: less is more;
- do not overuse filters: beautiful processing is great, but you should not change the colors;
- do not apply too much oil to the cuticle before shooting;
- maintain a normal distance between the camera and your nails: do not photograph too close or too far;
- as if spontaneous shots are great, but not when it’s unclear what the frame depicts. The manicured hand should be clearly visible.
We hope our review was helpful and you will create an amazing portfolio of your amazing work! We wish you beautiful manicures and photos.
You can also buy a package of webinars from the ParisNail school and upgrade not only your photography skills, but also your Instagram!
Ideas for photos
With cup:

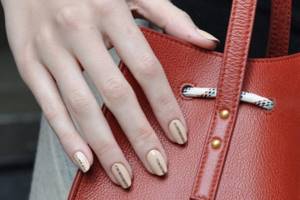
On the bag:
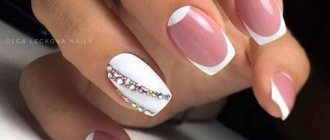
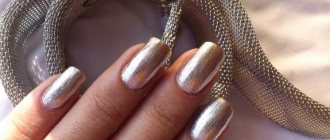
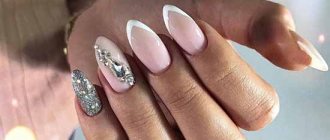
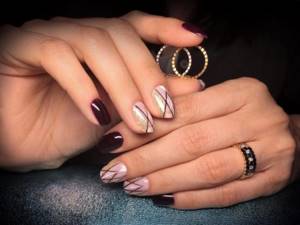
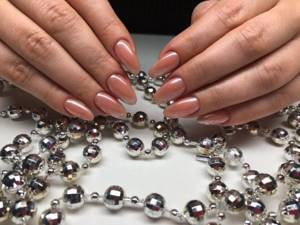
With beads:
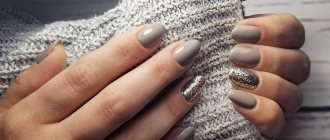
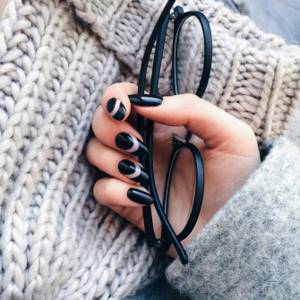
On the coat:
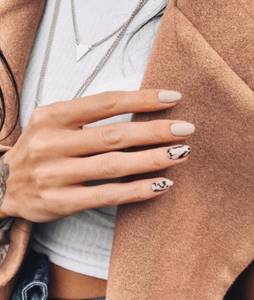
To be a sought-after master, you must not only follow trends, but also skillfully present your talents. Some ideas for photos:
- in hand is a tea cup with an unusual matte texture;
- fingers on the collar of a coat, on the buttons of a jacket, squeezing a thin scarf;
- accessories of contrasting shades in hands - leather bags, clutches;
- nails against the backdrop of a handful of mother-of-pearl beads or sea pebbles clutched in the palm.
Shots taken with imagination look more sincere and attract more attention than glamorous staged shots.
It’s easy to create a portfolio even using your phone camera if you follow the guidelines. Using unconventional ideas, creative professionals create content so captivating that they easily hold the attention of subscribers and find new clients.
Attributes and details for manicure photographs
There are also items that can decorate any photo and highlight a manicure!
Massive mug
It is advisable that it contains something very tasty: coffee or cocoa with marshmallows, ice cream... Grasp the cup - a beautiful shot is ready.
Fashionable clothes, accessories
Photos of girls holding a clutch or branded bag in their manicured fingers always look stylish. You can also accidentally touch the collar of your coat with your brush.
Materials used to make the manicure
Just grab the bottle of polish.
Face
Flirtatiously cover your eyes or mouth with a brush.
Decorations
Handle beads or clutch a stylish bracelet.