Many women successfully do French manicures at home.
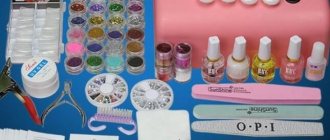
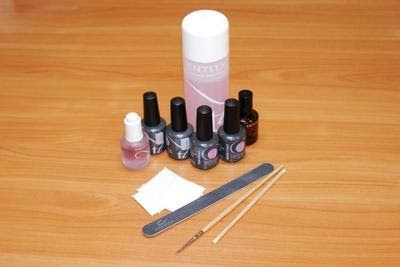
To do this, you need to buy several varnishes of different shades, a fixative and special strips to create an even smile line. Also, to create this type of manicure, brushes are used to draw a smile and various designs. Any accessories can be bought in stores, boutiques, salons. A more economical option would be to purchase a special set. The French manicure set includes all the necessary tools.
So, how to do a French manicure using a kit?
- First of all, you need varnishes for a French manicure, namely base varnish, translucent varnish and colored varnish.
- After you have adjusted the shape of your nails, you need to apply a base polish and translucent polish of a suitable shade to them.
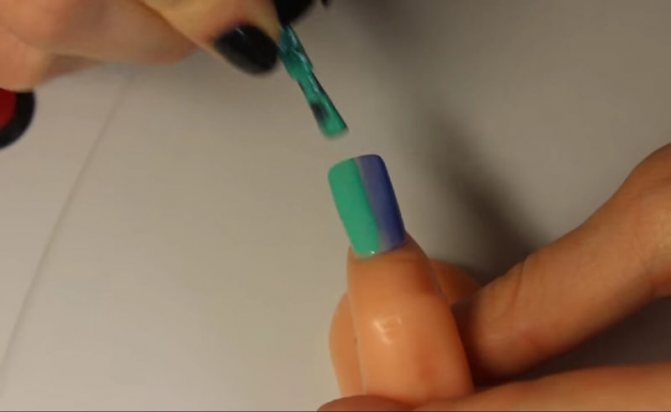
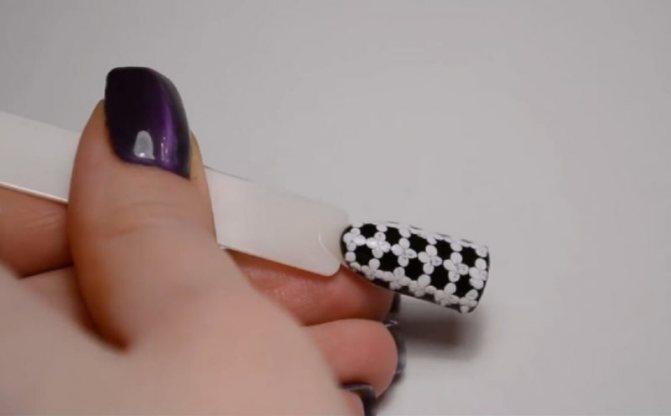
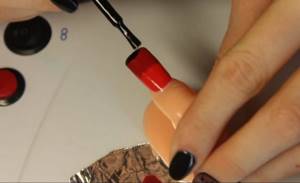
- After drying, you need to stick the stickers included in the French manicure kit on your nails.
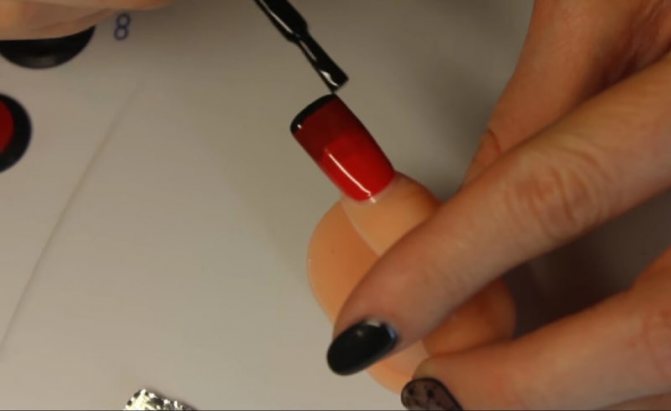
- Now apply colored polish from the sticker to the edge of the nail.
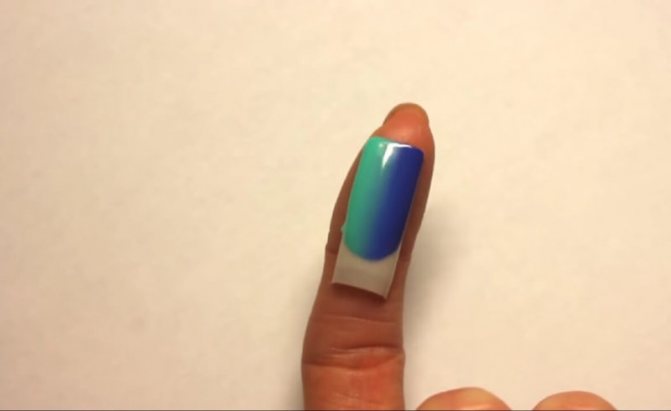
- As soon as the polish dries, the stickers need to be removed and the nails covered with a protective layer.
Now let's look at the issue of price. Is it worth buying a special set in order to sometimes give yourself a French manicure, or is it better to visit a salon if necessary? The classic version will cost approximately 600 rubles, and a set for a French jacket can be purchased for 250 rubles. Thus, even for one-time use, buying a set is profitable!
If you buy everything separately instead of a set, it will most likely cost a little more. If you want to make drawings on a French manicure, then the benefits of doing it yourself will be even more significant.
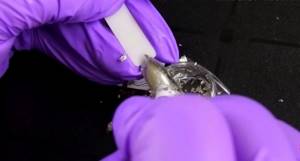
“Native” brush from the bottle
The first brush that we get acquainted with and begin to use is the one that is in the bottle with varnish. It is made of synthetic bristles, the tuft is round at the base, so the tip is widened. It's very easy to use. We collect the pigment, remove the excess color from the walls of the bottle and apply the varnish with strokes in the direction from the base of the nail to the free edge.
It is not always convenient to apply pigment with such a brush. When you press the tool while applying color, the dome flattens and forms sharp corners, making it difficult to paint the area of the nail near the cuticle.

Often the “native” brush does not meet the requirements of rigidity, length, density, or material. Creating patterns and drawing prints with such a tool is especially not very convenient. This is where special brushes come to the rescue.
About forms
The shape of the brushes depends on the purpose.
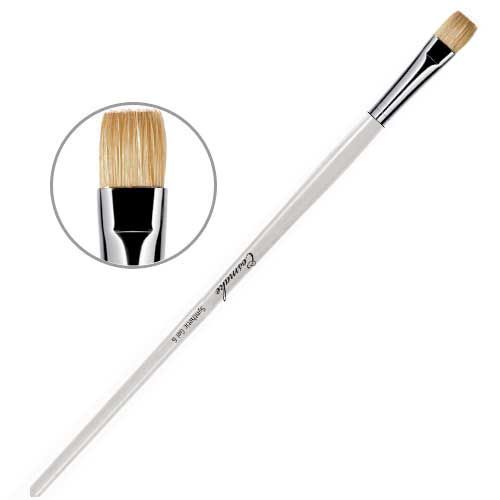
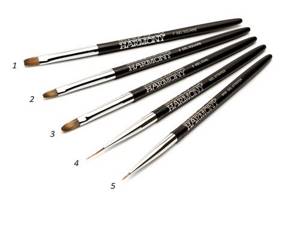
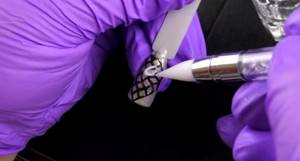
- To create a French look, you need to use brushes with beveled bristles, as shown in the photo. The special configuration of the tool will allow you to make your smile line perfectly straight.
- Devices with an oval shape make it possible to paint nails at the base of the cuticles.
- Small, mini options are used for applying patterns.
- Large manicure brushes are not used for applying shellac, as they are not convenient for this technology.
Rounded
This brush can be used like a brush from a bottle, that is, you can apply pigment to the entire nail. The shape of the bristles is much more convenient for applying pigmented varnish to the surface of the nail near the cuticle than that of a brush sold with a bottle of varnish. We place the flat tip of the brush near the cuticle; it fits well into the small “pocket” under the cuticle, which eliminates the possibility of varnish flowing.
It is convenient to use this tool to work with biogel when extending, leveling and creating nail architecture.
It is also convenient to decorate your nails. Apply paint on both sides to the rounded dome. When applying, apply pressure to the tip; during the stroke, reduce the pressure and slightly turn the brush towards the edge.

Owning an oval brush allows you to very quickly make beautiful patterns, as well as draw floral prints in various techniques.
Main criteria
To ensure that the brush for applying gel polish in the photo does not disappoint during use, you need to choose a tool with sharp bristles. The pile can be of either natural or artificial origin. The first option is considered more durable and of higher quality. But it also costs much more than artificial analogues. When choosing a brush for gel polish, we also pay attention to the handle of the product. Wooden ones are ergonomic and environmentally friendly, but plastic handles make the device cheaper. In order for the gradient of gel polishes with a brush to turn out flawless, the tool must have a strong clip - the part that connects the bristles and the handle of the brush. Thanks to the high-quality clip, the pile does not fall out or fluff up more than necessary.
French manicure with a French manicure brush
This manicure tool greatly simplifies the process of creating a French manicure, because it has a dome with an ideal sinus that fits absolutely on all nails equally and neatly. That is, in any case, you will get the perfect “smile line”. Let's look at an example of how to use a brush to create French decor. To do this, thoroughly saturate the brush with paint and apply it to the nail surface as follows:
- We apply the longer tip of the dome close to the periungual ridge at the distance from the base of the nail at which you want the bend of the jacket to begin.
- Hold the brush almost horizontally to the nail surface
- Press the brush onto the nail and pull it down. We get one part of the French
- We saturate the brush with paint again and apply it to the nail on the other side.
- We refine the middle of the bend with the same brush and get the perfect jacket
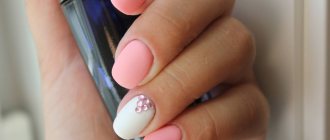
Design options for a French jacket - a selection of ideas
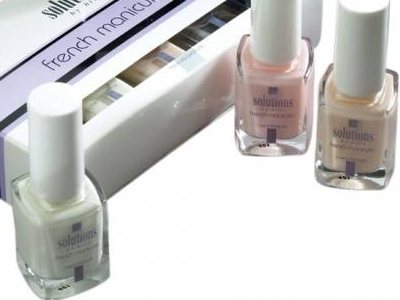
French nail polish
If you are in doubt about the best way to do a French manicure at home at minimal cost, then start with a regular one.
nail polish. Both ready-made kits and all components separately are available for sale. The kits usually include:
- base coat;
- pink camouflage;
- white nail polish for a smile;
- top coat for durability and shine.
To get an even smile line the first time, use stencils for a French manicure.
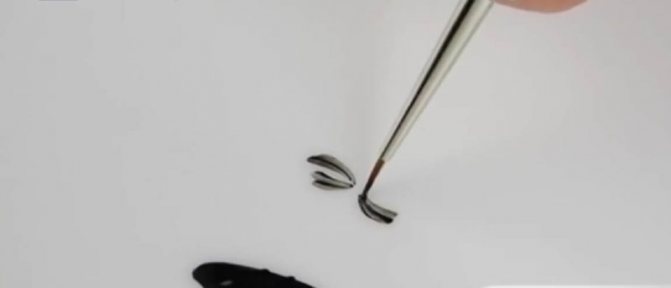
Flat
This brush can be used both for applying glitter, colored powder, and for creating interesting patterns and ombre on nails. When working with a brush, the method of applying paint is important.
- We lower one of the flat sides of the brush into the paint, place it vertically on the edge and, changing the pressure on the brush, make a wave-like movement. There should be a little paint on the brush.

- We apply paint in the same way. We also do not change the position of the brush. Using arcuate movements we create a decorative element
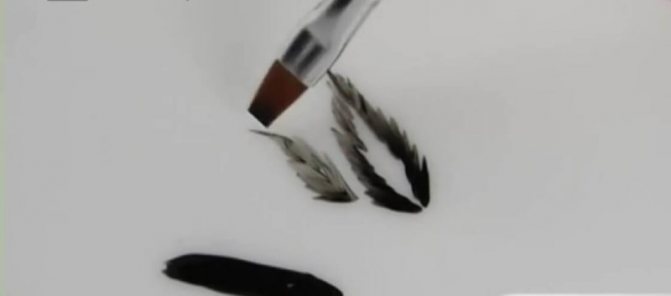
- As if by shading the surface, we can get a beautiful version of the leaves
Using the example of a vertical gradient decor, let’s look at another option for how to use this tool.
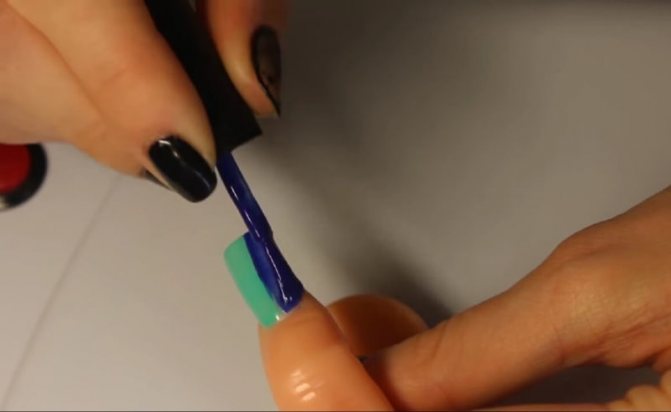
- Apply one of the selected colors to one half of the nail, and apply another color to the other half. This will be the color first layer
- Wet the dome in degreaser so that the brush is slightly damp. This will help smooth the transition.
- Lightly, without pressing, draw the dome over the surface of the varnish in the direction from the cuticle to the free edge. It is important not to start moving from the middle of the nail and not to break it in any place. A few of these movements, and the transition will become smooth. Place in a lamp to dry for half a minute.
- Apply the second layer in the same way as the first
- We repeat the procedure with mixing colors. We hold it almost parallel to the surface of the nail so that the fibers do not streak the gradient, but smoothly smooth it out. Dry in a lamp for half a minute
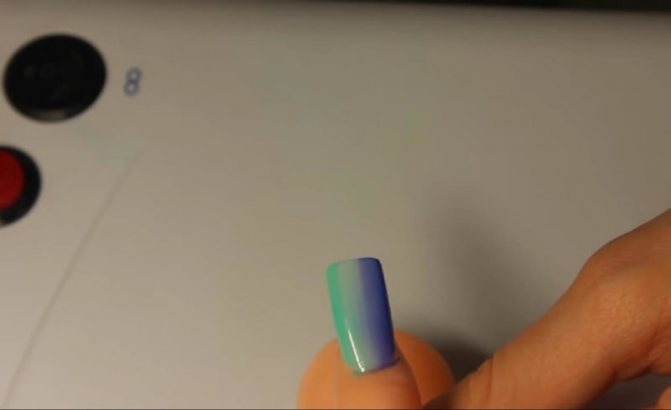
- Apply a third layer of colored varnish. Repeat the procedure with the brush. You can move it slightly left and right to make the transition area wider. The main thing is to move from light color to dark so that the dark varnish does not creep onto the light one and does not overlap it. The result is a soft gradient of two shades:
Features of a gradient manicure with step-by-step instructions, several technologies and spectacular designs.
How to wash
It is clear that manicure brushes need to be kept clean. Only in this case will the tool last as long as possible. How to clean a brush? You can use nail polish remover. But this liquid negatively affects the quality of the pile. After washing the tools in this product, the villi become unruly, hard, or, on the contrary, excessively fluffy, which is also not suitable for creating a beautiful manicure.
In order not to think for a long time about how to clean the brush after gel polish, it is recommended to purchase a special composition. Reviews from craftsmen claim that after washing the brushes in a special solution, the period of use is extended and the appearance of the product is preserved for a long time.
Summing up
It is not enough to know how to choose the correct shape and softness of the bristles of the device for working with shellac. In order for the tool to serve for a long time, it is very important to know how to clean the brush from gel polish. Keeping your tools clean will not only create beautiful work, but also extend the life of your tools. When choosing suitable options, pay attention to the labeling. As a rule, shellac brushes are labeled according to their purpose. It is quite difficult to confuse this instrument with others. This category of products has a special shape, which is required for clear modeling and creating a manicure design. A good brush should be soft enough and made from natural materials.
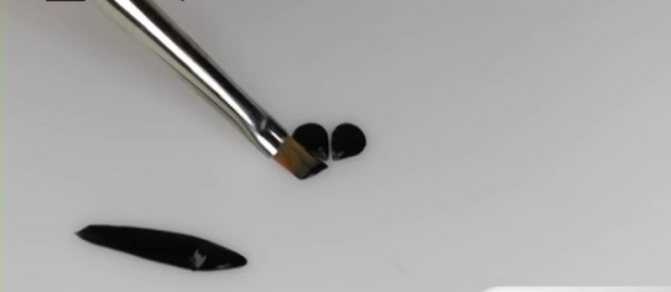
Beveled
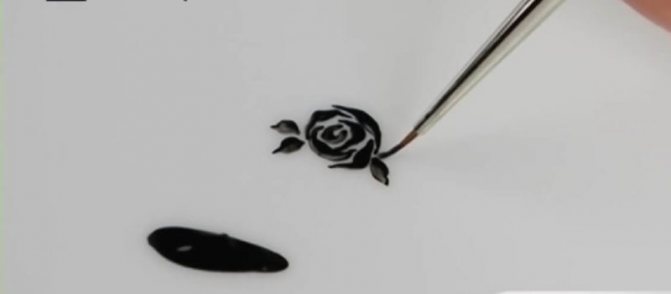
Using an angled brush and drawing patterns is quite easy. Choose a tool with a natural dome, which retains the paint on the tool longer, gently applies pigment to the nails and does not leave areas without painting. Be patient, practice a little and you will be able to draw no worse than in the salons. The main thing is to adhere to a certain technique:
- The resulting pattern depends on the method of applying paint. We dip the cut of the dome in thick acrylic paint, the rest of it remains clean. If you type too much, you'll end up with a bold, incomprehensible drawing, but we want graceful lines. Place the brush perpendicular to the surface and easily lower it onto the cut
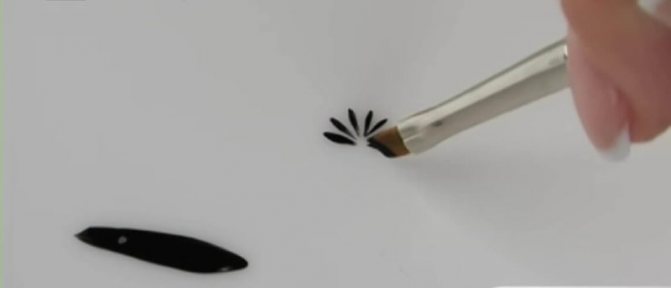
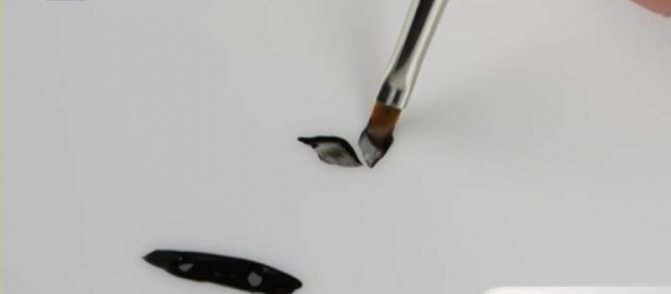
- Let's put paint on the brush in a different way. Let's put one of the sides of the dome directly into the paint. We apply this flat side to the surface and get the following element
- If you use the principle of applying paint from the first point, and place the brush on the cut with a little pressure and drag it a little, you can get an element for creating flowers
- Apply paint to one of the flat surfaces. We place the brush on the corner, while moving we lower it onto the entire surface with paint, and then lift it and finish painting with the corner of the brush
By varying the pressure on the brush we create the elements of the pattern. First, it is better to practice the technique on a stencil to learn how to feel the pressure and stroke of the brush.
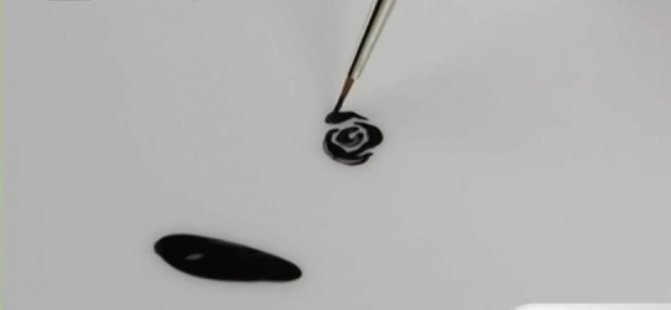
Brush Petal
Using the Petal to create floral designs is very simple because of the dome shape of the brush, which allows you to easily draw petals and leaves. We saturate the dome of the brush with acrylic gel paint and, using a simple stroke with pressure, stretch it over the surface of the nail.
Depending on the amount of paint collected and the degree of pressure, we draw elements of larger or smaller sizes.
Spot
The brush is used to make small drawings. The paint is applied to the tip, and the brush goes almost perpendicular to the surface.
By varying the pressure on the brush you can get small petals.
By combining pressure on the brush and arcuate movements, we obtain an element with which you can depict a flower.
The dotting brush is easy to use, and with some skill, it can replace several other tools.
Liner
A liner or hair is very convenient for drawing straight, thin lines. Paint is applied to the brush to its full length. Dip a tuft of lint into the paint and drag it through the paint layer several times on all sides.
Place the brush on the surface and drag. You will get a straight, long line. Depending on the required length of the strip, the brush is placed with the entire working part on the surface or partially.
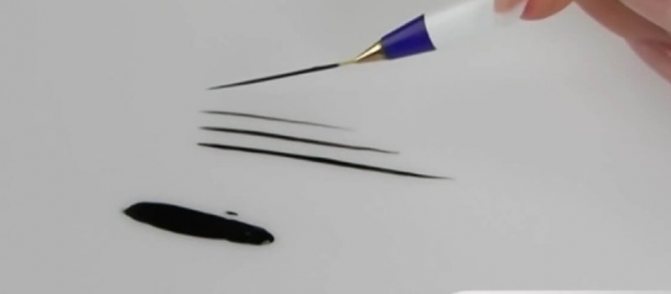
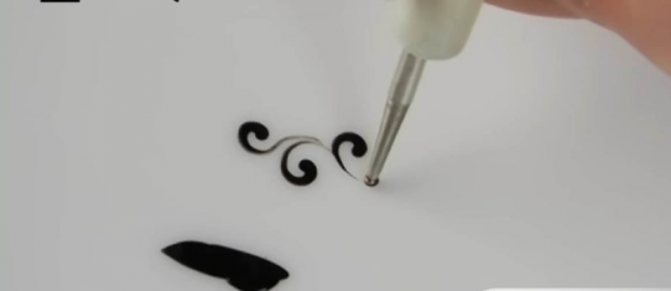
If you put paint on the tip of the dome, place the brush vertically and drag it with pressure, you will get a thin, elegant monogram. A combination of such elements can decorate the entire nail or complement the created design.

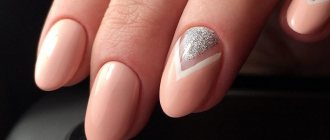
If you hold the brush at an angle of 30 degrees to the nail surface, it is convenient to carefully draw interlocking lines that can become part of a geometric pattern.
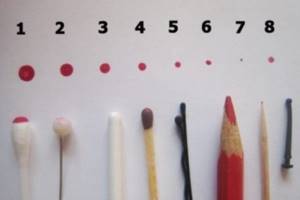
Dots
The main purpose of this tool is to put points. The size of the dot depends on the diameter of the ball. Used for design as an auxiliary tool. It is especially convenient to use for those who are not very good with brushes. With the help of dots you can create absolutely any drawing, fashionable abstraction. Let's look at the principle of use using a simple dot design as an example.
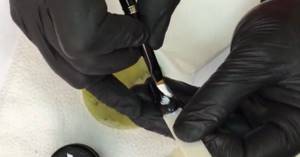
- We prepare nails with a hygienic manicure for the decoration process
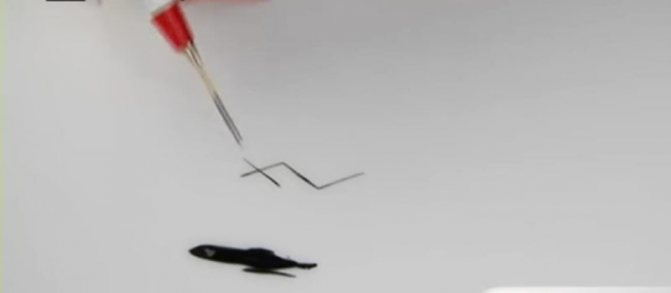
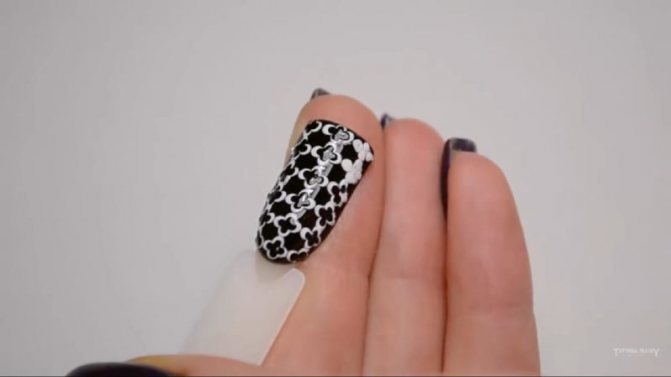
- We use black gel polish as a base. Apply pigment to the nails in two layers and dry in a lamp for 30 seconds.
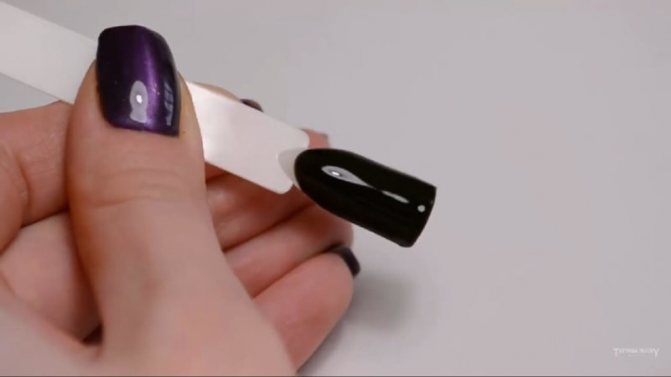
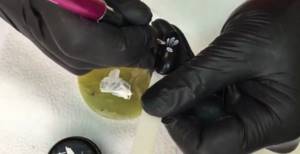
- We put white gel paint on the ball of one of the ends of the dots and put dots on the black pigment in the center of the nail from top to bottom. We used gel paint because it has a denser consistency, so the design will not spread
- Near every two points we place another point on each side. It turns out a series of peculiar cross-shaped flowers. No special skills are required to complete the design. With the help of dots, ideally shaped circles are always obtained, so you only need to pay attention to the symmetry and size of the dots
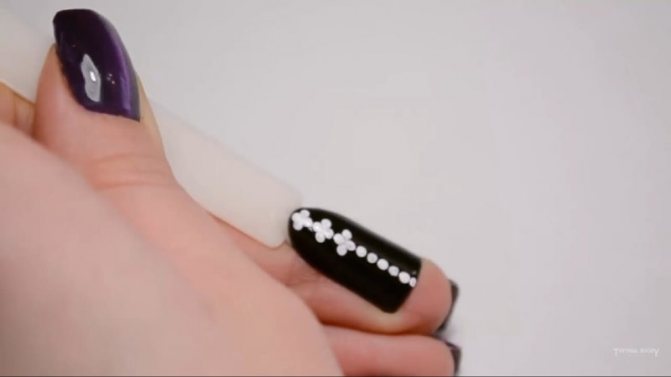
- We continue to place dots on the side surfaces of the nail. You can arrange them as in the photo, or in any order you want.
- We get such a lattice of white flowers. Dry your nails in a lamp for 30 seconds
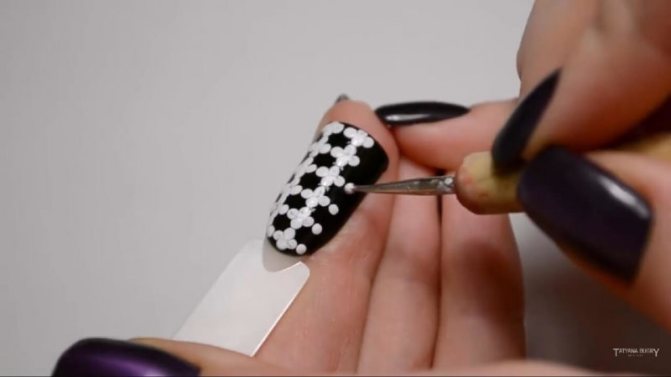
- Now, using a smaller tool, place black dots on top of the white dots. Of course, you have to dip dots into paint more often than with a brush, but getting uniform dots is much easier and faster
- Fill all the white dots with black splashes. Dry your nails in the lamp for 30 seconds. We cover the drawing with the finish and dry it in a lamp until completely dry. The pattern turns out to be very unusual, interesting, contrasting, and is made using ordinary dots
Using this tool like a pencil, you can create monograms.
Compositions made with dots are distinguished by their ease of execution.
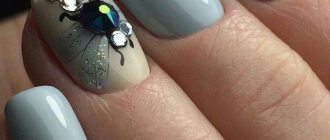
Gel spider and spider manicure
French gel polish
Perhaps the optimal combination of speed, durability and affordable price is French gel polish . This procedure is also most convenient from the client’s point of view:
- Fast (up to 1 hour).
- There is no unpleasant odor, as, for example, with acrylic extensions.
- The natural nail is not filed down when applying and removing the coating
- The coating polymerizes in a matter of seconds, no need to wait for it to dry.
Why does shellac from some artists last for weeks, while for others the coating begins to crack and chip off already on the third day? It's all about the subtleties and secrets of technology. For those who want to overcome peelings and delight clients (or yourself, if you do your nails at home), we have prepared lessons on French manicure with photos.
Prepare the client's hands
Remove the old covering and treat the client's hands with a disinfectant.
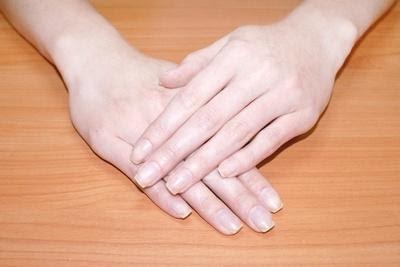
Prepare your natural nail
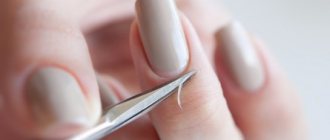
To prevent peeling at the base of the nail, carefully push back the cuticle with an orange stick. To make your work easier, apply Color Couture Entity One Cuticle Oil to the border between the nail and the skin. If the cuticle is very grown and dry, give the client a trimmed or European manicure.
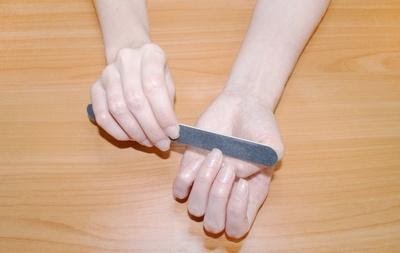
Shape the free edge of the nail
Using a CND Kanga Board natural nail file, shape the free edge into an oval or square according to the client’s wishes.
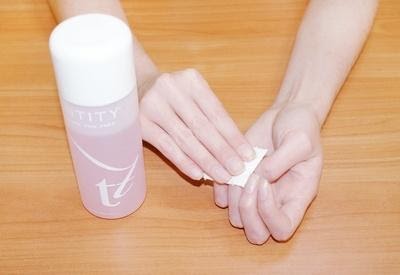
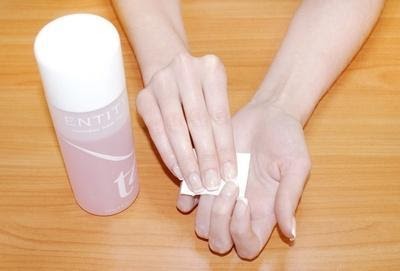
Clean and degrease the nail plate
Wipe nail plate with Entity One Natural Nail Prep using Graham HandsDown Nail Wipes. This stage is needed to remove dust from the surface after sawing the free edge, fat, cuticle particles and other contaminants. Only on perfectly clean nails does French gel polish last without peeling. Be careful not to accidentally touch the client's nails with your fingers after treatment. If this happens, wipe the nail with the product again.
If the client has so-called “wet nails,” then additionally apply Entity One Nail Dehydrator. How to identify such a detail? Ask her how regular polish holds up. If even professional brands of varnish “live” on the client’s hands for 1-2 days, then the reason may be the moisture of the nail plate. Treatment with a dehydrator in this case will help make the coating more durable.
Apply primer
The primer will increase the adhesion of the gel polish to the nail plate and extend the life of the manicure. To perform French with Entity One gel polishes, you can choose between the acidic Entity One Nail Primer - for healthy nails, and the acid-free Entity One Nu Bond - for weak and damaged nails.
Apply base coat
Entity Base Coat protects nails from staining with gel polish pigments, evens out the surface and has a positive effect on durability. Apply the base in a thin layer, making sure to seal the end of the nail. Cure the coating in a UV lamp for 2 minutes or 30 seconds in an LED lamp.
Cover your nail with camouflage
Apply 1 or 2 coats of Nude Fishnets Translucent Beige/Peach Camouflage Gel Polish from Entity One Color Couture. Cure each layer in a lamp - 120 seconds for a UV lamp and 30 seconds for an LED lamp.
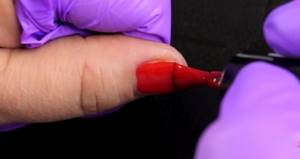
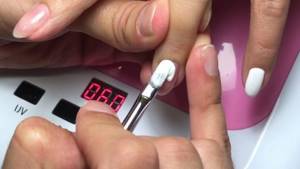
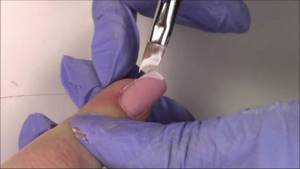
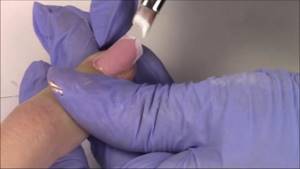
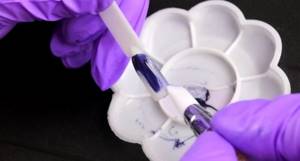
Use Entity One Spotlight Gel Polish to create a smile line, making sure to seal the end of the nail. It is better to make a smile in two thin layers, polymerizing each: this way the coating will lie smoothly and without bubbles. The lamp exposure time is the same: 2 minutes for a UV lamp and half a minute for LED equipment.
Masters disagree on how to paint a smile during a French manicure with gel polishes: with a brush from a bottle or with a separate thin brush? In fact, both methods have a right to exist. We have recorded for you a master class on French manicure with shellac, which shows both technologies for removing a smile. Take a look to make it easier to decide.
Treat your nails with a top coat
Entity One Color Couture, Top Coat provides additional protection against fading, damage and chipping, seals previous layers and extends wear life. Apply the top very thinly, not forgetting to cover the end. Curing time is the same as previous products.
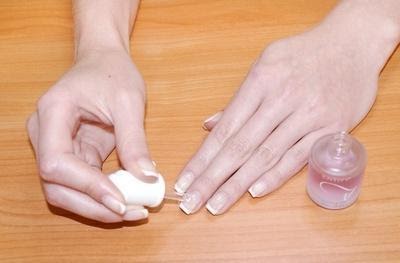
Remove the sticky layer
Entity One Nail Prep is suitable not only for preparing the nail plate, but also for removing the dispersion layer. Place liquid onto Graham HandsDown Nail Wipes and buff your nails.
Please note that the stickiness is removed only from the top, and it remains on the previous layers, which improves the adhesion of the layers to each other.
Finish your manicure with cuticle oil.
Cuticle oil Color Couture Entity One Cuticle Oil 15 ml will provide the skin with softening, nutrition and protection. The product is suitable for sensitive skin.
French manicure with gel polish is ready.
You can order all the products used in this master class in our store with delivery to all cities of Russia.
You will also need a base tone and a white Entity One color coat.
You can select them here:
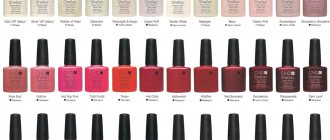
Are you using Shellac products from CND? We have made for you a review of shellac shades suitable for camouflage and a white smile, and photographed a manicure using them step by step. You can view the photo tutorial and ask any questions about CND products here.
If you or your client needs a French manicure on short nails , then be sure to watch our video tutorial on how to create the perfect French manicure on short nails.
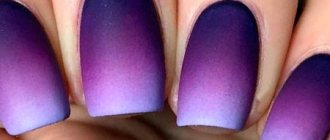
Fan
Using a fan brush, a gradient on your nails can be done quickly and very easily. For a gradient manicure, choose highly pigmented, dense varnishes. This will require fewer layers, which will have a beneficial effect on the final thickness of the nail plates.
- Apply background polish to the nail plate. If you need to apply several layers to cover the nail plate, then apply. Dry in a lamp for 20 seconds.
- On foil or on a palette, mix the background and dark varnish to obtain a medium shade, which we apply to the middle of the nail. This will be the transition area
- Apply dark polish to the tip of the nail
- We lightly moisten the fan brush in degreaser and sweep it over the surface of the nail from side to side in one place, without moving it. When we get the desired effect, we send it to dry.
- We repeat the procedure with the application of colored layers. The background color comes first, then the middle color and then the dark shade at the tip.
- Again, sweep with a brush until the desired result of the transitions appears and send it to the lamp until completely dry.
Openwork manicure - lace on nails
Silicone shapers
Silicone brushes are very convenient to work with. They can be used for both gel and acrylic, as well as simple varnishes.
The shaper allows you to distribute the pigment on the nail plate in a thinner layer than a brush does. Due to the fact that the silicone nozzle does not deform, sagging and accumulation of paint on the nail are eliminated.
With the help of a shaper it is convenient to work with natural cosmetic gold. Everything fits perfectly, rubs in, and in a thin layer. This tool is the perfect applicator.
It is convenient to work in the process of sculpting decorative elements of manicure, especially for inexperienced, slow craftsmen.
Silicone shaper brushes are a lifesaver for inexperienced craftsmen, and even for practitioners.
Preparation
To perform a manicure you will need:
- File.
- Orange sticks.
- Lint-free wipes.
- Degreaser.
- Buff for polishing the nail plate.
- Primer.
- Base and top coats.
- Gel varnishes (flesh and white for a classic design or any color of varnish for a colored one).
- Stencils for French manicure or a brush for painting nails.
- UV or LED lamp.
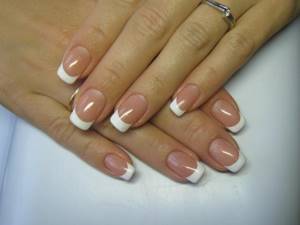
Photo of French manicure with gel polish
What to do if you don’t have brushes at hand?
Of course, you can only cover the nail plate with a brush, even the thinnest one. But when creating decorative nail art, you can use several life hacks if you don’t have the necessary brushes on hand. Dots can be replaced with almost anything. This could be a toothpick, a ballpoint pen, a safety pin, the tip of a cotton swab or hair clips and other available items.
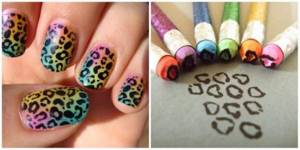
Cut or break the eraser on your pencil. You will receive a homemade stamp. Now just dip your eraser in any pigment and make a leopard print.
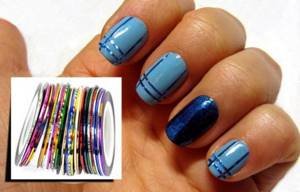
Patterns and lines on your nails can be made using stencils and manicure tapes.
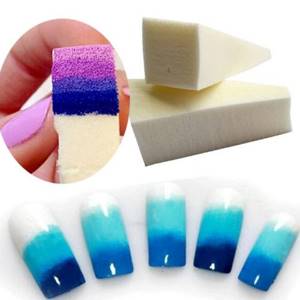
A fan brush for creating ombre can be replaced with special sponges for gradient, makeup, or a regular dish sponge.
Write in the comments if you liked the article?
Was it useful to you? What patterns do you like to make for your manicure? Comment
How to make an express French look with ready-made Dashing Diva tips
Do you urgently need a French manicure at home, but you don’t have a UV lamp and your drawing skills are failing? Keep on hand the new product from Dashing Diva - the new generation of Virtual Nails French false nails. In our video tutorial, we talk about this miracle product and show how you can “conjure up” a long-lasting manicure in a matter of minutes.
Another new product from this brand is French Wrap Plus tips. With their help, you will make an equally neat French jacket with your own hands, if you carefully look at our photo tutorial.