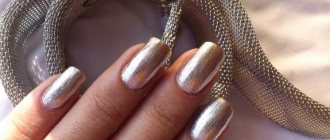
Ombre nails are another method of manicure treatment that has long been very popular among women. It’s not surprising, because the ombre method allows you to get an original look for your nails, and is also extremely simple to perform.
Read how to do a water manicure in this article!
Types of gradient manicure and preparation for it
Manicure using the ombre technique can be done in three ways:
Method 1
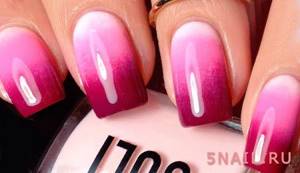
Ombre manicure with gel polish with a smooth transition from a light shade to a more saturated one of the same color. For example, from wisteria to plum color; or from pink lace to Mexican shade.
Method 2
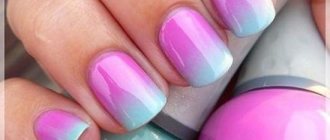
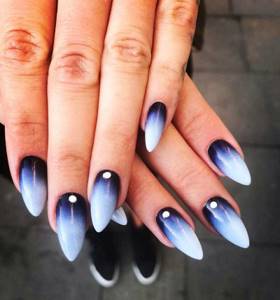
Make an ombre with gel polish, making a soft transition from one contrasting color to another. For example, from pink to blue, etc.
Method 3
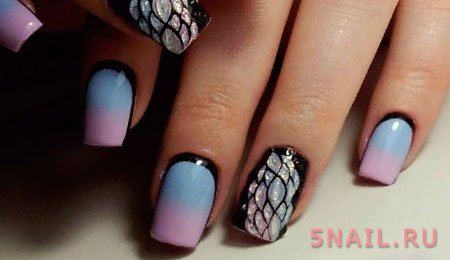
Make a gentle transition from one shade or color to another, not on each nail, but on all of them at once. That is, the gradient in this case manifests itself more extensively.
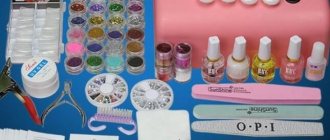
Before you make a beautiful ombre manicure at home, you need to perform basic preparation of the plate for applying a color coating to prevent chipping, peeling, and blistering of the enamel:
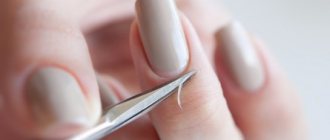
- Trim the length of the nails, paying special attention to the free edge so that there are no sharp corners left on it.
- Clean the top layer of the plate with a highly abrasive buffer. This is a mandatory step to ensure better adhesion of the base.
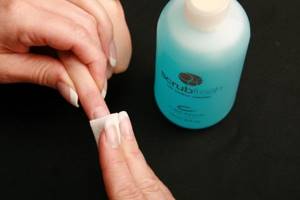
- Cover your nails with one layer of fresher (degreaser), the purpose of which is to remove excess moisture, sebum, and dust.
- Apply a layer of acid-free primer necessary for better adhesion of the plate to the gel polish.
- Cover your nails with a colorless base - it protects the nail from staining and also provides better paint adhesion. The base should be applied in a thin layer, slightly away from the side rollers, so that it does not run dry when drying. Dry your fingers in a lamp.
- After drying the base, you should remove the dispersion layer, which interferes with the uniform application of color and also contributes to its spreading.
- Make your chosen nail design. In our case, this is the ombre effect on the nails.
Which airbrush for nails is better to choose?
There are many models of airbrushes for nails in specialty stores. First of all, when purchasing, you need to pay attention to the manufacturer. Famous brands include:
- Sparmax;
- Iwata;
- Jas;
- Hansa;
- Evolution;
- Fengda;
- Air Nails.
The cost of professional airbrushes starts at an average of 3,000 rubles. Expensive models are the most convenient to use and allow you to achieve better results.
When choosing a device, you should take a closer look at its characteristics. To create a design on your nails, it is recommended to purchase airbrushes:
- with an air flow rate of 10 liters per minute and a pressure of 1.5-3 atm.;
- with a tank for 2 ml of paint or more;
- with a nozzle diameter of about 0.2 mm;
- with a compressor of 12 W and above.
Such devices will ensure the most uniform and smooth distribution of paint over the working surface.
In modern models, the compressor is activated automatically when the trigger lever is pressed. In budget outdated devices, it starts separately, and airbrushes make a lot of noise and vibrate, even if the working part is turned off.
Vertical transition of colors using a brush
Now let's look at one of the simplest gradients - vertical ombre manicure. To do this, you will need a wide flat synthetic brush and gel polishes of selected shades and colors. How to do ombre nails with shellac:
Step 1
After preliminary preparation, cover half the plate with the selected colors: make one part with one color, the second with another.
Step 2
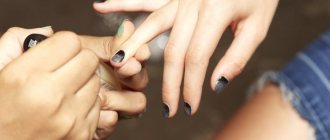
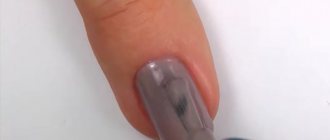
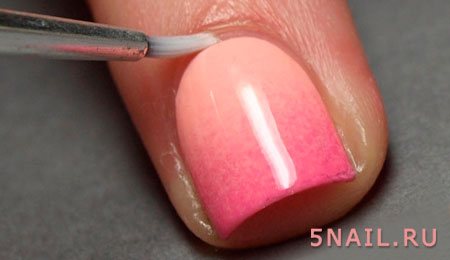
The brush that will be used to create the ombre effect with shellac should be moistened in a cleanser so that it is slightly damp. This will help make the transition smoother. You need to lightly, without pressure, move it from the base to the free edge. The movements should not end at any point, nor should there be a stop in the middle of the plate. After a soft transition effect is achieved, the fingers should be sent into the lamp.
Step 3
Reapply the second and third layers of enamel, be sure to go over the plate with a brush re-moistened in the cleaner, and dry each finger in the lamp. By the way, between stages of applying varnishes, the brush must be cleaned of paint by blotting it in a cleanser and wiping it on a napkin.
Step 4
When you are completely satisfied with the ombre effect on your nails with gel polish, you can cover the plate with top coat, dry your fingers, and remove the dispersion layer.
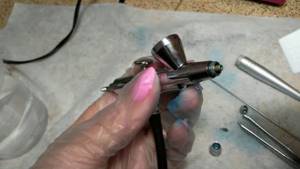
How to assemble an airbrush for nails
The paint sprayer is usually stored disassembled in a special case. Before you start creating a manicure, all parts will need to be connected. The algorithm may vary slightly depending on the airbrush model, but in general it looks like this:
- the gun is connected to the compressor;
- fix the hose through which air is supplied;
- Screw on the paint container if it is not integral with the body of the gun.
Pour a little ordinary water into the tank of the assembled airbrush and make several sprays. This is necessary to remove remnants of the previous pigment. Then the water is drained, the tank is wiped with a disposable towel and fresh paint is poured into it.
Advice! Before starting work, you need to test the airbrush on a sheet of paper and adjust the pigment supply and color density through the trigger.
Ombre foam sponge
To bring this idea to life, you will need a regular foam sponge. It must be cut into small pieces so that it is convenient to take one at a time and apply it to the plate. Many girls complain that this method of creating a gradient greatly stains the skin around the nail. But we know how to make an ombre manicure with a sponge as clean as possible. To do this, before the procedure you need to cover the skin with tape.
Now let’s look at the step-by-step process of creating a degrade using a sponge:
Step 1
After preliminary preparation, apply one coat of a base color, such as white, to your nails. Dry your fingers in a lamp.
Step 2
Place spots of two selected varnishes on the foil, one of them is the base one, the one with which the plate was coated. Using a needle, mix the colors in the middle. Then thoroughly soak the sponge in the diluted varnishes, make 2 gradient prints on the foil so that there are no bubbles on the plate later.
Step 3
Apply the gel polish with quick, soft, frequent, springy movements.
Step 4
Having achieved the desired effect, all that remains is to cover the plate with top and remove the stickiness with a cleaner.
How and how to wash your nail airbrush
From time to time, your airbrush needs to be washed, especially if it is used infrequently. The paint has time to harden inside the nozzle and in the tank, which reduces the functionality of the tool. You can tell that the system is dirty by the appearance of drops or characteristic “snow”—sticky pigment particles.
If you do a manicure with an airbrush for yourself occasionally, you need to clean it after each use before storing it. In a salon or home office, washing is carried out at the end of the day; with a dense flow of clients, the internal parts of the device do not have time to clog.
The choice of cleaning agent depends on the type of paint. If your airbrush uses acrylic pigment, you can wash the device with plain water. For silicone paint you need to take a special cleaner, for example, TEMPTU.
To clean the nozzle, simply unscrew its tip, moisten a brush in water or washing liquid and treat the area around the needle. Then the device is dried with a stream of air and the nozzle is fixed back.
Cleaning at the end of the working day is carried out more thoroughly. The procedure looks like this:
- blow the remaining pigment out of the nozzle onto a napkin or cotton pad until the air flow becomes clear;
- wipe the walls of the container with a small napkin;
- a few drops of water or a special liquid are poured inside;
- the nozzle is aimed at the napkin and the trigger is pressed several times in a row;
- pour a little more cleaner or water into the tank and turn on the compressor;
- press the trigger, after closing the nozzle with your finger, so that the liquid inside the tank bubbles.
It is better to clean the airbrush with disposable gloves.
Then you need to drain the water or cleaner, blow the remaining air out of the nozzle and repeat the entire procedure. At the last stage, remove the tip, pull the trigger so that the needle is completely hidden, and use a cotton swab to wipe the walls of the outlet hole.
Regular washing of the device allows you to maintain it in working condition. If the airbrush does not become clogged with paint, then it will not have to be completely disassembled to clean the dried pigment.
Smooth transition using acrylic powder
Let's look at another simple and quick way to make ombre nails, armed with fine-grained acrylic powder.
Apply colored enamel to the prepared plate and dry your fingers in a lamp. Cover the plate with a thin layer of top coat, do not dry, otherwise the powder will not adhere. Armed with a fan brush, as well as various colors of powder, begin to cover the plate with acrylic sand one by one. The transition between shades should be smooth, so when the shades meet, you need to lift the brush slightly up. To keep the coating smooth, you should periodically shake off your finger to get rid of unnecessary particles of powder. After tinting your nails, you need to put them in a lamp, and then fix the result with a transparent topcoat.
How to replace airbrush for nails
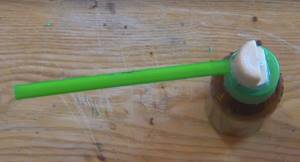
An airbrush is a rather expensive device. If you don’t have the money to purchase one, but still want to get a high-quality manicure, you can design a homemade coloring device.
The easiest way is to create an airbrush machine for nails using a ballpoint pen, a wine cork and a container for pigment. The diagram looks like this:
- the pen rod is removed and blown through, removing the writing part;
- make a corner from a wine cork and drill a hole in it;
- insert the plastic body of the handle into the prepared cork stand, and attach the rod to the bottom;
- the excess length is cut off with a knife, and a hole of a suitable diameter is drilled in the lid of the paint container;
- the rod is inserted into the bottle and the cork stand is secured with glue.
The entire structure can be assembled in just a few minutes. When using it, you don’t even need to connect a compressor; you just need to blow hard into the plastic tube.
This DIY alternative to a store-bought airbrush is good for creating a simple manicure.
Attention! Any homemade tool will be noticeably inferior in capabilities to a purchased device.
Common nail designs with degradation effect
You can experiment with gradient manicure as much as you like. This design will be appropriate everywhere: at work, a business meeting, a romantic date, a wedding, a birthday, and so on. The main thing is to choose the right shades correctly.
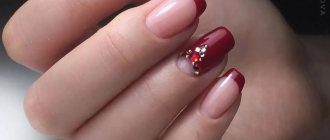
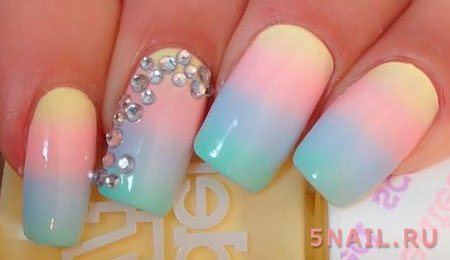
The baby boomer design or it is also called gradient French is very popular today. All kinds of nail ideas with this manicure allow you to create an interesting, cute look. For example, for work it is better to choose a discreet design without unnecessary decoration, and for some holidays or special occasions you can decorate your fingers with rhinestones and stones.
By choosing ombre shellac manicure, you can’t go wrong, because this is the type of coating that will last the longest.
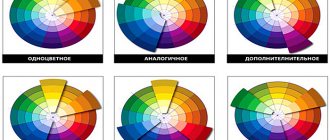
If you want to move away from soft colors and do an ombre manicure at home in a rich color scheme, then experiment. Choose varnishes of suitable shades, decorate your fingers with sparkles, bouillons, and rhinestones. Don't forget that the gradient visually lengthens the nail plate. And if you want to get a smooth transition, then make a stretch of analog colors, for example, in this combination: orange - red - brown; turquoise – green – salad; pink – red – burgundy, etc.
For those girls who love the classics, stylists suggest doing French nails
Warm colors are suitable for summer and spring design. And for the cold season, it is better to choose cool shades, for example, white with blue or blue. For a winter version of degrade, try doing a lunar manicure with a smooth transition of colors.
Now you know exactly how to degrade your nails in several ways: using a flat brush, a fan brush, a foam sponge, or acrylic powder. Choose any nail look from our collection, make different color transitions and surprise and conquer others with your impeccable manicure.
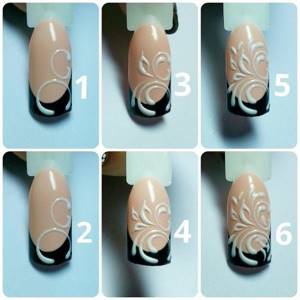
Monograms: execution technique
First step:
- Preparatory stage, during which you need to prepare your nails for painting:
- cuticle removal;
- creating a form;
- if possible, leveling the nail plate;
- degreasing the nail.
Second step:
- As the first layer, you can choose a plain or transparent base.
- After the nails are completely dry, you need to choose a drawing tool: a needle or brush, stencils or plates, stickers.
- The next step depends entirely on what exactly the monograms will be drawn with.
Third step:
- The drawing must be applied very carefully. When creating monograms by hand, you need to start from the side of the nail, slowly moving towards the middle or to the base.
- When painting monograms with gel polish, each element must be dried in a lamp.
- If desired, monograms can be decorated with stones, rhinestones or sparkles.
- The last step is to coat the manicure with a fixative for durability.
Don't miss the most popular article in the section: How to extend nails with gel polish. Nail extension instructions for beginners. Photo.