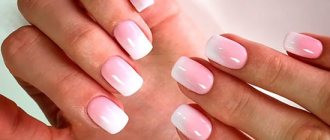
Gradient or ombre nail designs have been at the peak of popularity for several years now. It’s simply impossible not to fall in love with such a manicure, because there are many variations of the gradient with gel polish.
The first thing to start with is choosing the right color scheme. The color wheel will help with this. In order for the transition to be as smooth as possible, it is recommended to take colors that are next to each other, on the same line or 1-2 cells apart. A gradient can be made from two or three colors or more.

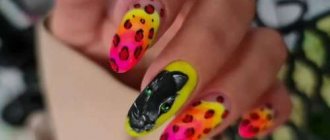
Contrasting colors are recommended to be mixed only through additional intermediate colors. All neon shades are made on a transparent base or with a milky base.
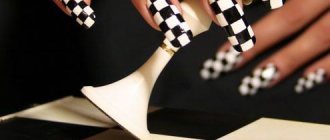
Degrade using a fan brush
A gradient on gel polish nails can also be done using a fan brush. This brush is thin and wide in shape, similar to a fan. Making such a transition from one color to another will result in a sharp roll, but this method has also earned recognition.
It’s easy to make a gradient nail design with gel polish using a fan brush:
- Apply the base color and dry.
- Drop the selected gradient varnishes onto the foil (the base one, which already covers the nails, and another one), mix them with a needle. Combine two selected colors on the foil. Apply the resulting tone with a brush to the middle of the nail.
- Apply a second color to the smile line. Take a fan brush soaked in degreaser and begin to actively sweep it over the nail, thus mixing the colors. Dry your fingers.
- Repeat steps 1 and 3.
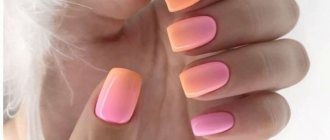
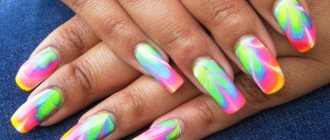
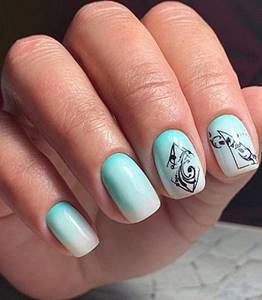
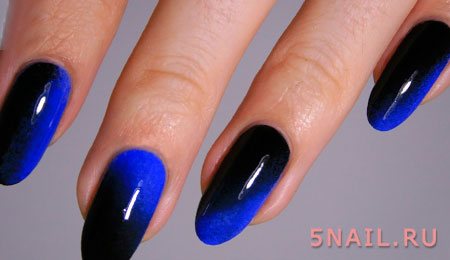
This is what a horizontal gradient made with gel polish looks like using a fan brush.
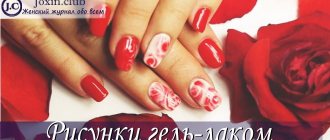
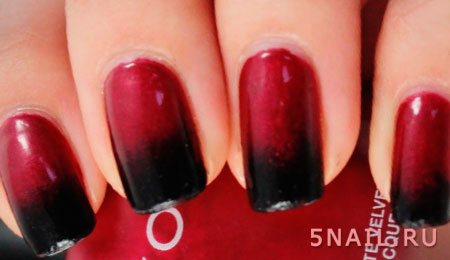
And this red manicure is suitable for sexy, ardent women.
Fashion trends
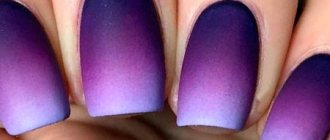
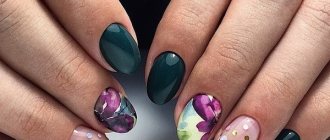
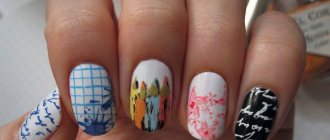
You can play with sharp and smooth tints of shades, add patterns, drawings and plant motifs. Geometric stripes, brush strokes on a matte or glossy background, and a combination of different coating textures will look original. A beautiful spring-summer outfit will be complemented by combinations of red, mint, lilac, orange, and coffee. Autumn-winter - done in cold colors - green, blue, wine, purple, black.
Glitter Gradient
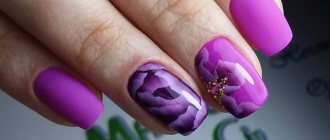
The technique of gradient manicure with gel polish is achieved by using pigments. After applying the base color and drying your fingertips in the lamp, you need to pick up a “petal” of glitter with a brush, apply a thick layer to the base of the nail, moving up to the middle of the plate. The pressure should be smooth. A dense layer of glitter is formed at the tips of the nails, gradually the pigment becomes thinner and ends at the base. This is how the color transition on the nails is achieved.
This coating looks very elegant even despite the shine and shine.
Tools and materials
To work you will need:
- Standard manicure set, including scissors, files, and cuticle tweezers.
- Degreaser or primer.
- Basic composition for creating a strong base for future manicure.
- Colored gel polishes.
- Top coating.
- Wooden toothpicks, foam sponge.
Performing degradation on nails with a dish sponge
An ombre manicure can also be done using a regular foam sponge. If anyone else doesn’t know how to make a gradient manicure at home using a sponge, then we hasten to explain the process of creating it:
- Paint your nails with colored paint and dry.
- Combine two varnishes on the foil.
- Blot the sponge well in the mixed palette. To avoid bubbles on the nails after applying a piece of washcloth to the plate, the first two or three prints with bubbles should be made on foil.
- After this, you can begin to transfer the gel polish with soft but quick movements. Repeat steps 1, 3 and 4 several times, applying new layers to the nails until the desired effect is achieved (often 3 layers are required).
- The final touch is to cover all the nails with top coat.
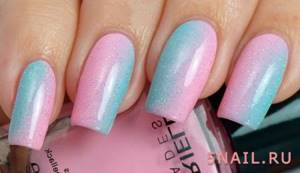
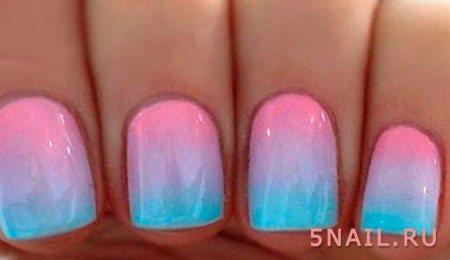
By making a transition from one color to another using this technique, you will get a gradual, soft and beautiful gradient. By the way, color transitions can be done both horizontally and vertically. To dilute the image a little and make it light, you can apply pea dots. And a vertical gradient in pastel colors looks cute and gentle even on long nails.
Tips for those who do ombre with a foam sponge:
- You need to choose a sponge with small pores.
- A foam sponge, even if it is clean, needs to be washed, dried and cut to make it convenient to work with.
- To ensure that the manicure looks decent and that sponge scraps do not stick to the plate, after washing, drying and cutting the foam rubber, you need to brush off all the debris from it with a brush.
- When doing a manicure with a color transition using a foam sponge, many girls stain the skin around the nail. To prevent this from happening, we recommend applying PVA glue or sticking tape to the skin around the nails before painting.
Using a fine brush
Creating a gradient with a brush is not difficult, but for everything to work out successfully, you should first practice not on your nails, but on third-party objects.
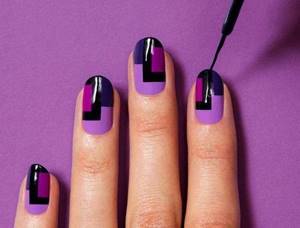
Graphic gradient with thin brush
Step by step creation of a gradient:
- Two (or more) colors are selected and applied in two stripes to the sanded nail. Varnishes should be applied in equal proportions.
- Take a brush (size zero), soak it in degreaser and squeeze it out.
- The brush is passed along the junction of colors, forming a smooth transition between them. The procedure can be repeated several times.
After each stroke, the brush must be thoroughly wiped with a napkin. There should be no lint left on it.
It is necessary to dry the coating thoroughly
Acrylic powder for ombre nail design
Another win-win option on how to make a gradient on your nails at home. To do this, you can use special acrylic powder. The technique is as follows:
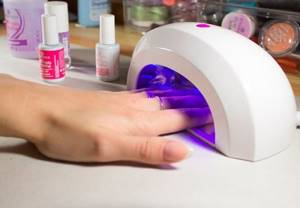
- Cover the plate with the selected colored varnish and dry it in a lamp.
- Apply a top coat; no need to put it in a lamp.
- Pick up acrylic powder with a brush and begin to slowly apply it to the base of the nail.
- Having reached the middle, lift the brush up to reduce the area of paint scattering. Periodically, you need to shake off excess powder from the nail into a jar so that the applied layer is even.
- Do the same with the selected second color for the rest of the nail.
- Send it to the lamp. Lightly sand the coating with a soft buff.
- Wipe off the dust from your nails again and apply top coat.
This is how you can quickly and easily create a manicure with a color transition using acrylic powder.
And this is what a matte nail gradient in gray and white looks like:

Knowing all the nuances of how to make a gradient gel polish at home using a fan brush, dish sponge, pigments, acrylic powder, you will be able to create interesting, stylish and unique nail looks. Feel free to use our photo ideas to create your own unique style.
Gradient manicure: video
Tags: nails
Market Analytics
- Top 10 Best Beauty Products in 2022
- Global cosmetics market 2022: an unprecedented test for the global cosmetics industry
- Top 10 Cosmetic Research and Development of 2022
Convenient search for beauty salons on our website
Beauty salons in Moscow Beauty salons in St. Petersburg Beauty salons in Ekaterinburg Beauty salons in Novosibirsk
Latest blog posts on our website
- Naturecream / Properties of the “Sunny” oil itself
- Naturecream / “Sugar” wrinkles - or what glycation can do
- Naturecream / Esterified oils
- Naturecream / Arnica - the magical plant of alchemists
- Naturecream / Tremella Extract - Snow Mushroom Detox for Skin
- Prostye-sovety / How to visually enlarge your lips with makeup
- Naturecream / Apricot kernel oil for face
- Naturecream / MATRIXYL3000 - the best skin elasticity stimulator
- Naturecream / SPF in Natural Oils
- Naturecream / Geranium (Pelargonium) oil for skin health and beauty
Latest forum topics on our website
- Natalya / How to properly make a gelatin mask?
- Mrs._Smith / Badly sunburned! What to do?((
- Ice / Is it necessary to combine fitness classes with a diet?
- Antonova / What can be used for hair loss?
- Radio operatorKat / Who was on a protein diet?
Other articles in this section
| Drawings on nails Drawings on nails can be done with acrylic paints, gel polish or shellac using a needle, brush, toothpick, stamping, water, tape, sponge and newspaper. If you are tired of a boring, monotonous manicure, it's time to familiarize yourself with unique design options that allow you to create beautiful designs on your nails. Some of them require professional skill, but many of them can be learned on your own. |
| Manicure on short nails Fashion trends in manicure today favor short nails. Just a few years ago, preference was given to long, well-groomed nails: they were carefully nourished and grown or lengthened in other ways, without neglecting the extension of nail plates using acrylic or gel. Today, natural manicure is popular, and caring for it is much easier. |
| Combined manicure Every girl chooses the type of manicure depending on her personal preferences, but combined manicure is becoming more and more popular. |
| Manicure for September 1st with a jacket September 1st is coming soon. Children will go to school, some even for the first time. And on this day you want to have a corresponding manicure. We offer you an interesting nail design with a jacket pattern for girls and boys. Your marigolds will be dressed in school uniform just like your children. |
| European unedged manicure An unedged manicure is a cosmetic nail care procedure that differs from a classic trimmed manicure in that the thin skin of the nail cuticle is not cut, but is moved and removed using special products containing fruit or lactic acid. Read our article about how unedged manicure is performed (it is also called European), what products and tools are needed for it. |
| French manicure French manicure is a universal nail design suitable for any outfit and occasion. French, like no other type of manicure, can make your hands well-groomed, graceful and neat. Read about the history of French manicure, its types and methods of execution in our article. |
| French pedicure (French) Beautiful, well-groomed legs are the dream of every woman. Delicate skin of the feet and neat, beautifully shaped nails are a real decoration, eloquently speaking about your desire for perfection in everything. Not even the most thoughtful look will be complete if you forget about the pedicure - unkempt legs will negate the impression of a beautiful outfit and spectacular makeup. This problem is especially relevant in the summer - the time for sandals and open sandals obliges us to carefully monitor the beauty of our feet more than ever. |
| Knitted manicure Knitted manicure on nails is a very interesting, relevant and fashionable solution. With the onset of cold weather, we so want to dress warmly and each of us remembers the sweaters carefully knitted by our mother or grandmother. Large, beautiful knitting makes the product incredibly beautiful, cozy and homely. And it is precisely this texture that modern fashionistas strive to depict on their claws today. |
| Laser treatment of nail fungus: pros and cons of the procedure According to statistics, nail fungus is the most common dermatological disease. It is also called mycosis or onychomycosis. It is not always possible to cure with tablets and ointments. In the first case, intoxication of the body occurs and there is a large load on the internal organs. Ointments are not always able to penetrate into tissues. Therefore, such therapy is often ineffective. Laser treatment of nail fungus is a modern and effective method. Thanks to him, in 95% of cases it is possible to cope with the disease. In the article we will consider what nuances you need to know about the procedure, what to pay attention to when preparing, whether there are contraindications and side effects. |
| How to choose and make the right nail shape The choice of nail shape directly depends on the shape of the cuticle edge and the length of the nail plate. A manicure can look completely different in each case. Choosing the shape of your nails is like choosing a silhouette in clothes: it will help hide imperfections, visually lengthen your nails, or vice versa, make your hands coarser and your fingers shorter. |