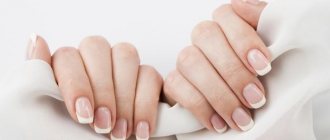
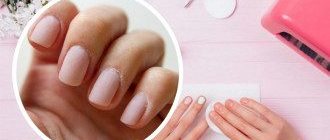
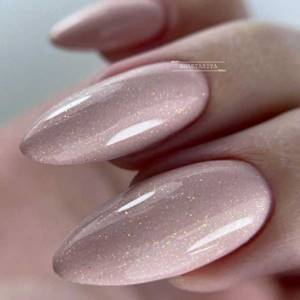
You want to wear a beautiful manicure with gel polish for as long as possible, but nothing lasts forever and the time comes to get rid of the decorative coating. To do this, it is better to visit a nail service specialist, but this is not always possible, so you need to know some of the nuances of the process.
Removing gel polish
You can remove gel polish with acetone at home if you follow some recommendations. When carrying out manipulations, it is worth remembering that this is an aggressive substance that does not adversely affect the condition of the nail plate. But until manufacturers have invented an effective gel polish remover without acetone, you have to be as careful as possible.
Phased withdrawal
Professional products
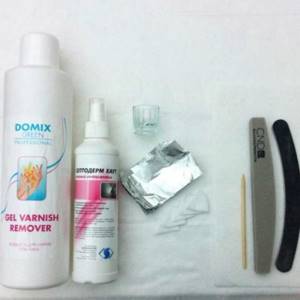
The most preferable option is to purchase a set of manicure products, which contains all the tools necessary to apply and remove gel polish at home.
List of funds:
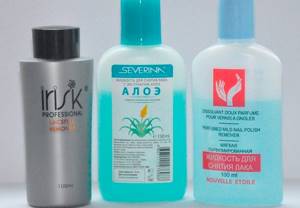
- Severina – efficiently copes with the removal of any coating. The process takes 10-12 minutes. An important advantage is the affordable price for most.
- Nano Professional is an effective, high-quality product that many professionals prefer to use in their work. Great not only for salon procedures, but also for removing gel polish at home. Effectively removes coating in 8-12 minutes.
- CND – one of the most popular global brands. It has a high price and maximum effect. Minimizes the impact of negative influences on the nail plate, while coping well with any coating.

- Solomeya is the most budget option from the line of professional products. The duration of the procedure is at least 20 minutes. The advantage of the product is the natural oils, vitamins and other caring components included in its composition.
Acetone
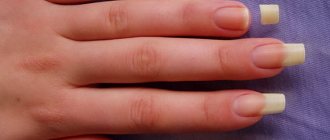
Some women are able to remove gel polish at home using regular acetone. But this should only be done if there are no other means. Acetone negatively affects the general condition of nails, in particular it dries them out greatly. If this has already happened, then it is necessary to restore the health of the nail plate with vitamin complexes.
It is permissible to use acetone only in a situation where it is part of the gel polish remover.
What to do after deletion
After the procedures, the nails are in any case weakened by the effects of acetone. In this regard, the plates and skin require special care after the procedure:
- use cuticle oil daily;
- nourish your skin with hand cream twice a day;
- once a week, use a rich cream, put on thermal gloves over it and leave it overnight;
- be sure to wear gloves when doing housework (washing dishes, etc.);
- do not forget to wear warm gloves when going outside in the cold season;
- After removal, it is recommended to take vitamins so that the skin and nails are fully restored.
The next application procedure can be done immediately after removal. It's okay if you continue to walk without covering.
Removing gel polish is a quick and easy process. The main thing is to remember the nuances of the procedure so as not to harm the nail plate. There is no need to go to a salon and pay money if you can perform the procedure yourself.
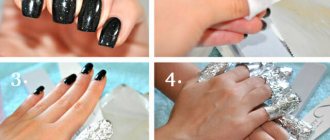
Alcohol or vodka
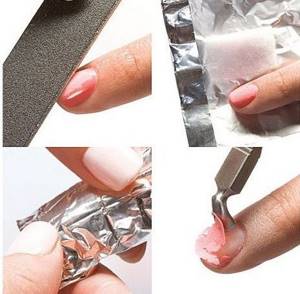
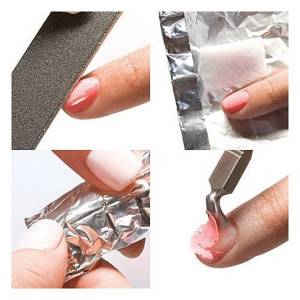
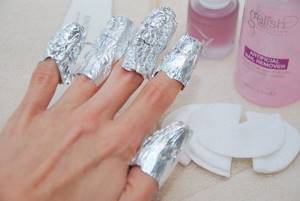
These substances do an excellent job of removing the top coating, but only if the correct proportions are met. Alcohol must be combined with water in equal proportions, vodka remains unchanged. To begin, blanks of cotton pads need to be moistened in the prepared solution and placed on the nails. To speed up the procedure, the fingers are wrapped and secured with foil.
After 17-18 minutes, the foil with cotton pads can be removed in the order in which they were applied to the nails. If the coating remains hard, then the procedure must be repeated again.
When removing gel polish, you must not use force, otherwise there is a risk of damage to your nails.
Don't miss the most popular article in the section: How to draw monograms on nails step by step for beginners. Instructions with photos.
How to properly remove the coating?
The process is quite simple. The step-by-step procedure is as follows:
- Use a sanding file to remove the top coat of shellac. This must be done carefully so as not to injure the skin. You don’t need to cut down a lot, a couple of millimeters will be enough. You only need to remove the shiny layer;
- Wash your hands with warm water, wipe dry;
- Generously lubricate the skin around the nail plates with rich cream;
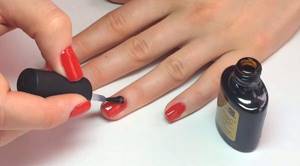
- Cut cotton swabs in half, divide into two halves, soak them generously in acetone or a special liquid, apply to the nail plates, press firmly. It is inconvenient to carry out this step on your own; it is better to have outside help. If there is none, first do the nails on one hand, then proceed to the other;
- After 15-20 minutes, carefully remove the cotton pads. Take an orange stick, pry up the coating, it should come off and come off in an even layer. It is very important not to forcefully remove the shellac to avoid damaging your nails. If the polish does not come off, re-wet the sponges and apply for another 10 minutes;
- After the shellac is removed, wash your hands and apply a protective varnish;
- Treat the cuticle with special oil.
At this point the process is considered complete.
Required Tools
To get rid of gel polish yourself, you don’t need complex and expensive tools:
- Coating remover. The easiest way to remove gel polish is with a special liquid. Manufacturers produce not only gel polish kits, but also products for their removal. It is enough to find out from the specialist the brand of the products he works with and purchase a liquid for removing the same production. If there is no special product, then you can get by with regular acetone.
- Foil. The most ordinary confectionery foil can be used. If suddenly she wasn’t at home, then a plastic bag or cling film will help with the procedure. In highly specialized stores you can easily find so-called “clothespins”. Thanks to their use, cotton pads soaked in a special liquid adhere more tightly to the nails, which speeds up the process of removing gel polish.
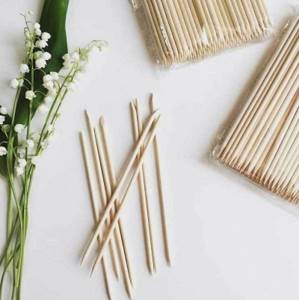
- Orange sticks. As an option, you can use a special metal pusher. It will not only carefully remove the remains of gel polish, but will also last a long time.
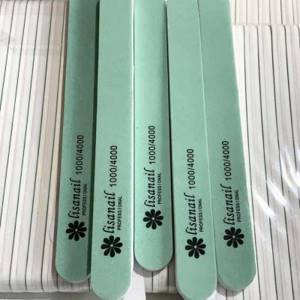
- Sanding file.
- Cotton pads (cotton wool).
- Cuticle oil.
We prepare the necessary materials
Before you start removing gel polish, you need to purchase all the necessary materials and equipment. So, for work we need:
- Sanding file. Please note that the abrasive should be no more than 180 grit, otherwise you will damage the nail plate;
- Special liquid for removing shellac. Of course, it is better to choose a professional remover, but you can only purchase it in stores with professional cosmetics or online, where fakes are often found. If you want to save money, stick to acetone;
- Cotton swabs for makeup removal or lint-free wipes;
- Moisturizing hand cream or oil;
- Orange stick;
- Cuticle remover oil.
Every girl probably has almost all the materials in her makeup bag. The only thing you may need to buy is acetone or remover. The first option is more budget-friendly. The average price of liquid is 40 rubles. But remember, there are negative aspects to using it:
- The procedure will last 15-20 minutes. And it’s not a fact that the varnish will completely become soft and be removed without any hindrance;
- Acetone can damage the skin around the nails, because in these areas it is very sensitive.
A remover can cost from 500 to 3000 rubles, it all depends on the manufacturer.
It is worth paying attention to the following brands: Severina, Cosmake, Domix Green. If all materials are prepared, you can begin the procedure itself.

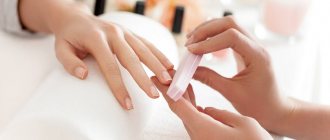
How to remove gel polish with remover
Not many people know how to remove gel polish at home in a way that minimizes damage to the nail plate. At the preparatory stage of work, you should thoroughly wash your hands and prepare your tools in advance.
For work you will need: foil, remover, file, cotton pads.
Instructions:
- First, using a file, you need to remove the top layer of coating. If there are three-dimensional designs on the nails, they also need to be filed down.
- Cotton pads are cut according to the shape of the nails. Each blank is treated with remover and applied to the nail plate.
- The top of the finger is wrapped in a strip of foil.
- The duration of the procedure will be 13-15 minutes, depending on the manufacturer of the product.
- After the allotted time has passed, the foil and cotton pads are removed from the nail with smooth circular movements.
- The gel polish on the nails is cracked and can be easily removed with a wooden stick.
At the end of the procedure, professionals advise applying a caring cream to your hands.
All ways to remove gel polish at home
You can remove gel polish in different ways, and they all have their own characteristics. We will look at each of them.
Removing gel polish with acetone
This is the simplest and most common method of removal. But it has its drawbacks. First of all, this has a negative effect on the skin. With prolonged interaction with liquid, nails, cuticles and the skin around the nail lose moisture and become dry and dehydrated. Also, sometimes the liquid can cause itching and an allergic reaction in the form of a rash. Another disadvantage is that if removed incorrectly, it is easy to damage the nail plate by removing not only the coating, but also part of the nail itself.
One of the advantages of removal using liquid is the availability of the method. Everything you need can be easily purchased at your nearest store.
How to remove gel polish yourself using liquid:
- Using a 100 grit coarse abrasive file, cut off the top layer of the coating. If the gel polish is applied thinly, you can only remove the shiny glossy layer before the color coating. If the nails are leveled with a base, then you need to cut off the glossy, colored and partially base coat. It's important not to overdo it. To do this, periodically brush off the dust with a brush and be careful whether you are sawing artificial turf or natural nails.
- Cut three cotton pads into 4 parts and soak each one in liquid.
- Cut 10 pieces of foil into different pieces. They should be enough for 2 turns around your finger. The pieces must be at least 10x10 cm.
- Place cotton wool soaked in the liquid on each nail and wrap it in foil so that the finger is completely covered.
- If there are caps or clips, secure the foil to your fingers.
- Time it for 15 minutes.
- After 15 minutes, start unrolling. Start with the little finger of one hand, don't remove everything at once.
- After removing the foil, carefully scrape off the gel polish with a stick or pusher. Do not try to remove all the unevenness, as this risks damaging the natural nail.
- Repeat the action on all fingers.
- Let your nails dry slightly for 5 minutes.
- Take a 180 grit file and use light, barely touching movements to remove any unevenness.
- Then, using a buff, moving from the edge of the nail to the cuticle, complete the removal.
- When your nails are more or less smooth, shake off the dust and polish your nails first with the green side of the polisher, then with the white side. You can use force. The presence of a squeak will tell you when the nail is ready.
- After the coating is removed, apply cream or wax to the hands and nails using rubbing movements.
- Then coat your nails with regular clear polish.
How to remove gel polish without acetone
You can remove gel polish from nails without special liquid and without foil. You can remove it with a nail file. The advantages of removing without a product include the fact that if removed correctly, the natural nail will not be damaged, and the skin near the nails will not lose moisture.

This method has a relative disadvantage. If you have not previously had experience in removing with a file, then it will be difficult for you to see where the coating ends and the natural nail plate begins. This means there is a risk of cutting off the excess, thinning the nails. Another downside is that when removing with a file, it is easy to scratch the cuticle. You need to act extremely carefully so as not to injure the delicate skin.
How to remove gel polish with a nail file at home step by step:
- File away the top gloss and color with a 100 grit coarse abrasive file. The file should be strictly parallel to the nail. In order to simplify the task, you can first file off the length of the nail. This way you can see how thick the coating layer is on the nail. The work area will also be reduced.
- When you reach the transparent base layer, visually assess the thickness. Turn the file over to 180 grit and, using gentle movements, begin filing down the base layer. Stop every few times and brush off the dust with a brush. It is important to see whether you are filing a gel polish or a natural nail.
- Stop when you reach your natural nail. If there is gel polish left in certain areas, remove the residue point by point, barely touching it, with a soft file or buff.
- Shake off all the dust and go over all the nails with a buff.
- Then buff your nails with the green side of the polisher. After this, turn the polisher over to the white side and repeat the process.
- Apply cream or wax by rubbing into nails and finger skin.
- Cover your nails with clear polish.
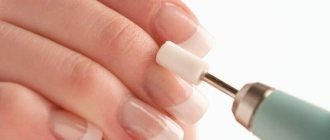
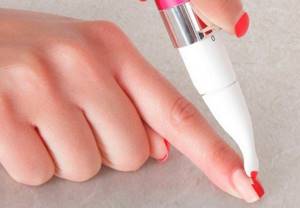
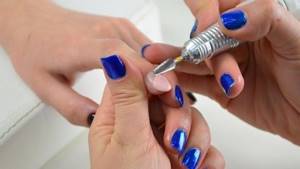
Manicure machine
The optimal method of removal is the device. But the removal will be successful only in skillful hands, or if the technology is followed. Therefore, we strongly recommend visiting a specialist who has the skills to use the device. If this is not possible, then follow our recommendations.
One of the disadvantages of removal with a device is that the cutter heats up, and removal can be quite uncomfortable, causing a burning sensation. But if used correctly, this should not happen. If there is a strong burning sensation, then most likely the removal is not happening correctly. Also, if you use the device ineptly, you can seriously damage the nail plate. Due to incorrect pressure, you can saw through grooves on the nail plate.
The undeniable advantages include the speed and convenience of the method.
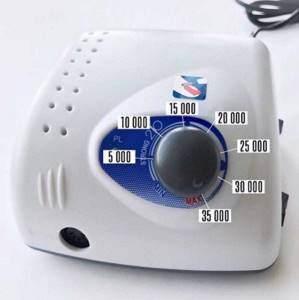
To remove the coating with a machine, you will need a powerful machine and a carbide or ceramic cutter for removal.
Left-handers will need a special reversible cutter.

How to remove gel polish with a machine:
- Insert the cutter into the handle of the device and close the clamp.
- If you are left-handed, switch the device to left rotation, if you are right-handed, switch to right rotation.
- Turn on a low speed of 5-7 thousand revolutions and bring it to the surface of the nail. Check to see if the cutter is sliding on the nail. It should kind of stick. If it slips, switch rotation and check again.
- After the correct rotation is established, turn on the device at 30-35 thousand revolutions. To do this, you need to turn the speed regulator almost to the maximum.
- With barely touching, confident movements, move from the cuticle to the edge of the nail. Do this at a moderate speed. If the nail gets very hot, it means your movements are too slow. Or it could mean that you are in one place for a long time.
- Follow the above steps on all nails until a thin layer of base gel polish remains on the nails.
- When a thin layer remains, you have a choice: remove it or leave it. If you are planning further coverage, you do not need to cut off the remains. And if you want to take a break from the coating, you can carefully remove the layer with a file, or leave it to grow on its own, simply covering it with a clear varnish.
- If you decide to let the base layer grow out, buff your nails with a buff and polisher before applying regular polish. And then degrease the nail plate with alcohol or a special degreaser.
Gel polish remover wipes
Wipes are not much different from a foil compress with a soaked cotton pad. Well, maybe just convenience. Their downside is that they are less effective and often only work on very thin surfaces. By the way, they will cost more than removing liquid.
One of the advantages is that the gel polish will still be removed from the nails. And also ease of use. For this method, you do not need to cut, measure, or soak anything. You just need to tear off a piece and place your finger inside the bag of liquid. The greenhouse effect is achieved due to the foil layer inside.
How to remove gel polish using napkins:
- File off the glossy finish with a 100 grit file.
- Place the marigolds inside the napkins for 15-20 minutes.
- Take out the nails one at a time and remove the excess with a tool convenient for you.
- Let your nails dry for 5 minutes.
- Sand your nails with a buff and then with a polisher. First with the green side, and then with the white side, until the characteristic creak.
- Moisturize your nails and skin with cream or wax.
- Cover your nails with clear polish.
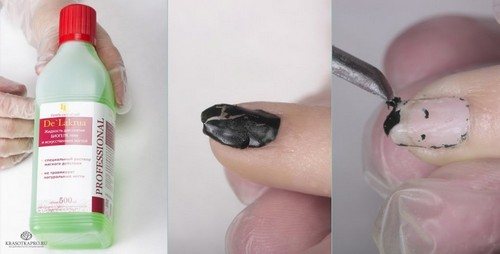
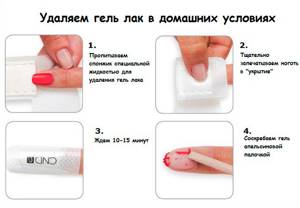
How to remove with acetone and foil
Not many people know how to remove gel polish at home using acetone and foil. However, this option is the easiest and most affordable. The main disadvantage is that acetone is very drying to your nails.
For the procedure, you need to prepare a product with acetone, cotton pads, foil, and a nail file in advance.
Instructions:
- Using a file, cut off the top layer of varnish. This stage will reduce the duration of the procedure.
- Then you need to give the cotton pads a shape as close as possible to the shape of your nails. This is necessary to reduce the likelihood of acetone getting on your skin.
- Then thoroughly soak cotton pads in acetone, place them on your nails, and then wrap your fingers in foil.
- To speed up the process, it is recommended to periodically massage your fingertips.
- After 18-22 minutes, you need to remove the foil along with the cotton pads and look at the result. If the gel polish remains on your nails, you can try to remove it with a wooden stick. Otherwise, the procedure must be repeated again.
To protect the skin from the negative effects of acetone, it is advisable to lubricate it with nourishing cream or Vaseline.
How to remove strengthening gel polish
Removing reinforced gel polish yourself is much more difficult than a simple coating. Of course, it is best to contact a specialist, but if you have read this far, then you probably intend to do it yourself. We will try to help you with this.
To begin with, forget everything we told you about acetone removal. When strengthening, it is strictly forbidden to soak the coating. This will cause a lot of damage to your nails, and you will most likely end up with painful, tissue-thin nails. To remove the reinforcement, you will need a device or, in extreme cases, a file. Removing a simple coating using a dry method is no different from removing reinforcement. To remove the reinforcement, use our instructions above.
The only caveat is that it will take more time to remove the reinforcement. Also, we do not recommend removing the thin base layer. After all, if you apply strengthening, it means your natural nails are weakened. In this case, it is better to cover your nails with clear varnish or gel polish, leaving a protective layer.
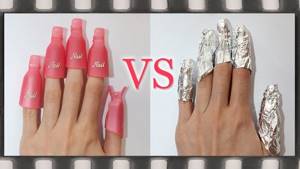
How to replace foil
Experts suggest how to remove gel polish at home if you don’t have foil. The best option is to use cling film. It, like foil, does not allow the chemical to evaporate quickly.
You can replace cling film with a regular plastic bag.
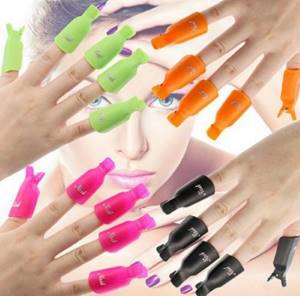
In this case, you need to wrap the bag around your nails and secure it with tape. If desired, you can choose silicone caps in any specialized store. A little product is poured into them, and then they are put on the fingers. These caps are suitable for repeated use, they are easy to wash and store.
A bath is the fastest method of removing gel polish. Pour a chemical remover into a small bowl and then completely immerse your nails in it. 6-8 minutes are enough to get results. But this method has significant disadvantages: firstly, it may cause irritation on the skin, and secondly, it seriously wastes the product.
Removing shellac by other means
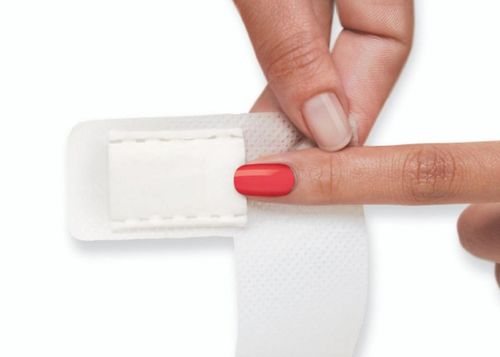
If you do not want to use foil, a logical question arises: what to replace foil with when removing gel polish? You can remove gel polish without foil more quickly using special standard-sized branded wrappers. They are impregnated with shellac remover and simply slide on each finger. After the time recommended by the manufacturer of the branded wraps, they are removed from the nails and the gel polish is removed with orange sticks. This method is much simpler - you don't need to cut out foil for each finger.
How to replace foil if there are no branded wrappers? Use a medical plaster instead, which is found in every home medicine cabinet. Removing gel polish without foil is carried out according to the above scheme. If you decide to use only improvised means to remove shellac, before using acetone, you must generously lubricate the skin around the nails with a rich cream so as not to damage the delicate layer of the epidermis. Acetone vapors are not safe for the skin, and the wrap should be performed for at least 10 minutes. During this time, delicate fingers may suffer, no matter which side of the foil you seal them with, and the cream will protect the skin from penetration of acetone.
Useful tips
Gel polish is an excellent long-lasting nail coating that is not that cheap, since applying shellac requires a starter kit and an ultraviolet or LED lamp. If you can afford such a manicure, then you should acquire special means for removing gel polish in advance, and experiment less with your nails, using, for example, liquid without acetone instead of branded compounds.
To prevent unwanted consequences and not spoil your nails and skin on your hands, you should listen to the advice of manicurists:
- Gel polish cannot be removed simply mechanically. The base layer is securely attached to the nail plate, so the nails will be damaged by the sharp side of the tool.
- Which side you use to remove gel polish with foil does not matter, since foil is used to soften the gel polish without access to air. It doesn't matter which side you turn it on.
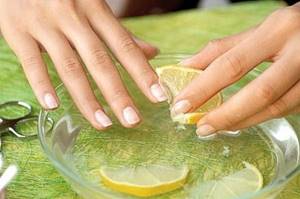
- After the procedure, use restorative creams, apply baths with iodine and lemon (a few drops each). You can immerse your hands in them for 15 minutes to nourish your nails.
- If you don’t know what to replace foil with, you can use regular cling film - it also does not allow air to pass through. It doesn’t matter which side you wrap it around your finger.
- To remove gel polish, orange sticks can be replaced with a plastic manicure pusher.
Listening to the authoritative opinion of nail service professionals, every owner of beautiful nails can remove shellac on her own. But still remove shellac with means, compositions and devices that are intended for this.
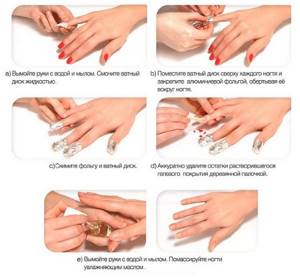
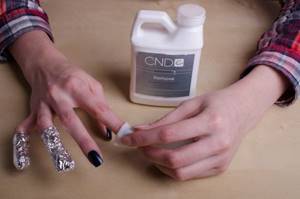
How to remove with nail polish remover
At home, it is advisable to remove gel polish with a special product from the company that the master uses in his work. But it is not clear how to solve the problem if this information is unknown. Below is a universal method used by most women at home.
To remove gel polish you will need the following tools:
- foil;
- cotton pads (cotton wool);
- acetone-containing nail polish remover;
- wooden stick;
- sanding file.
Having prepared all the necessary tools in advance, you can proceed directly to the coating removal procedure:
- At the beginning of the procedure, you need to remove voluminous patterns and top gloss from the nail plate.
- Cotton pads are divided into blanks. Each piece is completely dipped in nail polish remover, placed on the nails and wrapped in foil on top to secure it.
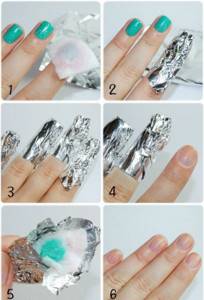
- The duration of the procedure will be 17 minutes. Then you need to remove the foil and cotton wool from each nail.
- Gel polish remaining on the nails can be removed using a wooden stick.
- If you have difficulty removing the coating, professionals advise repeating the procedure again.
- After the remnants of gel polish are completely removed from the nail plate, it is recommended to sand the surface of the nail with a polishing file.
Don't miss the most popular article in the section: How to extend nails with gel polish. Nail extension instructions for beginners. Photo.
Shellac removal procedure
Sometimes, instead of foil, to remove gel polish, they use adhesive tape, caps, or manicure bottles, into which remover is poured and fingers are dipped for a while. The entire process of removing the old coating with foil can be divided into three main stages, each of which can be done at home:
- Preparatory step. The top top layer of gel polish must be sanded to give the remover good access to the decorative and base coat. Remove the fixing topcoat using gentle movements with a nail file.
- Nail wrap. For this you need foil. How to use it? You should first prepare small pieces of foil from a roll, then moisten a cotton pad in the remover, apply the size to the nail plate and wrap it in foil, creating a “greenhouse effect.” The foil size is approximately 7x7 cm.
- Cleaning your nails. About ten minutes after wrapping, the nails can be freed from the foil. Softened shellac can be easily removed with orange sticks or use a manicure spatula instead.
After completing the procedure, nails and cuticles can be treated with a nourishing cream. The process of removing gel polish using foil takes a little time, and doing it at home will not be difficult.
How to remove with a special device - cutting
This method is considered by experts to be the most gentle and fastest. For the procedure you will need a special apparatus and 2-4 files of varying hardness. The gel polish remover is similar to a small drill or sander. It comes complete with several attachments: from the hardest (metal) to soft.
Using hard attachments, remove the main part of the gel polish. Soft ones are used at the final stage of work - when polishing the nail, while processing the cuticle. At the preliminary stage, it is advisable to practice on plastic or false nails. Then you can get to work. Gel polish should be filed off carefully and without haste. You should start with the hardest bit.
You can remove gel polish using special attachments.
After cutting down the next layer, they move on to softer nozzles. Elbows should be in a fixed position. As an addition, you can use nail files, but then the procedure will take longer.
Tips for fashionistas
Use our tips for cleaning gel polish off your nails.
- Process and perform the necessary manipulations first with one hand, and then with the other. This will make it more convenient for you.
- Cotton pads save your liquid to dissolve hardened gel and cause less damage to the skin and cuticles.
The above methods and methods for removing shellac from nails will help you quickly and efficiently remove the annoying coating. Will keep your nails healthy and beautiful.
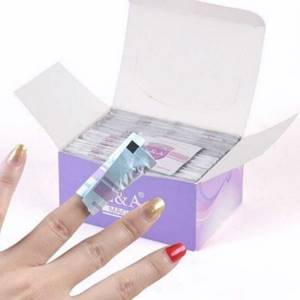
How to remove with special wipes
Not everyone knows how to remove gel polish at home using special wipes. However, napkins are sold in any specialty store. Each wipe is soaked in acetone and stored in a small sealed bag. At the beginning of the procedure, use a file to remove the top layer of gel polish. Afterwards, a thick layer of thick cream or Vaseline is applied to the skin around the nails.
After carefully tearing the edge of the bag, take out a napkin and wrap it around your nail. To secure the napkin, you need to put the bag on top of your finger. After 17-22 minutes you need to check the result. If the gel polish is in place, you can try to remove it using an orange stick. Otherwise, the procedure must be repeated again.
The main disadvantage of the method is that there is a high risk of drying out the nail plate.
Advantages of gel polish over other coatings
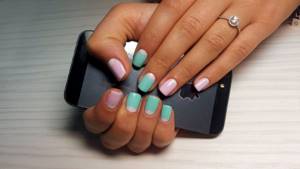
- Gel polish is very durable. The average duration of wearing such a coating is 2.5 weeks.
- It is unlikely that it will peel off or crack ahead of schedule.
- The only reason why you need to correct your manicure with gel polish after 2 weeks is for the nail to grow back. It doesn't look aesthetically pleasing. Toenails grow slower, so a pedicure based on it lasts up to 4 weeks.
An overgrown base of the nail looks unsightly, so manicure is usually renewed every two weeks. - Gel polish dries in a UV lamp in a few minutes. Thanks to this, the procedure time is significantly reduced. Conventional coatings dry naturally, which is very long and inconvenient.
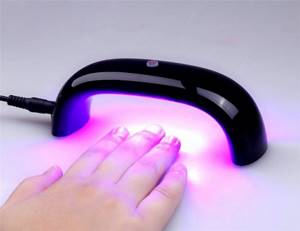
Gel polish is dried using a special UV lamp - There is no need to file the nail plate before application. This is the main advantage of the product over other coatings.
- You can apply a regular coat over the top if you want to play with the colors. Then remove the top layer using acetone. This way you can change your nail color quite often. This will not damage the gel polish.
- With the help of gel polish you can bring almost any idea and design to life. This cannot be done with a regular coating, since it takes a long time to dry and the design may be smudged. Thanks to the gel, craftsmen can create complex and voluminous patterns in just an hour.
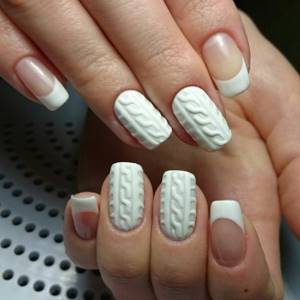
A manicure with a voluminous pattern can be easily achieved using gel polish. - It prevents nail splitting. Also, thanks to the coating, the plates become more durable and bend less. Due to this, nails grow faster.
- It cannot be removed in the classical way.
- The gel can even be applied to extended nails.
Shellac is an innovative coating that usually costs more than gel polish. The main advantage of the first is that no special means is required to remove it. However, before applying shellac, you need to pay special attention to degreasing the nail plate, which is not always convenient.
Which method is the most gentle?
Not every specialist can answer how to remove gel polish at home so as to minimize damage to your nails. And this despite the great popularity and demand for the technique of coating nails with gel polish. Each of the proposed options has its own characteristics. Basically, specialists combine techniques to obtain the fastest possible results.
In this case, minimal damage is caused to the nails. The whole process is as follows: the top and main layers of gel polish are removed with ceramic and diamond milling attachments, and the base coat is removed using a special liquid. As a result, the duration of the procedure is no more than 5 minutes. This method reduces the risk of possible damage to the nail plate.
Types and properties
Shellac, in its production, uses a strong base. Special substances are added to it to increase durability and strength. Thanks to this mixture of the necessary ingredients, it was possible to ensure that the manicure can last up to three weeks or more. They remove shellac from nails only because they grow quickly and the appearance of the manicure is catastrophically deteriorated from this.
Shellac has fundamental differences from varnish, both in composition and in the method of application to the nail plate. Here you need to have special devices and certain skills in working with shellac. It does not tolerate mistakes and requires maximum accuracy and smoothness in movements. By following these rules, you can get a beautiful and neat manicure. In order for the shellac to harden and take its final form, it is allowed and even necessary to dry the nails under the light of an ultraviolet lamp.
Nowadays, shellac is the most durable nail coating, which also comes in many different colors. This helps fashionistas easily create unique looks using manicure and pedicure. Shellac is also considered a good alternative and, most likely, can easily replace technology such as nail extensions.
This is an environmentally friendly technology that does not contain harmful substances that can harm or destroy the nail. All girls choose this coating for its harmlessness and ease of application.
Why is it difficult to film?
Causes:
- Gel polish remover . It is advisable to choose a product from the same manufacturer as the gel polish. If the company is unknown, then you can use nail polish removers with acetone or products from other manufacturers. But then the procedure time will increase significantly, because each product has a certain exposure time.
- Coating manufacturer. Experts identify a number of companies whose gel polishes are difficult to remove. In this case, it is recommended to first saw off the top layer, and then use the product.
- Best before date. If the expiration date is coming to an end, using such a remover is strictly prohibited. But you can find other uses - for example, using it to clean a manicure lamp.
- Nail design. If there are large volumetric designs or sparkles on the nail plates, then this complicates the gel polish removal session. Experts advise cutting off the design first, and then proceeding directly to treating the nails with liquid.
- Thick layers. When covering your nails, each layer should be applied in a thin layer. This will not only make it easier to remove gel polish, but will also reduce the drying time of your nails.
How to remove gel polish at home
First, let's figure out what kind of helpers we can turn to when removing the coating ourselves. It can be:

Special liquid for removing gel polish. It is suitable for removing thinly applied gel polish or its residues. We strongly advise against using liquid to remove reinforced coatings. She is not able to soften acrylic and gel, but often girls who tried to soak the reinforcement then try to remove it. And orange sticks, pushers and files are used. Which literally tear off not only the coating, but also the layers of the nail plate. Of the 150 layers of keratin that a healthy nail has, at least half are torn off when removed incorrectly.
Attention! The liquid can only be applied to the prepared nail plate.
It is better to buy the liquid in specialized nail stores. Ordinary hardware and cosmetic stores usually sell liquids of rather dubious quality. The average price of 200 ml liquid is about 200 rubles.
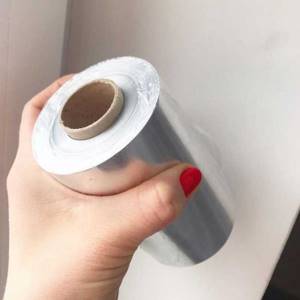
Foil. It is needed to wrap each finger on which cotton wool soaked in liquid is placed. This retains the heat and chemical properties of the liquid. Without foil you won’t get a 100% result. The foil can be any kind, both professional and food grade. We advise you to take food, as it is cheaper and more accessible.
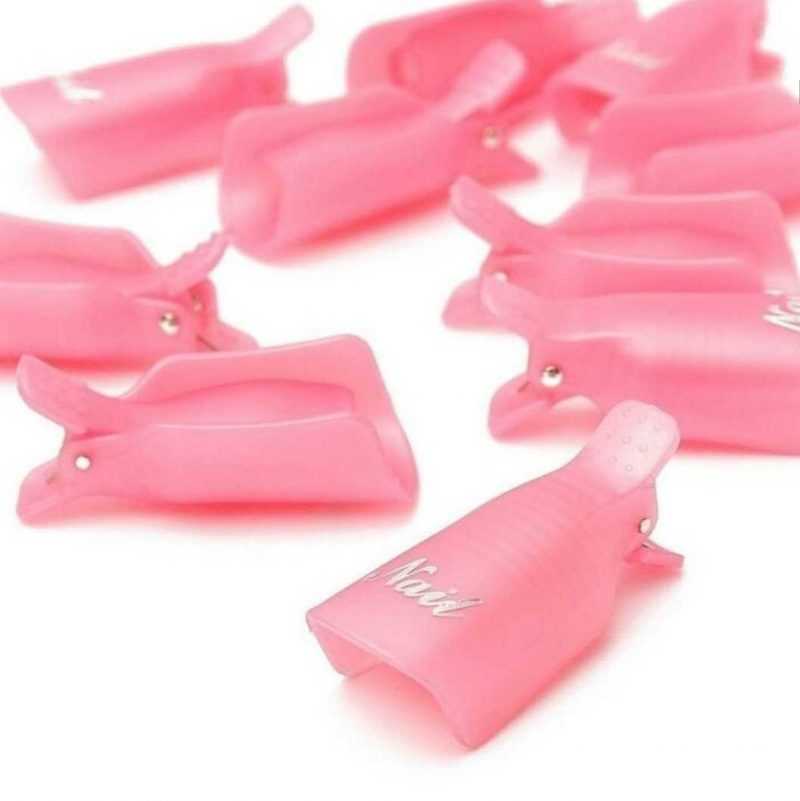
Caps/clips. These are special devices that help secure structures made of foil and cotton wool on the nails. In fact, their use is not necessary. But if you have no experience with removal, caps and clips will make your first experience easier. If you still don’t have this tool, just wrap the foil tighter, cutting off a larger piece.
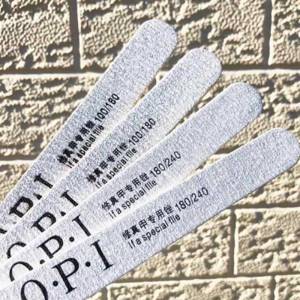
File 180/100 grit. This is a must-have tool when removing the coating yourself. Use a file to file off the glossy top, and if the nails are thick, cut off the color and part of the base. This way, the liquid will be able to penetrate deep into the applied gel polish, but the nail will remain intact. In addition, you can remove gel polish without liquid, only with a nail file.
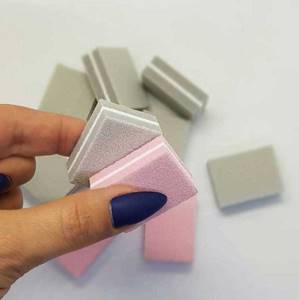
Buff. This is a small foam cube or rectangle with a rough surface. Its effect is similar to a file, but the buff has a much softer effect than a file. It must be used after removal.
Polisher. The polisher is also very similar to a file, but it does not have any obvious abrasive or dusting effect. Typically, the polisher is green on one side and white on the other. Its coating is so fine that it is difficult to notice with the naked eye. The polisher takes effect after applying the buff. Using a polisher, you can hide unevenness and roughness and add shine to your nails.
Orange stick/pusher. They are needed to scrape off the remnants of the soaked coating from the nail.

A device with a special cutter for removal. Not everyone can boast of having a powerful device, however, it cannot be ignored. This is the most reliable and optimal assistant for removal.
Why is it filmed?
Gel polish coating lasts ideally for at least 2 weeks, regardless of the brand and price. Otherwise, it is necessary to identify the causes of coating detachment. Experts divide them into 2 categories.
Physiological features:
- Soft and fragile nails lead to a reduction in the period of wearing gel polish. In such a situation, the solution to the problem is to carry out procedures to strengthen the nail plate.
- Excessive hand moisture negatively affects the wear quality of the coating. The problem is eliminated by using an acid primer immediately before applying the base coat.
- Irregularities on the nails reduce the wear time of gel polish. Experts recommend straightening the nail plate before starting the session.
- Some diseases of the body lead to peeling of gel polish: diabetes, hormonal imbalance, disorders in the nervous system, taking potent medications. When other causes can be ruled out, you should pay closer attention to your body.
Incorrect application technique:
- The most common reason is poor cuticle processing.
- Unsatisfactory degreasing of the nail plate. Sometimes standard nail polish remover is used as a degreaser. But experts recommend purchasing a special product that is used specifically for gel polish coating.
- Insufficient baking of each layer in the lamp. Be sure to follow the instructions for the lamp.
- One of the layers is applied too thick. In this case, the coating will peel off in less than 2 weeks. Each product should be applied in a thin layer and dried thoroughly under a lamp.
Other methods and means
A very pressing question is whether it is possible to remove shellac with a liquid without acetone. This product is effective for removing regular nail polish, but it cannot cope with silk, so you should refrain from using it.
However, there are several products and methods available that can effectively remove shellac coating.
Many people are interested in whether it is possible to remove shellac with acetone or a solvent intended for household use. Such substances are excessively aggressive towards the nail plates and skin surface, so using a solvent or technical acetone is highly undesirable.
A more gentle substance than a solvent is isopropyl alcohol, which is widely used in medicine and is often included in personal hygiene products. To remove shellac with this alcohol, you will also need cotton pads and pieces of foil. However, you can do without foil - it will be effectively replaced by cling film that does not allow air to pass through.
You should use isopropyl alcohol in the same way as other products - professional remover or regular nail polish remover.
- soak cotton pads with alcohol;
- attach them to the nail plates;
- secure tightly with foil;
- after fifteen to twenty minutes, remove the cotton pads;
- rub nourishing oil into the surface of the nails.
How to make gel polish removal easier
To simplify the procedure for removing gel polish, experts suggest using several tips:
- It has been noticed that removing gel polish is more difficult if your hands are cold. In this case, your fingers can be warmed up in advance using a heating pad, hair dryer or UV lamp.
- Many gel polishes are easier to remove if you remove the top layer at the preliminary stage using a file or cutter. Afterwards, you can begin the usual soaking with a special agent using the wrapping method.
- The foil with remover must be removed step by step from each finger - remove the remaining gel polish and only then move on to the next finger. Otherwise, the remaining gel polish will harden again in air.
The most harmless way: remove shellac without acetone
Acetone and its use in gel polish removal procedures often leads to brittle nail plates. The attractive appearance of nails is lost. What substance can help in this case? Liquids that do not contain strong softening substances are powerless or ineffective. Such compositions only make the manicure less shiny, but shellac does not disappear anywhere.
To replace acetone, there is an excellent shellac remover - remover. This product is a very effective way to remove gel polish, and can only be found in special stores. The remover does not have a strong odor like nail liquid and in addition has a mild effect on nails. Typically, such nail care products contain useful elements, substances and vitamins that help keep your nails in good and healthy condition.- Isopropyl alcohol also works well for removing shellac from nails. This fairly inexpensive product can easily be found at any hardware store. It fights well against manicure and removes it quickly.
Additional Information! Isopropyl alcohol is a very concentrated liquid. Inaccurate use may harm the skin near the nails. Use this product with caution.
Try to minimize contact with the skin as much as possible. Watch the time and do not keep isopropyl alcohol on your nails for more than 25 minutes.
To remove such a complex coating, special tools are required. We use the easiest way to remove shellac coating from the surface of the nail plate. This helps significantly reduce the negative impact on nails.
Toolkits:
- special liquid for dissolving shellac;
- sponges in the form of pockets;
- orange sticks for cleaning the surface.
Procedure:
- It is necessary to degrease your hands. A simple way is to wash with soap.
- Treat sponges with liquid to dissolve shellac
- Place your finger in the special pocket for your finger. The special part with liquid should be on the surface of the nail.
- Zip the pocket tightly. The sponge should be well fixed.
- After 10 minutes, remove the covers. The shellac peels off, and the soft parts are simply removed with the flat end of a hard stick.
Additional Information! These manipulations produce minimal negative effects. Thus, shellac is removed much better. This method allows you to protect the entire surface of the nail plate without a buffer.
Tips and precautions
Precautionary measures:
- Chemical gel polish removers often cause an allergic reaction. When the first negative signs appear, you must stop using this or that product.
- The procedure must be carried out in a well-ventilated area. Due to the specific odor, the products can negatively affect the body as a whole.
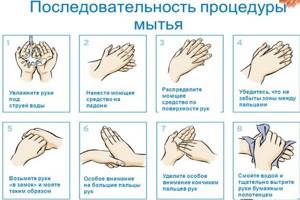
- Before starting the process, you need to thoroughly wash your hands with soap and treat them with an antiseptic. This stage will eliminate the possibility of infection if the cuticle is suddenly injured.
- If possible, you should avoid using metal tools when removing gel polish. They interact chemically with various agents. It is best to use orange sticks or wooden spatulas.
- Experts recommend not using technical acetone. This leads to the formation of burrs.
- The nail plate must be handled very carefully during the removal procedure and immediately after. Due to chemical exposure, it becomes soft and easily injured.
Removing gel polish at home is a process in which there are a lot of nuances. If you take them into account, this will allow you to avoid wasting time and money on visiting a specialist.
Nuances:
- The main mistake made by those who remove gel polish at home is putting excessive pressure on the nail plate while removing the remaining coating. As a rule, this leads to damage to the nails. To avoid the need for this, just soak the cotton pad again with a special liquid and wrap it around your nail.
- If at home you not only undergo the removal procedure, but also apply gel polish to your nails, you can use a little trick. To avoid any difficulties when removing the varnish, before the first layer, apply a regular transparent varnish to the center of the nail.
- After removing gel polish at home, your nails should be provided with comprehensive care. Excellent cuticle oil. It will soften irritated skin and provide nails with intense nutrition.
What you need
Before you start washing the coating, you need to prepare. This will help minimize the risk of damage to your nails and skin. In addition to acetone you will need:
- Cotton pads or gauze (bandage), or any fabric that needs to be cut into small pieces;
- Foil - regular food foil is suitable, it is also cut into several parts;
- A spatula for pushing back the cuticle - it will scrape off the gel polish;
- Buff or file with medium-sized grain;
- Any fatty cream;
- Cuticle care oil;
- Strengthening nail coating.
Foil on fingers
It is also advisable to prepare a bath with warm water and add chamomile decoction to it. It will soothe irritated skin and nail plate.
Nail care after removal
Recommendations:
- Balanced diet. To ensure that your nails remain strong and strong after the gel polish removal procedure, you need to adjust your diet. The daily menu should include a complex of vitamins, minerals and proteins. This diet helps restore metabolism.
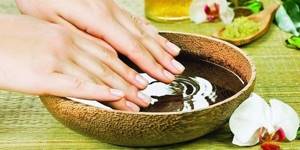
- Olive oil baths. Olive oil will perfectly help strengthen and restore thin, damaged nails. Pour olive oil into a shallow container, heat it in the microwave to a comfortable temperature and place your hands in the bath. The duration of the procedure is 12-14 minutes. The result is noticeable within 6-8 days with daily use.
- Baths with sea salt. Sea salt helps to quickly strengthen nails and prevents them from splitting and brittleness. In a bowl with warm water you need to dilute 20-25 g of sea salt. Keep your fingertips in this solution for 10-12 minutes. At the end of the procedure, be sure to apply a caring cream to your fingers. Experts recommend using such baths once every 3-4 days.
- Berry mask. One of the most famous methods of strengthening nails after removing gel polish is a berry mask. Experts recommend choosing sour berries: red currants, cranberries. The berries must be crushed to obtain a homogeneous mixture, then apply the mixture to the nails, securing with polyethylene or cling film. After 17-20 minutes, rinse your hands with warm water. The acids contained in the berries will give your nails a healthy and shiny look.
- Lemon juice. Lemon juice is great for removing split nails. To do this, you just need to rub freshly squeezed lemon juice into the nail plates using your fingers or cotton pads. After 2-3 minutes, it is advisable to apply a nourishing cream to each nail to consolidate the result.
You just need to follow professional recommendations when removing gel polish at home, according to experts, and then you can save time and money on visiting the salon and keep your nails healthy.
Article design: Oksana Grivina