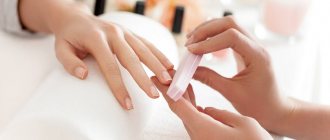
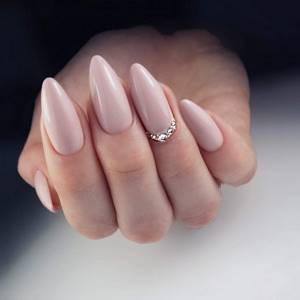
A beautiful manicure is the “calling card” of a well-groomed woman. Without neat, aesthetic nails, it is unthinkable to look elegant and chic.
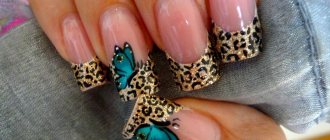
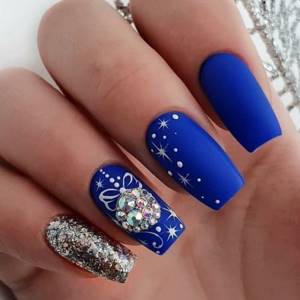
But, alas, natural material is not always pleasing. For one reason or another, not every woman can boast of strong, strong nails that can be grown to give a fashionable shape. And if you want something special, for example, an edgy, fashionable shape with a long length? There’s really no choice here: only build-up.
But it may happen that you need to urgently remove your nails, but there is no time or opportunity to visit a specialist. In this case, all hope is only in your own skillful hands.
Is it possible to remove extended nails yourself correctly?
Before you figure out how to remove extended nails yourself, and whether this can be done at all, a few words about what materials they are made from.
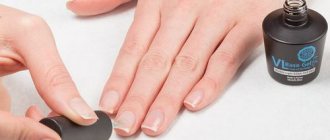
Nail extensions are, in fact, “sculpting” them from special polymer materials: acrylic or gel.
Interesting!
Both acrylic and gel are acrylates - polymer materials. The difference is in appearance and features of working with these materials. Each of them has its own advantages and disadvantages, so you need to choose based on specific conditions.
The advantages of acrylic include:
- less dust during operation;
- strength;
- low shrinkage;
- possibility of repair;
- the ability to remove it using a special solvent;
- plastic.
It also has disadvantages:
- smell;
- dullness;
- tendency to yellowing.
In turn, the gel boasts the following advantages:
- aesthetic appearance;
- hypoallergenic;
- no odor;
- resistance to chemicals.
The disadvantages include the following:
- fragility;
- impossibility of repair;
- dust from working with materials;
- reaction to temperature changes (frost or bath).
So, we have found out the main differences between the two materials for nail extensions. Both of them are a plastic mass, which then polymerizes and thus hardens: acrylic - under the influence of heat, gel - under a UV lamp.
To remove nails, the master dissolves acrylic in a special liquid, but simply files off gel nails, because they do not enter into chemical reactions, which means there is no way to dissolve them.
Application of the device
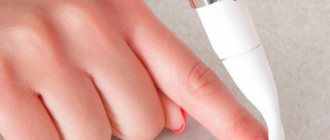
You can remove extended nails using a grinder. It has a rotating head with an abrasive surface and replaces a conventional file to remove the built-up layer.
The device has the following attachments:
- Fine-grained. Clean natural nails from artificial coating residues.
- Coarse-grained. They are used to thin the built-up layer at the initial stage of its elimination.
When working, do not press the attachments too hard, otherwise you can damage both false nails and your own nails, which will become brittle in the future.
Removing gel polish with a device
When shortening artificial plates, their free edges can fly off, injuring the eyes. To prevent this, you can use glasses or place your hand in a transparent plastic bag.
Rules for self-removal of artificial nails
The main thing is to clearly understand that acrylic and gel nails are removed differently. In the first case, you need a solvent, in the second - special files.
You also need to stock up on time and patience and follow simple rules:
- read the detailed instructions on how to remove extended nails;
- prepare all the necessary materials and tools;
- take your time, be careful;
- be sure to carry out restoration measures after removing the extended nails.
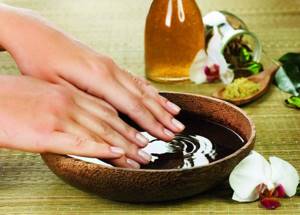
Preliminary stage - preparation
During the procedure, all necessary materials and tools must be at hand.
What you will need to remove acrylic nails:
- Special solvent for acrylic. Sometimes it is recommended to use nail polish remover with a large percentage of acetone, but I advise you to use this product only if you find yourself on a desert island, you desperately need to remove acrylic from your nails, and you have nothing on hand other than acetone. Still, acetone greatly dries and damages nails, and it is also a toxic and extremely volatile chemical compound that is not at all good for health.
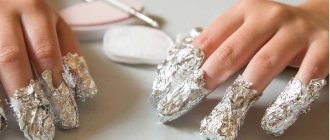
- We will make some kind of “compresses” from the liquid, so we will need material support - cotton pads and foil. I recommend preparing pieces of foil in advance that are long and wide enough to wrap around your fingertips. Cut them generously.
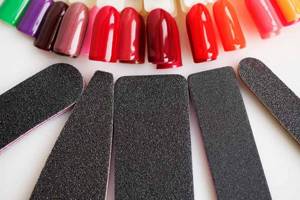
- A rough saw to cut off the top layer of material.
What to stock up on to remove gel nails
The gel will have to be cut off first and then filed away, which means you will need nippers and files:
- For the top layer - highly abrasive (less than 180 grit).
- Further, as you approach the nail, you need gentler files.
There will be a lot of dust during the cutting process, so you will need glasses and a mask.
Removing shellac
This type of coating cannot be removed mechanically, using abrasive materials, or cut down. The plate can be injured, and then inflammation of the periungual bed will occur. Nails will become brittle, weak, and grow slowly. Shellac cannot be removed with any solvents. The effect of exposure will be insignificant, and the nails will be damaged by the chemicals.
To remove the coating at home you will need to prepare:
- special solution for nail polish remover;
- cotton swabs and disks;
- aluminum foil;
- orange stick.
The disks must first be cut in half, and 10 rectangles must be prepared from foil to wrap the fingers.
Sequencing:
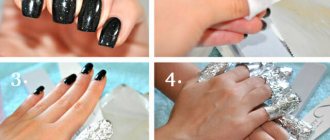
- Wash your hands with water and liquid soap to degrease the skin.
- Soak a swab in nail polish remover.
- Place it on your nail, wrap it in foil, and secure with a rubber band.
- Leave the product for 15 minutes, remove.
- Polish your nails with a polishing block (buff) or a nail file.
The varnish should be removed using rotational movements. The bulk is removed immediately, and the remainder is removed with an orange stick. It can be replaced with a spatula designed to push back the cuticle. If the shellac has not completely left the nail plate, then the procedure must be repeated.
In order to prevent dry skin and thinning of the plates, it is recommended to apply cuticle oil with massage movements.
Removing acrylic nails
So, the time has been booked, the materials and tools have been prepared, let’s begin!
We begin the process of removing acrylic nails by cutting off the top layer with a coarse file. After the top layer is removed, the nails are no longer so strong, and you can begin to soften them.
Softening acrylic nails
To remove acrylic, you need to dissolve it with a special liquid, but this is not varnish; it cannot be removed in a couple of seconds.
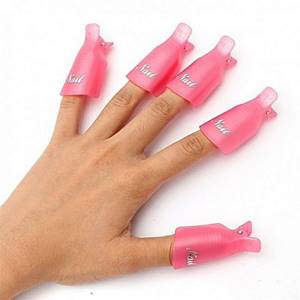
Therefore, we moisten a cotton pad with liquid, place it on the nail and wrap it with foil or put on clips. This is necessary to ensure that the liquid does not evaporate too quickly.
Care after removing the artificial layer
When working, the top layer of nails is always damaged, so it is not recommended to cover them with varnish for 6-7 days. The plates should be restored using the following methods:
- Rub in any essential oil. The procedure will prevent splitting and make your nails healthy.
- Paraffin baths. They allow you to restore plates after damage quite quickly. The product thickens and “seals” them.
- Using biogel. The coating protects from the negative influence of the external environment.
- Nourishing masks based on natural products. They accelerate the restoration of the structure of the plates.
No special effort is required to remove artificial nails, but you must strictly follow the algorithm for removing them.
How to remove gel nail extensions yourself at home
You will have to tinker with the gel. This material is solvent resistant, so it needs to be cut down.
Important!
Wear safety glasses before starting work. In the process of cutting off the free tip of the nail with tweezers, pieces of hard material will fly in different directions. It would be completely inappropriate if such a fragment flew into the eye.
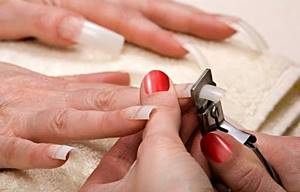
After the nails are shortened, take a coarse file and file. We saw for a long time, patiently. It is better to stick an adhesive plaster on the fingers with which you hold the file, otherwise you will get calluses.
When a thin layer of material remains, wipe the surface with acetone to assess how much gel is left, then take a smaller nail file and buff the nail.
Important!
A thin layer of gel coating can and should be left on. By filing everything too hard, you risk damaging your nail, it will become thin, brittle, and you may even get injured.
Errors when removing the coating:
- Wrapping all fingers on both hands with solvent at once. If you don't have an assistant, it will be difficult.
- Failure to comply with the exposure time of the liquid to dissolve the acrylic.
- Using too rough files.
- Overzealous filing of the gel can damage the natural nail.
- Neglect of protective equipment when filing nails (masks, glasses).
- Lack of care after removing extended nails.
Useful tips
In order for the acrylic removal procedure to be successful and as safe as possible, you need to familiarize yourself with the nuances of its implementation.
- During the initial shortening with a clipper, it is important not to cut at the root. Radical shortening results in skin wounds under the nail, which causes bleeding. In this situation, there is a high risk of infection. Leave at least 2 mm of free nail.
- Before starting work, it is necessary to disinfect all manicure tools with alcohol. Hands are washed thoroughly with soap and antiseptic is applied to nails.
- When using acetone or products based on it at home, you need to ventilate the room well, since inhaling its vapors has a negative impact on health.
- Instead of acetone, you can use alcohol to soften acrylic. Some try to use hot water as a working fluid. The effectiveness of this method has not been confirmed.
- Skin protection should not be neglected when treating with acetone. This is especially true for fingers with burrs and other microdamages. For the safety of the nail plate and hand skin, the exposure time in acetone should not be exceeded.
- If you experience pain during acrylic removal, you need to stop the procedure and make an appointment at a nail salon.
- Sometimes, simply rubbing the cream into the nail plates is not enough. More effective results in restoring natural nails are shown by polishing them after removing the artificial coating, followed by massage with oil products and re-polishing.
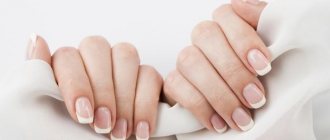
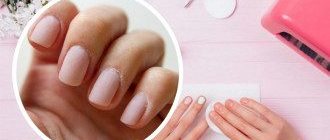
How to care for natural nails after removing extensions
So we did it! The artificial material is removed, and here they are, our dear nails. True, they don’t look very good. The nail plate is thinned and rough. It's not surprising, because it's damaged. Nails may become brittle.
Interesting!
You must understand that the surface of the nail plate is already damaged, and it is impossible to return it to its “pre-acrylic” state. You will have to wait until the nail grows back completely, only then can it be considered restored.
What can we do while the nail is growing?
It is best to cover your nails with medicinal varnish, which will slightly strengthen the plate and prevent it from crumbling, and also improve its appearance. In the process of growing nails, you need to carefully care for the cuticle and rub special oil into it to make the nail grow stronger.
Cuticle oil: effect on nails
In the process of removing artificial coating, in addition to the native nail, the cuticle also suffers. The skin around the nail plate dries out and cracks.
Cuticle oil is a nourishing agent that • moisturizes, • saturates with vitamins, • prevents peeling of the skin around the nail, • activates the growth of the nail plate, • improves blood circulation.
Cuticle oil is used every evening until the nails are completely restored. The product is rubbed into each nail in turn. Remains on hands until completely absorbed. The nail restoration process takes several weeks.
You can make your own cuticle oil. The basis of any product for caring for the nail plate and surrounding skin is essential oils. To eliminate thinning and splitting of the nail plate, bergamot, patchouli, and ylang-ylang are used. General strengthening of nails will be ensured by the use of lemon, eucalyptus, chamomile, lavender, rosemary, thyme, and tea tree. An alternative to essential oils can be 5-6 drops of lemon juice.
Use essential oils in combination (2-3 types). This will speed up the recovery process.
Add a few drops of your favorite essential oils to vegetable oil (olive, hemp). The required amount of vegetable oil is 25-30 ml. Vegetable oils can be mixed, for example 15 ml of grape seed oil and 10 ml of jojoba.
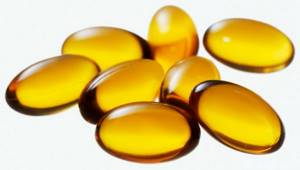
It is advisable to add 1 capsule of vitamin E to the oil mixture.
Recommendations
"Beauty requires sacrifice". And in the case of nail extensions, we make these sacrifices. What advice would you like to give:
- Don't overuse extensions. From time to time, remove the coating and allow your nails to rest and grow completely.
- In between extensions, take good care of your nails.
- If you decide to remove your nails yourself, be especially careful.
Have you ever gotten your nails done? Which material do you prefer and why?