A neat manicure is a decoration for women's hands. Unfortunately, due to the frantic pace of life, many girls cannot find time to visit a salon. What to do in this case? Everything is very simple! You need to learn how to do simple procedures yourself, at home. To do this, it is absolutely not necessary to attend expensive courses, because thanks to video lessons posted on the Internet, you can learn not only how to properly design your nails, but also how to make beautiful designs using various tools.
Working with the cuticle
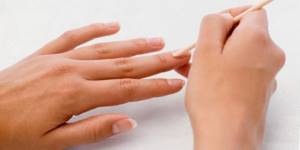
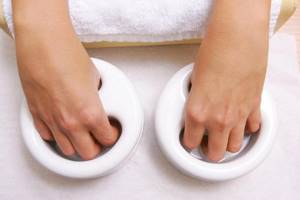
A DIY manicure at home starts with the cuticle. Where to start processing it? In order for dry skin to become more pliable and be removed painlessly, it should be softened, and a bath with warm water will help with this.
SIMPLE HOME MANICURE
To do this, pour water into a small bowl and add sea salt if desired. In this case, you can get a comprehensive procedure that will help soften the cuticle as much as possible and at the same time strengthen the nail plate, soften the skin on your hands, and eliminate irritation. The time for taking such a bath is 10 minutes.
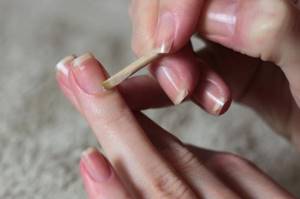
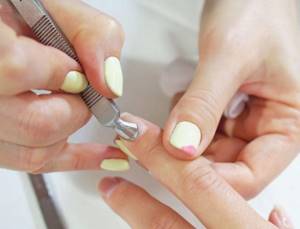
Use a terry cloth to blot your hands and use an orange stick to push back the cuticles.
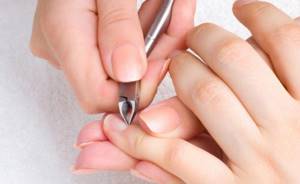
Remove it using special pliers.
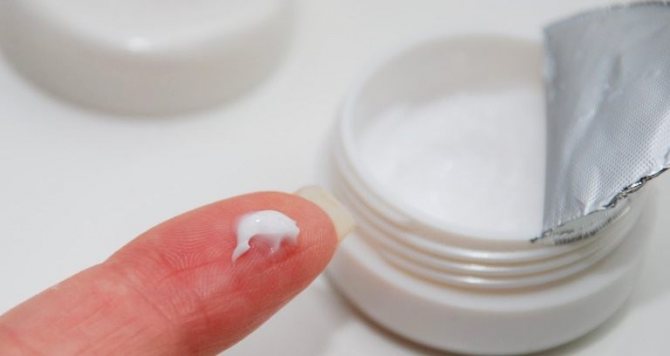
Then rub in cuticle oil or regular rich hand cream.
Today, a lot of different products are sold to make cuticle removal easier. For example, salons actively use a special product to soften the cuticle. It allows you to get rid of the skin without the use of cutting tools, but when working with it you need to be very careful, since if you leave the composition on your nails too long, you can get a burn or cause excessive dryness of the nail plate.
CUTICLE SOFTENERS
| Brand RUNAIL. The remover contains aloe extract. The cuticle softens within 3-5 minutes and is removed with a stick or a special manicure tool. Not suitable for very rough skin. |
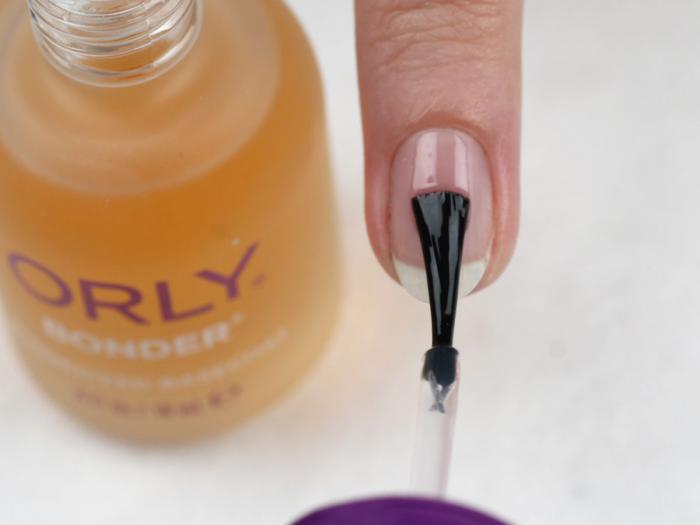
| Brand ORLY. Medium consistency, specific aroma, removes cuticle well. The exposure time is only 20-30 seconds. | |
| Brand INGARDEN. The remover has a liquid consistency, is convenient for home use, and perfectly softens the cuticle. Application time also ranges from 3 to 5 minutes. | |
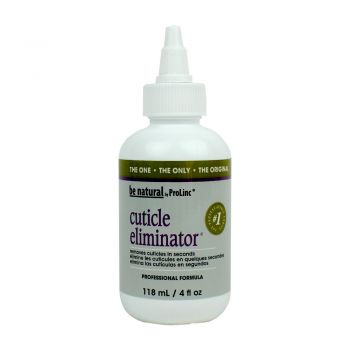
| Brand Be natural. Acts quickly, maximum time 45 seconds. Very quickly softens the cuticle. It is better to apply in stages, several fingers at a time. Suitable for rough cuticles. |
| Brand OPI. The product is in the form of a light cream with a pleasant aroma. Exposure time 3-5 minutes. Not suitable for very rough cuticles; it will soften them only slightly. | |
| Brand CND. A good remover that removes cuticles very carefully. But not very suitable for home use due to its large volume. | |
| Brand MASURA. Remover with algae extracts. Well softens and nourishes the cuticle. | |
| Oriflame brand. The remover has a pleasant smell and softens the cuticle well, but the bottle is not very convenient to use. | |
| Eveline brand. Not a very comfortable tube. The product is difficult to distribute accurately. It greatly softens not only the cuticle, but also the nail plate. |

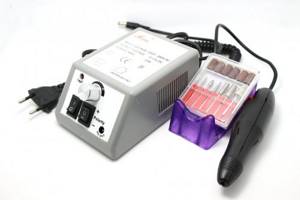
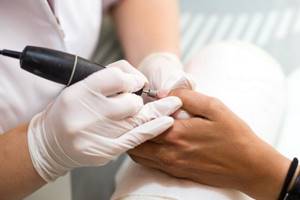
Hardware manicure for beginners
Probably everyone has already heard about hardware manicure. More and more fans of this technology are appearing. Its trick is that it allows you to free it from dead cells without damaging the cuticle. Of course, here you will have to master a special apparatus, which is equipped with various cutters. It will help you forget about wire cutters and other devices. Hardware manicure is performed quickly and painlessly.
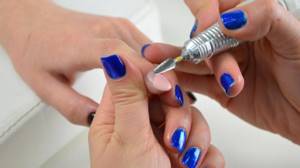
HOW TO DO A HARDWARE MANICURE CORRECTLY STEP BY STAGE
It is performed on dry skin. At home, it is better for beginners to work at low speed to prevent accidental damage.
Stages of work:
- If there is old coating, it must be removed. How to do this correctly, see the section: How to remove gel polish.
- Treat the skin with an antiseptic liquid.
- Use a stick to push back the cuticle. Using a cone-shaped nozzle, remove the skin. Hardware manicure for beginners should be performed at medium speeds. Movements should be neat and smooth. The cutter should not be pressed too hard against the skin. To remove the cuticle you need to move from left to right.
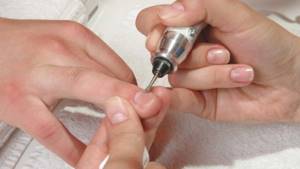
- Give your nails the desired shape. The disk attachment is designed for this purpose.
Video tutorial on hardware manicure
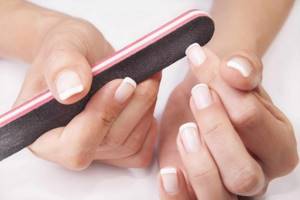
European manicure at home
A trim manicure is not the only way to get your hands in order. European manicure, which has a lot of advantageous characteristics, is considered its worthy competitor. Its essence is that the cuticle is treated with a special softening compound, and then pushed back with a stick. After applying the decorative coating, a special oil is applied to the cuticle, which slows down its growth. The beginning of a manicure for beginners is giving the nails the correct and suitable shape. To do this, use a file of medium hardness. After that, the nails are covered with regular varnish and the coating is secured with a special product.
The advantages of European manicure are obvious:
- The risk of infection is reduced.
- Does not cause pain.
- It will be an excellent choice for people with thin, sensitive skin.
EUROPEAN HOME MANICURE
- The first step is to remove the old coating from your nails. Detailed instructions in the section: How to remove gel polish.
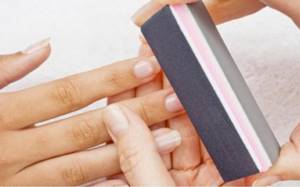
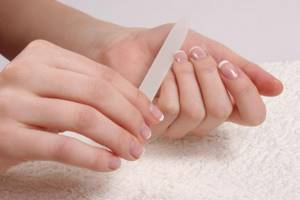
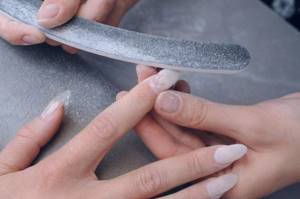
- In the second stage, you need to shape your nails using a natural nail file and lightly sand them.
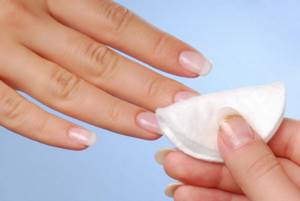
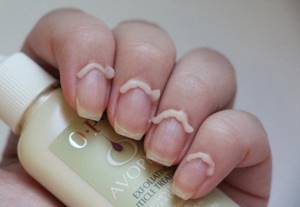
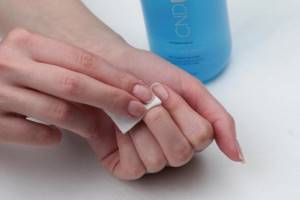
- Apply remover (a special cosmetic product for softening and subsequent removal of the cuticle). The exposure time is different for everyone, from 30 seconds to 10 minutes (on average 3-5 minutes). Read the instructions carefully, because... the recommended time cannot be exceeded. Then you need to remove the remover with a cotton pad or wash it off.
- We push back the cuticle and clean the edges if necessary.
- At the final stage, we roughen the nails using a buff and degrease them using a special de-sticking agent.
It is better to degrease your nails with special lint-free cotton pads for manicure to avoid getting small fluff on the nail, which can subsequently ruin the appearance of the coating.
Nails are prepared for applying gel polish. You will learn about the sequence of stages of a gel polish manicure below in the step-by-step photos.
Video tutorial on how to perform a home European manicure
How to do edged manicure at home?
Despite the popularity of European manicure, many girls still prefer the edged version, thanks to which a manicure with gel polish or other coating looks very impressive.
Performing a trim manicure for beginners in stages is as follows:
If there is an old varnish coating, it must be removed.
- File your nails and give them the desired shape.
- Prepare a bath to soften the cuticle (you can additionally apply remover).
- Then push back the softened cuticle with a stick or metal pusher. You can also clean out the pterygia with a spatula.
- Using nail scissors or nippers, carefully trim the cuticle along the edge and clean the area of the side ridges. After this procedure, the cuticle can be wetted again and pushed back again.

- Apply nourishing oil or cream with massage movements until completely absorbed.
Video tutorial on trimming your own manicure
Lesson #6. Tools and materials for manicure and pedicure.
Do you know how professional tools differ from tools from manicure sets? How are skin tweezers different from nail clippers? And why the tool from the advertised beautiful and expensive manicure sets is not suitable for your work. No, then let's start studying.
Lesson #7. Classic edged manicure.
In this lesson you will also learn what nail lines and nail stuffing are, what hand maceration is, how to properly massage your hands and how hand massage affects the client’s attitude towards you.
Lesson #8. European manicure.
Did you know that European manicure is the safest, since instead of tweezers we will use special cuticle removers. It is cuticle removers that dissolve dead skin around the nail plate and take care of the cuticle.
Lesson #9. Hot oil manicure.
Hot oil manicure is generally the height of perfection in cosmetology; when performed, it moisturizes and therapeutically restores the skin of the hands under the influence of special creams or lotions.
Because of its importance, this lesson is divided into two parts. In the second part you will learn how to prepare your own lotion for hot manicure according to our proprietary recipe
Lesson #10. SPA manicure or hand care system.
In this lesson you will learn all the procedures that have a unique restorative and rejuvenating effect for the hands and the woman’s body as a whole. The lesson is also divided into parts as an appendix to the lesson includes a guide on applying a paraffin hand mask.
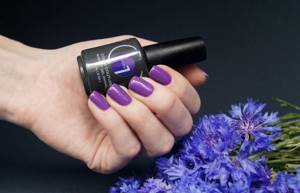
Manicure with gel polish for beginners: step-by-step lessons
Manicure with gel polish is a common occurrence, because ordinary varnishes are already fading into the background due to their impracticality. Gel polishes allow you to get a high-quality coating that can please the eye for 2-3 weeks. Of course, there were some downsides. After 2.5 weeks, the overgrown part of the nail catches the eye, which spoils the impression of the manicure done. It’s okay if you have the opportunity to visit a specialist, but there are situations when going to the salon is impossible for certain reasons. In this case, a manicure with gel polish under the cuticle will help.
This technique increases the wear time of gel polish. Within 2 weeks, your nails will look as if you just recently had a manicure. Of course, making it at home will be problematic. To get a good result you need to have certain skills.
The secret of applying gel polish under the cuticle
First, using a standard brush, apply the gel polish to the nail as close to the cuticle as possible. Then the side ridges and cuticle are pushed back with a light finger pressure and gel polish is carefully applied to the unpainted area of the nail with a linear brush. The result is recorded in the lamp.
If you still want to try it, it is recommended that you first watch video tutorials that are dedicated to learning how to do a classic manicure with gel polish.
Video tutorial: How to carefully apply gel polish under the cuticle?
STEP-BY-STEP INSTRUCTIONS WITH PHOTO FOR APPLYING GEL POLISH
- The first stage is preparing the nail plate.
Roughen the surface of the nail using a buff.

We remove dust and degrease the nail using a special product for degreasing and removing stickiness from nails. We carry out all manipulations using lint-free manicure napkins.
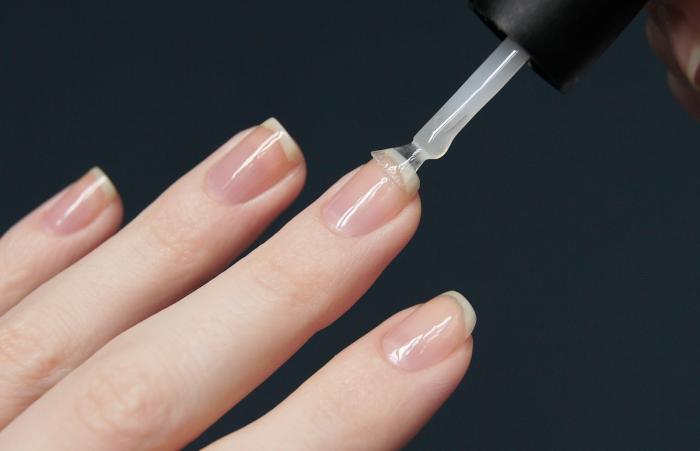
Apply primer.
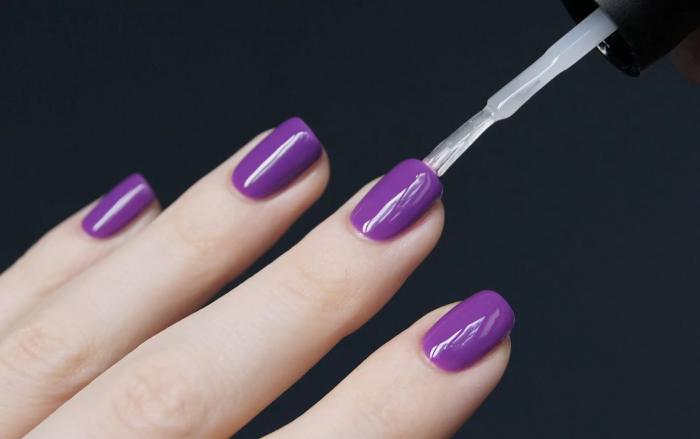
- Second stage - coating.
The first layer consists of the base (base coat). Dry in UV (2-3 minutes) or LED lamp (30-40 sec).
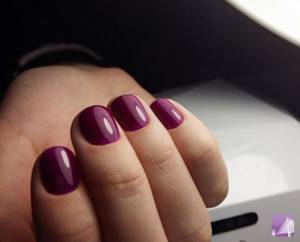
Next, a color coating is applied (gel polish in 1-3 layers depending on the consistency). Each layer is also polymerized in the lamp (the exposure time is similar).
At the end of the manicure, a finishing coat (top) is applied. Also dried in a lamp. If necessary, remove the sticky layer using a special product that was used to degrease nails during the preparation stage.
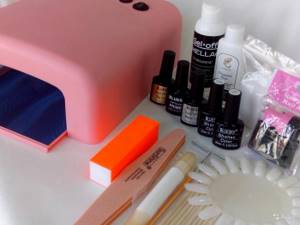
Thus, the minimum kit for a beginning manicurist looks like this:
To remove gel polish:
- Gel polish remover;
- Foil or special finger pads;
- Cotton pads;
- An orange stick, or a pusher, or a special cutter.
For a manicure:
- Manicure set with scissors, clippers, pusher, spatulas, etc.
- Orange sticks;
- Remover (cuticle softener);
- Cuticle oil;
- Files;
- Manicure machine (if you want to do hardware manicure at home).
To prepare nails for applying gel polish:
- Buff;
- Lint-free wipes;
- Means for degreasing and removing stickiness;
- Primer.
For applying gel polish:
- UV or LED lamp;
- Standard set base top;
- Colored gel polish;
- A linear brush (for manicure under the cuticle) and a set of brushes for artistic manicure (if desired);
- Nail decor (if desired): foil, rhinestones, microbeads, acrylic powder, stickers, stamping kit and much more.
Distinctive features of a nail professional
It is hardly possible to recognize a good master at first glance. But if you watch his work, you can be sure that this is a nail professional. What separates a pro from a beginner?
- Responsible attitude towards hygiene. Files should ideally be disposable; if not, the master uses liquid to disinfect them. The manicurist works only with gloves. He takes the tools out of craft bags. The hand bath has a layer in the form of a bag or bag.
- Use of professional equipment: from a manicure vacuum cleaner to safe lamps for drying artificial material.
- Working on brands of the same brand. A specialist in his field uses bases, varnishes and topcoats of the same brand when performing a manicure.
- Ability to perform any type of manicure: classic, unedged, hardware. The ability to select the type of service to suit the situation distinguishes a true professional.
- Limited use of cuticle oil. Amateurs usually use it liberally. A professional master prefers not to overdo it with any means and tools for work, and strives to do without oils.
- Easy removal of old coating. No products with acetone. No metal tools to remove material from your nails. Even hardware equipment only finishes up to the base.
- Accuracy and speed of coating application. The ability to quickly apply cuticle coverage comes with experience.
In addition, there is professional ethics, the ability to communicate with the client, and additionally sell him your services. Yes, there are other ways to distinguish a professional from an amateur. But these are the main ones. If something is wrong, there is no need to talk about skill.
How to remove gel polish correctly
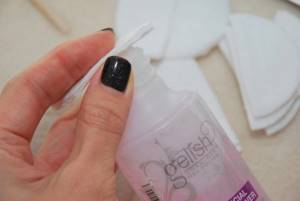
Gel polish is a very durable material, which is not so easy to remove. It is possible to perform the procedure at home. This will require time, a certain tool and a special composition for removing gel polish from nails.
For use at home, people most often buy inexpensive gel polish remover from the Severina brand. There are two types on sale: “Severina Professional” liquid for more expensive gel polishes, which are easily removed from nails, and “Super-effective gel”, which dissolves almost any gel polish (even from an inexpensive price category). For professional use it is better to use more expensive products. Also, almost any brand that produces gel polishes in the line has its own recommended compositions for removing coatings.
INSTRUCTIONS FOR REMOVING GEL POLISH FROM NAILS BY YOURSELF AT HOME
- First, cut off the finish layer (top) with a rough file;
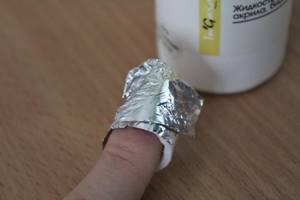
- Next, take cotton pads, soak them in gel polish remover, place each pad on the nail and tightly wrap each finger with foil.
The exposure time for each product is different, as a rule, it is 20-30 minutes.
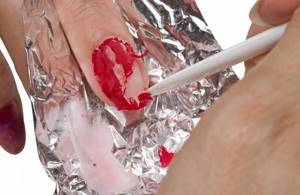
- After the product has taken effect, remove the foil and carefully clean off the gel polish with an orange stick. If there are small irregularities left, you can clean them up using a buff.
How to disinfect and sterilize manicure instruments
Many people believe that instruments for individual use do not need to be sterilized. But in vain, because skin particles can remain on them and bacteria can multiply. In addition, without regular cleaning, tools will quickly become dull and fail.
For beauty salons, there are strict instructions on how to sterilize manicure instruments. The general process includes not only sterilization of the instruments themselves, but also disinfection of the room, the master’s clothing, and work surfaces. For sterilization, a special unit is used - a sterilizer for manicure instruments (sterilization is the process of destroying fungal and bacterial spores).
Let's look at how to properly handle manicure tools and care for them at home after use.
Processing of manicure tools is carried out in several stages:
- wash tools with soap;
- immerse in a disinfectant solution in an open form;
- place in the oven preheated to 200° for 20 minutes;
- remove tools after the oven has cooled completely;
- This procedure should be carried out at least once a month.
We also disinfect the files - we spray them with disinfectant spray. After this, the file should dry completely.
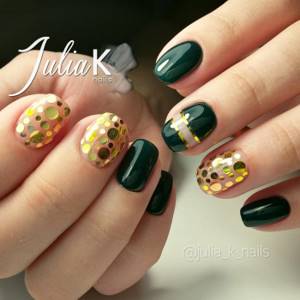
Simple designs for the beginner manicurist
Step-by-step photos of fashionable manicures and video tutorials on manicure at home will allow you to quickly master popular techniques. You just have to stock up on free time and patience. Enjoy watching!
- Simple drawings
- Flowers and patterns
- Rhinestones
- Kamifubuki
- Rubbing
- Broken glass
Flaws
- high cost of truly high-quality cosmetics;
- gel polishes create a dense film, due to which the nails lose their own protective coating and do not “breathe” at all ;
- not suitable for nails with a weak and thin structure - the manicure lasts three to six days;
- A manicure done with gel polish is difficult to remove and takes quite a long time;
- Coating with gel polish requires full compliance with the rules , otherwise the varnish may “peel off” on the same day.
Gratitude
I express my gratitude for writing the book:
To my mother, Galina Akimovna Stepanova. Mommy, I thank you for your wisdom, for your support and faith in me. For welcoming me, at the peak of my career, home. Not really understanding why I need this, but humbly and with a modest desire to be proud of me, answering those who worried: Don’t touch Rimma. She is writing a book. Mommy, dear, I love you very much. Thank you for giving me this life, for having me!
Fokin Vladimir Alexandrovich. Volodya, I thank you for always being there. Even when you are not there, I know that you are with me. You, like an invisible rock behind my back, give me confidence that I can do anything. Like an angel, you carefully lead me away from roads that have a dead end at the end. With all your might you support me in my chosen path and pretend that you are not at all involved in my victories. I am grateful to the Universe for having you in my life! I can't imagine her without you.
Blinovskaya Elena Olegovna. Lenochka, I thank you for the “marathon of wishes” and for the rest of the trainings! This is the best spiritual growth practice that has ever happened to me! It was after completing the entire course that I gained confidence that I was on the right path, and that I should finish the book now, and not sometime in the future. Thank you for the tools you give to restore order in the head of every person who completes your marathons!
To my close friends for their support and faith in me: Sima Levina, Marina Deppershmidt, Natalya Marchenko and Elena Vasilyeva.
To my wonderful, most meticulous and demanding first teachers, Irina Vasilievna and Irina Borisovna.
...I also thank all the people who have met me in my life and who have been teachers for me!
And now, my dear reader, I invite you to your professional journey, called:
NAIL SERVICE MASTER!
Why is it dangerous to use unsanitized tools?
The answer to this question is simple - if you prefer this classic method of nail care, injury is possible. And if you come into contact with the same tools that another person used, dangerous infections can be introduced into the wounds, including viral hepatitis and even HIV. In a manicure salon, you can become infected with other diseases, including nail fungus.
Even if you think that your master is a decent person, and all the clients of the salon as a whole, too, then still clarify how the tools are disinfected after each client.
If you do your nails at home, also keep an eye on who else is using your manicure kit. After all, guests rarely come with medical records, and they themselves may not be aware of some of their diseases.