A neat, stylish and elegant manicure is one of the main rules for a successful image of a modern woman. Today, anyone can make a beautiful and fashionable manicure at home - if you know the basic rules of this procedure. It is important to take into account all the nuances: technique, style and, most importantly, safety. The key rules for home manicure are in the material below.
Basic rules of care
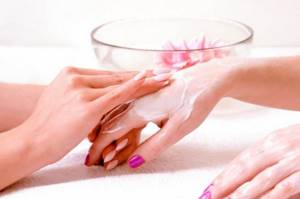
It is important to take care of the skin of your hands. Chapped, chapped hands with untreated cuticles will not add beauty to your look. Be sure to use the cream according to your skin type and season.
Make scrubs and masks to make your hands velvety. Paraffin therapy helps maintain beauty and a well-groomed appearance very well. It can be done not only in the salon, but also at home. Use cuticle oils, rub it into the nail plate - then you will have it in perfect condition. Don't go outside without gloves during the cold season. Have home beauty sessions for perfect nails every week.
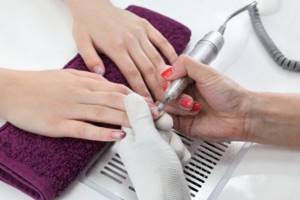
Removing old coating
Removing the old coating includes three stages of work: cutting off the length, removing the color coating and base, correcting unevenness and material residues.
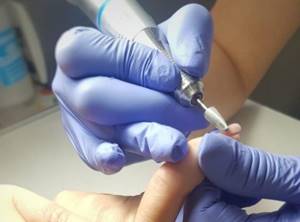
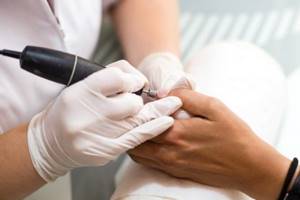
Length removal
It is performed with a metal carbide or ceramic cutter with a blue notch. It is placed perpendicular to the free edge and by moving from one side to the other the length is removed to the desired length. From corner to corner. Left-handers work in reverse mode, and right-handers work in forward mode. A left-hander takes the length from the right to the left corner, and a right-hander takes the opposite direction.
It is necessary to work with the nose or protruding part of the cutter at a speed of 20,000 - 30,000 per minute. We do not allow the cutter to tilt so that it does not hit or bounce.
Low speeds are used in extreme cases, only when there is a burning sensation.
Possible causes of burning:
- Blunt cutter . It does not clean, but irons the material, releasing heat at high speeds;
- Bent nozzle . It is uncentered and vibrates, taps and gives additional heat. It is necessary to change it, and you can work at high speeds without slowing down;
- Vibration of the device handle, faulty handle . Solution - you can slow down;
- Sawed nail plate . The solution is to slow down and work with less pressure;
- Sensitive nail plate. The solution is to leave a small amount of base on the surface.
When removing the coating, the entire surface of the nail can be divided into three zones:
- Central part and free edge;
- Cuticle area and left side wall (right - for left-handers);
- Right side wall (left - for left-handers).
The third zone is the most inconvenient. To process it, it is necessary to rotate the client’s hand 180 degrees.
Removing color coating and base
In the central part the material is thickest, and at the cuticle and side walls it is half as much. Therefore, when removing, it is necessary to focus not only on the direction of movement of the nozzle, but also on the pressure. In the central part the pressure is stronger, and at the cuticle and side walls it is weaker. Also, if there are bumps and smudges near the side walls, the pressure in these areas will be stronger.
It is recommended to work with long arching movements in the first zone. The resistance stroke of the cutter removes a thick layer of material, and with a smoothing direction, in the direction of rotation of the cutter, a thin layer of material is removed. This technique is convenient for processing thin areas of the coating to avoid cuts and damage.
Correction of irregularities, detachments and removal of material residues
Immediately you need to pay attention to the presence of detachments. It is recommended to remove them completely. Detachments can be removed with a diamond cutter or a regular nail file.
Detachment of the coating can be located on the free edge, in the cuticle area or at the side walls.
- If it is on the free edge, remove it with light smoothing movements until the area disappears.
- If the detachment is near the side wall, then it is better to remove it with a nozzle in the direction of rotation, as if the hand is “following” the cutter. This is a safe technique that removes a very thin layer of material.
- If the detachment is on the central part or at the cuticle, then it is best to remove it with transverse smoothing movements. For right-handed people, move to the right. Left-handers - to the left, without resistance from the cutter.
Now you need to look at the profile and end of the nail, assess the condition of the arch. If there are bumps or hills, we smooth them out with a milling cutter using smooth arched movements.
Hardware manicure - answering frequently asked questions
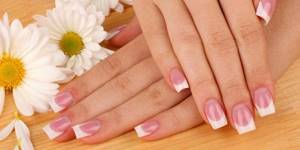
Choosing the right form
To have perfect nails, you need to choose the right shape. Now the most fashionable is the almond-shaped one. But it is not suitable for everyone, so you don’t need to focus only on current trends. The ideal nail shape is one that matches your cuticle line.
- Oval is the most universal, suitable for almost everyone. It is most comfortable to wear and visually lengthens the nail. In addition, this manicure looks neat and elegant.
- Round nails are best suited for those with short nails. It looks unusual and is convenient for those who lead an active lifestyle. To achieve this shape, you need to cut off all the sharp corners and make them as smooth as possible.
- Nails with sharp square corners are also quite popular. They suit owners of graceful long fingers. The manicure turns out sophisticated and neat. It is best to do this shape on medium-length nails. The main feature is that the side lines of the plate must be parallel and at right angles to the cuticle. But this type of manicure is uncomfortable to wear, and it also needs to be adjusted in time.
- The “soft square” shape is similar to the previous one, only more practical to wear. The corners are made rounded. This manicure is valued for its convenience and practicality.
- Almond-shaped should be done by girls with long graceful fingers. It looks good on medium length. All lines of the nail plate are reduced to the center and acquire an oval curve.
- The beveled shape is suitable for lovers of extravagant manicure. The technology is similar to creating a square, but an oblique cut is made at the tip. One end should be sharp and the other blunt. “Beveled” manicure should be done only on a durable plate and long nails.
- Sharp nails should only be done on long, thin, graceful fingers. But some women especially like this shape.
- Pointe shoes are also popular and suit almost everyone. This shape combines “square” and “almond”. This manicure turns out to be unusual and spectacular.
The right type of manicure is the main component of perfect nails. You can correct imperfections and highlight the advantages of your hands. In addition, it is important not only to choose the desired shape, but also to create it correctly.
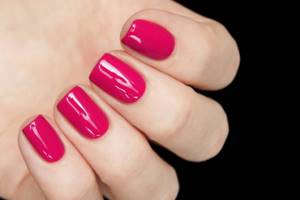
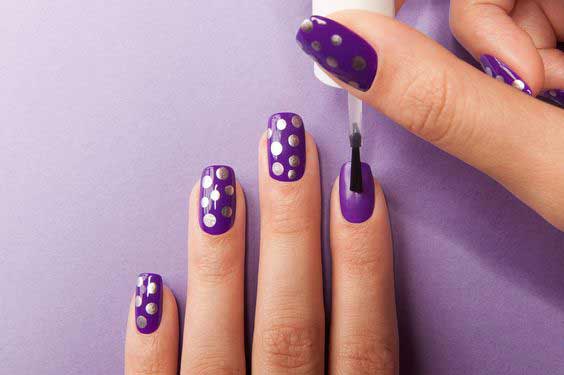
Applying varnish
The next step in a proper manicure is the application process itself. Oddly enough, few people understand that the varnish needs to be applied from the center, swiping once along the sides, and then applying it to the entire nail with just one movement. A similar application pattern can be observed in the work of the master. It is worth noting that this option helps to create an even coating.
How to file your nails correctly
Correctly designing your nails is important not only to ensure that the manicure turns out neat. Their health depends on this. Most girls believe that you need to move the file from side to side. They think that this way they will quickly give the nail plate the desired shape. But such technology will lead to its delamination.
Use a special soft tool to work on natural nails. The main rule is that you only need to work with a file in one direction. You also need to press the tool tightly enough to the nail so that it does not become loose and the plate does not delaminate. When you're done with the first step, be sure to use a soft buff to make the edges smoother.
Lifting the “skirt” from the cuticle
To lift the “skirt”, a diamond attachment with a sharp nose and a flat main part is best suited. For example, a bullet, a lentil, a cylinder with a red notch.
To raise the skirt, it is necessary to work at speeds of 5,000 and above, depending on the condition of the client’s skin. The rougher the skin, the higher the speed.
Using a cutter, using pushing and smoothing movements, the raised cuticle is turned upward with a skirt or visor, and raised at an angle of 90 degrees.
When opening the sinus, you can help yourself with your other hand, slightly pulling the skin down or to the side from the nail. You cannot pull the skin diagonally from the sinus, so as not to tear this thin transitional rectangular area.
Do I need to remove cuticles?
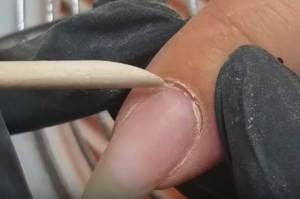
Most experts believe that it does not need to be removed because it performs a protective function. And not everyone is able to cut it correctly and accurately, and this can lead to the formation of burrs. Therefore, “European manicure” is becoming especially popular, in which the cuticle is carefully pushed back with an orange stick. Also apply special oils and creams to make her look healthy and well-groomed.
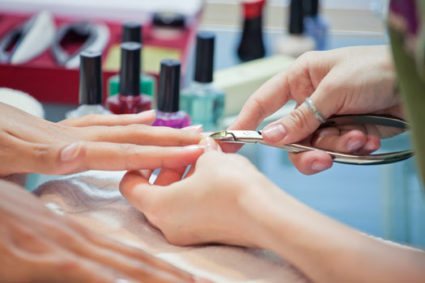
What is a classic edged manicure?
Once upon a time, the classic edged manicure was popular; in nail salons it was the only way to get your hands in order.
First, the fingers were steamed in hot water and the cuticle was cut off. After the procedure, it grew back quickly, the manipulation had to be repeated often.
Removing cuticles and hangnails often causes new problems.
Some people learned relatively recently what a European manicure is: it uses a remover (cuticle remover).
There are products available on the market to slow down cuticle growth, and if you regularly devote time to caring for your hands, you don’t have to resort to trimmed manicures at all.
Some clients believe that the hardware method of performing the procedure is better, but it also has disadvantages: it cannot be used for treating thin nails.
A properly performed trimmed manicure will be useful:
- nail growth accelerates;
- removing the cuticle eliminates the appearance of grooves on the plates;
- the risk of developing infection as a result of injury to the skin is reduced.
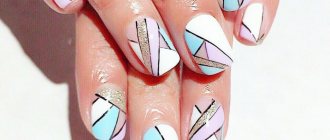
How to get the perfect highlights on your nails?
They can only be done on a flat surface. Therefore, you need to degrease the nail plate and apply an acid-free primer to it. Next, you should choose the thickest base for gel polish and begin leveling the nail plate.
If you did the highlight correctly, it will not be distorted in any way. It should flow smoothly from side to side. Once you have aligned the plate, proceed to create a beautiful nail design.
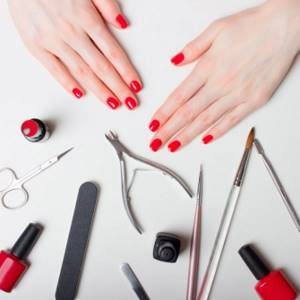
What you need for the procedure at home
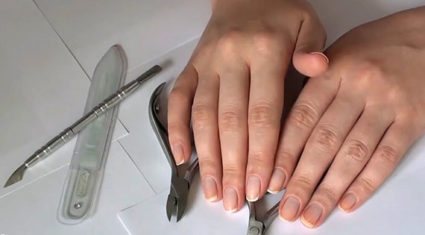
To perform the procedure you must have the following tools:
- manicure scissors (preferably with straight and curved blades);
- nail clippers;
- a file with an abrasiveness of 180/320 grit (it is used to create the shape of the nail);
- polishing file;
- hand bath;
- double-sided pusher (one edge is a spatula, the other is pointed).
You will need not only tools, you will also need:
- orange sticks;
- hand cream;
- remover;
- care oil;
- nail coating;
- nail polish remover.
Professionals and beauty salons have a much larger list of products and tools; at home you can get by with fewer.
The main nuances in creating a manicure
Surely, before getting a manicure, you looked at photos of perfect nails and chose the desired design and color scheme. But this is far from the most important thing. What advice can manicurists give girls? Be sure to apply a base before starting work so that the varnish lasts longer and applies evenly. You need to select a design in accordance with the shape of the nail plate so that it looks aesthetically pleasing. It is also better to use a top coat.
The beautiful appearance of your nails also depends on your lifestyle. Try to eat right, take vitamin complexes. Follow the basic care recommendations, and then your hands will be in excellent condition.
Choosing manicure products
The next step is to use only proven and high-quality products for manicure. It becomes quite logical that a cheap varnish can not only color the plate too much. But also cause its subsequent destruction. And refusal of a base coat leads to brittle nails, dryness and adds yellowness.
All tools must be sanitized and prepared so that they can handle all tasks smoothly. Scissors, nippers - all this should be sharp so that the girl can immediately remove or trim excess sections of the nail and cuticle without unnecessary movements.
Think before you get a fish pedicure
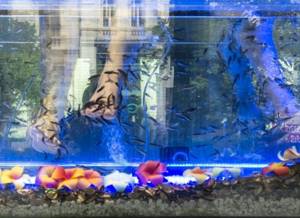
©
Professionals do not recommend this procedure for several reasons: Pisces can easily spread skin diseases and viral infections among clients of the same salon. Fish have their own microflora, which has not been fully studied. Therefore, it is unclear how your skin might react to it. Some salons save money and buy cheaper types instead of garra rufa fish. Most often they have teeth, and therefore the fish do not suck the skin, but bite it, thus causing microtrauma.
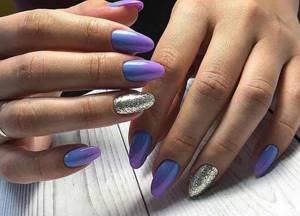
Manicure “different hands”

The more familiar design of different hands was included in the list of nail trends of past seasons, and now it will be popular again. There are plenty of manicure styles for different hands, including romantic manicure, bright and delicate, plain and with patterns, matte and glossy.
Please do not trim your little toe during a pedicure.
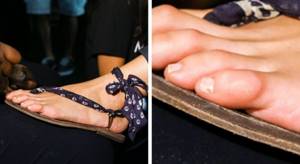
According to professionals, masters who try to treat the little toe using the principle of a trim manicure are making a huge mistake. There is a lot of pressure on the little toe due to our weight, it is constantly in contact with tight shoes, and for many people this toe is also slightly deformed. In such cases, a small skin “hood” grows at the base of the nail, which serves as protection. If you cut it off, more and more growths will appear.
If you are unhappy with the shape of your nail bed, ask for it to be lengthened.
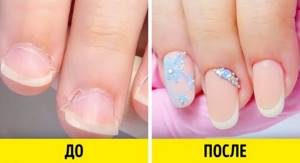
Have you noticed that sometimes the coating on short and wide nails looks strange and not very beautiful (in common people such work is unceremoniously called “hooves”). Inexperienced craftsmen can explain this by saying that the form was initially unsuccessful and it was simply impossible to make something more aesthetically pleasing. However, modern manicure technologies make it possible to lengthen the bed of even those nails whose width is greater than their length. To do this, the specialist slightly shifts the skin edge and makes a soft extension. If corrections are made in time, these nails will look perfect for a long time. Take a look at the real result of such a procedure.
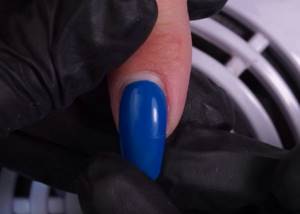
If your skin reacts poorly to a manicure, ask the master to change one tool.
Unfortunately, many have encountered cases where the skin of their hands reacted poorly to a manicure. In such situations, the first thing that comes to mind is an allergy, and the second is to never cover your nails with anything again. But, according to experts, it is not at all necessary to give up manicure. Sometimes it’s enough to ask the master to change the metal pusher to orange sticks. The reason why the skin reacts painfully to a manicure with a pusher lies in the chemical reaction that occurs when the metal comes into contact with the sticky layer of gel. Some skin takes this calmly, but more delicate skin begins to itch and peel.
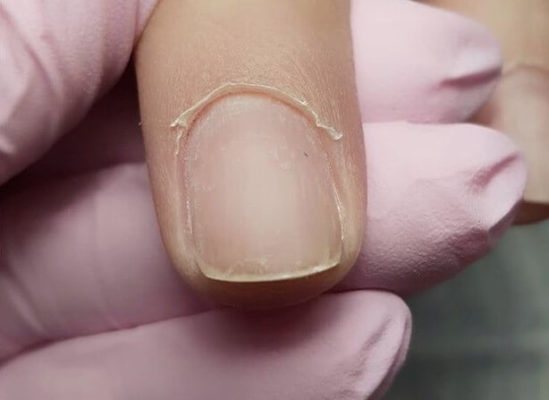
Don't cover your nails if you have an uneven free edge.
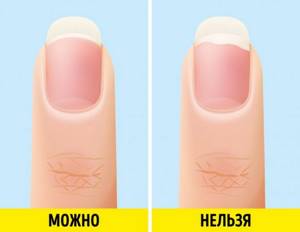
There can be many reasons why the free edge looks this way: injuries, chemical burns, wearing the gel for too long. In such a situation, coating cannot be applied. The fact is that in such cases, a pocket filled with warm and moist air forms between the skin and the nail - an ideal environment for the development of fungus. If you apply gel or even regular polish to such a nail, this will increase the greenhouse effect and increase the risk of infection. Unfortunately, such problems with a free edge occur quite often, but a huge number of craftsmen turn a blind eye to this so as not to lose a client.
Don't wear the covering for too long
Manicurists love to post photos of regrown nails on their pages and boast that their coverage lasts up to 6 weeks. But this doesn't really bode well. During regrowth, the apex (the lower part of the artificial nail) shifts, the load is distributed incorrectly, and injuries, cracks and detachments appear, which transfer to the natural nail. Professionals recommend wearing the coating for no longer than 2 weeks.
If the cuticle grows back quickly after a manicure, check to see if the manicurist has cut your nails
When cutting, the master inadvertently removes the top layers of the nail, without affecting the part of it that is under the cuticle. As a result, thin scales appear at the base, which begin to be visible as soon as the nail grows. The scales remaining from the cut can really be easily confused with cuticle, but they grow back much faster. The situation can be corrected with the next manicure: according to professionals, the saw marks will disappear during the next treatment. The main thing is not to forget to change the master.