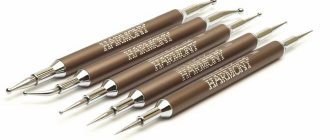
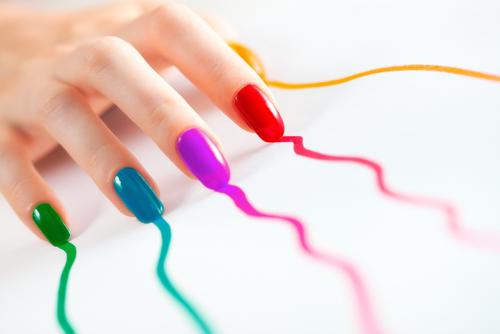
Girls are so unpredictable! Every week a new mood, every day a fresh image. A bright, and most importantly long-lasting manicure is simply necessary here. Well-groomed hands increase self-confidence, and “that same shade of red” pleases the eye. Therefore, it’s such a shame when cracks and chips appear on neatly painted nails.
It's an annoying little thing, but the image is no longer ideal. How to fix regular nail polish to make it last long ? To put on makeup and forget? Don't update the layer daily. Work, home, hobbies also require dedication.
How to maintain a manicure for a long time - the secrets of well-groomed women
To make your manicure look neat, long and beautiful, you need to know some secrets of applying varnish.
- If the varnish has thickened, it can be applied in one layer. If the polish has thickened so much that you can’t paint your nails evenly, pour a special liquid into it.
- Before painting your nails, shake the bottle of polish and warm it in your palms. This way it will become uniform and cover your nails evenly.
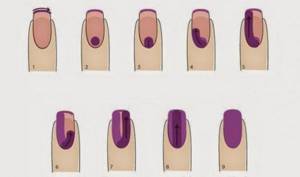
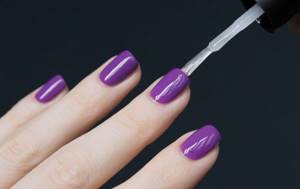
- Nails begin to be painted from the little finger. Place your fingers on a flat surface (palm should hang down). The light on the nails should fall from the left and from above.
- Dip the brush completely into the bottle of varnish. Afterwards, remove excess varnish by wiping one side of the brush on the edge of the bottle.
- Mentally divide the nail into 3 parts. Step back 1 part from the cuticle so as not to stain it. With confident and quick movements, sweep the brush from the middle of the nail to the tip. Paint the edges of the nail. If there is not enough varnish on the brush, dip it into a bottle of varnish.
- Paint the rest of your nails in the same way.
- Leave your painted nails to dry.
Getting the right manicure isn't all that difficult—you just need to devote enough time to it. A quick manicure is unlikely to turn out neat and long.
Take care of your nails and hands, and then your look will always be complete and stylish.
The best manufacturers
Opinions about varnishes, of course, vary greatly. To the owner of healthy nails, almost any varnish seems excellent. But those who have loose and uneven nail plates are much less fortunate.
- IsaDora is a well-known Swedish brand that offers a very rich range of colors. The secret of a good manicure from IsaDora is not only the quick drying of the product, but also a special wide brush.
- The famous American manufacturer Orly offers varnishes, base coats, dryers, etc. The Orly nail polish collection contains products enriched with vitamins.
- The Polish brand Belweder produces many medicinal products. The company's varnishes not only decorate nails but also strengthen them. Belweder products are easier to find in pharmacies than in salons.
- OPI – according to statistics, accounts for half of all varnishes sold in the country. The secret is the huge variety. And this applies to color, texture, and cost.
- Among the gel polishes, VINYLUX from CND stands out. The product is offered as a “weekly” varnish, and, judging by the reviews on the forum, it really is a record holder for “longevity”.
- The company's main rival is the famous Revlon. The products of this company do not need advertising.
Alternative option
When asked what to use to cover the varnish, many women would answer that nothing. As it turned out, many ladies are opponents of the final coating. They believe that the more layers on the nails, the faster the base color chips. That is why some women prefer to simply coat their nails with varnish and patiently dry it.
There are also ladies who simply do not know about such wonderful remedies that help their manicure last longer.
We fix
Manicurists believe that applying a top coat to the varnish allows you to preserve the beautiful result of the procedure. It should be applied at the end of the procedure, since painting your nails without applying top coat means doing a poor-quality manicure.
It is very important to choose only high-quality top coatings. Naturally, they are not cheap
Some women cover their nails with clear varnish instead of topcoat, but this shortens the life of the manicure. How to make it seem to others that you always have a fresh manicure? Apply top every 2-3 days.
The top coat contains the following substances:
- Nitrocellulose. It fixes the varnish and also prevents delamination of the nail plate and varnish;
- Synthetic components. They can add shine to the coating, or, on the contrary, make it matte;
- Elastic substances. Basically, it is silicone or rubber. It creates a protective film on the nails;
- Biological components. They help the product adhere to the nail plate;
- Vitamins and mineral components. They are necessary for healthy nails.
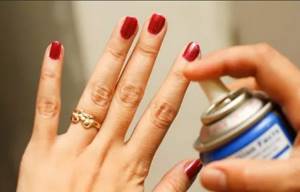
Don't use too much varnish
Most women believe that if you paint your nails in more layers, they will last longer. However, this is a misconception. After just a few hours, you may notice unevenness in the coating. This is due to the fact that a large amount of varnish does not dry completely.
If you want the polish to have a rich color on your nails, you don't have to apply too much product.
Stick to the layering technique. It is better to apply regular varnish in several thin layers of varnish. Before each of them, wait a few minutes so that the solvent contained in the varnish evaporates. Otherwise, not only will the coating be weak, but you may also damage the nail plate. The maximum number of layers allowed for durable coating is 2 layers.
Do not apply varnish in three layers
Trying to make the color of the coating more saturated, many apply varnish in three or even thicker layers. As a result, the varnish applies unevenly, takes a long time to dry, and looks sloppy. To make your manicure as long as possible, apply both the base and polish in a thin layer. Apply the first coat, wait until it dries, then apply the second coat. This way the polish will adhere better to the nail plate and be more durable.
Advice:
Do not paint your nails near an air conditioner or heater - due to temperature changes, the polish will not apply evenly. To make the coating dry faster, you can use special nail polish drying sprays or use the good old remedy: dip your nails in cold water.
Applying base before and after
The base layer is very important in manicure, since it helps to preserve the manicure for a long time. Nail base is a special product that cares for the nail plate, strengthens it and evens it out.
The base coat enhances the adhesion of the polish to the nail, so that the polish on the nails lasts longer; you need to select a quality product. If you paint your nails with regular polish at home, it is better to also apply a base coat. Regular nail polish doesn't last long, but a base coat will prevent your nail tips from chipping. It is better to apply 2 layers of base at the end to preserve the manicure longer - up to several weeks.
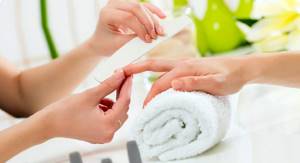
Nail preparation
In order for the varnish to dry well and stick, it is necessary to follow the technology of preparing nails for coating and the process of applying the varnish itself.
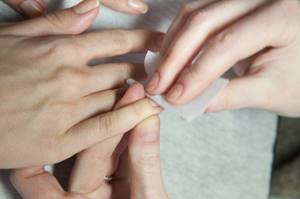
First, the old varnish is removed using a special liquid or acetone. Next is the most important thing. You should take care of the cuticle - the skin that grows around the nail
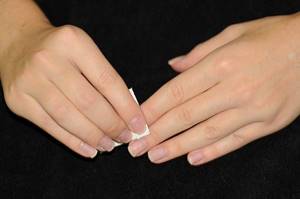
To make your manicure look beautiful and your hands well-groomed, apply a little cuticle oil. It softens the skin, after which it can be easily removed with a wooden stick. Next, you need to put the shape and surface of your nails in order. To give the desired shape, a hard file is used; softer files and special sponges are used to polish the nail plate. When the nails become smooth, the polish goes on more evenly. It’s good if these procedures are carried out at night, so you can smear your hands with nourishing cream and leave it on. When the preparations are finished, we proceed to applying the varnish coating. To begin with, use a transparent base. But in order for the polish to adhere better, the nail plate must be degreased using a special liquid or regular soap. Experts do not recommend applying colored polish to a bare nail plate. The base strengthens the nails and is an adhesive element. This way the color will last better and longer. The matter remains small. Apply polish from the middle of the nail, moving to the edges. You can apply a special product to the cuticle that will help quickly remove nail polish if it gets on the skin. If the color is uneven, with gaps, apply a second coat when the first one dries. At the end it is recommended to apply a clear sealing varnish. It will allow you to maintain your manicure longer, even if you have to come into contact with water.
Degrease your nails before applying polish
If you need skin cell regeneration, then oil solutions and nourishing masks are a useful option. However, they negatively affect the durability of nail polish. Before manicure, treat the nail plate with a special liquid. If any residual oil remains on the nails, it will prevent the polish from adhering to the surface of the nail.
To degrease the nail plate, you can use the products you have at home. A nail cleaner can replace a regular antiseptic or salicylic alcohol. Also use nail polish remover without acetone. After using nail polish remover, you should thoroughly wash your hands with soap and then wipe with a paper towel. White wine vinegar is also used to degrease the nail plate.
Why doesn't gel polish last?
The adhesion of the coating to the nail can be affected by many factors: the quality of the varnish itself, application technology and even your health! Let's look at the reasons in more detail.
Poor quality coating
Do not be surprised that the result disappointed you if you used products from dubious companies. In addition, the gel may peel off prematurely if you:
- you do not monitor the shelf life of the coating, and also violate the conditions of its storage (remember that varnishes are harmful to temperature changes and sunlight, which means they should be kept away from windows and heating devices in a closed cabinet or drawer);
- you often use varnish, which can only be removed using aggressive methods - sawing off or soaking in acetone (this can lead to increased fragility of the plate and problems with fixing the coating);
- you apply the same “2 in 1” product as a base and top: such a product is not as effective as two separate products, and, accordingly, provides worse adhesion of the layers;
- you use coatings that do not require the application of a base and finish at all: an attempt to combine three completely different products in one product at once looks dubious (and gives the same result).
We advise you to use only high-quality gel polishes from trusted manufacturers, and also always ask the specialist what kind of coating he uses. Not only the durability of the manicure, but also the health of your nails depends on this!
Shellac is what you need for increased fragility!
Violation of process technology
If you are confident in the polish you are using, check if you are doing your manicure correctly. Rapid detachment can result from:
overwetting of the nail plate (this phenomenon occurs if the hands were kept in water for too long and then poorly dried);
nails cut too short (at a short length it is not possible to properly seal the tip of the plate);
poor cuticle treatment: if there is skin left around the nail, the gel will get on it, but will not stick to it and will come off in a whole layer from the plate;
neglect of polishing nails: without polishing, they remain lumpy and uneven (even if this is not noticeable at first glance), and the polish lays unevenly;
insufficient degreasing: oily textures (including sebum) interfere with the adhesion of the coating to the plate, so do not use nourishing hand and cuticle creams before manicure;
unsuitable base for a weak plate (fragile nails must first be strengthened with a high-quality base for manicure, which should be selected by a professional);
exclusion of the base and/or top from the manicure process: these products prepare the nail plate and also fasten all layers together, providing a single strong coating;
too thick layers of products (be it base, top or the varnish itself);
poorly dried nails: it doesn’t matter at what stage of the manicure this happens - if at least one level is not completely dried, the technology is broken, which means the result will not be ideal;
ignoring “sealing”: if the free edge of the nail is not treated with varnish, the coating is easily damaged and removed with a film during wear.
Please note that these mistakes can also be made by a specialist in the salon! Watch what the master does during the manicure process: maybe he violates the technology, and then your nails suffer from it. Remember that not all professionals are created equal
If you have a mistrust of the master, it is better to change the specialist.
Health reasons
Some diseases affect the condition of the nails, and this, in turn, leads to the fact that the gel does not adhere well. Possible reasons include:
- hormonal imbalance (even changes in hormonal levels during menstruation can affect how the coating lasts!);
- disorders of the nervous system;
- diabetes;
- problems with immunity (in particular, after recent operations), as well as the associated use of antibiotics.
If you often experience peeling and rapid chipping of the gel, take time with your manicure and be sure to pay attention to your health. Make sure there are no problems in your body that you don't know about
How to glue peeling gel polish. How to make the coating durable?
Each manufacturer names different wear times, but it is usually recommended to renew your manicure once every 2 weeks. It also depends on the speed of nail growth: the client may come for the procedure a little more often or less often. How to ensure that the coating remains perfect throughout the entire wear period?
Let's look at the 2 most important rules that affect the durability of gel polish.
Proper manicure and preparation of the nail plate.
Immediately before coating, it is not recommended to apply fat-containing preparations to the nail plate: cuticle oil, creams, lotions, removers with moisturizers. Be sure to use a nail degreasing agent before applying the coating. The liquid effectively disinfects the nail plate before working with various coatings (acrylic, gel, gel polish), and also delicately degreases and dehydrates nails without drying them out. For this you can use:
Carefully remove the pterygium. With a wet manicure, it is easy to miss and leave it on the nail plate. Don't let this happen. You can effectively remove pterygium using:
– ,
– professional,
– .
Assess the condition of the nail plate. Has the previous coating been completely removed? If the top layer has absorbed a large amount of pigment, then between the upper scales there is now a small amount of varnish polymer. This factor prevents the gel polish from adhering to the nail. Buff your nails with a soft buff 240 grit. And also be sure to use a bonder for better adhesion of the material to the natural nail. For example, these:
Note the split ends. Shorten your nails or remove loose flakes
If the client does not want to remove the length, then the fragile ends need to be strengthened.
Correct application.
The first thing you should pay attention to is applying the base. It should not get on the skin, but it should completely cover the area where the color will be
Otherwise, the gel polish may peel off. Second, always seal the ends of your nails. This applies to all coating layers, including primer and bonder. Third, be sure to strengthen your soft, springboard-shaped nails. Without strengthening, gel polish will not last long. Strengthening the nail plate can be done using single-phase gel or acrylic. There are often problems with the base “creeping” from the cuticle, side rollers and ends; this is due to the tendency of this polymer to shrink. To reduce this effect, you need to apply the base with a medium drop and dry one finger at a time in a good powerful lamp. For example, in this:
Having learned how to correctly diagnose the condition of a client’s nails and identify the causes of gel polish peeling, you will be able to do manicures at a whole new level. This will allow you to expand your base of regular customers who will come to you.
We wish you successful work!
An important difference between regular polish and gel polish is the durability of the coating. But why does gel polish peel off?
The main reason is a violation of the technique of applying gel polish. How to apply the gel to achieve a flawless result and maintain an ideal coating without chips or cracks?
Types of fixatives
There are a huge number of types of nail polish fixer. They all differ not only in composition, but also in form. Let's look at the most current features of the product that helps fix the coating with decor.
By composition
An integral material for working with manicure exists in several variations. At first glance, it may seem that all bottles with clear liquid are the same, but this is far from the case.
There are several types of fixative:
- Classic option. Usually comes without a sticky layer, requires additional drying.
- Thick fixative. It has a dense consistency and has an increased protective effect against chips, cracks, scratches and fading. Perfectly strengthens manicure and all nails in general.
- Glossy finish. The product is not always transparent, and even a little cloudy. Creates a soft and pleasant gloss effect on nails.
- Matting. Helps reduce the brightness of the coating and gives it a special and noble matte effect.
- Fixative with biological additives. It contains natural ingredients that strengthen and heal the nail plate. Not suitable for extended nails.
By properties and form
Finish coatings also differ in properties:
- For regular varnishes. The product is suitable for treating nails that are painted with the most common varnishes. This coating lasts about 5-7 days.
- For fixing gel polishes. The gel polish top helps protect your manicure for 2-3 weeks. It must be dried in a lamp for 30 seconds to 3 minutes, like the entire gel polish system.
If we talk about the form of fixatives, there are several of them:
- glass bottle with brush;
- spray;
- liquid form with pipette.
An overview of the best nail polish fixers can be seen in the video.
The best manufacturers
For you, we have collected popular products that have been tested not only by time, but also by a huge number of nail art masters. What is the best way to choose a nail polish fixer?
| Manufacturer | average price | Characteristics |
| Orly | 700-900 rubles | A professional finishing coat creates a dense protective layer for your nail design. It makes the varnish dry much faster. |
| Kapous | 500-600 rubles | The manufacturer has a huge number of varnish fixatives. All of them perfectly protect the manicure, create perfect highlights and add depth to the coating. |
| Relouis | 200-350 rubles | The brand creates both classic fixers and sprays for the nail plate. They perfectly protect nails from mechanical damage. |
| Glos Top Coat | 160-250 rubles | The product has medium thickness. The product protects nails for 5-7 days, but gives a special unique shine. |
| RuNail | 280-360 rubles | The fixative has a convenient brush, thanks to which the product lies in an even layer on the nails. Protects well from chipping and delamination. |
| Kodi | 270-330 rubles | An excellent and relatively inexpensive solution for creating and securing your coating. Ideally fits on nails and protects them. |
Love the glitter
If a few days have passed and you see your manicure losing its appearance, use glitter to refresh it. It's fast and convenient.
“Open up any overgrown gel polish with a glitter polish to create an ombre effect,” Cosmopolitan beauty editor Brooke Shunatona shares a secret life hack.
— The best way to distract attention from a broken or overgrown manicure is glitter. It’s beautiful and seems to be applicable in the most desperate situations.”
Jennifer Choi of the Huffington Post agrees: "A glitter finish usually lasts longer because it improves the adhesion of the polish to the nail, and it's always easy to reapply with a new coat and won't be as noticeable as with plain or even matte finishes."
Sometimes glitter can only enhance a design. For example, an ordinary black coating, peeling off over time, after filling the gaps with sparkles, silver or gold varnish, becomes a real space on the nails.
Proper drying of nails
Most women know a life hack on how to fix nail polish in cold water. However, this method only gives an illusion effect. Ice water changes the consistency of the varnish and causes rapid chipping. Not the best way to preserve the beauty of a manicure for a long time is to blow on your nails. By doing this, you dry only the top layer, while the lower ones remain liquid. If you blow on the varnish, drops of saliva may settle on it. After this, small bubbles may appear.
Interesting: Manicure for beginners step by step photos 2022 and video
It is best to use special products so that the manicure lasts and pleases you for as long as possible. They contain substances that oxidize the varnish from the inside. The varnish needs to be dried in layers. The first layer needs to dry for about 15 minutes. Then apply the next one. The coating dries completely within 12-24 hours. To preserve your nail polish, for 24 hours after a manicure it is better to refrain from doing work that could damage the coating.
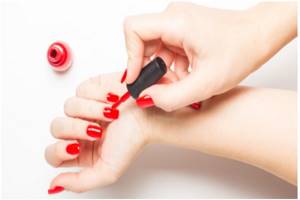
Manicure with regular polish at home
Prepare your nail. Polish the plate and file the free edge. The movements of the nail file are at the free edge from the edge to the center. Shape all your nails, making sure they are the same. Treat the cuticle. Cut off hangnails and apply cream to the skin around the nail. Before the procedure, you can steam your hands in a bath with salt and oils
ATTENTION! Steamed, wet nails cannot be painted or filed: the varnish will not stick, and the nail will be injured by the file. There are many ways: you can push the skin away with a pusher, the smooth metal end of a nail file, or an orange stick
If necessary, trim the cuticle with scissors, a machine, or a special socket (they are usually done at the opposite end of the nail file). Degrease the nail with alcohol, nail polish remover, or an alcohol-based lint-free wipe. Apply base. If you don't have one, a clear varnish will do. It is needed so that the colored layer does not stain the nail itself. Many bases contain vitamins for nails; they can be found at the pharmacy. Spread one layer of color. It must be thin, otherwise there is a high probability that it will not dry out and will become covered with bubbles. Push back the cuticle and apply polish directly underneath. The outer end (if the length of the nail allows) also needs to be painted over so that the varnish film does not lag behind the edge. Secure the colored coating with a topcoat. It can be glossy or matte, strengthening, with a diamond shine (if there are none, then replace it with colorless varnish). The top will make the manicure matte or more shiny and protect against wear.
Pin
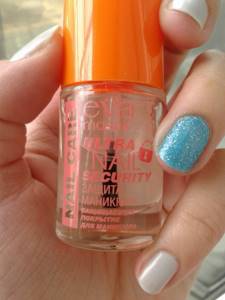
When the second color layer has dried, you should apply a transparent varnish (or a special fixative), which will finally fix the entire manicure. It is recommended to apply an additional coat of clear coat every couple of days to prevent chipping and add shine.
Mavala top coat nail polish fixative
Oil mixtures can be used several times
- 1 tbsp. Dissolve gelatin in 2 glasses of hot water. Cool to room temperature.
- 50 gr. any vegetable oil, 1 tbsp. l. honey, 1 tbsp. glycerin, water. Heat in a water bath, add 1 tbsp. l. white clay.
- Mix equal parts apple cider vinegar and vegetable oil.
- Decoction of elm leaves. 1 tbsp. l. leaves per glass of water.
- Chamomile, oak bark, flax seed, all in equal parts. Brew: 1 tbsp. for 400 ml. water.
- Calendula, mint, oak bark, nettle, chamomile - in equal parts. Brew: 1 tbsp. for 400 ml. water.
- Pour milk (kefir, fermented baked milk) into a small container, add a few drops of iodine, dip your fingertips.
- 1 teaspoon of seaweed per 100 ml of boiling water, leave in a thermos for 1 hour, strain.
Baths are usually done for 20 - 30 minutes, then rinse your hands with cool water and smear with nourishing hand cream.
Strengthening nails with onion peels
Onion peel is an ancient remedy used to heal skin and hair. Will it be good for your nails? It turns out yes. The raw materials include:
- Phytoncides;
- Carotene;
- Quercetin;
- Mineral salts;
- Vitamins “E”, “C”, “PP”, group B.
All elements are necessary for the body; vitamins and carotene are especially important for nail plates - a natural protein - the “builder” of hair, eyelashes, and nails.
Onion peel products can be prepared in 2 ways:
- In the form of decoctions and tinctures for nourishing baths
(A pinch of husk is poured with hot water and infused for 1 hour);
- As an oil
(Pour onion peels with vegetable oil and place in a cool, dark place for 10 days).
Onion baths are used 2-3 times a week for 1 month, and weakened nails and cuticles are lubricated with oil once a week until recovery.
From the list of caring and health products, for the convenience of their use, it is recommended to create an individual program on how to strengthen nails at home, which indicates on which days baths are taken and on which masks are taken.
Update your manicure
If the polish has chipped at the tip of the nail, or the nail has grown out, there are several ways to update your manicure. To hide a chipped polish, soak a cotton swab in nail polish remover and gently work the chip to smooth out the edges. Wait for the nail to dry, apply a thin layer of a new coating - so it will lie evenly.
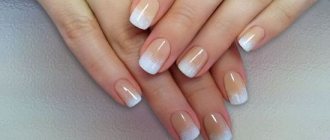
To hide an overgrown manicure, you can carefully file your nails and cover them with a layer of topcoat, or do a French manicure - cover the tips with a different color of polish to create the impression of a new design.
Finally, the most important thing: do not forget to moisturize the skin of your hands and cuticles every day, since a beautiful manicure is not only a fashionable nail design, but also well-groomed hands and the skin around the nails. Apply a top coat every few days to give your designed nails a beautiful shine and make your manicure last longer.
Expert commentary
Victoria Stanislavskaya, director of the beauty studio
Which girl hasn't wondered how to extend the life of her manicure? Unfortunately, ordinary varnishes do not please us with an ideal coating for very long; various flaws quickly appear... And again we don’t have enough time to go for a manicure, this is especially true for residents of megacities with their frantic rhythm! What to do in this situation? There are several ways that can extend the life of your manicure.
Polishing the nail plate
If the nails peel, then the coating will peel off along with them, so before applying the polish, you need to carefully remove the already peeled “scales” with a buff (a soft nail file with a very fine abrasiveness that practically does not injure the nail plate)
Base coat
Many people skip this step, but it also prolongs the life of your manicure. Before applying the base coat, it is advisable to degrease your nails with a special liquid called “Degreaser” or “Dehydrator”. Just apply it to a cotton pad and wipe the nail plate - this allows you to remove excess moisture and the natural fat layer, in the presence of which the coating does not adhere to the nail properly, which makes the coating last less. Next you can apply the base coat. It is advisable to choose it from professional lines.
Top coating
After you have applied two layers of varnish (preferably these layers are not thick), you let the varnish dry a little, then apply the top coat. It looks like clear varnish. It is also better to choose it from professional lines. Why do you need a top coat? It allows you to keep the color saturated longer, and also evens out the nail plate and adds shine.
These three simple steps will allow you to create a manicure at home that will delight you longer than usual. But also don’t forget about long-term coatings, such as gel polish, biogel - they are an alternative to regular varnish and last much longer!
Expert commentary
Anna Lehmann, nail technician
Every woman wants to look beautiful and well-groomed, and nails play one of the main roles in female attractiveness. Clean and tidy hands indicate a woman’s well-groomed appearance and her desire to look perfect under any circumstances. Today, manicure and nail care have a special place in the beauty industry.
Even the most perfect manicure can very quickly lose its original appearance. The durability of a manicure depends on the quality of the base and top coat, as well as how they are applied. Before applying polish, be sure to use a buff and degrease your nails so that the nail plate is smooth and clean. Next, you need to apply a base; if your nails are weak or peeling, then this should be a strengthening base. Then - two layers of colored varnish, while the end of the nail is necessarily sealed, and at the end - a fixer (top coat). To ensure that all these layers dry quickly, you can use a dryer.
Take the test Do you love yourself? The feeling of love can be directed either towards a specific person or expressed in relation to one’s own person. Its manifestations have various forms, but it should have nothing to do with selfishness and narcissism. In order to determine the degree of self-love, we suggest answering questions.
How to choose raw materials?
When choosing a varnish, consider your financial capabilities. You should not think that a cheap varnish can compare with a professional one. Choose mid-priced products.
- Inspect the bottle carefully. If there are defects on it or the bottom is not very stable, refuse such a purchase. An unstable bottom will lead to the constant capsizing of the bottle, and defects (chips, cracks) will shorten the shelf life of the product. Choose raw materials that have metal balls inside. It is necessary for uniform mixing of the product.
- Inspect the brush. It must be of high quality. It is better if the fibers are the same length and tightly packed. Then, when applying varnish, there will be no streaks or lumps on the nails. If the pile is disheveled, it means the varnish is stitched or of poor quality. A good varnish will not have the strong smell of acetone. When the varnish thickens, you can add a little acetone to it, but it is better to purchase a new bottle. If you dilute the varnish once, it will no longer be as bright and durable as it was immediately after purchase.
- Consider texture. Products with glitter and small sparkles stay on the nails much longer. The coverage will last for 7-10 days. Sand varnishes give the nail plate an interesting texture. They also last quite a long time. If you need coverage for 10-14 days, choose varnishes with a craquelure effect.
- Consider the shade. Pearlescent varnishes adhere well to nails and are a very versatile product. Manicure with mother-of-pearl is a daily option. When painting your nails with bright or dark shades, even the smallest scratches can be noticeable. Light colors do not show damage to the coating.
It is possible to extend the durability of your manicure. How long the varnish lasts is a question that depends on the raw materials and the quality of application.
It is also important to properly care for your nails and cuticles. Try not to apply nail polish to your cuticles.
Because this will lead to chipping very early. If you cannot paint your nails evenly and beautifully on your own, ask a friend or contact a manicurist.
How to fix regular nail polish so that it lasts for a long time: tips and tricks
It is not enough to fix the surface correctly; during application and after it is necessary to adhere to a certain technology. There are several tips that require an integrated approach.
Strengthen
Of course, this is a long process. However, if the plates are soft and thin, not a single product, even an expensive one, will remain in its original form for more than 1-3 days. It’s elementary: bend the tip of the plate and the coating will fly off.
To strengthen the plates, use healing recipes for strengthening. Before treatment, clean the surface and rinse your hands thoroughly.
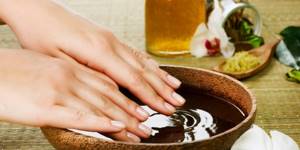
- Salt bath:
Mix 2 tbsp in a bowl. spoons of salt, 1 teaspoon of 5% iodine, 3 drops of essential oil, add warm water (200 ml). Sea salt can be replaced with table salt. It is not advisable to use bath salts with fragrances and dyes. Duration 20-30 minutes, then lubricate your hands with nourishing cream. Repeat once every 7-9 days.
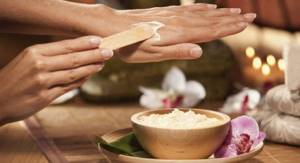
- Massage with oils:
You can buy any oil. Olive, jojoba, coconut, chamomile, tea tree, eucalyptus, avocado, lemon, sandalwood, and ylang-ylang are most often recommended. To enhance the effect, choose 3-4 drops of your choice, 4-5 drops each.
Rub the resulting mixture into the nail plates and skin with massage movements for 5-8 minutes. Afterwards, put on cotton mittens to avoid staining your underwear. Carry out the procedure weekly at night.
Grind
The advice is related to the previous one. On a flat surface, without bumps or pits, the coating will last much longer and will look neater. Therefore, take a Teflon or diamond file designed for polishing the required hardness - and go ahead.
Just without fanaticism! Since the procedure has disadvantages: it can weaken and thin the surface, especially prone to delamination. Experts recommend sanding no more than once a month if necessary.
Degrease
Nourishing masks and oily solutions nourish the cuticle and promote cell renewal, but for cosmetic products they are the worst enemies.

For degreasing, both a special cleanser and an antiseptic gel or salicylic alcohol are suitable. As a last resort, treat with nail polish remover without acetone, wash your hands with soap and pat dry with a towel. Also make sure that no dust or dirt adheres to the plate.
Use the base
Do not apply decorative special coating immediately. A special base was created to hide the remaining irregularities and protect the plate from the harmful effects of the dye.
To achieve the best results, professionals advise buying products from one manufacturer. Choose a base that restores and strengthens damaged, weak horny plates.
Only thin layers
The thinner the layer, the more firmly it clings to the nail. Do not hurry! Dry the row properly.
The maximum number of layers is 2. Dry the first one for 15-20 minutes before applying the next layer. It will take from 12 hours to a day until it dries completely. During this period, it is not recommended to perform work that could damage the coating.
Wear gloves
How to fix regular nail polish so that it lasts a long time if you wash dishes and clean without gloves? Nothing! It may be inconvenient, but you have to pay for beauty with comfort. If you are bothered by the rubber smell that remains on your hands, wipe your skin with lemon juice after doing household chores.
It is recommended to wear thick rubber gloves with cotton lining. Household chemicals and hot water will cause enormous harm to the health of your nails and the beauty of your manicure.
Technology
Avoid getting the varnish on the cuticle, it lifts the paint and leads to chipping. It is not necessary to cut it, just carefully push it away with an orange stick using softening oil. Base oils for cuticles: burdock, castor, wheat germ, apricot, almond.
If the varnish smudges or chips during painting, under no circumstances apply another layer on top. This action will make the surface uneven and unsightly. First, you need to smooth out the damaged area with a cotton swab, after moistening it in liquid with acetone. Apply a layer over the top after drying.
Pin
Experts advise applying the final stage the next day after the cosmetic procedure. This way the manicure will last longer.
The durability and quality of the manicure depend on the properties of the top coat, so you can’t skimp on it. You can change it to a colorless varnish, but the effect will be worse. To give the impression of a fresh manicure, apply sealer every 2-3 days.
Follow the operating instructions
It is important to understand that varnish is primarily a cosmetic material that requires proper use and storage. A few simple rules:
- store in a cool, dark place;
- do not shake the bottle, as the air bubbles that form will quickly render your favorite red unusable;
- To mix the contents, roll the bottle between your palms.
Choose quality raw materials
You should not expect a lasting effect from a cheap product as from a professional one. There is no need to purchase expensive luxury brands, but low-quality ones should be left on the store shelf.
When selecting, pay attention to the bottle; the presence of defects is unacceptable; the bottom must be stable and level to avoid tipping over. Choose a specimen with metal balls inside. They are designed to mix the contents evenly.
The image of a manicure depends more on the brush than on the composition. A low-quality brush will leave streaks and lumps. Villi of the same length should fit snugly. Disheveled pile indicates poor quality or expired.
The contents should not emit a strong odor of acetone. It is used in production, but the aroma must be weak and light.
If the substance thickens during use, but the color turns out to be your favorite and it will be difficult to say goodbye, you can dilute it with a drop of acetone-based liquid. But this is a signal to replace the bottle.
Dry cool
Drying a freshly painted layer near a radiator or under a hot hair dryer is a bad idea. Such actions will only bring the moment of the next painting closer. The best option is to dry it naturally. In a difficult situation, keep your hands in cold water.
Correct application
The first thing you should pay attention to is applying the base. It should not get on the skin, but it should completely cover the area where the color will be
Otherwise, the gel polish may peel off.
Be sure to strengthen soft, springboard-shaped nails. Without strengthening, gel polish will not last long. Strengthening the nail plate can be done using acrygel, single-phase gel or acrylic powder.
There are often problems with the base “creeping” from the cuticle, side rollers and ends; this is due to the tendency of this polymer to shrink. To reduce this effect, you need to apply the base with a medium drop and dry one finger at a time in the lamp.
Having learned how to correctly diagnose the condition of a client’s nails and identify the causes of gel polish peeling, you will be able to do long-term manicures. This will allow you to expand your base of regular customers who will come to you. Tatyana Sorokina master of manicure and pedicure
Option five: nail oil
How to coat the varnish to improve the health of the nail plate? In this case, a special medicinal oil is suitable.
Surely all women know that polish can have a negative effect on the health of their nails. Situations often arise when the nails simply turn yellow or lose their usual shape. This may be due to poor quality coating. In order to heal and restore the nail plate, you need to use a special oil.
When the polish is completely dry, take a soft brush and cover each nail with it. After this, you need to wait about ten minutes and only then proceed with your business. The oil has the ability to penetrate the nail coating and act on the nail. At the same time, remember that you cannot apply this product before varnish. Otherwise, the coating may not lie as desired. You can purchase this remedy at any pharmacy chain or store specializing in nail services.
Strengthening the nail plate
Manicurists have a separate item in their price list – strengthening the nail plate. This is a useful option for women with thin and brittle nails.
Acrylic powder is used for strengthening, which has the following advantages:
- You don't need to undergo training to learn how to use it.
- Available in any cosmetic store.
- The thickness of the acrylic powder layer is adjusted. There will be no additional volume on the nails that can spoil the appearance of the nails.
- Provides good adhesion to varnish due to its rough texture. This is an excellent property for keeping gel polish on.
- Hides cracks and imperfections of the nail plate.
You can also strengthen the nail plate with various masks and baths.
- The most common way to strengthen the nail plate is to take a salt bath. To do this, mix salt (2 tbsp), iodine (1 tsp), essential oil (3 drops) and 200 ml of water.
- It is better to use sea salt, as it has medicinal properties. Place your hands in the prepared solution for half an hour, and then lubricate the skin of your hands with a cream with nourishing properties.
- Carry out this procedure every week to strengthen the nail plate.
You can make effective masks using oil - coconut, olive, chamomile, eucalyptus, sandalwood or lemon. Use tea tree oil, which additionally has a disinfecting and anti-inflammatory effect.
Mix a few drops of different oils and apply the mixture to the nail plate. Rub the oil mixture thoroughly with massage movements and leave overnight. To avoid staining your bed linen, wear cotton gloves. Do it for 7 days.
Option two: finishing gel
How to coat gel nail polish? Of course, with a special finishing agent. It is worth noting that such a fixative can only be used when using gel polish or acrylic. When applied to an even layer of a standard decorative nail product, the finishing gel simply will not “grab.” If you manage to dry such a manicure, then most likely it will not last more than two days.
The finishing gel applied to the gel polish allows the manicure to last for a long time. Reviews from women who use this product are positive: the design does not wear off, the coating does not chip, and the manicure lasts more than one month. At the same time, ladies do not limit themselves to housework.
Apply the finishing gel only after the base coat has dried. Drying must be carried out in a special lamp. Apply the finishing gel using a special brush to the nail surface and place your hand in the lamp. Each nail must be kept in the device for at least three minutes. After this, make sure that the gel is completely dry. Treat the nails with a degreaser.
Features of this type of varnish
Compared to other varieties, this one attracts more attention (of course, if we talk about options in the same color), so it requires moderate use.
Another feature of it is its versatility: the shiny varnish will look equally beautiful on both long and short nails. Their shape also doesn't matter.
At the same time, there is an incredible number of coating options. Firstly, it can be of all possible colors, secondly, the size of the sparkles can vary from micro specks of dust to large pebbles and sequins, thirdly, they can be of a wide variety of shapes (stars, disks, hearts, flowers and much more).
And finally, different types of shiny varnish also differ from each other in their transparency. Moreover, it depends on how transparent the color itself is, and on how high the concentration of glitter is.
Good varnishes that last a long time: a review of manufacturers
You can extend the life of your manicure by correctly using purchased compounds, or you can achieve this using tricks with special coatings for nails. However, if the varnish itself has little durability, it will be very difficult to artificially extend it.
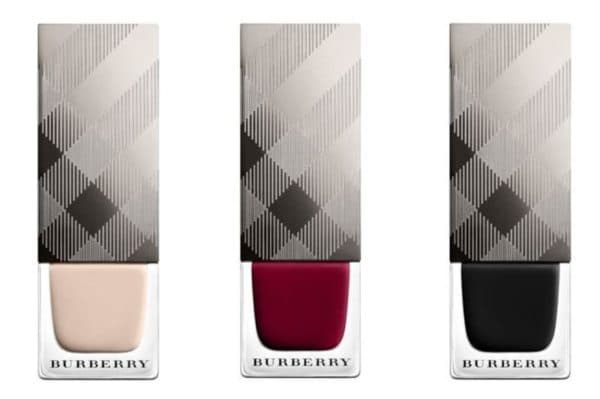
Burberry
Which manufacturers have proven themselves well in presenting durable and beautiful varnishes:
- OPI. It is known primarily for the breadth of its product line, but that’s not all. Such varnishes are distinguished by their high quality, resistance to external influences and increased durability.
- Essie. The company has become famous largely due to the fact that the products from this brand stay on the nails for a very long time and retain an attractive appearance even a couple of weeks after application.
- Burberry Nail Polish. The varnish from a famous brand is created using a patented technology containing vitamins and myrrh extract. Thanks to this, the composition optimally protects the plate from damage, giving maximum durability to the manicure.
The place where you purchase the varnish is important, since there are even too many fakes on the modern market. So, you should buy formulations in specialized stores, focusing on the expiration date and brand.
Kodi Professional
Reliable fixation of the hairstyle will be ensured by Schwarzkopf Professional blue hairspray.
Be careful with water
Once your beautiful manicure is done, make sure you don't have long contact with water for at least 24 hours. Faina Ritz, founder and chemist of Duri Cosmetics, explains that when you put your hands in water, "your nails absorb the water and their natural shape expands." Then, “as this water evaporates, the nail shrinks, causing the coating to crack and break off.”
Also, wash dishes and laundry only with rubber gloves and sacrifice long baths for beautiful nails. A quick shower is your new choice!
This advice will benefit not only the manicure, but also the hands themselves, which suffer from dishwashing detergents and all kinds of powders.
Manicure rules
Over the past six months, I have given up going to a manicurist. First, her salon closed for a while. I then spent a lot of time restoring my nails after years of gel painting. So now I decided to do my nails the old fashioned way.
My nails became simply excellent, but one fact continued to upset me. The polish comes off my nails in just a few days. When my patience ran out, I called my craftswoman and asked what I was doing wrong. In response, I received some advice.
I can’t say that with them my polish lasts for 2 weeks. But much more time passes when he looks decent. The difference is noticeable!
No hot water before manicure
If I know I'll be painting my nails tonight, I don't allow hot water near my hands. This means no sauna, hot tub or shower. I even wash dishes in cool water. The fact is that hot water slightly softens the surface of the nail plate.
Therefore, when a nail with fresh polish cools completely, air bubbles may form between them. As you understand, in such cases the varnish will come off much faster.
Degreasing my hands
Now before each painting I wipe my nails with nail polish remover. Without acetone, of course. Thanks to the absence of sebum, polishes last better.
I don't paint my nails right before bed
I used to think that a thin layer of nail polish takes 15-20 minutes to dry. In fact, it needs at least a few hours. And when we go to bed with freshly painted nails, the top layer is crushed and becomes duller.
Maybe the next morning it won't be visible to the naked eye. But you will need to redo your manicure faster.
I work with gloves
I make sure to do all housework only with gloves. I wash dishes, floors, and wash stains on children's clothes exclusively with protection. Otherwise, no nail polish will last.
Base and clamp
All my varnishes are of high quality, with good coverage. But before, I still applied it in two or even three layers. I thought it would be better this way. In reality, everything is somewhat more complicated.
A thick layer, on the contrary, peels off faster. But this does not mean that one stroke with a brush is enough. Be sure to make the first layer the base. These are special transparent varnishes that both nourish the nail plate and better adhere the varnish.
Then the pigment layer must be hidden with a fixative. They are sold separately, but I still use the same clear varnish as for the base.
These tips may not change anything radically, but, in my opinion, everyone should know this. And here we wrote about the dangers of gel polish.