French manicure is a classic that is always in fashion. The French jacket is a favorite of many women; it goes well with clothes in any style, from evening dresses to formal office attire. A distinctive feature of the French coat is the smile line, which not everyone can draw by hand. This is why there are stencils for French manicure - with them anyone can draw the perfect smile line in a matter of seconds.
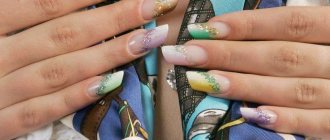
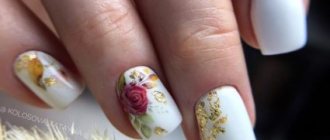
Nowadays, the classic version is no longer surprising, so non-standard French is becoming more and more common, when the edges of the nail are painted in bright colors. Women decorate their nails with designs, decorating the border of the smile line with rhinestones or “golden sand”. In general, there is room for your imagination to run wild.
What is called the “smile line”?
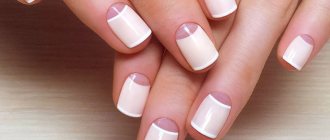
The classic version of the French manicure is when the main part of the plate is painted in a tone close to the natural nail (light without or pale pink), and the tip is covered with white varnish.
The line separating the protruding tip of the nail from the main part of the plate is called the smile line. It is carefully outlined with a brush, and then the protruding part of the nail is painted white along the contour.
Note that the smile line is different for all people: symmetrical and not very symmetrical, beveled to one edge, round, oval, elongated, etc. But this does not matter, since by doing a French manicure you can adjust it in your favor.
How to use it correctly?
Stamping technique
To use this technology you will need:
Kits are available for sale that contain all the necessary material to create an exquisite manicure design. Typically, manufacturers complete sets with several plates with various images.
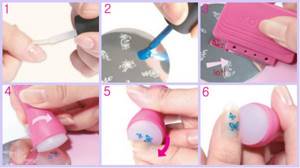
Step by step application guide:
- The first step is to remove the remnants of the old manicure from your nails.
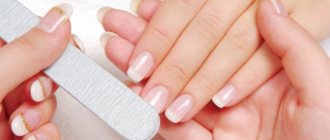
- Carefully file the nails and generously degrease them.
- Using a specialized varnish-paint, we begin to fill in the image on the stencil.
- Using a scraper, remove excess varnish base.
- Using a rubber stamp, touch the mold and collect the applied paint.
- Very carefully touch the stamp to the nail and thus transfer the design onto the plate.
- After waiting for the paint to dry completely, the surface of the image should be treated with transparent varnish. This will make it possible to keep your manicure in perfect condition for as long as possible.
French manicure
To work you will need:
- ordinary varnish (good quality);
- adhesive-based stencils;
- transparent varnish for fixing;
Step-by-step application guide using regular varnish:
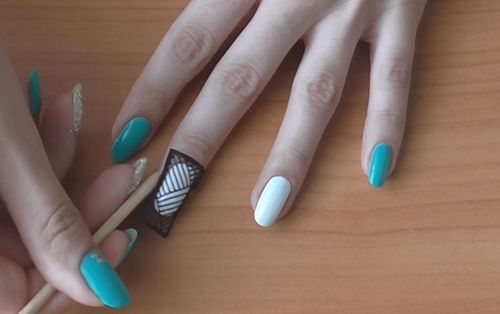
- Having filed the nails and thoroughly degreased them, we proceed to applying the base, which, as a rule, consists of a dark blue varnish.
- After waiting for it to dry completely , take 2 strips and stick them on, keeping the right angle at the top left. It should be a rectangular shape.
- The space that results from these manipulations is painted over with blue varnish.
- We wait for it to dry completely and, having prepared 3 strips, glue them, creating a triangular shape in the middle of the nail plate.
- The resulting middle is painted with pink varnish.
- After waiting for complete drying , apply a fixative.
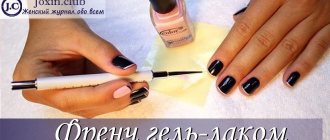
Step-by-step application guide using gel polish:
- Apply the base coat.
- Leave to dry for 2-3 minutes under a UV lamp.
- A stencil is glued to the nail plate.
- The workpiece is painted with ordinary varnish and carefully removed.
- As soon as the varnish is completely dry, the nail is treated with a top coat.
- Leave to dry under a UV lamp for 2 minutes.
Stencils for French - what are they and what are they for?
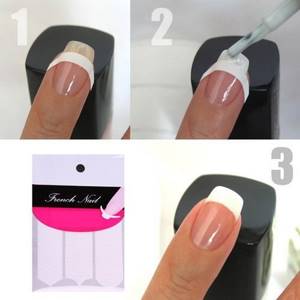
What do stencils for a French jacket look like? These are small sticky strips of paper in the shape of a crescent, usually small in width - 5-6 mm. They are glued one at a time onto the nail in the place where the smile line is located. All that remains for the woman to do next is to apply white varnish to the tip, being careful not to go behind the stencil, and voila! The perfect French jacket is ready!
It’s interesting that stencils for French hair are used not only at home, but also by many craftsmen in salons. They allow you to save a lot of time and effort, because to draw a smile line with a brush by hand, you need good skill. One wrong move and everything will have to be redrawn. With stencils everything is much simpler: glue them, paint them with varnish, remove them and you're done.
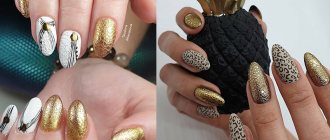
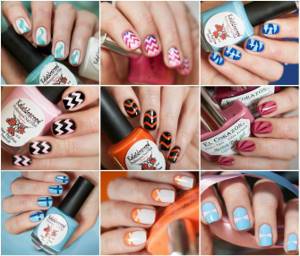
Modern French manicure is replete with a variety of shapes. For example, the smile line does not have to be semicircular. Nowadays, non-standard solutions are at the peak of fashion, such as:
- triangle;
- zigzag;
- wave;
- heart;
- straight beveled line.
Stencils of all listed shapes are available for sale.
The price for them is low, for example, on the well-known Aliexpress they are sold at a price of 10-11 rubles per package. The package contains 60 strips, that is, enough for 6 times.
You can purchase stencils for a French jacket as a set. El Corazon has these. The set includes 120 strips in every shape and variation imaginable. The price is affordable - only 70-80 rubles for such a variety!
Which gel polish is better
It’s hard to say which gel polish is best for French polish, there are many of them, for every taste, but the following are popular:
- KODI 20 CN. This is a translucent tea rose shade. The product is usually applied in 2 layers, then it looks denser. The enamel texture makes work easier and avoids smearing on the skin.
- PNB 004. It is light beige, in two layers it has a milky undertone. The varnish retains its shine and tint for a long time.
- MY Nail 003. Lovers of peach color will like it. The shade is unobtrusive, but noticeable.
- MY Nail 005. Similar to the previous color, but lighter and cooler.
- MY Nail 007. This is a coffee with milk shade, also delicate and at the same time juicy.
KODI 20 CN MY Nail 007 PNB 004
The last three varnishes are characterized by ease of use, low consumption and durability.
As a base you can use KOTO 840 (camouflage), OXXI Professional 1 and 3, POLE, Monami bases. They not only add gloss and tint, but also smooth out the surface of the nails.
KOTO 840 OXXI Professional 1 OXXI Professional 3
For a French coat, white varnish is of great importance, which should be applied in a dense layer, without bald spots. This requirement is met by two-layer ones, sold for 250-350 rubles. per bottle of 10-12 ml:
- Monami Luxury Light gold,
- Bluesky 80501,
- Neonail 2696,
- Lunail 61,
- Klio 52,
- TNL #28.
TNL No. 28 Monami Luxury Light gold Lunail 61
It’s easier to work with thick consistency single-layers that cost 500-600 rubles. per bottle 7-10 ml:
- Tartiso TCL-32,
- Tartiso FR-01,
- Tartiso TRV-01,
- Arnelle 001,
- Haruyama 001,
- Ju. bilej B1,
- Bagheera Nails BN-04,
- Kodi 33,
- Lianail Snow Maiden,
- Neonail 5059,
- Alena Caprice 104 and 300.
Neonail 5059 Tartiso TRV-01 Lianail Snow Maiden Kodi 33 Haruyama 001, Arnelle 001
What can replace stencils for French manicure?
Do you want to do a manicure right now, but don’t have stencils on hand? There is no need to limit your creative flight. Scotch tape, adhesive tape or landscape paper - these improvised items will successfully replace stencils for a French jacket.
We make a stencil from adhesive tape or electrical tape:
- Cut a sticky strip 3 cm long.
- Cut lengthwise so that the width of the strip becomes 0.5 cm. The result is a sticky piece of 3 by 0.5 cm.
- Give it a classic semicircular shape or leave it as is. If your soul requires sophistication, you can cut a zigzag or wave.
- To ensure that the tape reduces stickiness and does not tear off the nail polish, a stencil from it must be glued to some surface before use and peeled off - do this a couple of times.
Don't have any sticky tape at home? Then the paper will come off. It is better to take a landscape paper or, in extreme cases, a notebook sheet. A newspaper excerpt is not suitable - it is too thin and stained by printing ink. Cut out a stencil of the desired shape from thick paper. It’s easy to attach the homemade product to your nail – just wet it with water.
The nuances of using nail stencils
To get a truly beautiful result, you need to know and follow some subtleties. Failure to follow basic techniques for using a stencil for nail polish can result in a smeared and unclear design.
Therefore, in order not to redo your manicure, consider the following features.
- It is necessary to apply the varnish for the design with a sponge and not with a brush. A limited amount of varnish is collected on the sponge, which eliminates spreading and blurred edges.
- Do not peel off the selected stencil in advance. We need it to hold firmly on the nail and not move, so we shouldn’t let the sticky layer dry out.
- Nail design stencils cannot be removed immediately. Apply a couple of layers of varnish, wait for it to dry, and only then peel off the template.
Since the surface of the stencil will already be stained, it is better to use a new one for each nail. If you print them, there will be no problems with the number of sketches.
We make French in 15 minutes!
You will need:
- stencils (10 pieces);
- varnishes of two colors (for the main part of the nail and the edge), transparent fixative varnish.
Let's get to work!
- Do a regular hygienic manicure: treat the cuticle with tweezers or a special remover (we wrote about what a cuticle remover is here).
- File your nails to give them the desired shape. French looks impressive on rectangular and classic oval shapes.
- Apply a base coat to your nails (special base coat or regular clear polish).
- Cover your nails with 2 layers of varnish of the main color (pink or light beige). You can leave them transparent. Dry each layer in air for 7-8 minutes, or 2 minutes in a UV lamp (if using shellac).
- Glue the stencil to the first nail. Apply it directly to your own smile line and wrap it around the pad of your finger.
- Apply white polish to the edge of the nail, staying within the stencil. Remove the stencil. Dry the varnish. Repeat the same with the remaining nails.
- Cover all nails with a clear coat of top coat varnish. This will give the manicure extra shine and even out the border from the base color to white at the edges.
- Decorate your manicure as desired with glitter, rhinestones, stickers, designs, or leave it as is.
Using stencils, you can make a French haircut very quickly and at home, rather than wasting time recording and going to a beauty salon.
French manicure is a favorite design option for the nail plate for many fashionistas. This design is very feminine and natural, and in addition, it allows you to look well-groomed and appropriate in almost any situation. French manicure never goes out of style, it suits any style and color of clothing and looks suitable in any situation. An absolutely indispensable accessory for creating such a manicure are special strips - stencils for French manicure, which help make it neat.
Classic French: hand drawn
French or French manicure is one of the most common nail designs, initially with a pink nail plate and a white crescent-shaped tip.
View this post on Instagram
Publication from