Regular polish is currently losing its popularity due to the emergence of so-called gel polish. Every day it becomes more and more difficult for him to compete with him. Of course, there are reasons for this. In this article, we will take a detailed look at the main advantages and disadvantages of regular nail polish, tell you how to properly perform a manicure with a simple polish, and also show you some amazing nail design ideas that can be done using the most common polish.
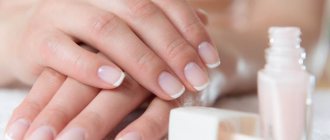
Proper manicure at home
As a result, you have to puzzle over how to properly do a manicure using the simplest means at hand right in a hotel, rented apartment or in a sanatorium on the shore of a warm sea.
With such a development of events, detailed instructions will definitely help out, explaining what actions need to be taken in order to apply the right manicure at home in the shortest possible time.
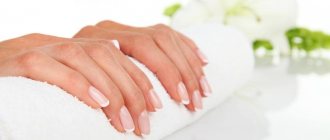
- Strange as it may sound in the era of the widespread dominance of fashionable nail art salons, a completely decent and even stylish manicure can be done even with the most modest budget for cosmetics and with almost a complete lack of relevant skills.
- To be convinced of this, just look at a few photos of a proper manicure on the Internet and in fashion magazines.
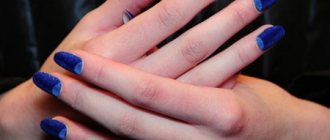
White and blue nail art

A more complex version of a manicure with regular polish for short or long nails is the design proposed in the photo. You'll have to tinker with him. However, the result will please the young lady and arouse the envy of her friends. So, if the reader is interested in nail art technology, we offer detailed and step-by-step instructions for its implementation:
- First of all, you need to prepare white varnish, blue and transparent, a toothpick, a household sponge, a piece of foil, scissors and tape.
- Then coat each nail plate with white polish and dry thoroughly.
- Draw a line on the tip of the thumb and ring finger - the technique resembles a French one.
- Paint the separated area with blue varnish.
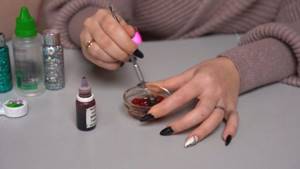
- Drop equal amounts of white and blue varnish onto the foil. Mix.
- Paint the top of the cake with the resulting shade.
- Next, complement it with white and blue specks.
- Place multi-colored peas on the nails of the index finger and little finger.
- Then cut off several thin strips of tape and attach it to the nail plate of the middle finger.
- Apply two stripes of blue and mixed shades to a household sponge so that one overlaps the other.
- Then make a print and remove the adhesive tape.
- The manicure done with regular varnish is completed by applying a transparent coating and drying.
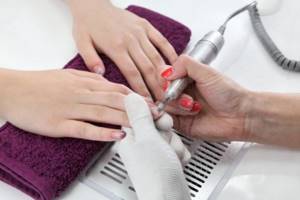
Hygienic manicure techniques
Regardless of what plan was adopted for decorating nails - applying varnish, gel or enamel - the procedure for care and decoration should still begin with a hygienic manicure.
Without being able to apply the correct hardware manicure, at home or while traveling, it makes sense to use one of the following two methods:
- Trimming, in which the cuticle and side ridges are processed with special scissors or nippers;
- European, which aims to soften the cuticle and move it towards the nail base.
Bright French
The technology of French manicure is familiar to many. However, the classic version is so common that it has already become boring. And then professional craftsmen thought about solving this issue. As a result, we came up with an original design, the photo instructions presented above will help you execute it. If there are no special stencils or you simply don’t want to spend money on them, you can draw a “smile” by hand using a thin brush or cut out templates from paper adhesive tape.
The insidiousness and unpredictability of the cuticle
In this case, it is advisable to take wise advice: it is better not to undertake a trimmed manicure if you do not have the slightest idea about the structure of the cuticle and the safe method of processing it.
Simply removing the cuticle is completely unacceptable. This action is strongly opposed by the following two considerations.
- After a few days, burrs will form at the site of the crooked cut and pain will appear.
- This fact will be all the more unpleasant because on the evening of applying the manicure you will get the impression that all the procedures were done flawlessly.
- On each finger, the cuticle has a special structure and is differently close to the capillaries.
- This means that if the skin on one finger can be cut off without pain and suffering, then on the other there will be a very real danger of injuring oneself.
The area where the finger is injured will ache and ache, and if things go badly, it will fester, which will require immediate surgical intervention to completely remove the pus.
Simple nail design for beginners: stamping with gel polish
Mastering stamping is not at all difficult, even despite the large number of tools in the set. Even if you have just started mastering nail design, we recommend that you immediately choose a high-quality stamping kit for yourself. Cheap options can completely discourage you from working with this tool, since they contain many defects, for example, the pattern on the plates is not embossed very well, the stamp is made of low-quality material, which affects the design on the nails.
The standard stamping kit includes:
- plate with patterns - you can buy more of them by choosing any patterns you like
- stamp - pay special attention to its quality, the stamp will determine how the pattern on your nails will turn out
- scraper – necessary for removing excess gel polish on the plate
Gel polishes may be included in the set, but it is better to buy thick gel polishes, which are ideal for making stamping patterns.
Dry and wet manicure
To avoid such a development of events, you need to give yourself a proper manicure with European-style gel polish. It virtually eliminates the risk of injury.
European manicure is divided into dry and wet. Dry is applied using special cuticle treatment products called removers. The second is done using a bath that softens the tissue.
To make a dry manicure, just cover the cuticle with a special product. All that remains is to wait for the time specified by the manufacturer, and then move the cuticle with a special orange stick. Any doubts that this will not be difficult to do will be dispelled after watching a video of a proper manicure.
Nail art black and beige
If the reader likes the design proposed in the photo, you should prepare varnishes of the desired shades, a thin brush, rhinestones, and glue. Then perform simple manipulations:
- Paint all nails, except the one on the little finger, in a light shade. Cover it with black varnish.
- Wait for the base to dry completely and add a black arch to the nail on the ring finger.
- Dry the result.
- Then glue the rhinestones.
- And dry your nails with regular polish in a convenient way.
Required set of accessories
A wet, unedged manicure should be given a little more attention.
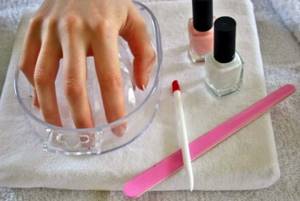
To apply it you will need:
- A container with warm water. When traveling, you can use a tea mug or basin. It is desirable that the water temperature be in the range from 37 to 40 degrees;
- Orange stick. You should keep two or three of these sticks ready. The fact is that warm water will quickly destroy the integrity of the stick;
- A file for giving the nail plate a suitable configuration. For natural nails, use a 220 grit file;
You should also keep two towels ready to quickly dry the skin on your hands.
Gradient nail art
The design looks very stylish, the technology of which can be seen in the photo. For its execution, you can use any varnish. The main thing is to protect the skin around the nail plate with thick cream or PVA glue. And also, if desired, you can cover a regular manicure with shiny varnish, decorate it with rhinestones or a pattern. It all depends on your own wishes and imagination.
Simple sequence of actions
- First you need to create the desired configuration with a file. It is important to do this just before the bath, otherwise you will have to deal with softened nails that are practically impossible to file.
- The geometry of the nail is selected according to its thickness and length. If you don't have enough time, just shorten the nail slightly. This also makes sense if it still retains the contours obtained in the nail salon.
- Next, you need to soberly assess the condition of the side rollers. If their coarsening is detected, you need to carefully process them with a 180 grit file. It is important that during the work it does not touch the nail in any way.
- Then you need to soak your fingers in the bath for seven to ten minutes. This will significantly soften the cuticle, which will make it much easier to move.
- Then an orange stick is taken and the cuticle is gradually shifted towards the nail base. You should not put too much pressure on the stick, otherwise it will injure both the nail and the cuticle. This algorithm should be reproduced on all other fingers.
- All that remains is to thoroughly wipe your hands with towels.
Care
Any nails must first be put in order and the plate properly prepared for application. Only then can color be applied. All procedures will take no more than 30 minutes of free time.
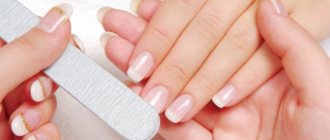
Form
You need to give it the desired shape with a nail file. Classic and popular forms today:
- oval;
- square;
- soft square;
- almond.
How to choose the right nail file? There are many types of materials:
- metal;
- glass;
- ceramic;
- plastic;
- sand.
First you need to determine how hard your nails are. The numbers written on the files indicate abrasiveness. The average abrasiveness for natural nails should start from 190 and end at 270 grit, for extensions from 90 to 180 grit. It is recommended to cut them in one direction, touching them lightly so as not to damage them too much.
When doing a manicure with your own hands, the best and most natural option is a glass nail file.
Steaming
After this, you need to steam your hands. Place the hands in a warm bath with aromatic salt for 10-15 minutes. It nourishes the nail plate and also softens the cuticle.
Then you need to cut it off with special nail scissors. And treat all places with nourishing oil. If you don’t have scissors, you can use products that soften the cuticle. It can be easily removed with an orange stick.
Polishing
A special procedure that gives your fingers a well-groomed and healthy look. You need to prepare in advance:
- buff (special nail file);
- oil;
- cream.
The nail plate is polished with a buff. You need to cut carefully, lightly touching the surface. Particular attention should be paid to the cuticle, the area of the side ridges and the tip. After the procedure is completed, a nourishing cream is applied.
Coating
How to do a manicure yourself? Just a few years ago, girls used ordinary varnishes, which were washed off literally on the second day. Each time I had to re-paint the nail, which was very inconvenient. It was replaced by gel. This is a whole system, thanks to which the color lasts longer on the nail for about 2-3 weeks.
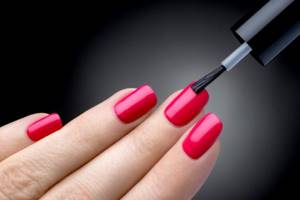
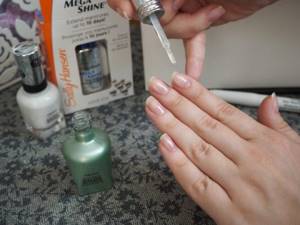
Manicure with varnish at home
Every fashionista needs to be able to apply a manicure at home using a simple polish. Despite the fact that more and more lovely ladies are interested in permanent gel polish, there are still many who stubbornly use simple varnish and find a wide range of advantages in it.
- Accordingly, it would be logical to ask why make recommendations about this technology at all.
- After all, the whole procedure consists of painting and drying.
- In reality, proper varnishing involves a little more work.
The extended manicure technology in this case will increase the service life of the varnish and reduce the traumatic effect on the nail.
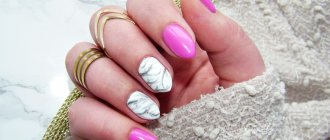
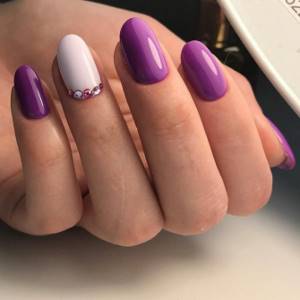
Snake design
The following manicure option with regular varnishes looks very original. To implement the idea, you will need a pale pink, purple, transparent polish, a simple pencil with an eraser at the end and a power ball button, rhinestones and nail glue if desired. When everything you need is at hand, we proceed to follow the instructions:
- Paint all your nails pink.
- We are waiting for the coating to dry completely.
- We attach the button to the pencil eraser, getting an original tool.
- Using it, we apply purple peas to the nails of the ring and middle fingers.
- We cover the result with transparent varnish.
- If desired, we add rhinestones to the rest of the nails, attaching them with glue.
Coating kit
For a technically flawless manicure application in this case you will need:
- Liquid for degreasing, removing stickiness and dehydration;
- Primer for the varnish layer, which will absorb all minor depressions and form a plane for the varnish layer;
- Varnish of the desired color, and it is advisable to choose it from the “free” category. Such coatings do not contain active substances that eat into the nail and quickly destroy its outer layer;
- Cotton pad or lint-free wipes;
- Crystal varnish fixer with drying effect;
- Cuticle oil. It is desirable that it be natural and not contain mineral additives. Only in this case will the oil bring the expected effect: the cuticle will soften and hangnails will not appear.
It would also be a good idea to stock up on liquid tape. It will protect the skin next to the nail plate and prevent the polish from running.
Advantages of short nails
Now short nails have come into fashion and this has a number of undeniable positive aspects:
- no need for specialized care;
- appropriate appearance in any situation;
- dark shades go better with them;
- practicality;
- do not require strengthening procedures.
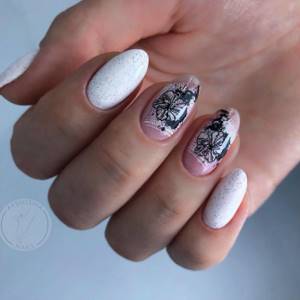
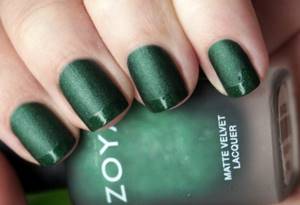
Leading designers, presenting their clothing collections to the public, give preference to short nails and simple, laconic design. This season, shades of white (matte, pearl), bright red, gray and sea shades are very popular.
As for prints, various lines and geometric shapes, a smooth flow of color from almost black to a colored tone, in the form of waves, are very relevant. These are, in principle, unpretentious and effective drawings. It is very fashionable to combine different textures in one design. Matte shades and textured varnishes with various fillers look quite good.
The article provides a detailed guide to performing a manicure, which describes in detail all the steps to perform it. For beginners, examples of simple and at the same time fashionable prints for nails are given. To perform them you will not need any special equipment, simple available tools will suffice. Any girl will have tape, a needle and scissors at home.
Following the advice of the article, every girl will be able to perform a manicure on her own at home, choosing an individual design. He will be able to emphasize her originality and become an integral part of any image. The biggest positive aspect of home care is the significant budget savings. Don't be afraid of anything, a lot of practice and you will master the art of manicure impeccably.