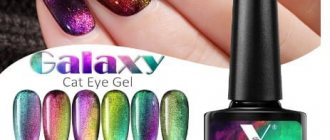
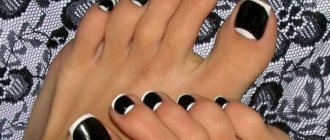
All girls want to stand out and attract the attention of others, which is why they pay such close attention to beauty issues. This includes facial, body, hair care and, of course, a flawless manicure, which is not complete without a color coating!
From the article “What is gel polish?” We have already learned how many advantages this material has! No wonder he was loved by millions of girls all over the world. But what if a girl doesn’t want to spend money and go to a beauty salon or a manicurist? How to apply color coating at home? What will you need for this?
Before applying gel polish, it is necessary to carry out preparatory procedures: do a manicure and properly prepare the nail plate for coating. And after applying a colored coating, you can complement it with a simple design and carry out care procedures that will help preserve the beauty and youth of your hand skin.
Conventionally, the entire procedure can be divided into the following stages:
- manicure;
- preparing the nail plate for coating;
- coating of the nail plate;
- design;
- hand skin care.
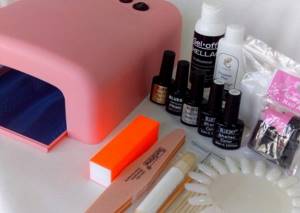
We will analyze the materials and tools needed for each stage, and the technology for applying gel polish at home.
Stage 1. Manicure before gel polish
Before applying gel polish, you need to get your nails in order. Treat the cuticles and give your nails a beautiful shape. At this stage we will need:
- orange stick;
- pusher;
- cuticle remover;
- scissors, tweezers or nippers for removing cuticles;
- file for natural nails.
Orange sticks medium 17.8 cm IRISK 90-100 pcs
Manicure pusher P-06 small spatula/hatchet length 132 mm Nippon Nippers
Cuticle Eliminator Be Natural 59 ml
Cuticle scissors matte S-03 length 90 mm Nippon Nippers
Disposable files 220/280 11.5 cm (03 Lemon) IRISK 10pcs/pack
Today there are 3 main types of manicure:
- hardware;
- combined;
- classical.
Hardware and combined manicures are done using a special device. Before using it, it is better to undergo training, since if used incorrectly, you can damage the nail plate.
It is better to do a classic manicure at home.
What do we do at this stage?
- Using a file, give the free edge the desired shape.
- Apply cuticle remover to the cuticle and side ridges.
- Place your hand in a bath of warm water for 3-4 minutes. We wipe our fingers and start manicure.
- Use a pusher to push back the cuticle.
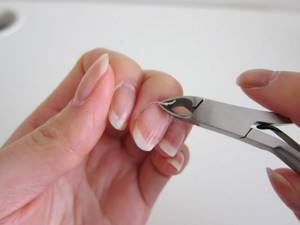
- We remove the cuticle with scissors (tweezers, nippers).
- With an orange stick dipped in water, we go along the contour of the nail and clean the pterygium.
Home manicure kit
Before starting the creative process, you should organize your workplace. There must be a wide table with high-quality lighting, an organizer for small parts, brushes, buff, and nail files. For hardware manicure, you will need a safe outlet within reach of the network cable.
You should also prepare the following set of materials and tools:
- Container for bathing and steaming hands.
- Sets of essential oils, moisturizing cream, vitamin cocktails for therapeutic cosmetic procedures.
- Soft towel.
- Files and buffs for giving a certain shape to the nail plate. Tools should be selected according to their hardness after consulting a nail service specialist.
- A trimmer, which is a double-sided blade. One of the tips is designed to push the cuticle to the root of the nail. Use the other end of the trimmer to remove dirt from under the nails.
- You will need tweezers to remove the cuticle (for those who like an extended trim manicure with complete removal of the cuticle).
- To create original designs, you will need a set of gel polishes or shellac, a base coat and a finish. Following the strict sequence of applying decorative coatings will allow you to get an incredibly stylish nail design.
If you wish and have some skill, you can use rhinestones, multi-colored foil, stickers and nail frames for additional decoration. Having an LED lamp will be an advantage.
Stage 2. Preparing the nail plate for coating
Next, you need to prepare your nails for a manicure with gel polish. This stage is very important, since it determines how well the adhesion of the natural nail and the artificial coating will occur. To carry out proper preparation, we will need the following materials:
- buff;
- brush or brush for removing dust;
- lint-free wipes;
- 2 in 1 liquid: degreaser and sticky layer remover - this product removes natural deposits (grease and dust) from the surface of the nail plate, thereby preparing the plate for better adhesion to the artificial material;
- dehydrator (nail-prep) - deeply dries the nail plate and removes excess moisture from it. A dehydrator is a must for people with oily skin and prone to excessive sweating, since usually the structure of their nails is damp and oily, which impairs adhesion to artificial turf;
- primer - translated as “primer”. There are acid-free and acidic primers.
The acid-free primer acts as double-sided tape and ensures strong adhesion of the natural nail to the artificial nail.
The acid primer lifts the keratin scales of the nail plate for better adhesion to the artificial material. Since the acid primer contains aggressive components, you must be careful not to get it on the skin and cause a burn. It is recommended to use it before extensions for girls with wet or oily nail texture.
What do we do at this stage?
- We treat the surface of the nail plate with a buff to lift the scales of the nail plate and improve adhesion.
- Remove dust with a special brush.
- Apply degreaser to a lint-free cloth and wipe your nails. If you want to make the process as comfortable as possible, we recommend using liquids without chemical fragrances, such as ParisNail liquids. They have pleasant aromas and 100% rid the nail plates of germs, grease and dirt, thus guaranteeing long-lasting wear of the coating.
- If you have oily skin, then to improve adhesion, apply a dehydrator to the entire surface of the nail and air dry for a minute.
- Then you need to apply primer to the free edge of the nail. The free edge is one of the most vulnerable places, and thanks to the primer, the adhesion between the nail plate and the artificial material improves, which contributes to longer wear of the coating. We also air dry the primer for one minute.
Nail design for beginners - general recommendations
In order to learn how to perform a manicure beautifully and efficiently, first of all you should learn a little about its varieties, because when visiting a salon, any young lady, as a rule, simply sits down in a comfortable chair, voices her wishes and puts her hands at the complete disposal of the master, without delving into into the nuances and details of the procedure. But before you start designing your nails, you should additionally tidy up the nail plate itself and take care of the overgrown cuticle. A classic trimmed manicure is a procedure during which the cuticle is removed using special tweezers or miniature scissors. This option is ideal for those with rough cuticles, but is considered very traumatic and requires extreme care.

Unedged manicure is performed using lactic or fruit acid and completely eliminates the use of cutting tools. This procedure takes much less time, is considered less traumatic, but is contraindicated for young ladies with sensitive skin and allergies. Hardware manicure is also considered a fairly well-known and popular procedure. In this case, the cuticle is removed and the nail plate is processed using a special device - a milling cutter and several attachments. However, it is very difficult for a novice master or amateur to judge how correctly and accurately to handle this method. After the cuticle is removed, the shape and length of the nail plates are adjusted using a nail file, the surface of the nail is degreased and you can begin to create a design.
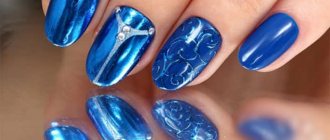
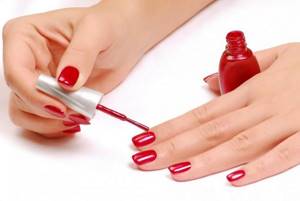
Stage 3. Covering the nail plate
Next we move on to the most anticipated stage - coating.
We will need:
- base coat;
- color coating;
- top coat (with or without a sticky layer);
- lamp for polymerization. For more information on how to choose a lamp, read the article “How to choose a lamp for drying gel polish?”.
Rubber base for gel polish Rubber Diva 15 ml
Gel polish NR-100 Nail Republic 10 ml
Sticky Top by Mystique 15 ml
Top without sticky layer Haruyama 8 ml
Lamp UV/LED Perfect Lamp 2+ 48 W with three pads black ParisNail
If you don't want to make designs and use a top with a sticky layer, then we will also need:
- lint-free wipes;
- 2 in 1 liquid: degreaser and sticky layer remover.
What do we do at this stage?
- Apply a base coat to the surface of the nail. Dry it in a lamp. We do not remove the sticky layer.
- Apply gel polish, if necessary in 2 layers. We dry each layer in a lamp. We do not remove the sticky layer.
- Apply top coat. Dry it in a lamp.
- If you are using a top coat with a sticky layer, then moisten a lint-free napkin with a sticky layer remover and wipe your nails with it.
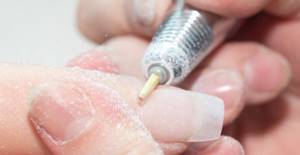
How to give yourself a hardware manicure at home
You can perform a manicure using special equipment. Nowadays, homemade versions of milling cutters are sold, which are quite inexpensive. This is a well-known, popular pen that can be purchased on AliExpress. It is a handle with a motor that is connected to the power supply. Milling cutters of different diameters and grain sizes are inserted into the coupling. These products are used to remove dead skin cells and cuticles. Here it is also necessary to adhere to a certain scheme. Handles and cutters for hardware manicure can be found here.
If you do not yet have an account on Aliexpress, register on the site and enjoy all the privileges of a buyer, receiving bonuses, discounts and good cashback. You can register by studying the article on our website at this link or video instructions at this link .
Instructions:
- The peculiarity of this manicure is that it is carried out dry, that is, without preliminary soaking. That is why it is ideal before painting with gel polish or for extensions. Because the nail does not absorb excess moisture.
- Take a flame router or needle and attach it to the router handle holder. Turn on the device at low speed. Parallel to the nail bed, remove the cuticle and pterygium from the pocket. Do not drive the cutter directly under the cuticle, but gradually move deeper and deeper. Do not try to push the cutter deep at the very beginning with great effort. This can damage the cuticle or tear it away from the nail bed, causing a wound and bleeding.
- After this manipulation, the cuticle rises and becomes protruding. It can be removed using a ball cutter. They come with diamond coating or corundum. We recommend using a diamond-coated ball at the initial stage. It is coarser and allows you to remove large pieces of very dry cuticle that has grown.
- Corundum balls are used for final processing. Please note that ball cutters are not driven along the nail bed, but work exclusively in the cuticle area.
- In the area of the side rollers, processing is also carried out using a needle cutter. After this, a file is taken and the free edge is processed to give a shape. If you are not going to apply gel polish, you can apply nourishing oil to the cuticle area. You can see how gel polish coating is carried out here .
- To avoid cuts, do not stay in one place for too long. Try to work not completely chaotically, but according to a certain pattern. Otherwise, you will get torn cuticles that dry out quickly. Hangnails often form in such areas.
- This handle comes with bad cutters, so you may have to purchase new diamond-coated ones. For removing gel polish, the ideal option is a ceramic corn chip with a blue notch. The set does not include a ball cutter, so you will have to purchase it separately. It is necessary to remove dry cuticle.
Hardware manicure
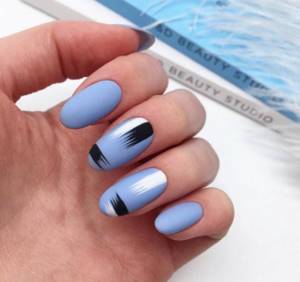
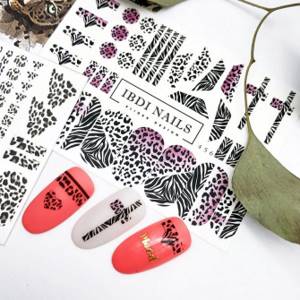
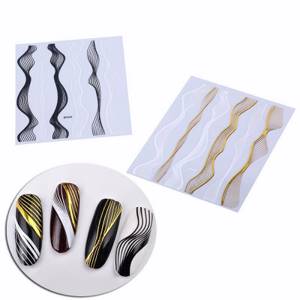
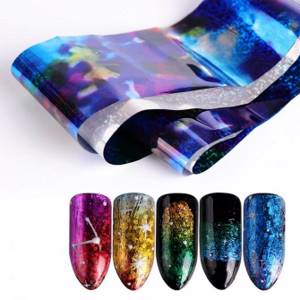
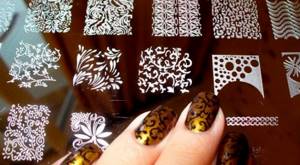
Stage 4. Nail design
Now you can move on to the designs. Since we make the coating at home and are not professionals, it would be logical to use the simplest designs. But don't be discouraged, they are very stylish and impressive!
For example:
- slider designs;
- stickers;
- foil.
Slider design Ibdi_Nails AIR FOIL 13
Stickers F660 Leaves gold
Foil for casting gold 4 cm*1 m RocheNail
In addition to the designs themselves, we may need a top coat to secure the sliders or glue for the foil.
Top for designs Factor Lianail 10 ml
Glue for foil ARTEX 15 ml
Now let's look at how to make each of the proposed design options.
Slider designs:
- Those nails on which we will attach slider designs do not need to be covered with topcoat;
- Soak the pre-cut slider design in water, dry it on a napkin, then separate the film from the backing;
- Apply the base coat. We do not dry it;
- We plant the design on an undried base coat. In order not to damage the slider design when smoothing it over the nail, you can use a brush or silicone hoof;
- Dry the base coat together with the slider design in a lamp;
- Apply a topcoat to secure the sliders. Dry it in a lamp.
Stickers:
- If they are used, it is necessary to remove the sticky layer from the coating;
- Remove the sticker from the backing, cut it if necessary, and apply it to the nail plate;
- Cover with topcoat and dry in a lamp.
Foil:
- If you decide to use foil as a design, then after applying gel polish you do not need to use a top coat;
- We firmly press the matte side of the foil to the sticky layer of dried gel polish and sharply tear it off. Dry in a lamp;
- We apply the top coat and dry it again in the lamp.
TIP: if the stickiness of the gel polish is not enough and the foil does not print, then you should use a special glue for foil.
It's very easy to use. Remove the sticky layer from the colored coating, apply glue to the surface of the nail and wait until it becomes transparent. This means the glue has dried. Then we print the foil as described above, secure it with topcoat and dry it.
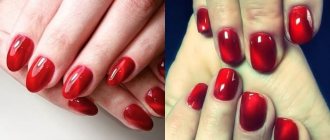
How to paint your nails with regular polish

Source: @nailsbydannimoore
The base and top do not necessarily have to be from the same company. The base can be regular, which will protect the plate from the coloring pigment, or medicinal, which contains vitamins to strengthen it. The topcoat should be used as the last step, after waiting until the varnish has completely dried.
- Before applying the base coat, degrease your nails - wipe them with a cotton pad using nail polish remover. This will help remove natural oils or old coating residue that acts as a barrier to the first coat.
- Choose a comfortable position. You shouldn’t start painting with your hands suspended: put them on the table.
- Start covering your nails with a thin layer of base: put a small amount on a brush, moving from the cuticle to the free edge.
- For the first color layer, take an almost dry brush, that is, shake off as many excess drops as possible. The first layer should be thin. Swipe the brush in one motion from the cuticle to the free edge, then in the same motion along the sides. Don't worry if streaks or streaks form in the first layer. Let it dry for 5-10 minutes.
- For the second layer, take a little more decorative varnish, carefully stretch a drop from the cuticle to the free edge. Go back to the base and brush along the sides.
- If you can’t paint your nails evenly in the cuticle area, use a very thin brush.
In the second layer, you should already pay attention to the glimpses, since the coating should be uniform. If they are visible somewhere, take a small drop again and paint them over. Even distribution of varnish should be done quickly so that the coating does not have time to dry.
Before applying top coat, wait 10 minutes until the varnish is completely dry. If it doesn't dry enough, a rough or hard top brush can damage the finish and cause it to smudge. Apply the top coat as evenly as the second coat of varnish.
Hand skin care
In order for the skin of your hands to maintain beauty and youth for many years, it is necessary to do skincare procedures. We will need:
- cuticle oil;
- hand cream.
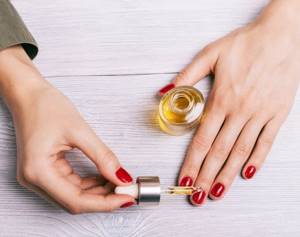
At the end of the manicure, you need to apply cuticle oil. Place a drop of oil on the cuticle of each nail and rub well. Please note that there are mineral and natural oils. Mineral oil forms an invisible film on the surface of the cuticle. If you use this oil every day, you will get the opposite effect: the cuticle will begin to dry out. This oil is more suitable for masters: the client comes for a manicure once every 3-4 weeks, and mineral oil is ideal for single use. At home, on a daily basis, it is better to use natural oil, for example “Dadi Oil”, “ruNail”.
Organic oil for nails and cuticles Dadi Oil Famous Names 3.75 ml
After the oil, you need to apply a moisturizing or nourishing cream to the skin of your hands and cuticles.
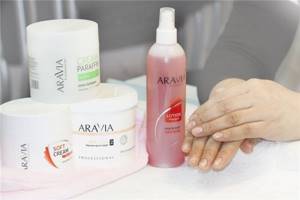
NOTE! It is necessary to take care of your hand skin not only after a manicure! Before going to bed, smear your hands with a moisturizing or nourishing cream, and in the cold season, before going outside, with a protective cream. Once every 1-2 weeks you can scrub and perform paraffin therapy. To save time and money, you can purchase cream paraffin from “Aravia”.
Cream paraffin Flower nectar with flower and beeswax ARAVIA 300 ml
Let's look at the technology for using such a cream.
- Thoroughly scrub your hands to remove dead skin cells.
- Apply a moisturizing or nourishing cream and rub it in well.
- Apply a thick layer of paraffin cream.
- We put on plastic gloves and do not take them off for 15-20 minutes.
- After the specified time has passed, remove the gloves and wipe off the remaining paraffin cream with a paper towel.
After the procedure, it is advisable not to wet your hands for two hours.
Be sure that after such care your hands will tell you: “Thank you!”
Tools and materials for manicure at home, choosing the shape of nails
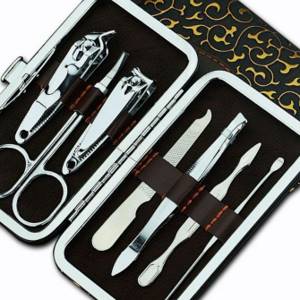
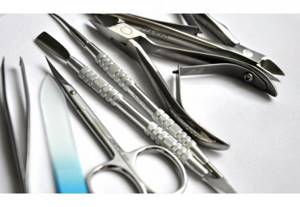
List of tools for trim manicure:
- Manicure scissors
- Cuticle tweezers
- Orange sticks
- Nail bath
- Pusher
- File size 180-240 grit
- Salt
- Soap
- Towel
- Antiseptic
Try to purchase quality tools. Tweezers and clippers for ingrown toenails are required. They can be used to trim thick nails or use for pedicures. The difference between these nippers is the sharpening angle of the blades.
Tools for classic manicure
Tools for hardware manicure:
- Router handle
- Cutters: flame, needle, diamond and corundum ball
- File
- Antiseptic
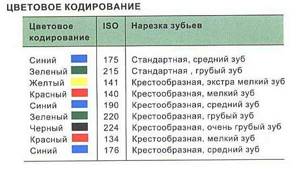
Notches on cutters, explanation

Handle cutter for home manicure
Do not buy cheap cuticle cuticle nippers and forks. They do not cut it well and can cause a cut. Nippers for key rings are not suitable for manicure, they have a poor sharpening, they do not cut the edges, but tear them. Choose the right nail shape. A diagram with forms is presented below.

Nail shapes
Please note that the choice of cutter must correspond to the manipulation. Large cutters with green and black markings should not be used to process natural nails. The blue corn cutter leaves cuts on natural nails. Therefore, for cuticle processing and hardware manicure, choose corundum cutters or diamond-coated cutters. At the final stage, you can treat it with a silicone polisher.
What difficulties may arise when applying gel polish at home?
- Unable to apply coating accurately
- Gel polish shrunk during polymerization in a lamp
- There are bubbles in the gel polish
- The coating peels off after a few days
The main advice: don’t get upset, be patient and practice this skill. It’s better to get trained at our licensed school “ParisNail”!
One of the reasons may be insufficient lamp power. Perhaps your gel polish is well pigmented and the lamp power is simply not enough to dry it. It is advisable to use a lamp with a power of at least 48 W. Also, the gel polish could shrink due to the fact that you applied it in too thick a layer.
This may happen due to the fact that the bottle of gel polish has been shaken. To get rid of bubbles, you need to open the bottle, but do not remove the brush. Let the material stand in this state in a dark place so that it is not exposed to daylight for a couple of hours. After this, you need to mix the composition with a brush, close the bottle and twirl between your hands.
Perhaps you made mistakes when preparing the nail plate for coating or in the technology of applying gel polish. Also, the reasons may be an incorrectly selected base or top. For information on how to choose them, read the articles “Base for gel polish. What is it and what is it for?”, “Top for gel polish. What is it and what is it for?
Common mistakes in home manicure

- poorly prepared cuticle . If you have a hard cuticle, then it is quite difficult to move it carefully and the result is a sloppy manicure. To soften the skin, apply oil to the cuticle at least once a day, then it will be much easier to do an unedged manicure;
- cuticle trimming . I have already written that I do not recommend doing a trim manicure yourself. Another reason is that the more you cut, the faster the cuticle grows;
- many layers. It is better if the coating consists of 3, maximum 4 layers, and each of them should be as thin as possible. This rule applies to both nail polish and gel polish;
- applying polish or gel polish to the skin . This usually happens due to a poorly done hygienic manicure, which does not allow the color to be applied accurately. If you are not confident in your abilities, use liquid tape, otherwise the manicure will look untidy;
- uneven layers . Nowadays this mistake is less common, since almost all nail coating products tend to self-level. However, try to keep the layer even without any bumps or depressions;
- under-dried coating . As soon as you start painting your nails, three hundred things immediately appear that cannot be delayed. As a result, you smear the polish or don’t hold the gel polish in the lamp enough. It will be faster to dry the coating properly than to redo the manicure later;
- improper removal of the coating . The biggest temptation is to remove the gel polish without soaking it in an even, beautiful layer. Along with it, you also remove the top layer of the nail, which becomes weak and thin.
10 mistakes when doing hardware manicure and how to avoid them
How to save money on manicure?
Do you want to perfectly master the art of manicure from A to Z and never spend 2,000-3,000 rubles in a salon again? Then learn how to do a manicure yourself and save money, time and nerves!
Come to our School for an online course from top teacher Tatyana Svoboda “Manicure for yourself,” which can now be completed for only 499 rubles !
The teacher will tell you all about the technique of applying the coating, removing it, modern designs, how to strengthen your nails, and much more. You will become a real pro and will be able to create your dream nail designs, and, if you wish, monetize your hobby in the future!
Course bonuses:
We give all students a 15% discount on ready-made manicure starter kits, as well as a 5% discount on purchases at ParisNail and 15% on any other online course. Upon completion of the training, you will be issued an electronic certificate of completion of the course.
How to make an easy and beautiful manicure: preparation
Before decorating your nails with bright decorative varnishes, let’s put them in order. The complete set of tools for a “general” manicure is as follows:
- hand steam bath and sea salt,
- nail files (for grinding and filing),
- cuticle remover or orange stick,
- nail scissors,
- cuticle oil,
- moisturizing hand cream,
- decorative nail polishes
- colorless base
- colorless varnish for manicure
- nail polish remover and cotton wool
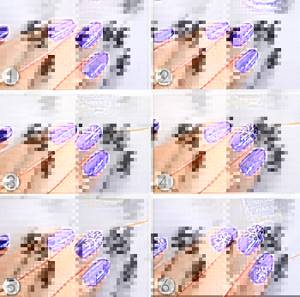
How do you draw patterns on your nails?
The nail art industry is developing so quickly that it is very difficult to keep track of the techniques for creating nail designs. Who would have thought that the popular method of applying a design to a nail would be water based. But you shouldn’t underestimate the more familiar methods.
You can create patterns on both natural and artificial nails. Learning to draw complex patterns and ornaments with simple tools is not difficult, you just have to have patience.
Using regular tape or foil
The essence of this method is to create an even geometric pattern or figure on the nails. But first, cover the surface of the nail with a base varnish (choose any color you need). But it is worth understanding that the main layer will ultimately become the color of the drawing itself.
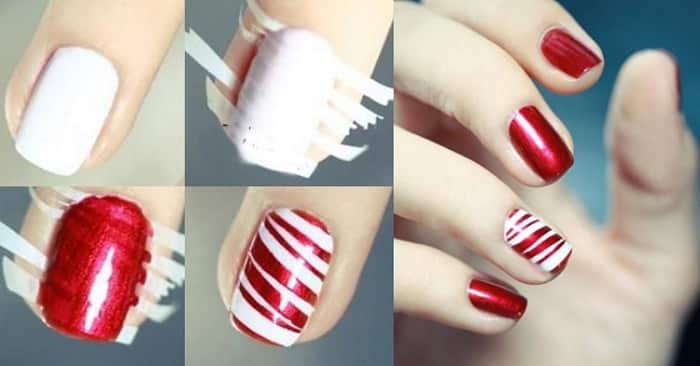
The design itself depends on how the tape was glued: thin stripes or wide, straight, zigzag, diagonally, or it covers part of the nail, forming geometric shapes.

For manicure, it is better to take masking tape. It has less adhesion to the surface of the nail and will not damage the polish when removed. At the same time, its stickiness will be enough to make a beautiful drawing.
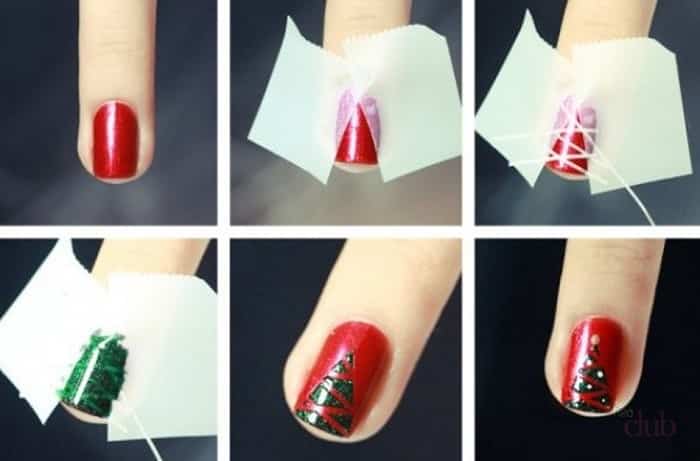
In addition to adhesive tape, they also use special foil tape for design. It is easier to use, since you do not need to monitor the width of the strip. Finished tapes can have different thicknesses, and it is not necessary to remove them. It can become part of the design.

Regular needles
To make a drawing with a needle, you need at least two colors of varnish (more is possible, depending on what kind of design is intended). One is for the base (this layer must be completely dry before starting to apply the drawing), the second and then for painting. There are many options for creating simple but effective drawings. Nail designs made with a needle do not require much time or additional costs.
The following effect on nails can be done with a thin dot tip, but the easiest way to do this is with the sharp end of a needle.
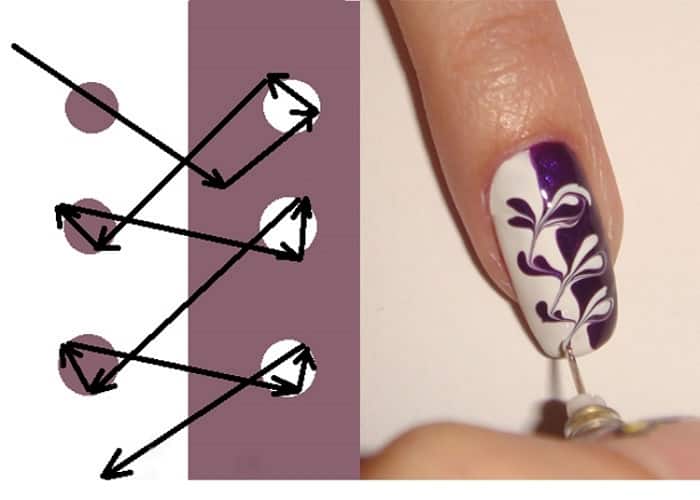
Option for designing nails using a needle and two colors of varnish
The technique of applying a design with a needle is accessible even to those who have never done nail design before. The main feature is to have time to apply a beautiful pattern before the varnish on the needle dries. And if the drawing is done pointwise, then until the drops of varnish dry on the nail.
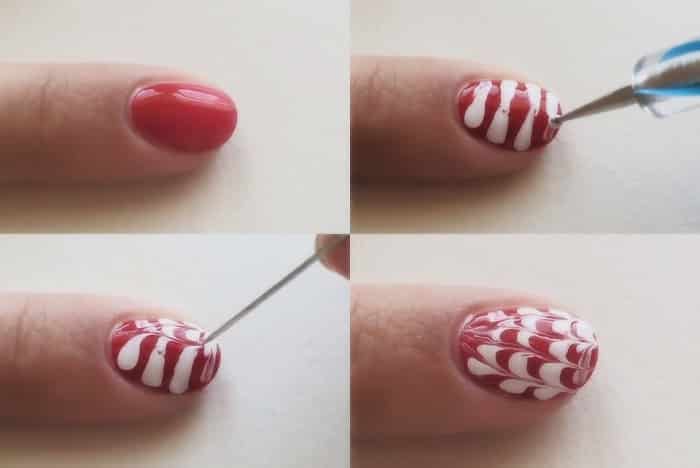
If you paint with a needle, the line you draw will be thin. You can also use a needle to outline the contours of the design.
The result of drawing with a needle
https://www.youtube.com/watch?v=56cGQcjEFPA
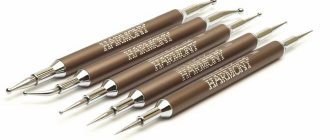
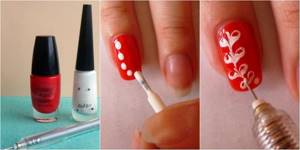
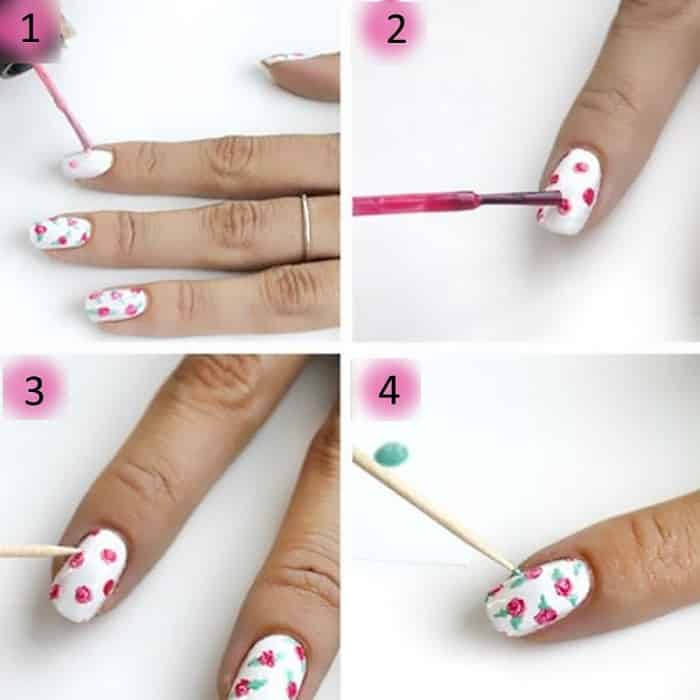
Using dots
The result on your nails, if you paint them with dots, will be similar to what is done with a needle. Only using a dot for painting is more convenient - such an amount of varnish is wrapped around the tip ball that it does not interfere with the work (it does not roll off in large portions and it is more convenient to apply straight lines without “blunders”).

Select the color for the base. The design is applied with a “ball” that is dipped in varnish of the desired color. If you need to change the color, you can simply wipe the tip of the tool with cotton wool or a napkin moistened with nail polish remover.
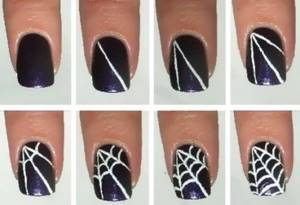
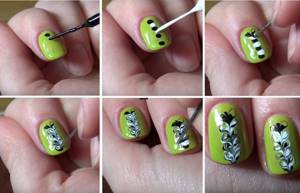
Thin brush
A thin brush gives you more chances for high-quality nail painting. With its help you can create an unusual floral pattern and neat thin lines. You can especially go wild on long nails.
To start painting with a brush, you need to cover the nail with the main color (white, colorless, red, pink, black, multi-colored varnishes, including gradient manicure). The coating must dry completely. Then the pattern is applied with a thin brush. You can do this with regular painting brushes, but it is better to use special brushes with nylon fibers. To achieve different effects when painting, you may need other brushes with different thicknesses.
The most convenient way to apply beautiful patterns is with a brush. Its fibers hold enough varnish or acrylic paint to draw a long line without additional addition.

A regular toothpick
A toothpick is a great tool for applying designs to your nails. The technique of applying a pattern with these tools requires care, since a large amount of varnish is wrapped on the wooden base of the toothpick and then rolls off unevenly, which interferes with the work.
Nail decoration can be done on a dried or wet basis. The effect of this will vary.
The toothpick leaves a significant mark on the nail. She is comfortable drawing monograms, flowers, abstractions, etc., but it is almost impossible to achieve a thin line from her.
Using a toothpick, it is optimal to draw large elements, and then draw them with a thin brush. After finishing work, it is better to apply a protective transparent coating.
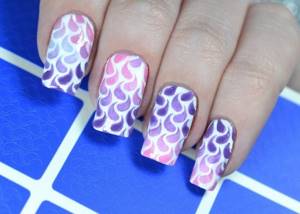
Using special stickers
Special stickers - stencils - can simplify the work of decorating nails. With their help you can create a wide variety of patterns and effects on your nails.
To use them, color is applied to the nail, which ultimately becomes a design. After this layer has dried, the stencils are glued. Cover with varnish of a different color. When this layer is completely dry, the stencil is carefully removed.

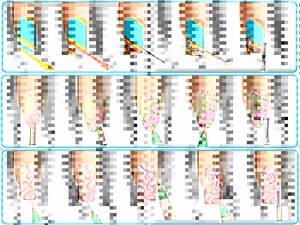
An interesting effect is obtained if you take a gradient manicure as a base option. Decorating your nails in this way will help make your manicure unusual and unique.
You can make a gradient yourself; for this you will need at least two colors of varnish in bright colors and a wide, flat fan-shaped brush. Follow the steps as shown in the picture.