Home page » Beauty » Nails
Author of the article
Svetlana Pavlikhina
Reading time: 5 minutes
AA
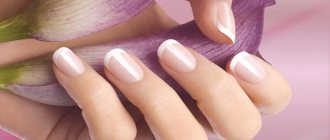
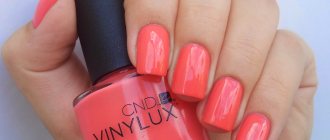
A manicure using gel polish, done according to all the rules, lasts a long time (at least 2 weeks), looks neat and tidy. To prevent the polish from chipping or peeling off 2-3 days after the procedure, you need to properly and thoroughly seal the end of the nail. This nuance must be taken into account by the manicurist in order to extend the life of the gel polish.
When is a sealing procedure still needed?
The end is closed not only when applying gel polish, but also in a number of cases when it is necessary to preserve the coating (nail).
If the stratum corneum begins to peel off, and the manicure is still very fresh, then the master can reseal the edge, maintaining a neat appearance.
Sick, peeling nails that lack vitamins can be grown back and preserved by sealing.
When the tip of the nail or its edge breaks off and there is no time for proper care, the crack is sealed with gel polish.
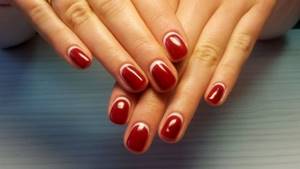
New manicures
Nail modeling
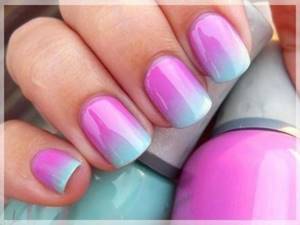
Gradient manicure
An interesting option would be to use rhinestones, which can be used to lay out absolutely any shape. The use of multi-colored pebbles can decorate the simplest and most modest manicure, for example, autumn, dark and gloomy.
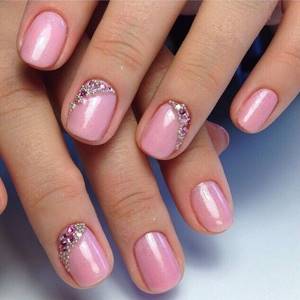
Using rhinestones
If a classic French manicure is not suitable for some reason, you can replace it with a lunar manicure. It looks a little different, but at the same time stylish and beautiful.
Lunar design
Geometric design is suitable for girls striving for the ideal. Clear, even lines, geometric shapes - all this is used in manicure. It turns out to be unusual, but extremely stylish and fashionable.
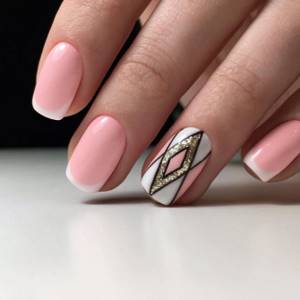
Geometry in manicure
One option can replace another, it is possible to use several designs at the same time. At the same time, do not forget about the basic rules of manicure: do it carefully, do not rush. A balanced diet full of vitamins, minerals, and nutrients will help maintain the condition of the nail plate. A small adjustment to your diet can change your situation for the better in a short time.
Tools and materials
Gel sealing requires the same tools as coating. First, the nail should be prepared, degreased, then get to work.
Tools:
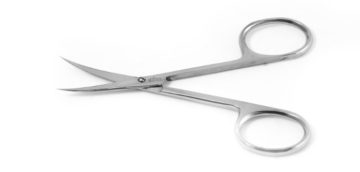
- manicure scissors help adjust the length and shape of the nail plate, and remove the cuticle;
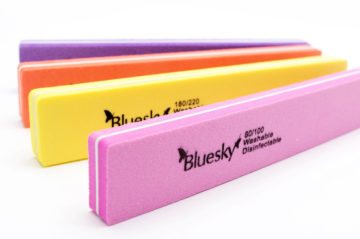
- buffs (polishing blocks) of varying degrees of abrasiveness prepare the stratum corneum for applying varnish;
- files with different grain sizes level and shape the free edge of the nail;
- brushes for applying varnish;
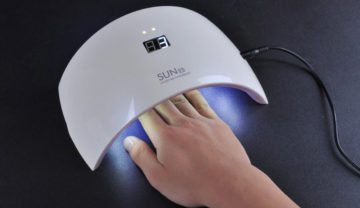
- UV lamp for drying each layer.
You may need wire cutters or orange sticks. They are used if you need to remove excess skin around the nail bed.
To apply the coating and seal the chip, it is necessary to use high-quality materials:
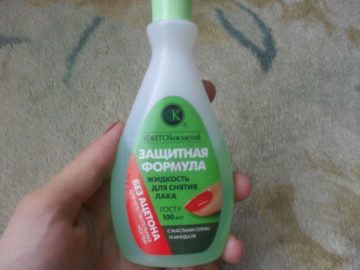
- means for removing liquid and fat from the nail plate (bonds, dehydrators);
- disinfectant;
- primer;
- the basis;
- top
The primer and top are colorless, the base is colored.
Benefits of coverage
This product belongs to decorative cosmetics. Its name comes from the combination of two elements. This is a polish and gel in one bottle. If the varnish itself can dry out, then use a special lamp to dry the gel. They are different, and the duration of drying depends on their type.
It should be remembered that each applied layer must be dried. If you do this simultaneously for all applied layers, then there will be no result.
Gel polish is based on a gel used to model nails and a coloring enzyme. These products are represented on the market by many manufacturing companies. Moreover, each product will differ not only in color saturation, but also in the speed of drying.
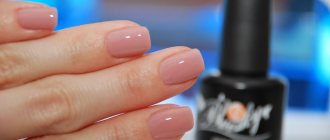
You can wear a shellac manicure for from two weeks to 30 days. It all depends on the quality of sealing and the characteristics of the nail plate.
Advantages of gel polish:
- To apply the coating, you do not have to injure the nail plate, which cannot be said when using a gel.
- The color, brightness and shine of the varnish do not wear off for a long time.
- A properly sealed nail tip will not peel off.
- The cosmetic product is absolutely harmless.
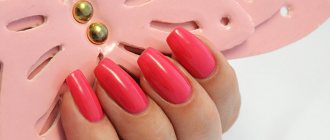
- Thanks to the wide range of colors, you can create a variety of designs.
- Available to almost everyone.
With this product, even weak and brittle nails turn into quite dense and strong ones. This is not due to the beneficial effects of the product, but to the many layers that cover the nail. All these qualities of varnish can be obtained only in one way - correct application and strict adherence to the rules. The slightest deviation from the technique and sequence of application will result in a poor-quality manicure, which will begin to flake and chip after just a few days.
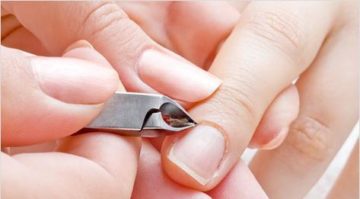
End sealing technique
The work can be divided into 3 stages: preparatory, main, final. If you strictly follow each of the suggested steps, the coating will turn out to be of truly high quality.
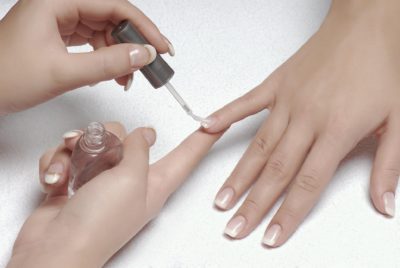
Step 1 (preparatory)
First, the cuticle and excess skin are removed, and the nails are given the desired shape.
It is important to thoroughly degrease the surface of the horny plate and remove excess moisture with dehydrators . The same manipulation is carried out at the end.
After treating with any liquid, hands are dried without using a lamp.
Then the surface of the nail is polished with a buff, partially removing the keratin layer for better adhesion to the primer.
Use a special lint-free cloth to remove any remaining nail dust.
It is important that the plate is well cleaned of any particles, otherwise the coating begins to swell and peel off from the horny plate.
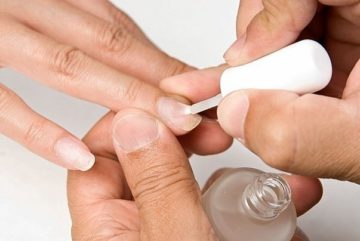
Step 2 (basic)
A primer (base) is applied to the keratin layer and end. Using a brush, apply the product to the back side of the free edge, pass well along the end, trying not to leave bald spots.
Dry the first layer for 5 minutes with or without a lamp (this depends on the instructions for use of the product).
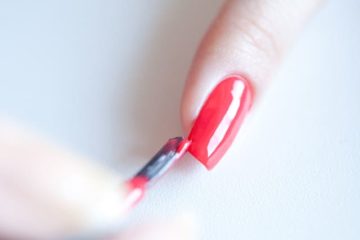
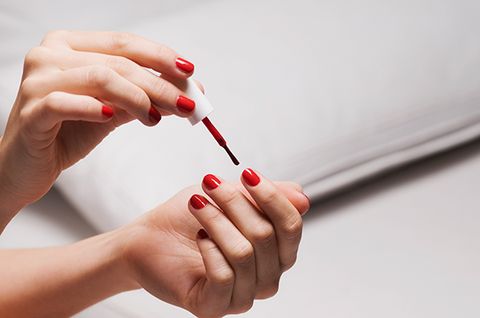
As soon as the base dries, apply a colored layer. It is applied from the base of the nail, pulled out to the free edge, moving slightly past the end.
At the sides, all layers of varnish are carefully applied, pushing back the skin. The base is dried under a UV lamp for 3-4 minutes.
Step 3 (final)
After the base has dried, begin applying the top. Using a dry thin brush, carefully process the edges of the nail along the entire perimeter, then apply a fixing coating to the entire horny plate, going beyond the edge.
The finishing layer is dried under a lamp in accordance with the instructions.
How to fix a broken nail?
Breakage of the nail plate causes a lot of inconvenience and discomfort. However, there are several ways to restore its original appearance.
Natural
Clinging to various surfaces, a cracked nail on the hand can come off at any time, which will lead to bleeding and severe pain. If for some reason it is impossible to visit the salon, you need to fix the broken nail yourself.
Important! The procedures for restoring natural and extended nails are completely different. First of all, you need to remove the varnish coating from the broken nail.
To do this you will need the following tools:
First of all, you need to remove the varnish coating from the broken nail. To do this you will need the following tools:
- file;
- foil or similar material;
- orange stick for manicure;
- fat cream;
- nail polish remover;
- cotton pads.
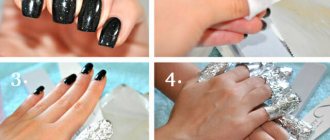
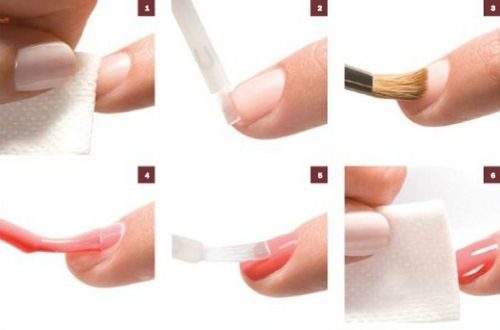
Restoring a broken nail is carried out in several stages:
- The top layer of the coating is cut off and the top section of the nail is lightly ground down.
Cream is applied to the finger (up to the 2nd phalanx inclusive), a cotton pad is moistened in the liquid and wrapped around the finger, and wrapped with foil on top so that alcohol or acetone vapors cannot quickly evaporate. After 15 minutes, the foil, disc and gel polish coating are removed using an orange stick. All steps can be repeated again if the first attempt does not bring the desired result. - Thoroughly polish the damaged area.
- Place foil under the nail plate, having previously folded it into 4 layers or a form specially designed for nail repair. Then secure with adhesive tape.
- Degrease the nail.
- Apply primer and dry using a UF lamp.
- Apply a rubber-based base to the treated area, then apply a strip of foil to the desired length of the nail, join the sectors and also apply a layer of base on it with a thickness exceeding the thickness of the nail layer.
- Dry thoroughly under an ultraviolet lamp.
- Paint the artificial nail with gel polish in 2 layers.
- Dry under a lamp.
- Straighten the nail using a nail file and nail scissors.
You can repair a nail using a special manicure glue; if you don’t have it on hand, use its industrial analogue. The algorithm of actions is as follows:
- wash and dry your hands thoroughly;
- place the finger with the damaged nail in warm water and hold for 5-7 minutes to soften;
- dry your finger and apply a drop of glue to the nail, distributing it evenly over the nail plate;
- press for 2-3 minutes;
- eliminate excess adhesive;
- sand with a file;
- apply decorative varnish.
Extended
Restoration of extended nails is carried out in several ways, which can be used:
- special silk;
- acrylic Powder;
- tea bag;
- medical plaster;
- biogel;
- acrylic.
Important! If the damage under the shellac (natural resin) is not too severe, then filing off the nail and growing a new one is not at all necessary. Repairing a broken nail is carried out in several stages:
Repairing a broken nail is carried out in several stages:
- cut out a patch of a suitable size from a tea bag, plaster or other available material;
- glue the patch to the damaged area using glue with strong fixation;
- Apply an adhesive layer to the glued material, and after it dries, repeat the procedure several times;
- polish the restored part using a file;
- degrease, apply base, top and gel polish;
- dry in a UF lamp.
Crack on the side under the gel polish
The resulting defect can be eliminated using special glue and acrylic powder. Repairs should proceed as follows:
- remove shellac;
- degrease and disinfect;
- perform polishing;
- coat the crack and the area around it with adhesive;
- dip the finger with the cracked nail into a container of acrylic powder and leave for 2-3 minutes;
- remove excess powder and dry using a UF lamp;
- After sanding and degreasing, apply primer, base, top and gel polish.
Before applying each material, dry the previous layer well in a UF lamp.
The video clearly shows how to repair a crack on an extended nail:
Sealing the end on short nails
The preparation of a short nail plate for the application of gel polish is carried out more carefully to increase the adhesion of the varnish and the keratin layer. You need to properly seal the end and edge so that the gel does not peel off.
Application technique:
- Carefully remove the cuticle and excess skin around the nail plate, especially if the manicure is performed at home. The salon performs hardware (unedged) manicures.
- It is good to degrease the keratin layer, remove moisture, especially along the free edge. You can use pharmaceutical alcohol (70%).
- Treat the surface of the nail plate with a soft buff until matte. With this device you need to go well along the edge so that all layers of the gel lie evenly and “stick” well.
- Remove dust and crumbs with a napkin.
- Apply the primer in a thin layer (you need to do this especially carefully along the edges), dry according to the instructions. A thick coating on short nails will not last.
- Gel polish should be dense in texture, but applied in a thin layer. Carefully process the edge of the nail and dry it under a lamp for 3-4 minutes. It is not recommended to apply more than 2 layers of base.
- The top is applied especially carefully; it is important to thoroughly process the ends of the horny plate and the free edge. The finishing layer is applied in a thin layer, otherwise it will move to the edge and wrinkle. It is dried under a lamp for 3-4 minutes. It is important not to touch the edge of your nail to the lamp panel and not damage the polish.
- After drying all layers of gel polish, a sticky residue may remain on the surface. It can be removed with clinser or alcohol.
At the final stage, nourishing oil is applied to the cuticle and cream is applied to the hands.
Procedure
- First of all, you need to do a trim manicure: mold the plates, trim the cuticle and apply nourishing cream to your fingers.
- After the remaining cream has been removed using a napkin or cotton pad, a composition enriched with vitamins is applied using rubbing movements.
- Then the surface of the nails is carefully polished with a buff.
- The previously prepared cream is rubbed into the surface of the nails, after which they are polished again with a polishing disc.
- At the end of the procedure, you need to immerse your fingers in cold water for a few minutes. This allows the wax to adhere well to the surface of the nails.
Consequences of an unsealed nail
If each layer of gel is not sealed, the manicure will not last long. Water gets between the varnishes, the layers begin to delaminate . After a few days, the coating peels away from the base and chips may appear.
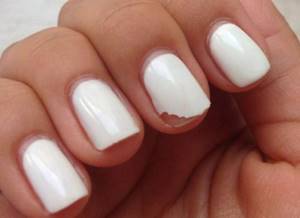
If the free edge is not immediately covered with gel, then the manicure will look sloppy and untidy. The nail plate is visible from under all the layers, especially if it is thick. Over time, dirt begins to accumulate.
This means that the master performed the work poorly and unprofessionally.
Stage 2. Selecting a UV lamp
The concept of “long-lasting nail polish,” if we are talking about gel polishes, is impossible without the use of a special lamp. It can be UV or LED.
Are you choosing? Then the best solution would be equipment with a power of 36 W. This model will save time by drying the coating layers faster and deeper. In addition, the declared power will be sufficient for the extension procedure
If you plan to do a pedicure, then pay attention to options with a retractable bottom panel (for example, from Jessnail): they are easier to disinfect
Take a closer look at the increasingly popular LED lamps. Their huge advantage is that the drying process takes only 30 seconds! They are, of course, more expensive, but over time the costs are recouped by low energy consumption.
In this video, a professional DIYer gives tips on choosing the perfect lamp.
Sealing errors
The durability of the gel coating is influenced by the technology of its application.
Errors that lead to chipping and delamination:
- applying gel to the unprepared edge;
- processing the edge with a file, not a buff;
- applying cream, oil before applying gel to the end;
- applying thick layers of gel polish;
- shaking the bottle of varnish before applying it;
- drying not in a horizontal, but in a vertical position;
- sealing when applying one layer of gel, and not all;
- removing the sticky layer released during drying from the primer or base (it can only be removed from the topcoat).
If you avoid these mistakes when sealing your nail, a manicure with gel polish will last about a month.
Useful tips
@goodhousekeeping.com
To prevent your manicure from peeling and to last as long as possible , it is important to follow several recommendations:
- Dry the brush thoroughly and apply varnish and primer without pressure.
- The brush should always be held perpendicular to the nail, and sealing movements should be done from left to right or vice versa. But under no circumstances apply varnish from top to bottom or bottom to top.
- To prevent the gel from getting on the skin, you can apply liquid tape.
- For several days, try not to use boiling water. Moreover, avoid visiting beaches and solariums. If this requirement is not observed, your manicure will crack within 2-3 days.
- Don't file your nails. If something happens to your manicure, then the gel coating must be removed and all operations must be performed again.
- When washing dishes or working in the garden, use rubber gloves. They will protect your nails from dirt and protect sensitive skin from irritation.
How to make your own beeswax cream
To make your own nail wax, you need to:
- Take natural pure beeswax and melt it in a water bath. For 1-2 procedures you will need about 20 grams of the substance.
- Add 80 grams of base vegetable oil (e.g. almond, olive, coconut).
- Pour 1-2 teaspoons of boiled or distilled water into the mixture. Pre-distilled water must be heated to a temperature of 37 degrees.
- Add a few drops of essential oil, which will help eliminate the problems of your nails. You should not get carried away with oil, as it tends to penetrate very deeply and quickly into the nail tissue. For this dosage, 5 drops of essential oil will be enough.
Oils that I recommend adding to the cream:
- From delamination – patchouli, cedar, bergamot, pine, sandalwood oils
- To relieve inflammation – chamomile, rosemary, tea tree
- To add shine and strengthen – ylang-ylang, bergamot, lavender oils
The finished nail wax should be poured into a dry glass container and allowed to cool without placing in the refrigerator.