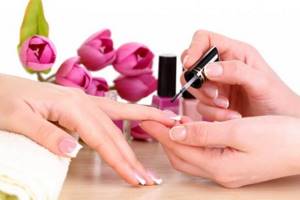
Have you learned how to apply gel polish at home, spent money buying a lamp, tools and a bunch of gel polishes, but the artificial coating does not last for the promised 2-3 weeks and chips after a few days? Don't be upset.
Perhaps, when applying the coating, you simply make mistakes, correcting which you can enjoy a lasting result!
Use quality varnish
Cheap varnish will last a short time. Low-price products do not contain durable plasticizers. You will have to apply it more often - the consumption increases, and the savings on materials are not justified. Such a product may still contain harmful impurities and damage your nails.
A high-quality varnish contains hydroxyethyl methacrylate, or HEMA.
Do not file your nails while wearing gel polish.
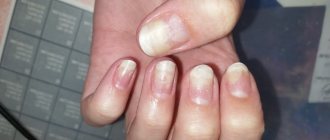
The coating seals the edges of the nail plate. The ingress of moisture and dirt is reduced to a minimum. If you file the tip of the nail, the protective function of the gel polish disappears. A microscopic gap is formed through which droplets of water and dust enter - the coating will not last long due to delamination.
We extend the life of a manicure with gel polish - we do not file it ourselves.
Manicure stages and possible mistakes
Today there are 3 main types of manicure:
- hardware;
- combined;
- classical.
Combined and hardware manicure must be done using a special manicure apparatus, but before using it, it is better to undergo training, since improper operation of the apparatus can lead to damage to the nail plate, for example, cuts. For beginners, it is better to do a classic manicure at home.
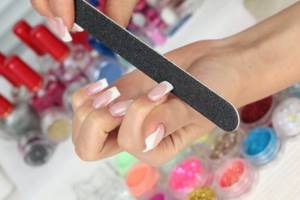
Stage 1. Shape filing, cuticle processing
Before applying gel polish, you need to put your nails in order: treat the cuticle, file the shape.
What do we do at this stage?
- Use a natural nail file to give the nail the desired shape.
- Apply a special cuticle remover to the cuticle and side rollers.
- Place your hand in a bath of warm water for 3-4 minutes. We wipe our fingers and start manicure.
- Use a pusher to push back the cuticle.
- We remove the cuticle with scissors (tweezers, nippers).
- With an orange stick dipped in water, we go along the contour of the nail and clean the pterygium.
Stage 2. Preparing the nail plate for coating
The next stage is preparing the nail plate for coating with artificial material. This stage is very important! Errors in preparing the nail plate can lead to deterioration of the adhesion between the natural nail and the artificial surface.
What do we do at this stage?
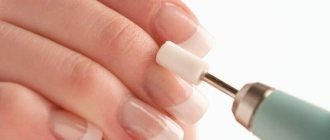
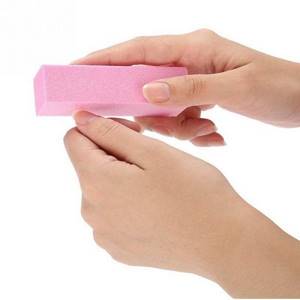
- We treat the surface of the nail plate with a buff to lift the scales of the nail plate and improve adhesion.
- We remove dust with a special brush or dust removal brush.
- Apply degreaser to a lint-free cloth and wipe your nails.
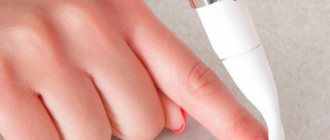
- If you have oily skin, then to improve adhesion, apply a dehydrator (nail prep) to the entire surface of the nail and air dry for a minute.
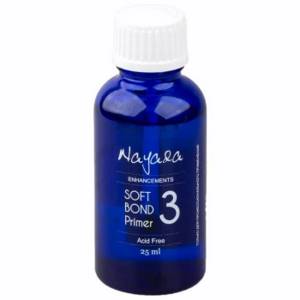
- Then you need to apply primer to the free edge of the nail. We also air dry the primer for one minute.
Mistakes at the nail plate preparation stage
Mistake #1:
Typically, people with oily skin or those prone to excessive sweating have a moist and oily nail structure. When preparing such nails for coating, it is necessary to use a dehydrator (nail prep) to deeply dry the nail plate, remove excess moisture from it and improve the adhesion of the natural nail to the artificial coating.
Mistake #2:
The free edge of the nail is one of the most vulnerable places: if you do not pay proper attention to it, chips and detachments may appear. To improve the adhesion between the nail plate and the artificial material, it is necessary to use a primer. Primer is translated as “primer”. There are acid-free and acidic primers.
The acid-free primer acts as double-sided tape and ensures strong adhesion of the natural nail to the artificial nail.
The acid primer lifts the keratin scales of the nail plate for better adhesion to the artificial material. Since the acid primer contains aggressive components, you must be careful not to get it on the skin and cause a burn. It is recommended to use it before extensions for girls with wet or oily nail texture.
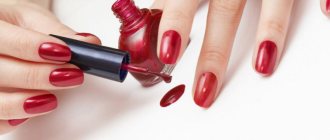
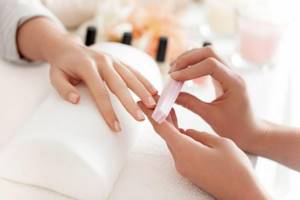
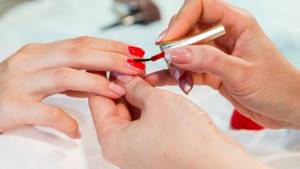
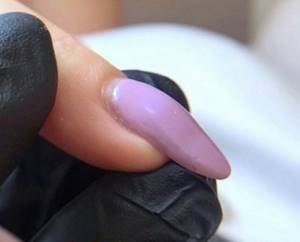
Stage 3. Covering the nail plate
Next we move on to the most anticipated stage - coating.
What do we do at this stage?
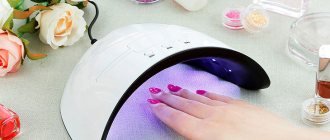
- Apply a base coat to the surface of the nail. Dry it in a lamp. We do not remove the sticky layer.
- Apply a color coating (gel polish), if necessary, in 2 layers. We dry each layer in a lamp. We do not remove the sticky layer.
- Apply the top coat (with or without a sticky layer). Dry it in a lamp.
- If you are using a top coat with a sticky layer, then moisten a lint-free napkin with a sticky layer remover and wipe your nails with it.
Errors at the stage of covering the nail plate
Mistake #1:
You used the wrong base for your nails.
The condition of the nail plate is different for everyone: for some it is strong, while for others it is thin, soft and plastic. You cannot use the same base for all nails. It is necessary to analyze the condition of the nail plate and pay special attention to the choice of base coat.
Today there are 3 main types of base coatings: hard, elastic and camouflage. What are their fundamental differences? Which one to choose? Let's figure it out.
Hard bases
A solid base is a base that almost does not bend after polymerization. Most often, solid bases are characterized by a liquid consistency. Due to their liquid consistency, such bases are more suitable for experienced professionals, since leveling the nail plate with them must be done quickly, otherwise streaks will appear. You won't be able to grow your nails with a hard base! Hard bases are suitable for healthy, strong nails. On soft, bendable nails, such bases can cause chips and detachments.
Elastic bases
Such bases have a thick consistency, after polymerization they are plastic and bend.
Elastic bases are great for beginners: they are easy to work with, as they do not spread, and the alignment is perfect. Using elastic bases you can extend your nails. Elastic bases are great for soft, highly flexible nails. But on long nails they sag over time, that is, after a while a “dip” appears across the nail.
Why is this happening?
The thing is that in the stress zone (at the junction of the free edge and the nail bed), the base shrinks. This effect can only be achieved on long nails, because the stress zone is also a bend zone when pressure is applied to the free edge, and the length just puts stress on it.
Bases are soft gels, and they, in turn, as we said above, can be elastic or not.
Elastic bases perfectly strengthen the nail plate when leveling, because they are flexible, tenacious, and when the free edge moves, they, like an elastic band, move with it. But this is precisely why shrinkage occurs.
There are bases that contain solid plasticizers. Solid materials do not move with the nail and, accordingly, do not shrink. But keep in mind, UNDER HEAVY LOAD, almost any base will give minimal shrinkage.
What to do?
Strengthening with acrylic or hard gel, but this is a completely different procedure. In addition, the harder the material, the worse it soaks and the more difficult it is to cut.
ADVICE! Sometimes it is not very clear from the name of the base whether it is hard or elastic. To determine the type of base, you can do the following: apply a small drop or strip of base to the surface of a transparent plastic bag and put it in a lamp to polymerize. If after polymerization the drop (strip) bends, it means you have an elastic base in your hands. If you can’t bend the drop and it cracks, then the base is solid.
Mistake #2:
You held your hand in the lamp incorrectly and the coating did not dry well.

How to hold your hand in the lamp correctly?
- The hand should lie parallel to the table, not on its side, otherwise the material will flow.
- Do not press your fingers together, relax your hand. If you squeeze your fingers, there is a chance that the material at the side walls will not dry well.
- When polymerizing colored gel polish, under no circumstances remove your hand from the lamp before the prescribed time! The color may not dry out and may fade!
- Pay special attention to your thumbs. We dry them separately, do not press too hard and do not roll them on their sides.
Mistake #3:
You stored and transported the gel polish incorrectly, it has thickened or air bubbles have formed in it, which is why the coating does not adhere well and is difficult to work with.
How should you store and transport gel polish?
- Gel polishes are afraid of sunlight. Due to exposure to ultraviolet rays, the material may thicken or lumps may appear inside it. To protect gel polishes from light penetration, manufacturers produce them in black (less often colored) bottles. Despite this, you should not place gel polishes near a window; it is better to store them in a dark corner or a special case away from sunlight. For the same reason, DO NOT FORGET TO CLOSE THE BOTTLE COVER TIGHTLY after finishing the procedure.
- Do not store gel polishes near heating or heating devices, avoid sudden temperature changes. All this negatively affects the structure of the gel polish. The ideal storage option is stable room temperature.
- Don't shake gel polishes. Due to shaking, air bubbles may appear in them, and this leads to the fact that the coating does not fit well on the surface of the nail plate. The adhesion between layers also deteriorates, and this can lead to detachments and chips. If you often transport gel polishes, then do it in a special case with fixation for bottles.
NOTE! The application of color coating most often occurs in close proximity to the polymerization lamp. Place the bottle of gel polish so that the light from the lamp does not fall on it, otherwise the gel polish may thicken.
ADVICE! If bubbles still appear in your gel polish, you need to do the following. Open the bottle, but do not remove the brush. Let the material stand in this state in a dark place so that it is not exposed to daylight for a couple of hours. After this, mix the composition with a brush, close the bottle and twirl it between your hands.
Mistake #4:
During polymerization in the lamp, the gel polish shrunk.
One of the reasons may be the insufficient power of the lamp you are using. Perhaps your gel polish is well pigmented and the lamp power is simply not enough to dry it. It is advisable to use a lamp with a power of at least 48 W. For information on how to choose a lamp, read the article “How to choose a lamp for drying gel polish?”.
Also, the gel polish could shrink due to the fact that you applied it in too thick a layer.
Mistake #5:
The brush turned out to be defective, making it inconvenient to work with or making it impossible to make a coating at all.
Sometimes the brush hairs may stick out in different directions or be completely absent, so before purchasing gel polish, ALWAYS check the brush for defects!
TIP: in order not to buy a “pig in a poke,” buy gel polishes in professional stores that are official representatives of brands and give you the opportunity to test gel polish for free before purchasing. In such stores you can apply gel polish to the tip and see if you like its thickness, density, and brush shape.
You can take advantage of this opportunity in our “ParisNail” stores!
Which design lasts longer on nails?
Everyday home and professional work quickly wears out the nail coating. Choosing a manicure design to wear for a long time:
- French with different color smile lines;
- Graphic drawing;
- Multi-color coating, glitter;
- Aqua design with dried flowers.
All these are flat options, they will last perfectly until a new correction. It is possible to add small rhinestones at the base to prevent chipping. Short nails with a simple design will last longer than long ones.
How to give the desired shape
Square
First, the center is filed in a straight line, which should become parallel to the end of the finger itself. Then we file the corners, softening them only a little, but leaving them straight.
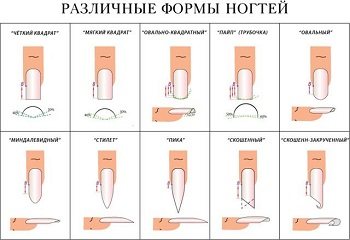
Different nail shapes
Square with rounded edges
We perform the same manipulation as with a square shape: we cut off the center straight, and process the sides with slight rounding.
Trapezoid
The plate is given a square shape, then the sides are filed until an elongated trapezoid is obtained.
Oval
The movements should resemble the work of a pendulum. Starting from the inner corners, the edges are filed towards the center, but should create a completely natural, rounded look. Next - from the corner to the opposite side and with a soft file we remove all the sharp points.
Almond
First, a square shape is given, then the sides are filed in the form of an elongated trapezoid, and the corners are removed with a soft file, giving the nails an elongated almond shape.
Stylet
The plate is given an oval shape, then the file is applied to the center of the edge and the side parts are cut down using movements from top to bottom. We repeat the same procedure on the other side.
Pipe
The sides are cut parallel to each other. To correct the free edge, the nail file should be held at an angle of 45º relative to the side lines.
How to decide on the shape of your nails and how to give your nails different shapes - watch the video in the master class: