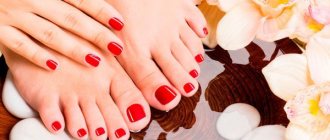
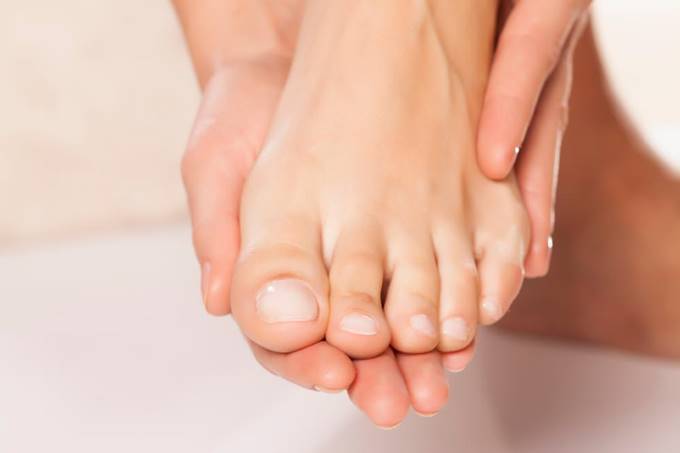
Lovers of high heels and open sandals undoubtedly know how important it is to always have a good pedicure. But well-groomed feet are not only a choice for those who wear open shoes.
A beautiful manicure and pedicure gives you self-confidence and truly inspires you. You need to constantly spend time on your feet. Sometimes it happens that there is no opportunity to visit the salon, but despite this, you want to stay “on top”.
With the help of a few simple tips, you will learn how easily and correctly you can do a pedicure at home without the use of special devices and equipment.
- preparatory procedure;
- foot baths;
- foot skin treatment;
- nail treatment;
- work with cuticle;
- applying varnish.
Below we will look in more detail at each stage of the pedicure.
Professional pedicure
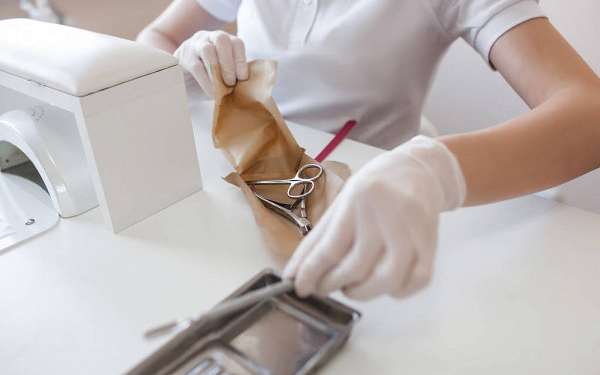
Special rules for disinfecting hands and objects, as well as sterilizing instruments, have been developed for manicure and pedicure specialists. According to them, the pedicurist is obliged to wash her hands before working with the client and after finishing, using an antiseptic . After use, baths must be treated with a disinfectant.
| Sterilization of used instruments is carried out either by boiling or by treating them with disinfectants that have passed state registration. |
The sterilization requirements for pedicurists correspond to the requirements for medical workers . But anyone who has at least visited a dentist can easily tell the difference. When cutting the cuticle, small cuts often occur, causing blood to appear. Getting it on an instrument without proper disinfection is fraught with consequences.
Pros and cons of technology
The advantage of a high-quality pedicure is to tidy up your feet and give them a well-groomed appearance. This is achieved by removing existing defects, decorating the nail plate with the most suitable method (device, edged, European) or a combination of types of pedicure.
Competent manipulations transform even the most problematic legs. After the session, corns, calluses, and ingrown nails disappear.
In difficult cases, a medical pedicure is useful, since a cosmetic pedicure only affects the aesthetic appearance of the foot. It is important to choose a professional master who follows all the rules of the procedure. Otherwise, a pedicure may lead to health problems.
Disadvantages of the procedure:
- if the instrument processing steps are not followed, infection can occur (including hepatitis and HIV);
- increased morbidity in the absence of experience;
- A trimmed pedicure activates the work of skin cells, which is why it grows quite quickly and becomes rough.
Why get a pedicure
In the summer - understandable. After all, toes peek out from sandals and open shoes. And you won’t be able to playfully run to the water on the beach without evidence of a serious attitude towards your appearance.
In winter, this becomes important when visiting the pool. You feel better when visiting a doctor and staying in a hospital. If a woman is married, this is a reason to please her husband. It is believed that this is done to please him, because others do not see.
But there is another reason - psychological . Even if others are not aware, a person is constantly aware of what kind of underwear he is wearing, whether his tights or socks are torn. And are your nails in order? This involuntarily affects the manner in which one behaves, gives confidence to one’s facial expression and courage to one’s actions.
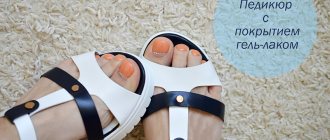
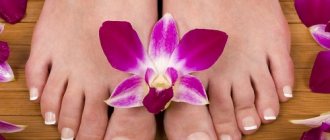
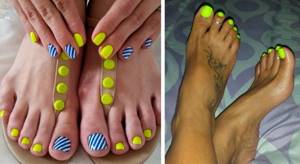
Nail designs for pedicure
In order for all your efforts to be appreciated, in addition to classic pedicure events, it is important to choose beautiful and appropriate nail patterns.
Below are popular photos of a bright pedicure, which is perfect for summer, early autumn and late spring, when it’s time for open shoes.
If you need a winter pedicure design as a sample, then we present you a selection of interesting designs with New Year and Christmas themes.
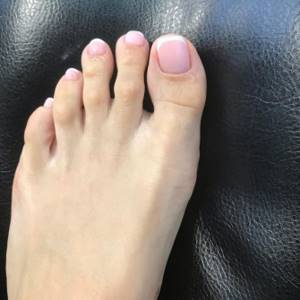
One of the most popular options is a French or French pedicure. It is appropriate for any event and always adds elegance to every girl.
The main thing is that the process and result of the pedicure bring you pleasure. And by listening to the recommendations of specialists, you will forever get rid of leg problems and become the owner of neat and well-groomed legs.
How nice it is to do yourself
Any self-care gives rise to a positive attitude, which psychologists consider a direct path to happiness. Pedicure is an art. After all, everything ends with painting - applying varnish to the nails.
Modern fashion dictates not the boring application of one color on each nail, but wild imagination. One month it is customary to alternate colors that do not match each other, the next - one nail should be slightly longer than the others. Moreover, it should shine with sparkles, which can be purchased in the store.
Keeping yourself busy wards off boredom and bad mood. No one will be able to give themselves a pedicure and be bored at the same time. A woman begins to feel better about herself, which is always reflected in her appearance. If a pedicure is done regularly and foot care is constantly taken care of, then you can do it quickly and enjoy it.
Finally, by mastering any new knowledge, any of us becomes more free and independent.
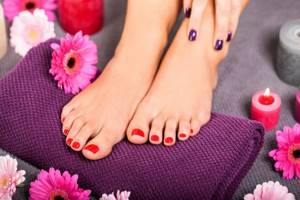
Photo design ideas for a classic pedicure
The trimming technique is an excellent basis for applying a stunning nail design. Neatly formed nails and delicate, clean skin of the feet and fingers look organic with the most stylish and fantastic designs. You can use anything that will lift your spirits - rubs and rhinestones, sparkles and magnetic varnishes, charming paintings or bright, amazing color effects.
View this post on Instagram
Posted by Unreel (@extremeofficial)
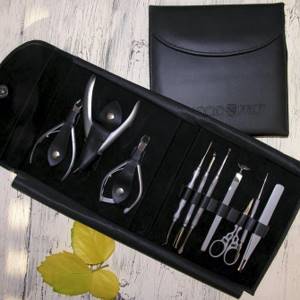
Required tools and accessories
For a home pedicure you will need:
- Ceramic or plastic foot bath.
- Towel.
- Heel grater.
- Fine grain pumice.
- Tweezers.
- Different types of files.
- Machine.
- Wire cutters.
- Scraper equipped with small blades for heels.
- Nail scissors.
- Softening cream.
- Finger spacers.
- Varnishes of various colors.
- Acetone and cotton swabs for correcting minor imperfections when applying varnish.
- Deodorant for feet.
Actions for sore fingers
In some cases, finger inflammation occurs after a pedicure. Unpleasant symptoms appear the very next day. This is due to the fact that an injury was sustained during the procedure, although it may not be immediately noticeable. The skin of the thumb is most often affected.
To prevent the infection from spreading to other areas, do not wait for swelling and accumulation of pus. It is recommended to consult a specialist who will examine the finger and prescribe appropriate treatment. This is a course of antibiotics, applying bandages with antibacterial agents, using a medicinal foot bath, taking vitamins to increase immunity.
At home, they effectively relieve inflammation and draw out purulent contents using a bandage with aloe, honey, potatoes, and celandine. Starting treatment from the first days will allow you to quickly cope with the problem without subsequent contact with a surgeon.
Foot baths
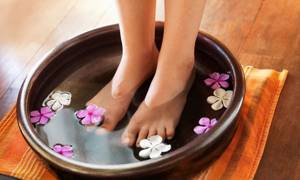
The pedicure procedure begins with a warm bath . It involves steaming the feet. At the same time, they soften, which facilitates further processing. You can add ingredients to the water, for example, herbs, various types of sea salt with additives, and essential oils.
Toning.
Mix sea salt, which has the property of strengthening nails, and essential oil. You can enhance the effect by adding dried mint. Proportions may vary.
Antibacterial.
Pour baking soda into the water. For a bath of water - four tablespoons. This baking soda bath is suitable for both treatment and prevention of fungal infections . Eliminates odor.
Relaxing.
Add an infusion of herbs - calendula or chamomile. The infusion is prepared by pouring two tablespoons of dried plants with a glass of boiling water. It should infuse for half an hour. This composition provides a strong disinfectant effect.
Softening.
Add four tablespoons of vinegar to the water ( not to be confused with acetic acid ). Apple cider vinegar will also work. The duration in this case is limited: no more than 15 minutes.
Exfoliating.
Sprinkle table salt. Place your feet in the water for a few minutes. Add two tablespoons of hydrogen peroxide to the water with salt.
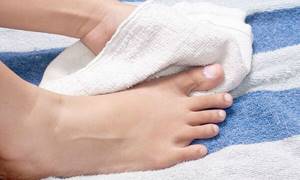
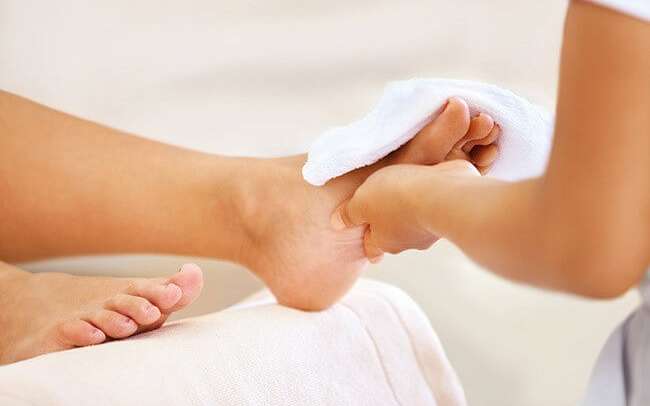
After taking a bath, wipe your feet dry with a towel.
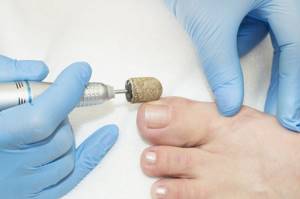
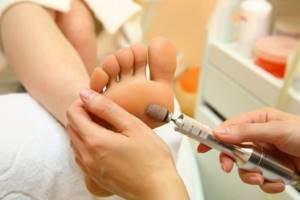
Electric machine for hardware pedicure
To perform a hardware pedicure, you will need a special machine with several cutters and silicon carbide attachments. To count on repeated and regular use, the machine must have a power of at least 40 watts and a cutter speed of 15 thousand revolutions per minute, as well as a reverse reverse function.
About cutters
Pedicure cutters can be divided into three types depending on the place of use:
- For treating nails and cuticles. The same cutters that are used for fingernails are suitable here. You can read more about them here.
- For treating the skin around the nails. Ceramic or diamond tips are suitable here. The abrasiveness of the cutter is selected depending on the condition of the skin.
- For treating the skin of the foot. Coarse abrasive diamond cutters, silicone grinders and silicon carbide attachments (disposable sand caps) are suitable here.
Stages
Main stages of pedicure:
- Foot baths.
- Remove any remaining nail polish applied last time using products specifically designed for nail polish remover.
- Shorten the length of your nails. Do not file them, but trim them with small tweezers.
- Soften the cuticle. Apply a softening agent to the surface of the nail and the sides.
- Treat the heels, removing rough skin from them. A special machine is driven along the surface towards the edges of the heel. Remove rough skin in thin layers, being careful not to damage the lower layers.
- Sand the surfaces of the feet with a coarse file.
- Use tweezers to treat cracks on the heels. When working, they should be placed along the crack.
- Remove dead skin on the fingertips. Use a soft file to sharpen the surface of the pads and the places where the fingers touch.
- Treat the cuticle. Wipe this area with wet wipes. Use a special spatula to move the skin from the middle to the edges.
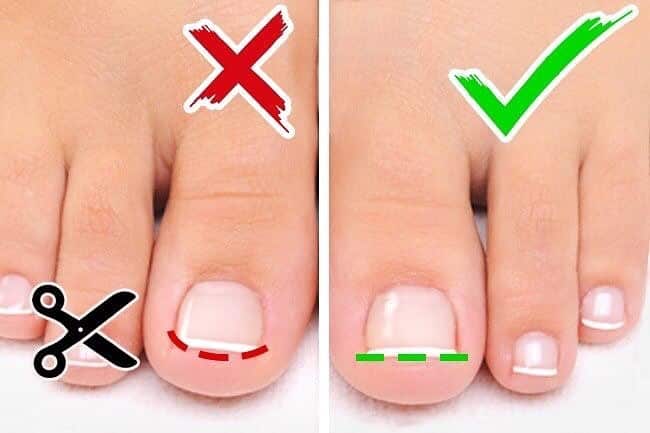
- Finish the edge of the nail. Use a file to give it a square shape to avoid ingrowth .
- Treat the nail plates with disinfectants.
- Apply a nourishing cream to your heels to prevent cracks.
- Give a foot massage.
- Cover with varnish. Can be done in several layers. Additionally, a clear varnish can be applied on top.
Execution technology step by step
Many girls make a big mistake when they decide to do their nails using the classic method. This error lies in the order of the procedure. Thus, the technology of a classic pedicure includes steaming the skin of the feet to make it easier to remove rough old skin.
@le_bonbon_nails
But the fact is that in this case, you must first trim your nails, since steamed nails become softer. This means that it will be easier to injure them or even break a nail at the wrong angle. Often this mistake leads to ingrown nails, which cause pain when walking and wearing shoes, and unpleasant consequences.
@pedikur_doma
So, step by step treatment of feet and nails using the classical method is done as follows:
- First of all, wash your feet with soap, treating each area of the skin and thoroughly rinsing off the foam. If you are going to do a pedicure and manicure at the same time, wash your hands thoroughly as well.
- Treat instruments with an antibacterial compound or use a special sterilization device. If there is neither one nor the other, regular alcohol (medicinal alcohol, which can be bought at a pharmacy), treating instruments in hot water or steam will do. Special tools must be treated with steam or boiling water in advance so that they have time to cool and dry.
@manicureland_cuccio
- If there is old polish left on your nails, remove it with your regular nail polish remover. To clean gel polish from your nails, use special products to remove it and follow the instructions.
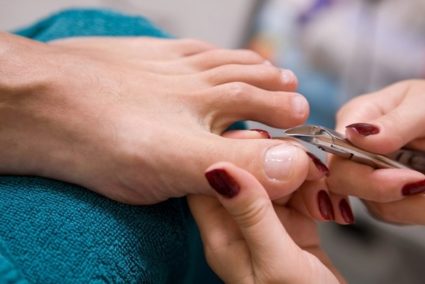
- Adjust the length and shape of your toenails. To do this, use wire cutters or nail scissors with thick blades. Use a nail file to give your nails the desired shape and round off sharp corners. Remember to cut your toenails straight (horizontally) to prevent them from becoming ingrown.
@salon_felichita
- The next step will be steaming the feet. You can skip this step if your feet do not need additional cleansing. But if you are still carrying out a complex, full-fledged procedure, this stage is as important as all the others. This is also typical for unedged pedicures.
- In order to steam the skin of the feet, warm water is poured into a bath (basin) of the required size and the necessary components are added. These can be special softening essential oils, salt (sea or regular), honey, lemon, foam, herbal infusions, etc. It is necessary to keep the legs in warm (slightly hot) water for about 10-15 minutes so that all the components have time to take effect.
@goodlife_ksy
- After this, it is necessary to treat the skin using pumice. The roughest areas of the skin on the feet are the heels, balls of the feet, and the bulge in front of the big toe. When treating feet with pumice, corns, old calluses, and dead skin particles are removed. The skin on the feet becomes softer, softer, and a feeling of freshness and lightness appears.
@topnail_servis
- Now you need to carefully trim the cuticle. To remove cuticles, use a softening compound. Apply it to the cuticle for a couple of minutes, then lift it away from the nail using a disposable orange stick.
- Once the cuticle is clearly visible and lifted from the nail, carefully trim it with thin nail scissors or a special cuticle remover. Be careful and try not to interrupt cutting the cuticle to prevent the appearance of hangnails in the future.
- Using a manicure spatula, carefully remove the pterygium from under the cuticle and side pits.
@olga.semenova777
- After trimming the cuticle, treat these areas with a special moisturizing oil. This way the skin remains soft and the toenails receive nutrients from the root.
- Home foot care also includes applying a moisturizing nourishing cream to the skin of the feet. For the best relaxing effect when rubbing the cream, massage your feet.

@svetlana_massaq
At this point, the trimmed version of the pedicure can be considered complete. If you are going to coat your nails with varnish, wait until the cream and oils are completely absorbed into the skin. To apply varnish, first treat your nails with a degreasing compound (alcohol, nail polish remover), as particles of the cream may remain on them, and the varnish will not lie evenly.
After this, apply your favorite polish to your nails, create any design, ornament or composition to your taste and wait for it to dry completely.
@gragosha
Mistakes when performing a pedicure
The most common mistakes:
Do not soften your feet in too hot water. The temperature should be no more than 30 degrees . You can keep your feet in the water longer.
When removing calluses and corns, do not use scissors or a blade. This may cause cuts. To do this, use a pumice stone or a scraper.
Do not cut the corners of the nail to avoid ingrown nails. Correctly cut your nails in a straight line.
Features of the procedure
The pedicure procedure has features that largely depend on the condition of the feet, skin structure, etc. Regular foot care at home extends the period between salon visits.
The frequency is also affected by the rate of nail growth, since as the nail plate grows, pressure from shoes occurs, which can result in ingrowth into the skin. Complex and deformed nails can be partially or completely changed only in a salon setting using modern technologies by experienced specialists.
But you should not abuse the constant effect on the skin and nail plate. Frequent sanding and polishing can lead to cuts, large detachments, increased skin sensitivity and other unpleasant problems.
Heel treatment
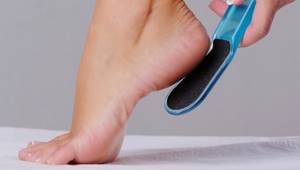
There are two types of heel treatment tools. If the condition of the heel is not very advanced, using a grater is sufficient. Otherwise, machine processing is necessary.
Processing with a grater
It is better to choose a grater with a wooden rather than an iron handle. The processing surface is made of pumice, plastic, nickel, stainless steel. The rough surface is created by notches applied by a laser.
| It is advisable to choose double-sided graters with different coatings - hard and softer. |
Having steamed your legs, first treat the heel with a harder coating, moving in one direction - from the sides and from the back to the middle.
Then rub the corns on the bottom of the fingers and on the side of the thumb with a grater. The leg is placed back into the bath. Take it out, dry it with a towel and treat the other leg in the same way.
Then the first one, taken out of the water and dried, is treated with the side of the grater with a softer coating, increasing the processing area. The second leg is being treated.
Processing by machine
When purchasing a machine, you need to pay attention to the material of the blade. It is better to choose surgical steel. Its advantage is increased wear resistance.
Blades are included with the machine. The preparatory step is steaming the legs with the addition of the desired components. Then you need to wipe your feet dry. Using light movements, without creating excessive pressure, begin to treat the foot, paying attention to the roughest areas. Direction: from the edges to the center of the heel.
The final stage will be to re-immerse the feet in the bath, and then treat the skin with a sanding file. Finally, apply the cream.
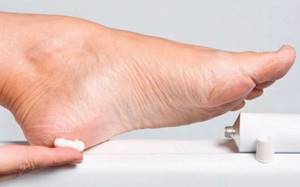
What do you need for a pedicure at home?
As a preparatory procedure, make sure that all nail polish is removed.
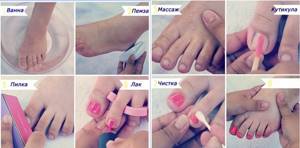
Photo - Pedicure instructions step by step
At the first stage, you need to prepare special tools for pedicure
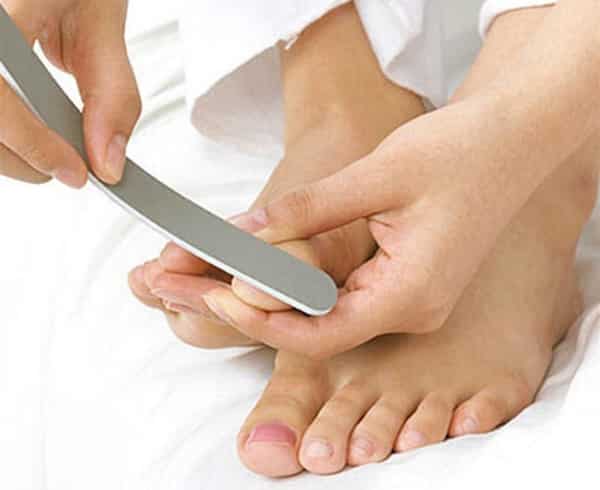
. If you have already decided to get a beautiful home pedicure of your nails, then buy a good nail file for your arsenal. Experts advise avoiding those that are too rough with a coating resembling sandpaper. Using such a tool will cause your nails to peel and take on an unhealthy and unattractive appearance. It is best to arm yourself with a glass nail file. It has many advantages. Firstly, it absolutely eliminates damage to the nail, and secondly, such a file does not wear off and will serve you for a very long time.
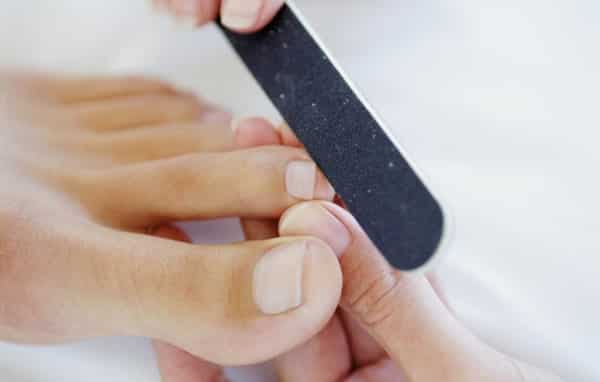
Photo - Nail file
It is necessary to file nails in one direction only
, giving them the correct desired shape. Don't experiment with the shape of your nails. Leave all experiments for your fingers, where your efforts will be appreciated and will not harm your health. Giving an unusual shape to your toes can lead to such a bad consequence as ingrown toenails. In the early stages, this disease can be treated independently by treating the problem area with a solution of soda and potassium permanganate, but in advanced forms it is necessary to contact a specialist.
The second stage of pedicure is polishing the nail
. For these purposes, it is necessary to have a double-sided polishing file. Use the rough side first to get rid of minor imperfections in the nail and remove any remaining polish, and then use the second, less harsh side. Polish your nails thoroughly and they will sparkle, become smooth and shiny.
Polishing the nail
Video lesson for beginners: home pedicure
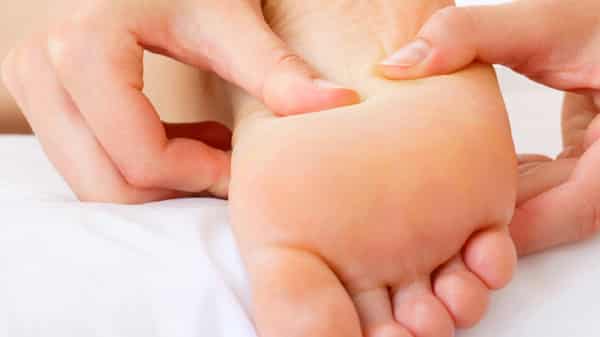
Cuticle treatment
The function of the cuticle is defense. The base of the nail is protected from infections entering this area. When doing a pedicure, the goal is to get rid of dead cuticle cells. As the cuticle grows, it dries out, causing hangnails to appear. Nails grow more slowly and their appearance deteriorates. Only constant care for the condition of the cuticle will make it healthy and give it a well-groomed appearance.
Trimming method
A method when the cuticle is trimmed with scissors or tweezers. Preference is given to tweezers made of hand-sharpened high-quality stainless steel.
Steam your feet in the bath. Remove one foot and dry it with a towel. Apply a product that has a softening effect to your nails in the cuticle area. Keep it on your nails for a little while. Take a damp cloth and remove any remaining product.
Take a spatula from the pedicure set and begin to carefully push back the cuticle, moving from the edge of the nail to its middle. Then take out a tool with a sharp end from the set and go through it, cleaning the skin of the thin layer that grows on the nail. Perform carefully without scratching the nail.
Take the tweezers and trim the skin around the nail. Trim your cuticles one at a time to prevent hangnails. Lubricate the cuticle area with the oil intended for this purpose. Treat the second foot.
| It is recommended to purchase tweezers in two sizes. Make large cuts first, and then use smaller tweezers in the corners. |
Unedged method
With this method, keratolics are used instead of tweezers . When applied, the cuticle softens. Then she moves away with the help of an orange stick. Then you need to apply a cuticle remover. After some time, the cuticle is pushed back again. The pedicure ends with cuticle oil treatment.
The advantage of this processing method is safety. With this method, only dead skin areas are removed, while the living ones remain as protection against bacterial infection.
Peeling and nourishing the skin of the feet
In order to remove dead skin, you need to take a pumice stone . It is best to use a fine-grained one in order to give an even surface to your skin. This tool becomes indispensable for foot care. Pay special attention to the most problematic areas (corns and keratinized skin) and treat them more thoroughly.
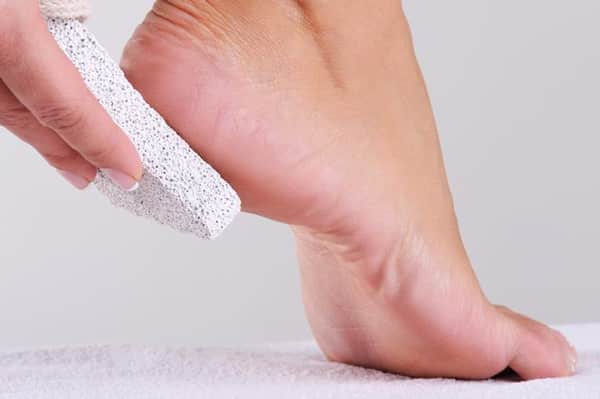
Pumice stone for heel care
But there are many places on our feet that are difficult for pumice to reach. In such cases, you can use a foot scrub and thoroughly treat the areas. After the diligent procedure is completed, you need to rinse your feet in clean warm water.
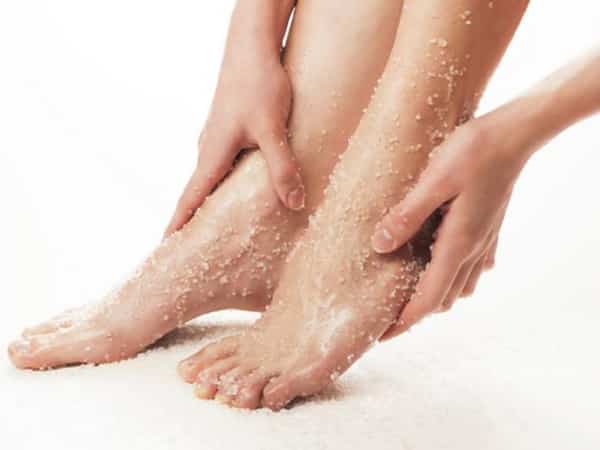
Foot scrub
Now you will need a wooden stick . The cuticle of the nails is sufficiently softened at this stage of the pedicure and can be moved without any traumatic consequences. Please note that experts do not recommend cutting the cuticle on your toenails; it must be pushed back regularly.
It's time to do the final nail cleaning procedures. Using a bone or wooden stick, you can easily clean your nails of remaining dirt. This procedure is best carried out with maximum diligence, in order to prevent injury to the fat pad, which is located directly under the nails. When the cleaning is done, we begin the most enjoyable process.
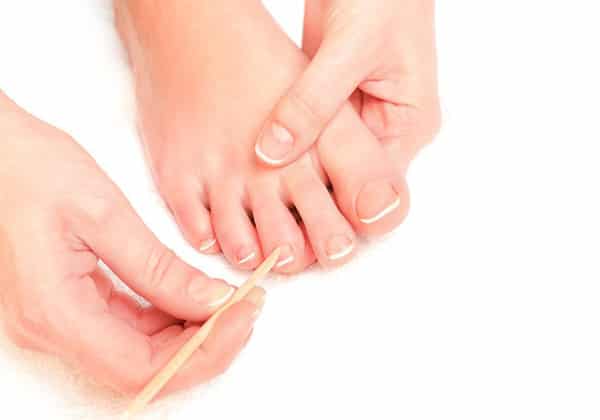
Wooden stick
Now your feet can be pampered with a massage . Massage your feet with additional nourishing cream if they are too dry and need moisturizing. If you experience profuse sweating, you can use special foot products with a deodorizing effect. And if you have been on your feet all day and feel noticeable fatigue on your face, legs, and throughout your body, then it would not be a bad idea to use creams from the series with a tonic effect .
Foot massage
If you don’t have any cosmetic product at hand, experts in the field of cosmetology recommend using regular vegetable oil . Using regular olive or sunflower oil, you can achieve good results in restoring the water balance of the skin of your feet.
Hardware method
Unlike the classic one, the hardware one does not require steaming the legs . A special oil is used to soften. The product acts selectively only on keratinized and dead skin. Living areas are not affected. Provides healing and disinfection effect.
Processing is carried out using grinding attachments and machine cutters. There is no cutting of the cuticle. It is impossible for an injury to occur.
The kit includes nozzles of various diameters. Nozzles of large diameters are used when there is a need to treat the feet, especially the heels. Small nozzles with a semicircular shape are used when the areas between adjacent fingers and the skin near the nail are treated.
The design consists of a device and a handle on which attachments are attached. First, the legs are treated with a coarse nozzle. Then, with a large amount of dead skin removed, they are replaced with more delicate ones. There are attachments designed for different areas of the foot. Nails, cuticles, periungual skin, calluses, and heel cracks are subject to care.
Stages of implementation
- Apply softening cream for about fifteen minutes.
- Remove dead and rough skin using attachments.
- Using cutters, remove corns and treat calluses.
- Sand the cuticles.
- Using a nail file, give them the desired shape.
- Polish.
- Sanding to achieve final gloss.
- Apply emollient cream.
- Massage your feet.
- Apply varnish.
The technology for performing hardware pedicure is clearly shown in the video below:
Treatment of calluses
The pedicure apparatus includes a nozzle for removing calluses . It removes calluses delicately without damaging the skin. A cream is placed in the remaining hole, which removes the roots of the callus being treated.
Circulation
During treatment, the device constantly massages. As a result, blood circulation improves, which has a beneficial effect on the skin of the foot.
After a pedicure performed using a hardware method, the skin that was removed does not begin to grow as quickly as when the pedicure was performed using a trimming method. The skin retains its elasticity for a longer time and becomes much less rough.
How to prepare your feet for a dry pedicure
In people with delicate and damaged skin, even the most gentle procedure can cause damage to the epidermis, so the use of antiseptics, regardless of the type of treatment, is mandatory.
Fact about pedicure
In Ancient Greece, the pedicure procedure necessarily included therapy with natural essential oils. In addition, the feet were completely painted with organic dyes.
Masters use special compounds that do not dry out the epidermis and soften it. If you do a dry pedicure yourself, then you need to buy these products in specialized stores.
All devices and instruments for the procedure must be treated with disinfectants or special sterilizers, then the treatment of the feet will be safe.
Disposable equipment: orange sticks, cardboard polishers and files, as well as master's gloves must be disposed of after each use.
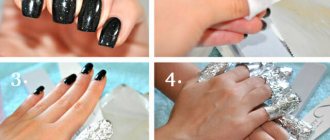
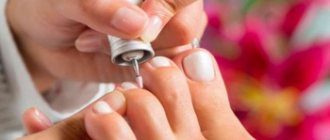
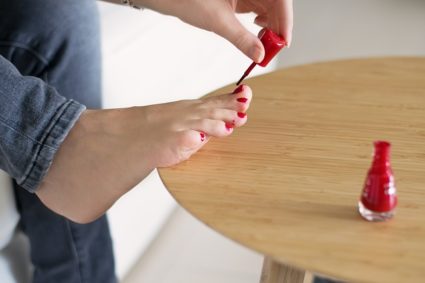
Applying varnish
When applying varnish, it is convenient to use finger separators . This will protect you from accidentally getting varnish on an adjacent nail, especially if they were supposed to have different colors.
Before painting your nails, you need to degrease them with a product that does not contain acetone . A special base must be applied under the varnish. The varnish is applied in two layers with a special brush. The procedure is completed by applying a fixative.
Alternative types of toe treatments
Liquid chemical
This method of foot treatment is considered an express method. It is based on the use of chemicals that contain alkalis or acids; in form it can be a gel, cream, or emulsion. The skin softens in just a few minutes, after which it is easy to remove.
Urea
If the feet are affected by corns or hyperkeratosis, then it is rational to use urea (urea) to treat them. The small size of the molecules of this substance promotes deep penetration into the layers of dead skin and softens it.
Urea can enrich tissues with useful substances, and it is also a good moisturizer.
Sequence of procedure:
- An antiseptic spray is applied to the skin of the feet;
- followed by treatment with urea;
- time for five minutes, after which the softened epidermis is removed with a spatula or napkin;
- the feet are given a neat appearance by sanding;
- The nail plates are polished and varnished.
Gel
This subtype of pedicure can be alkaline, acid, or urea. The main thing is that the product that is used has a gel consistency. In this form, it does not flow from the surface of the skin and is easily removed - it’s convenient.
Many people enjoy spa treatments as an alternative to regular pedicures. It is worth paying attention to them, perhaps they will add a special charm.
Monochromatic pedicure master class
The monochromatic finish looks attractive and is suitable for everyday pedicures. Those who want to stay on trend should choose coral color. It will be at the peak of popularity in the autumn-winter season. Shades of blue, beige, red, gray, as well as classic black and white do not go out of fashion.
Those who love unusual tones should choose purple, fuchsia, burgundy, gold, orange, mint. Neon varnishes are popular in the last season. They look catchy and defiant, and are suitable for a club or beach look.
A plain pedicure with rubbing, shimmer or glitter looks no less impressive. This coating looks festive even without additional decor, and is suitable for an evening look. If desired, you can cover only one nail with glitter, and paint the rest with glossy varnish of the same shade.
The matte monochromatic finish looks stylish and elegant. For the approaching autumn season, burgundy shades will be especially relevant.
How to do a plain pedicure:
- After preparing the feet, it is necessary to treat the plates with a degreaser to remove any remaining cream or oils from them.
- Then you need to apply the base to your nails, and after waiting for it to dry, cover it with varnish in 2-3 layers. Each of them is applied only when the previous one has dried.
- The coating needs to be secured with a finish, then the result will last longer.