Many women visit beauty salons to get their nails done. This process is usually accompanied by the application of a special varnish. Without equipment, it takes a long time to dry. To quickly dry gel polish, use a lamp with ultraviolet light. Its main property is the rapid polymerization process of the applied material. To ensure a high-quality manicure, you need to carefully choose a lamp for drying nail polish. Today there is a wide selection of this product, but you can make a device for drying nails with your own hands.
How to change it in UV with your own hands - step-by-step instructions
To replace an outdated or burnt-out lamp in the device, you must follow these steps:
- Turn off the device using a special button, if available, and disconnect from the network. Turn the box over, unscrew all the retaining parts of the base and cover of the case, for convenience, place the screws in a small closed container or matchbox so that they do not get lost.
- The device turns over into its usual position with support for the lower part of the block so that it does not fall off and the existing parts are not damaged.
- Carefully remove the top of the device. This should be done easily, without crackling, extraneous sounds, etc. The main thing is not to damage fragile lamps and electrical contacts.
IMPORTANT! As a rule, connecting wires are attached to the rear wall at the top of the case, leading to the control buttons from the board located on the base. Therefore, the cover should open “like a door” with minimal movement of parts of the housing so that the wires do not come off. Then it will be difficult to connect them without special equipment.
- A non-working or outdated lamp is identified and is very easily pulled out of the socket so that it does not crack in your hands, since the base is usually hidden inside a mirror structure in order to less scatter the emitted ultraviolet rays.
- In place of the old lamp, a lamp of similar power and dimensions must be inserted in order for the device to work correctly. The part is simply placed in the socket at the appropriate joints, easily pushed all the way so that the metal contacts are installed in place.
REFERENCE! Depending on the design of the device, to replace the UV lamp, you don’t have to disassemble it, but simply remove the damaged one and insert a whole lamp in its place. The main thing is that at this moment the device is disconnected from the network. It is easier to remove the lamp if you push it with your finger from the back of the socket, then you do not need to squeeze the glass bulbs. Unwinding the equipment reduces the risk of damaging the fragile glass in your hands.
- Close the top cover of the device so that the housing snaps into place. Typically, manufacturers produce plastic devices with self-locking box parts, and screws are provided for secure fastening.
- Before screwing in the device, you can check that the new lamp is connected correctly; to do this, you need to make sure that no wires are sticking out of the case, connect the equipment to the network, and press the power button. If the lamp does not work, you should turn off the device, lift the cover again and check the integrity of the installed lamp and its correct connection.
- All screws are inserted into place and screwed securely.
IMPORTANT! If the device body is plastic, and the screw socket on the body is not equipped with a metal insert (this is the case with most devices), you should control the degree of tightening of the bolts so as not to cut off the plastic threads or split the fasteners.
Features of Professional LED lamp 50W models
This LED manicure lamp generally gets good reviews and is great for nail extensions. The parameters of the model are quite high. If you believe customer reviews, the lamps are made with high-quality amplifiers. The direct conductivity of the model is 44 microns. The transceiver in the device is used with a capacitor. The power regulator in this case is of a push-button type. The lamp of the specified series operates at a frequency of 30 Hz.
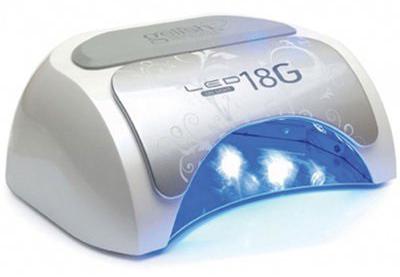
The converter is used as a conductor type. The presented model does not have a filter. The maximum current consumption is 7 A. The thermal loss protection system is of the second class. The device is great for painting nails. According to experts, the model treats the skin of her hands very carefully. The device is suitable for large beauty salons. You can buy a lamp of this series at a price of 21 thousand rubles.
How to change in ICE?
Lamps for manicure based on conventional tube ultraviolet lighting elements are considered more outdated compared to their analogues with LEDs or, as they are also called, LED lamps. There are no individual LEDs that are used in manicure machines available for free sale. Therefore, to replace damaged elements, you will need a “donor” - a broken or the cheapest lamp in the segment.
Read also: Methods for thinning thickened nail polish
To replace you will need: an iron, a powerful soldering iron, a screwdriver, wire cutters, a utility knife, an LED lamp with a burnt out or lost element, a “donor” device for LEDs, tweezers, fluxes, resealable small containers for LEDs and device bolts, preferably 2 for each device so that small elements do not get lost. All actions are performed according to the following instructions:
- The housing of both lamps is disassembled one by one. To do this, you need to find the exits of the screw caps, use a screwdriver to unscrew them all, place them in closed containers, you can use matchboxes.
- Carefully open the covers, taking into account that the connecting wires of the top cover buttons and the LEDs on the base are usually short and can easily break.
- Disconnect the connecting cables through the special connectors in order to work only with the base of each lamp.
- The plates on which the burnt or lost LEDs are located are unscrewed.
- Using a heated, powerful soldering iron, the back part of the fixed plate is heated, where the lighting element is supported by tweezers. As a result of sufficient heating, the part should detach on its own. If this does not happen, but some traces of adhesive or other substance remain, you need to use a utility knife or wire cutters to clean the place where the diode is attached, and use a hot soldering iron to remove the excess from the surface of the socket.
- Removing the diodes from the donor device is easier: the board with the lighting elements is removed, the reverse side is placed on the surface of a heated iron, fixed in a rigid position, the edges of the LEDs are coated with flux.
- After 20–25 seconds, remove the part that has come off the board. As a rule, this time is enough, but it is better to always keep tweezers at the ready.
IMPORTANT! Avoid overheating the LEDs, as this may damage them or reduce their service life.
- Before soldering, it is necessary to determine the correct polarity of the LED, usually this is marked on the board, and on the element “-” on the ground corner. The place where the diode is attached is first coated with flux, the part is installed on it, and using a hair dryer or a 60-watt soldering iron, the “landing” point is heated on the back side of the plate.
- The board on which all manipulations were performed should cool to room temperature. After this, the corresponding wires of the housing parts are connected, the device is carefully and very carefully connected to the network and its functionality is checked. If problems are found, it is necessary to find an error in the actions taken.
- If the installed LED works, you should put the lamps back together, clean up the area after yourself, and lay out the tools.
- The device is now ready for use.
Read also: Why does gel polish peel off? Gel polish application technology
Tricks for even application
Considering that gel polishes have a sticky structure, it is not always possible to apply them evenly.
Experts share some tricks for evenly applying shellac:
- Each layer should be applied evenly, without touching the cuticle and sealing the edge.
- Make the first manicure with a pastel shade in one layer. And only after your hand has trained can you move on to brighter shades of varnish.
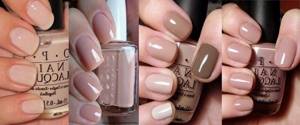
- The material must be of high quality. Bad material will never allow you to make a neat manicure; there will always be unevenness and chips.
How often should you change a light bulb and how do you know when it’s time to change it?
It is almost impossible to predict exactly how and when the lighting element in an ultraviolet lamp will need to be replaced. This depends on the amount of total operating time and the frequency of on-off switching. In home use, you can even wait for a separate illuminator to completely fail, which is unacceptable for salons.
With a busy work schedule, tube-type light bulbs are changed on average 4-6 times a year. This is due to aging lamps that are not able to produce the luminous flux of the required intensity. The gel will take longer to harden. In complex aquarium designs, the bottom layer, with a thick coating, does not harden at all, leaving the thin colored gel mobile.
It is impossible to determine by appearance that the coating technology was violated due to a low-quality lamp, however, the duration of use of the manicure is significantly reduced. Also, the lamps require replacement if they stop drying. They emit normal light without affecting the structure of the gel coating. It can also be determined by the increase in drying time; if it has increased by more than 50% from the nominal value, you should think about purchasing a new lighting point.
Why is it necessary to apply a base coat?
The base coat is the basis of any manicure using shellac.
Its main functions:
- protection of the nail plate;
- alignment;
- adhesion of the subsequent color layer to the nail;
- strengthening the nail plate;
- treatment.
Without a base, even with the most expensive shellac, the manicure will not be perfectly smooth and will not last long. The base is the first and main component of a reliable manicure, so do not neglect it.
Do-it-yourself repair of ultraviolet drying gel nail polish
There are several reasons why ultraviolet lamps fail:
- The LED lamp driver burns out.
- The resource runs out and the tubular lamp ceases to perform its functions.
- Any type of lighting element burns out.
- The power supply fails.
To repair, it is necessary to determine the cause and essence of the breakdown. If this is just a burnt-out lighting point, then the easiest way to replace it in tubular UV lamps is by simply replacing it with a new one. In LED lighting devices, it is necessary to completely disassemble the equipment, remove the burnt element, and solder a working element in its place.
If the driver burns out, you should determine which LED has failed. The difficulty is that not all of them light up and it is impossible to visually diagnose the point of failure. To do this, the elements are removed one by one, tested with a multitester and, if they work, soldered back in, the broken one is replaced until the entire device is fully operational.
The power supply can be repaired by a specialized service center or completely replaced at home. As a rule, the structure of a part is complex, and without the necessary skills it will not be easy to understand what exactly is wrong with it.
The superiority of LED lamps over fluorescent lamps
There are structural differences between these two types of lamps. For example, for an LED device to operate, all that is required is the presence of the diodes themselves, while fluorescent lamps require, in addition to lamps, a mount for them, a special ballast and a starter. UV varnish drying devices that use LEDs have the following advantages:
- a simple device with installation of LEDs and drivers for them;
- long crystal life;
- availability for inspection and replacement of faulty elements.
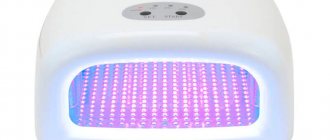
LED UV lamp
Nail dryer, in which fluorescent lamps are installed, has significant disadvantages in comparison with LEDs:
- CCFL light sources contain mercury, which is dangerous if the device is subjected to mechanical impact;
- easy to beat;
- high cost;
- The large size of the lamp does not always allow replacement with a more powerful one.
It is worth remembering that different drying devices are used for different types of manicure material. For example, an LED lamp is used exclusively for shellac.
How to do UV drying with your own hands?
Before you start assembling an ultraviolet nail lamp yourself, you should familiarize yourself with the following features of their launch systems:
- Electronic – characterized by great vulnerability to current surges in the network, lighter and simpler in design.
- Induction is heavier due to starting through the starter and choke, which make the device heavier; after switching on, the light flashes for a while, but is more resistant to mains current surges.
To assemble a UV lamp yourself, you will need to remove the base with the existing system, so it is better to take inexpensive illuminators.
List of required materials:
- Ballast as a ballast for limiting current of induction or electronic type. It is necessary to select this element so that its power matches the corresponding indicators of the lamp used.
- Fluorescent lamps.
- Food grade or self-adhesive foil is used to cover the internal cavity of the device to increase reflectivity.
- The housing is plastic, it can be used from another old device, just adapt it to the characteristics of the lamp.
- Cable with plug for connecting to a 220 V network.
- The control button can be in a standard form with an “On”/“Off” mode in the form of a push or roll type.
- Soldering iron.
Read also: Redness of fingernails causes
Instructions for preparatory work on assembling the ultraviolet lamp housing:
- Calculate the power of the device depending on the number of lamps used. If the lighting element has a power of 9 W, then when installing 3 of them in the device, the total power will be 27 W, with 4 lamps - 36 W, respectively. With higher power, the polymerization rate increases.
- Due to the ability to heat up during lamp operation, you should select a housing that will protect against burns. Thick plexiglass, wooden panels, casings from old unnecessary appliances, etc. work well.
- On paper, draw a diagram of the arrangement of the elements, calculate the number of wires and necessary parts, you should also decide on the appearance of the device, its shape and placement of the illuminators so that they do not interfere with your hands, do not hinder movements and can dry the gel.
- Think about how everything will be attached to the case, make all the spacers, panels, outputs and sockets for lamps, places for laying wires, an outlet for a button and a network cable.
- Cover the inner surface of the case with foil, trying to make it as even as possible, then the light will be better reflected and focused on the nails.
The procedure for assembling the electronic part of the lamp:
- Remove the base from the lamp, to do this, use wire cutters to separate the legs, remove the white base, prying it under the metal rim, after which 4 wires become visible, the first pair of which connected the starter, and the second pair went out to the legs;
- Connect the lamps to each other with wires, connect them to the ballast so that the outputs to the cord are located on one side, and the contacts for connecting the lamps themselves are on the other;
- Connect the cord to the electronic part and connect the button;
- Connect the assembled system to the network and check its functionality;
- Install the previously prepared “filling” into the body.
With certain skills, the duration of the process of assembling the electronic component of the device is approximately an hour. The case will take a little more time, it all depends on the chosen material, mounting methods, and imagination with the design.
Features of Glamor 10 W models
These LED lamps for manicure have many advantages. First of all, it is important to note the high pulsation parameter. The lamp converter is used with a filter. If desired, the power of the model can be selected. The lamp has no amplifier. The current consumption is exactly 3 A. The turn-on time is no more than 3.3 seconds. Everything is fine with color rendering in the device. The scattering angle of the lamp is low. You can buy a model from the presented series at a price of 20 thousand rubles.
Reviews of lamps of the Professional LED lamp 55W series
These lamps usually receive good reviews. Buyers praise this model for its compactness and high conductivity. The luminous efficiency at 30 V maximum is 3 microns. The lamps of this series turn on very quickly. During prolonged use, the case practically does not heat up. The current consumption indicator in this case is at the level of 4 A. The thermal loss protection system is used of the second class. The filter in the presented lamp is of the dipole type. The power of the device can be adjusted using a switch. The model costs around 22 thousand rubles.