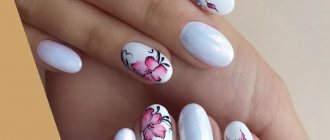
When performing many beautiful and original types of nail designs, it turns out that it is impossible to avoid getting varnish on the skin around the nails and cuticles.
And cleaning the side rollers after this is not the most pleasant moment. This problem especially often arises when performing water manicures, nail designs using stamping plates (stampint nail art), gradient manicures, moons in a reverse moon manicure, etc. More recently, the only protection against getting dirty skin was either sticking tape around the nails or applying fat cream. special protective products for the cuticle and skin around the nails are becoming increasingly popular , which, I am sure, will soon become an integral part of all nail care lines produced.
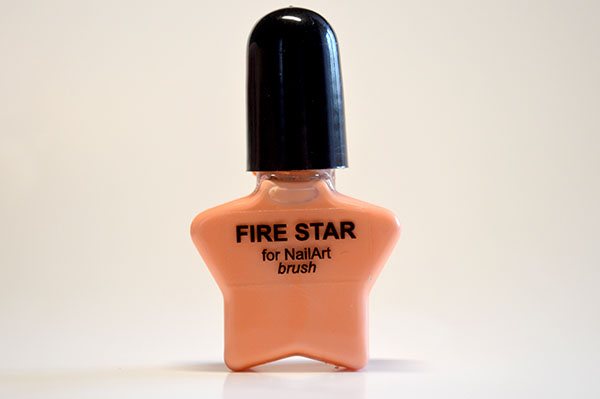
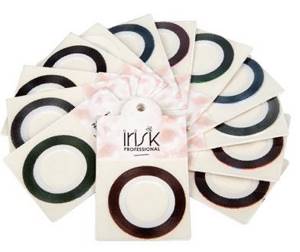
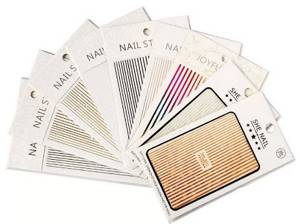
Such tape can be found from different manufacturers: MASURA, Kiesque Liquid Palisade, EL CORAZON Kaleidoscope Cuticle Defender, Pure Manicure Dance Legend, Skin Defender, Fire Star, etc. Initially, it was just a “pink thing around the nails” that was difficult to buy. Now it can be found not only in pink, but also in white, orange, green, etc. and ordering them has become much easier.
Here I will look at the technique of working with liquid tape for nail design using Fire Star as an example. This is a liquid tape that is sold in small 6 ml bottles in two versions: with a brush, like a regular polish, and with a sponge, like many lip glosses.
What is nail design tape
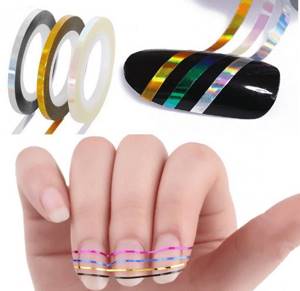
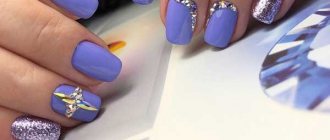
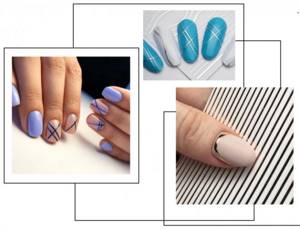
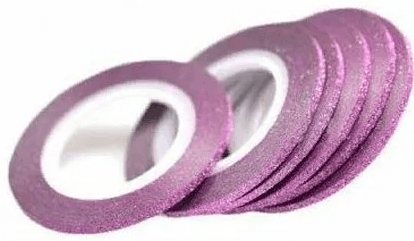
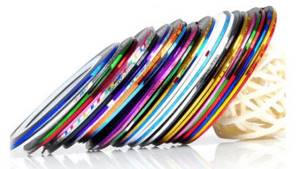
Manicure tape, scotch tape, self-adhesive are thin strips of paper, silicone or foil, 1 to 3 mm wide, intended for nail design. A manicure with ribbons is one of the most versatile design options, which is appropriate at any time of the year and never goes out of style.
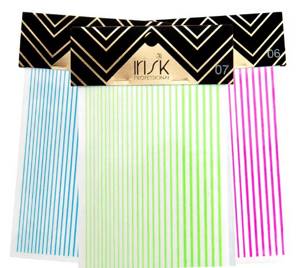
Types of tapes for nail design are determined by their design:
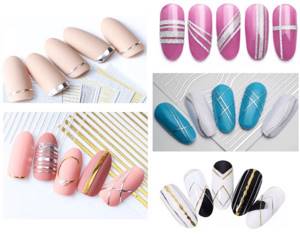
- holographic – metallized thin strips with a foil effect and shimmer in the light;
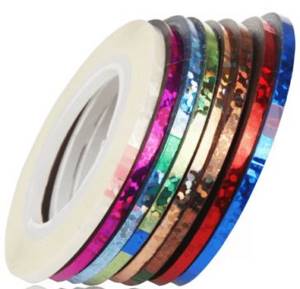
- shiny or shimmering - more dense, covered with a mound of sparkles;
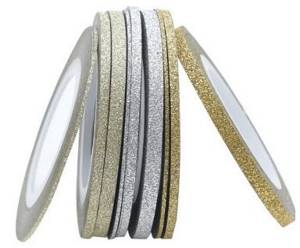
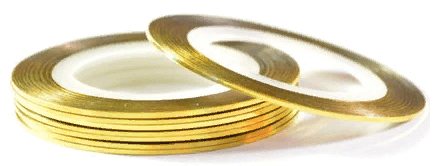
- for metal – gold, silver or copper color;
- plain - white, black and colored stripes without additional effects.
White stripes are most often used to create designs where it is necessary to temporarily cover some areas of the nail plate, and all steel colors may well become a full-fledged part of the design.
There are also two functional varieties:
- straight. Regular strips, which allow you to create only a straight line;
- flexible or bendable . Most often made on a silicone basis. Due to their elasticity, they are used to create lines of different shapes - waves, sharp bends, 3D effect.
They are produced in rolls of 10-30 meters, as well as in the form of stickers - on a paper base with lines printed on it.
Advantages of tapes for nail design:
- low price . A roll of 20 meters costs from 30 to 150 rubles, and this despite the fact that one manicure will take you a maximum of 10-15 cm.
- ease of use . No specific skills are needed to apply such a design; in addition, the design is created quickly;
- relevance. They are appropriate for any manicure - be it a wedding or an office one, and also look harmonious at any time of the year;
- versatility. Can be used on both gel polish and regular polish.
There are no flaws found in this design accessory.
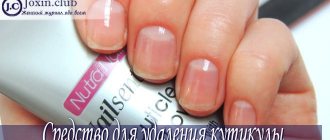
The cuticle requires protection
Often even the most spectacular manicure can be ruined by a small but very significant detail.
, – ugly stains remaining after such procedures. In order to be able to safely show off women’s fingers, you need to know what is used around the nail during a manicure.
The skin around the nail should be well-groomed.
There are very simple methods that our mothers used to use in their youth. However, the most modern devices are not only easier to use, but also more gentle.
They bring hydration and nutrition to the skin around the nail and cuticle. This effect on the skin is much healthier than, for example, glue with a chemical composition, when the areas most dangerous for contamination are smeared.
Creating a nail design with tape step by step
If the ribbon will be used as an independent decoration, prepare:
- tools for hygienic manicure, depending on preferences. This could be a machine and a set of cutters, nippers and scissors, a remover and an orange stick or a pusher;
- base and top coat. It is better to choose a special top for securing the design, as it is thicker and more elastic and allows you to preserve the design until correction without chips or cracks;
- colored gel polish;
- nail scissors;
- manicure tape of the desired color and texture;
- tweezers.
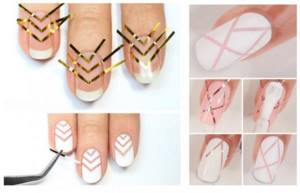
At the preparatory stage, do your usual manicure - remove the cuticle, treat the side ridges, file the shape, lightly walk over the nail plate with a buff.
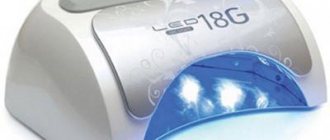
- Apply a thin layer of base coat and dry in a lamp for 30 to 120 seconds, depending on the type of device;
- Apply colored gel polish in 1 or 2 layers to the dried base. If 2 layers are needed, each of them needs to be dried;
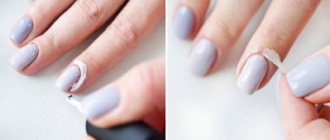
- Carefully cut the desired piece of manicure tape. You can place it horizontally, vertically, diagonally, in general - whatever you like;
- Place the strip on your nail. It is convenient to do this with tweezers, since the strips are thin. When using horizontally and vertically, it is recommended to make a small indentation from the cuticle or side ridges, and also make sure that the strip does not protrude beyond the free edge. If you do not adhere to this recommendation, then there is a high risk of accidentally catching and peeling off the strip, not only in the process of creating the design, but also after completing the manicure;
- Cover the resulting design with a top coat, maybe even in 2 thin layers, and dry it in a lamp. Don’t forget to fix the end of the nail plate with the finishing coat. If necessary, remove the sticky layer.
How to apply tape to varnish:
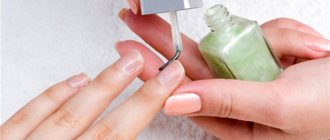
- Do a manicure, file the shape, prepare the nail;
- Apply a base under the varnish - it makes the coating smoother and also prevents the pigment from the varnish from being absorbed into the nail and staining it;
- Cover your nails with 1-2 coats of color. A two-coat application is often needed for pigmented colors to achieve a uniform color;
- Wait until the varnish is completely dry. This takes from 5 to 20 minutes, depending on the thickness and number of layers and the characteristics of the varnish itself;
- Cut off the desired fragment and transfer the strip to the nail using tweezers;
- Cover the design with a top coat of varnish and wait for it to dry completely.
As for the flexible tape, the procedure for using it on nail polish and gel polish is no different from the usual one. However, it can be placed not only directly. For example, along the perimeter of the nail with a smooth rounding in the cuticle area or with the formation of a bend along the entire nail plate.
Advantages of the product
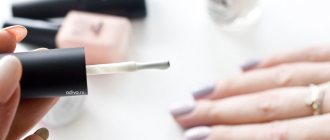
At home, when performing a manicure, women, after the polish has dried, remove its remnants using a cotton swab and nail polish remover. However, this method is inconvenient and harmful to the skin. Because of this, a completely new product - liquid tape for manicure is actively gaining popularity. The advantages of the product are:
- ease of use;
- guaranteed skin protection from varnish;
- quick drying;
- cost-effectiveness;
- complete safety for the skin;
- easy removal.
You should only buy high-quality tape from a reputable manufacturer. If you purchase questionable material, you may encounter the following problems;
- lack of an even layer during application;
- passing the varnish through the protective layer;
- skin irritation after use;
- Difficulty in removing - the tape will break and come away from the skin very poorly.
It is most convenient to use a product of a contrasting color so that when removing the edge of the film is clearly visible, then it can be easily pryed off with tweezers or a fingernail.
Manicure tape as a template
Manicure tape is used as a template to temporarily cover up parts of the nail plate and create a two-tone design. This option is suitable for beginners who have not yet mastered nail painting and have problems drawing straight stripes.
Prepare everything the same as for a regular manicure:
- manicure kit to treat the cuticle, free edge, side rollers, and the nail itself;
- 2 colors of gel polish, top and base;
- tweezers and scissors;
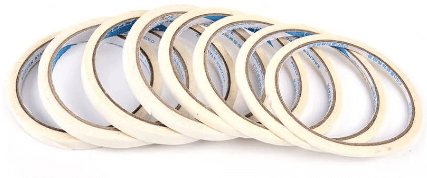
- Scotch tape for nails. Here you can take a regular white one, since in the end no one will see it anyway. RocheNail has one with a width of 1 mm.
Perform your usual manicure – hardware, combined, file, edged.
- Apply the base and dry in a lamp in accordance with the instructions for the device;
- Cover your nails with colored gel polish in 1 layer. Dry;
- Cut the tape into the required fragments and cover those places on the plate that should subsequently remain the background color. When gluing strips, be sure to leave protrusions for gripping so that you can easily remove them later;
- Apply contrasting gel polish to the pasted strips in an even, thin layer;
- Gently grab the protruding edges of the strip with tweezers and remove them from the plate with a confident movement. It is important here that the top layer of gel polish is as thin as possible, otherwise the edges of the strips will turn out torn;
- Dry the gel polish, cover the design with a top coat and dry again.
When working with gel polish, the order will be exactly the same - base for varnish, color, stripes, color. The only difference is that it is recommended to remove strips from slightly dried varnish. Don't forget the sealer at the end.
What does it look like
Liquid nail tape is sold in the same bottles as manicure polish, or slightly larger ones. It can be transparent (not often) and colored. The last option is more convenient. To apply the product, the lid has a brush of larger or smaller width. Its quality is much less important than that of varnish. If it is inconvenient, the brush is replaced.
In most cases, the tape is based on skin-safe adhesives, silicone or latex. If the latter is used, it must be taken into account that not everyone can tolerate natural latex, and then it causes irritation.
The product is universal, so it can be used to create various manicures. It is applied when painting nails with regular varnishes, painting with paints, water manicure and using gel polish, which is dried using UV lamps. One bottle should be enough for about the same number of times as the varnish.
Design ribbon manufacturers
VogueNails
The manufacturer offers manicurists, their clients and simply lovers of beautiful designs several varieties of silicone strips for manicure. There are colored, white, and metallized strips on a paper backing. Thanks to the elasticity of the material, VogueNails strips can be formed into curves and laid out in waves.
One set contains strips of different thicknesses to create new designs every time.
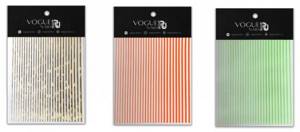
Roche Nail
Here the tapes are presented in rolls. Their thickness is different - from 1 to 3 mm, while the length is the same - 20 meters. Roche Nails has options with a holographic effect, white and black, colored, with glitter, as well as with the effect of precious metals - gold and silver.
IRISK
IRISK offers flexible manicure strips that can be laid out in different patterns. The strips are made of silicone, so they can easily take the desired direction. There are gold and silver, colored and gradient.
In addition to flexible ones, there are also regular, straight ones, but they are called self-adhesive thread IRISK. Adhesive-based strips with different colors and holographic effects are available in rolls. There are 14 different options in total.
AliExpress
On Aliexpress, dozens of different sellers offer manicure tapes. There are stripes for every taste, and even those that are not particularly common among Russian manufacturers. For example, wavy stripes on a backing.
There are also classic options in a roll. A large number of sets of 5, 110, 15 rolls with different effects.
For classic designs, gold and silver stripes of varying thicknesses are available. And flexible nail tapes to form different curves and directions.
Mini video master class on using skindefender.
To summarize our review, we note: by purchasing a manicure defender, you can forget about such little things as a crooked brush in your favorite varnish or shellac, as well as an inconvenient consistency (too liquid or with a generous presence of different sizes of glitter). Thanks to the “magic” film of the “pink” thing, even a novice manicurist can indulge in any experiments, ultimately getting an invariably great result!
You can buy Skin Defender using the link.
Source
Protective liquid EL Corazon
The abundance of EL Corazon products is impressive. It specializes in nail products, so if a problem arises and you need to decide what to apply around the nail during a manicure, you need to consult the company’s catalog.
Application of EL Corazon.
When developing products, specialists use various natural products
, which have a very beneficial effect on both nails and cuticles and the skin around them: all kinds of natural oils, often in combination, honey, lavender, almonds, passion fruit, plant and algae extracts, vitamins.
The products from this company, which are applied around the nail during manicure, have several types, and how they differ - they are smeared with blue or pink liquid.
They are also distinguishable by smell, but these two products give an excellent effect. Both products moisturize the skin and have a softening effect.
and after 30 seconds they turn into a thin transparent film.
Mix and apply
A primer for wood for painting is prepared from the following components: glue (sold in any construction stores, average price from 60 rubles for 0.9 liters) and warm water (40-45 degrees). The adhesive composition is suitable for construction or carpentry work. The price is lower for the first option. You will also need an empty plastic container, a small bucket and a spatula for stirring. Below is a table of prices for various glue manufacturers:
| Manufacturer and name | Peculiarities | Price |
| “Super PVA” moment | Quick-drying, viscous. | 145 rub. for 250 g. |
| “Carpenter” moment | Moisture resistant, viscous. Doesn't mix well with water. | 190 rub. for 250 g. |
| White House “PVA universal” | Construction, easy to install. | 60 rub. for 900 g |
| White House “PVA super” | Waterproof, viscous, suitable for all surfaces. | 75 rub. for 900 g |
| Expert “PVA carpentry glue” | Waterproof, viscous, contains antiseptic additives. | 116 rub. for 900 g |
| Expert “Universal PVA Glue” | Easily diluted with water and applied to any surface. | 83 rub. for 900 g |
| Text “Universal joiner! | Moisture resistant, quick drying. | 90 rub. for 900 g |
You should not buy the advertised Moment or Titan. When choosing, you don’t need to pay attention to the manufacturer, since an inexpensive option from White House or Expert is suitable for the primer composition. Essentially the composition of the emulsion is the same. A waterproof composition will be more difficult to dilute with water, so for quick woodworking it is better to use classic PVA glue. But waterproof gives the wood additional waterproofing and protective properties, like an acrylic primer. Diluted in small portions. It is not recommended to prepare a large amount of adhesive primer at once, since the mixture left loses its quality characteristics.
It is more profitable to purchase glue for preparing primers in volumes of 0.9 liters or more, since the price for small packages is higher. If you need to treat a small surface, then 250 g is enough, so there will be no unused residues.
Preparation
You can make a primer with your own hands using the following ratio: 1 part PVA - 2 parts water. But the ratio depends on the viscosity of the glue. After mixing, the DIY wood primer is checked for thickness using a test application. A small amount is applied to the wood, the mark should remain whitish, but not too dense. When drying, the film should not peel off from the wood. If the composition turns out to be thick, add a little more water. An antiseptic or a small amount of lime or crushed chalk is added to the finished mixture. Lime and chalk are sifted so that there are no large inclusions during application.
Water is poured into the glue in small portions, the composition is stirred all the time. If, on the contrary, you pour glue into water, it will be more difficult to mix the primer.
The finished primer will be well absorbed into the wood and applied evenly using a brush or roller. But before application, the wooden surface is sanded and leveled. If there are cracks or chips, the wood is puttied using special compounds.
Application
Instructions for applying PVA glue primer to a wooden surface consist of the following steps:
- The wood is being prepared. To do this, the surface is ground and leveled. The accuracy of further work will depend on the quality of preparation.
- Using a brush, hard-to-reach places are treated: corners, baseboards, places behind radiators and pipes.
- The remaining surface of the wood is covered with a roller or a wider brush. The first layer should dry within 1-2 hours.
- The wood is inspected for the presence of “fringe”. If the surface has lost its evenness, it is sanded again using the finest caliber sandpaper. It is more convenient to carry out sanding by placing a piece of paper on a small block.
- A second coat of primer is applied. Just like the first time, hard-to-reach areas are coated first, then the main surface.
- The treated surface must dry (for 24 hours), after which the paint and varnish coating is applied.
The finishing is considered complete after complete drying.
It is possible to use PVA glue as a base for a primer on wood, but the result is not always positive. If the primer is not diluted correctly, then over time the finish will peel off from the wood and the repair work will have to be done all over again. Under light paints and varnishes, the PVA emulsion turns yellow and the appearance of the wood deteriorates. Therefore, it is recommended to use professional primers for finishing, which are available in every hardware store and the price for them is not off the charts.
Skin Defender protects cuticles and ridges
Another product designed to provide protection around the nail during a manicure, which will solve the problem of stained skin when problem areas are smeared, is Skin Defender.
Thanks to this substance, any type of manicure, despite the level of complexity, will become a joyful event, as it will be neat and therefore effective.
The action of the product is based on the fact that, having a special chemical composition, it instantly hardens, turning into a film,
while protecting the skin from possible contamination with varnish.
The product dries very quickly: after 30 seconds you can begin the next procedure.
The total volume of the bottle is designed to treat up to 500 fingers on average.
Skin Defender is very easy to remove at the end of all manipulations with the nail plate.
Why is it that often when asked what to apply around the nail during a manicure, experts advise Skin Defender, it will be easy to prove.
Benefits of Skin Defender:
- only natural rubber is involved in its production;
- does not contain a pungent odor, but only the natural aroma of neroli essential oil, which adds excellent effectiveness to the product in terms of bactericidal, antiseptic and hemostatic;
- can be preserved for a long time after the first use, without drying out or forming lumps due to the use of a soil shaker;
- does not create foam when moving;
- The design of the bottle is designed in such a way that you can dip a brush intended for nails of any diameter into the wide neck. It closes hermetically, which prevents air from getting inside.