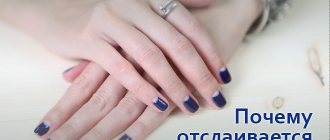
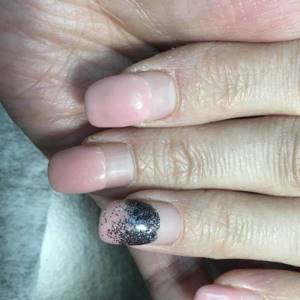
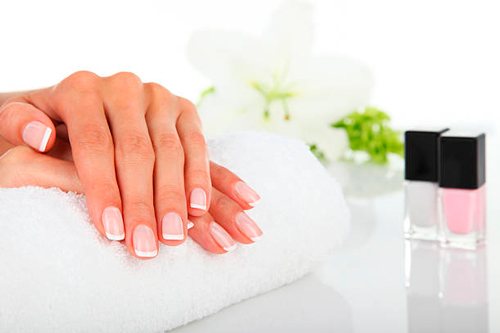
Why does the top become cloudy and how to avoid it?
All manicurists have probably encountered the problem when, after removing the sticky layer on the nails, the top coat becomes cloudy.
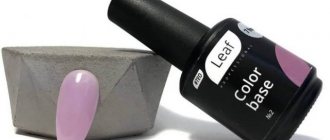
Why is this happening? Let's figure it out. Very often, masters use the same top coat for gel polish of different shades. This can cause dark pigments to mix with light ones - it is best to use different bottles of topcoat. However, it may also happen that gel polish and top coat from different brands will not be compatible with each other. In order to avoid this, you should use products from the same manufacturer. This will ensure that the base, top and color coating will be fully compatible with each other. Let's put the nuances with the products aside and move on to the most common reasons for loss of gloss.
One of them is an insufficiently dried top. Many inexperienced nail technicians often do not keep their nails under the lamp for as long as the varnish manufacturer indicates. The coating needs time to completely polymerize. This period may vary for different brands. In some cases, this time can be about 2 minutes under a UV lamp or 30 - 40 seconds under an LED lamp. It is worth noting that due to insufficient lamp power, the procedure may take longer.
The second equally common problem is that after drying the nails, some time must pass before removing the sticky layer. The coating must cool down and not everyone adheres to this rule. Do not start working on your nails directly from under the lamp. Equally important is the use of special means for removing the dispersion layer. Cloudiness of the top can also occur because the technician uses non-acetone liquids or alcohol. This is a grave mistake. In this case, it is extremely important to use professional products and a sufficient amount of cleaner, otherwise the result will never be satisfactory.
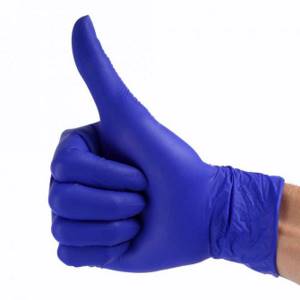
To ensure a glossy shine and a clean finish on your nails, you should use at least 3 sponges with cleanser on both hands. The dispersion layer can cause allergies in both the client and the master. Avoid getting it on your hands, and use gloves when removing it from your nails.
In order not to have problems with a ruined manicure due to clouding of the top, you must adhere to all of the above recommendations. It should also be remembered that the quality of work directly depends on the quality of the material.
Source
How to remove the sticky layer from gel polish: useful tips and a detailed overview of all methods
Home — Articles about manicure
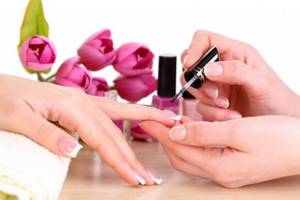
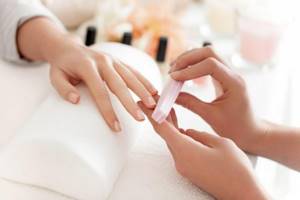
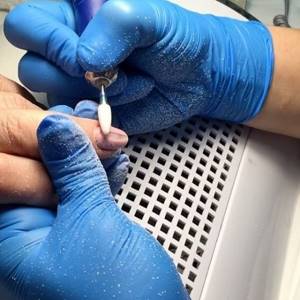
A sticky layer, also called a dispersion layer, remains after the gel is polymerized in a UV or LED lamp. It is necessary for high-quality adhesion of the layers, both to the nail plate and directly to each other. Having finished the manicure, it must be removed with a special liquid - this is the final stage of working with gel polish.
Do I need to remove the sticky layer from the base? This application option is new and therefore unfamiliar to many craftsmen. Before applying the selected shade, you need to use a cleanser - a special tool for removing the sticky layer. Thanks to this, even not too thick varnish will stop spreading, and it will be easier for you to work on creating a neat manicure.
If you use base and gel polish from different manufacturers, then removing the sticky layer is very desirable. As a result, it is possible to obtain a durable coating that looks flawless for several weeks - without chips, cracks or scratches.
When creating a classic manicure, the decision about whether to remove the sticky layer from the base is made by the master himself - a plain coating wears well both with and without the sticky layer removed. But when applying a certain pattern, when working with gel and acrylic paints, as well as various decors, the sticky layer is removed, otherwise the pattern will simply spread over the surface and you won’t get smooth, beautiful lines.
How to remove the sticky layer from nails?
How to remove the sticky layer of shellac? Cleanser is a universal option that is optimal for processing both top and base. It contains approximately 2/3 water mixed with 1/3 alcohol (this figure varies depending on the manufacturer, so it is recommended to study the composition), as well as oils and fragrances.
You can purchase odorless liquids or products with a pleasant aroma. If we are talking about a cleanser for home use, then the choice depends on personal preferences, but for professional use it is better to choose anti-allergenic products.
Klinser can be used for various purposes, among the main ways of using it are the following:
- Degreasing the nail before starting to work on the manicure - for this purpose it is worth buying a 2-in-1, both a cleanser and a dehydrator.
- Cleaning and disinfection of manicure tools and brushes - with its help it is easy to remove remnants of gel polish and disinfect the surface (due to the presence of alcohol in the composition).
- Removing the sticky layer from gel polish is the main purpose. After its use, the coating will not lose its shine, its durability will be excellent.
Cleanser is used very economically, which makes such a purchase quite profitable. If you apply it with special lint-free wipes, then one bottle will last for six months or even a year of home use. And for professional use, such a product is absolutely required - this is important not only for creating a high-quality manicure, but also for the reputation of the master. It is better to select all the products from one company (base, top, cleanser), but this is not a mandatory requirement.
Is it possible to remove the sticky layer with a degreaser?
How can you remove the sticky layer if the cleaner runs out at the wrong time, and there is no time or nowhere to buy a new one? Most often, a degreaser is used as a replacement, which is usually on hand and is intended for almost the same purpose.
But it is important to understand that a degreaser removes skin secretion products, and the substances that create a dispersion film on the surface of the nail plate have a completely different composition. Therefore, it is worth using not a special product, but available substitutes only when there are no other options. But in this case, you shouldn’t be surprised if the manicure fades, and small cracks begin to appear on the coating within a week.
How to remove the sticky layer at home?
Is it possible to remove the sticky layer with alcohol? If you can’t buy quality products, then you can. In this case, you should prepare your own clinser. The recipe is quite simple: 70 ml of water requires 30 ml of alcohol. The result will be an inexpensive product that, although not complete, will still be a replacement for the professional option. It is important to consider that this concentration may not be suitable for those with sensitive skin; in this case, you can prepare a water-alcohol solution, reducing the proportion of alcohol by half.
Is it possible to remove the sticky layer with vodka or alcohol tinctures?
When going through household supplies in search of something to remove the sticky layer of gel polish, you can use vodka and other liquids with a high alcohol content. They can be used if there are no other options, because this often leads to the coating quickly losing its shine.
You probably have several bottles of alcohol tinctures in your medicine cabinet, but not all of them are safe. For example, boric acid removes the sticky layer very well, but at the same time it has a negative effect on the skin of the hands - redness, irritation and even cracks may appear.
Important! You cannot use oil-containing products, as they can simply ruin the coating - all the work will have to be redone.
When choosing how to remove the sticky layer from the top coat when you don’t have a special product at hand, pay attention to alcohol wipes. They will help to carefully remove the dispersion coating, are convenient to use and are quite economical in consumption.
Is it possible to remove the sticky layer with acetone?
If there is no cleaner, no degreaser, no alcohol, you can use nail polish remover without acetone. It is safer both for the skin and for the coating itself, in contrast to acetone-containing products, the use of which can not only get rid of the sticky layer, but also remove the color.
But when using acetone, you shouldn’t be surprised why the top coat becomes cloudy after removing the sticky layer. It’s better to buy a professional shellac remover and enjoy a beautiful manicure, rather than skimp on little things, because in this case there is a very high probability that the work will be done in vain.
Using a gel polish top coat without a sticky layer
There are also finishing coatings that allow you to forget about the need to remove the sticky layer after the topcoat. They are somewhat inferior in strength to the classic version of the top, but to some extent they save time and money - you don’t have to purchase a separate cleaner, and the manicure will be ready immediately after the last layer has dried in the lamp.
It is worth remembering a useful rule that will be useful to those who use products with a sticky layer. You need to apply the clinser only when the top coat has completely dried, and this will happen 1-2 minutes after the nails have been dried in the lamp - and only after this time can you begin the final treatment.
Do I need to remove the sticky layer after the base? Yes, when working with not too thick varnishes, and also if the base and the selected shade of gel polish are made by different manufacturers or if you plan to apply a pattern or decorative coating. The sticky layer is always removed from the top coat - for this purpose a special cleaner or universal liquids are used, which are used both for degreasing and for removing dispersion coating. You can also use home remedies, but then you will have to sacrifice the durability of the coating, its shine, and sometimes even the richness of the shade.
Return to list of publications
bestshellac.ru
Top not shiny? We found out the reasons.
We all face the choice of that perfect top, with a mirror shine.
But, unfortunately, sometimes the TOP does not look the way we expect. What is the reason? Is it worth throwing it away when you can figure out the situation?
If you remove the sticky layer from the top coat immediately after removing it from the lamp, you may end up with a not too glossy nail, since the top coat has not had time to cool. It is necessary to allow the coating to cool for a few seconds, and only then wipe off the sticky layer from the finish coating. An important condition: we use a new napkin for each finger, otherwise you simply smear the remaining sticky layer over all nails, which makes the coating dull.
The coating can also be damaged by a product not intended for this purpose. If you damage the top layer of the finishing coat, micropores will appear on it, and instead of a glossy shine, the nail will become covered with matte islands or, at best, will fade.
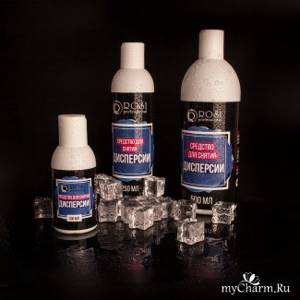
To remove the sticky layer, use only special products; we can recommend the ROSI sticky layer remover; it has a pleasant smell, a safe composition and is additionally suitable for degreasing the nail plate. This universal product will save you time and money.
If the gloss still disappears, try replacing the topcoat. Perhaps it is simply incompatible with your color coating, or use the Perfect top from the ROSI brand, which works with any flower beds.
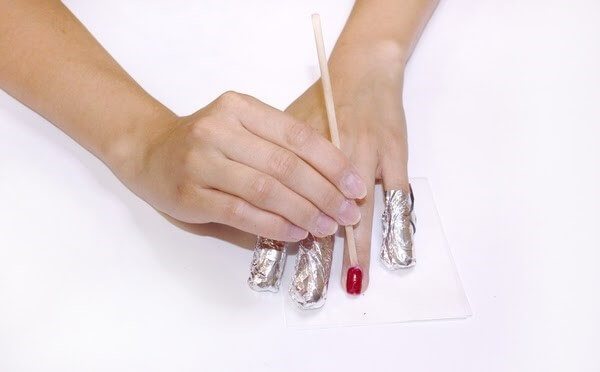
Be sure to check your curing lamp; it may have reached the end of its service life or the power may be significantly less than stated. To do this, apply a few drops of pigmented gel polishes to a piece of foil and dry for 30 seconds, then check whether the color has dried completely or whether it remains undried at the point of contact with the foil.
Also, to obtain a better shine, the top can be polymerized for 1-2 minutes instead of 30 seconds, in this case a minimal sticky layer will remain and it will be easier to remove.
We wish you good work, choose materials wisely.
Source
Do I need to remove the sticky layer from the base? Questions and answers on odiva.ru
Not all base coats require removing the sticky layer from them with a cleaner.
Some shellac bases, after removing the sticky layer, do not adhere to the layers of gel polish, and the gel polish peels off from the base like a film. The sticky layer is usually removed for further application of gel paint on the nails, since it requires no stickiness and a perfectly even coating. Some masters remove the sticky layer from the base in order to better distribute the gel polish, since on a base without a sticky layer it spreads less and more slowly. There is also the practice of removing the dispersion layer from the base if the base coat and pigmented gel polish are from different brands, and you doubt whether they will suit each other. However, with this approach, after removing the stickiness, it is also necessary to remove the top layer of the base coat with a file to ensure reliable adhesion. But this is only necessary for manicures using a cheap base. A high-quality base for gel polish has excellent adhesion properties and adheres even to budget pigmented gel polishes.
You can remove the sticky layer from brand bases: Kodi, Bluesky, Gelish, Entity, Cnd
Cannot be removed: TNL, Irisk (not recommended), Diamant Buy gel polishes Discounts on gel polishes
odiva.ru
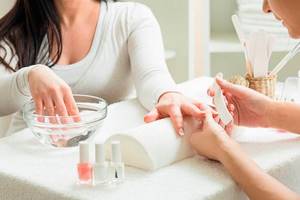
Mistakes when applying gel polish at home
Have you learned how to apply gel polish at home, spent money buying a lamp, tools and a bunch of gel polishes, but the artificial coating does not last for the promised 2-3 weeks and chips after a few days? Don't be upset.
Perhaps, when applying the coating, you simply make mistakes, correcting which you can enjoy a lasting result!
What should you not do after applying gel polish?
And finally, take on board some tips that will help you maintain the durability of artificial turf:
- During the first 24 hours after applying gel polish, prolonged water procedures should be avoided. For example, taking a hot bath or visiting the pool;
- also during the first 24 hours it is necessary to refrain from paraffin therapy and visiting the sauna, bathhouse;
- do not pick the nail plate;
- it is necessary to avoid mechanical damage: knocking with nails, opening jars with them, etc.;
- Household work with chemicals or detergents must be done with household gloves, since the aggressive components in these products can damage the coating. By the way, this particular rule will help not only preserve your manicure, but also the beauty and youth of your hand skin.
Manicure stages and possible mistakes
Today there are 3 main types of manicure:
Combined and hardware manicure must be done using a special manicure apparatus, but before using it, it is better to undergo training, since improper operation of the apparatus can lead to damage to the nail plate, for example, cuts. For beginners, it is better to do a classic manicure at home.
Stage 1. Shape filing, cuticle processing
Before applying gel polish, you need to put your nails in order: treat the cuticle, file the shape.
What do we do at this stage?
Stage 2. Preparing the nail plate for coating
What do we do at this stage?
Mistakes at the nail plate preparation stage
Mistake #1:
Typically, people with oily skin or those prone to excessive sweating have a moist and oily nail structure. When preparing such nails for coating, it is necessary to use a dehydrator (nail prep) to deeply dry the nail plate, remove excess moisture from it and improve the adhesion of the natural nail to the artificial coating.
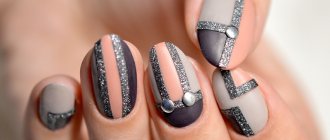
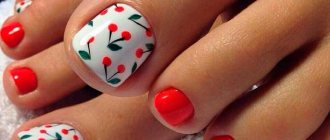
Applying shiny shellac: types of nail designs
Shiny shellac on nails looks noble and elegant and is suitable for both everyday manicure and festive nail decoration. For nail design, regular shellac with a glossy surface structure and material with the addition of various sparkles can be used. But what brilliant designs can you create? And why does shellac sometimes not shine even after the sticky layer has been removed?
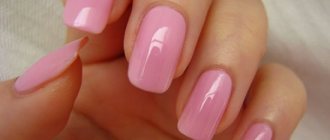
Shiny shellac
What can be created with shiny shellac
Shiny shellac can be used to create different nail designs. For everyday use, most often you will use just a glossy varnish or a composition with a small addition of small sparkles. You can see what shiny shellac looks like in the photo, made in the same color scheme with a small addition of sparkles.
Shiny shellac
The following types of manicure are most often used in everyday life:
- French,
- lunar,
- plain or in the form of various stripe patterns.
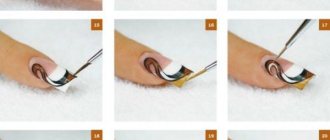
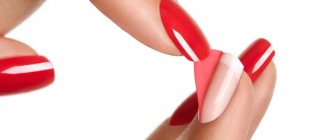
French manicure is considered to be the most popular type of nail decoration in 2016. Creating such a popular nail design is accessible even to beginners.
To do a French manicure, after preparing the nail and degreasing, you must do the following:
- Apply a layer of base and cure it under a special lamp.
- Apply the stencil to your nails, leaving the edge free.
- Paint the edge with shiny shellac, maybe with some glitter added, and dry it.
- Cover your nails with a finishing coat and dry.
- After drying, remove the sticky layer using a sponge with a special product, and lightly polish the nail with a special oil.
- If all technologies are followed during work, shellac will shine after removing the sticky layer and polishing with oil.
You can learn in detail how to do a French manicure by watching the video.
Lunar
This nail design is performed similarly to a French manicure, only a bright semicircle is drawn not along the edge of the nail, but near the base, where the cuticle is.
Plain manicure or with stripes
Here, after applying the base base, you can use multi-colored shiny shellac to create nails with an unusual design. The photo shows design options using various stripes.
Design with powder
In addition to everyday ones, bright festive types of nail decor using shiny acrylic powder are very popular.
Acrylic powder allows you to do without removing the sticky layer - you just need to sweep away the excess powder after drying the finishing base. How to make a bright shiny manicure can be seen in the example of New Year's nail decor.
After the necessary preparation (grinding and degreasing) of the nail, you must perform the following sequence of actions:
- Apply the chosen base color and dry with a lamp.
- Draw the selected pattern and polymerize it.
- If necessary, apply a transparent layer of shellac and stick sparkles, rhinestones or bouillons on it.
- After finishing the decoration, apply the finishing layer, sprinkle with shiny acrylic powder and dry. You can watch how to make a New Year's nail design with glitter powder in the video.
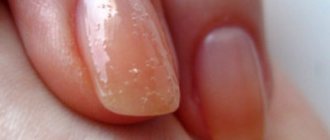
Reasons for the lack of shine after final cleaning of the nail
Sometimes it happens that after removing the sticky layer, the nail remains dull and does not shine, although a glossy material was used. Why does this happen? Why doesn't shellac shine?
There are many reasons why shellac does not shine after removing the sticky layer and polishing the nail. The most common of them are:
- Insufficient drying when removing the sticky layer damages the fixing coating.
- A layer of topcoat that is too thin, which shrinks during drying and bald spots appear on it. This is why the shine of the nail becomes uneven.
- Removing the sticky layer not with a special sponge, but using improvised means (cotton wool, pieces of fabric). At the same time, barely noticeable particles of material may remain on the surface of the nail, and because of this it does not shine.
- Using low quality shellac.
In the photo you can see what nails look like if the technology for applying shellac is not followed.
A manicure using shiny shellac can be appropriate both in everyday life and on a holiday. The main thing is to combine nail decoration with wardrobe items, emphasizing your individuality.
proshellak.ru
What else can cause problems when applying artificial turf?
Have you tried all kinds of bases, but your nails still appear chipped and peeling? There are several explanations for this, for example:
What to do? Do you want to part with your long-lasting, flawless manicure forever?
Of course not! You can take the webinar “Complicated cases in base coating of nails” from the teacher of the ParisNail school Velmitina Zaitseva.
You will receive a detailed algorithm for applying and fixing the material, learn all the secrets of the teacher and be able to avoid material detachments!
How to remove artificial material correctly and why is it important?
You've probably heard that gel polish spoils your nails, making them thin and brittle. It is a myth! It's not the material that ruins your nails! One of the reasons for damage to the nail plate is improper removal of the artificial coating, so this procedure must be approached with special responsibility!
Is it possible to remove gel polish yourself at home without damaging your nails? What materials and tools are needed for this? Let's figure it out.
How long can you wear gel polish?
First, let's figure out what period of wearing the coating is optimal. Often girls wear gel polish for a month, or even longer. However, they do not understand that they can damage the nail plate.
Technologists advise walking with the coating for no more than 2-3 weeks. Prolonged wear puts stress on the tip of the nail plate, its root suffers from the weight of the coating. All this can lead not only to breakage, but also to deformation of the nail plate.
How can you not remove gel polish?
RULE 1: Under no circumstances should you pick at the gel polish or tear it off the surface of the nail plate, because this can cause serious injury! If you are careless, you can remove the top layer of the nail along with the material, and this can lead to thinning and, at a minimum, painful sensations when in contact with water and various surfaces.
RULE 2: do not file away partially peeled off gel polish. In this case, you also risk cutting off the top layer of the nail and ruining it.
What other consequences might arise?
We hope these reasons are enough to convince you not to peel off the coating from the nail plate and do the gel polish removal according to the rules!
By the way, the peeling process itself is quite painful, it’s hardly worth it!

Questions and answers about shell and its uses
In this section, we answered the questions that were most often asked in our group in VKONTAKE, and also met on various forums dedicated to applying shellac yourself.
Questions about applying and removing shellac at home:
How to apply shellac correctly? Do I need to buff the nail plate before applying shellac, or remove the sticky layer after applying the base coat?
The process of applying shellac includes several stages:
Attention! Before applying shellac, treating the surface of the nail plate with a buff is not required!
Stage 1 - degreasing and disinfecting the nail plate using a cotton pad (or lint-free cloth) soaked in a special product for degreasing nails and removing the sticky layer (for example, ScrubFresh from CND or Cleaner from Severina). Pay special attention to the side surfaces of the nail plate.
Attention! There is no need to remove the sticky layer after drying the base coat! It serves to ensure strong adhesion of the color coating to the base coating, thanks to which the shellac coating stays on the nails for up to 2-3 weeks, depending on the individual properties of the nail plate.
Stage 2 - applying the base coat.
Apply Shellac Base Coat to pre-degreased nails and dry in a UV lamp (36 W) for 1 minute.
Stage 3 - application of color coating (Color).
Apply the first layer of colored shellac coating and dry it in a UV lamp for 2 minutes.
Then, apply a second layer of color coating and dry it in the same way, 2 minutes.
The color coating must be applied in a thin layer in order to avoid cracking and the appearance of unevenness.
Stage 4 - applying the top coating (Top Coat).
Apply Top Coat and dry it in a UV lamp for 2 minutes.
Stage 5 - removing the sticky layer.
Using a cotton pad soaked in liquid to remove the sticky layer, carefully remove the sticky layer. (if you are using Shellac Top Coat without a sticky layer, this step is not required)
After completing the shellac application process, you need to lubricate the cuticle with a special oil.
You can learn more about the application process by watching our video instructions.
Do I need a primer and finishing gel when applying Shellac Bluesky?
Bluesky Shellac is applied in 3 stages: base coat, color coat and top coat.
First, before applying the base coat, the unfinished plate is degreased using a degreasing agent and removing the sticky layer. For additional, more thorough degreasing, you can use Ph bond (balanced dehydrator), which provides stronger drying and degreasing of the nail plate. Frequent use of Ph bond is not recommended, because it dries out your nails quite a lot, which can subsequently lead to increased brittleness.
Is it possible to apply 3 layers of color?
2 layers of color coating is the optimal number of layers to apply, because... This is exactly the amount that ensures a neat appearance of the manicure without weighing down the nail, and also stays on the nails longer. But if the color coating turns out to be too light, not dense enough, or does not lie smoothly enough when applied in 2 layers, a 3rd layer can be applied, provided that the coating is applied thinly and evenly enough.
What and how to remove shellac and how long does it take?
Shellac can be removed using any concentrated acetone-containing product, it can be a special shellac remover, a biogel remover, or a remover for acrylic and artificial nails. Also, for removal you will need cotton pads and ordinary food foil, which can be replaced with special “windings” for removing shellac.
The remover must be kept on the nails for no more than 10 minutes, then you need to carefully scrape off the softened, cracked coating from the nail plate using a wooden stick (orange stick or orange stick).
In total, the removal process takes no more than 20-25 minutes.
You can learn more about the shellac removal process by watching our video instructions.
Can shellac be removed with regular remover?
varnish or is only a special liquid suitable for this?
In principle, any liquid containing acetone is suitable for removing shellac. But if you remove it with regular nail polish remover, it will take much longer and as a result, gel particles may remain on the nails and make their surface uneven. When using a special product (for example, CND Product remove, x-stronge from Severina, etc.), you only need 10 minutes to completely dissolve the coating. At the same time, the nail remains completely clean.
6. What should I do if shellac gets on my skin during application?
Nothing wrong with that! The main thing is to remove it before polymerization in a UV lamp. You can do this with an orange stick, or you can use lint-free wipes to avoid accidentally leaving lint on the surface.
Do degreasing and shellac removers have to be of the same brand as the coating?
You can use any manufacturer's product that suits you best for removing and degreasing. It is not necessary to use products from the same manufacturer as the shellac itself.
What to do if shellac is difficult to remove?
In order for shellac to come off easily from the nail plate, it is necessary that the shellac remover be on the nail for no more than 10 minutes.
If you have difficulty removing the shellac, you can first sand the top layer a little with a buff until the glossiness of the coating disappears.
UV lamps for shellac:
Is it possible to dry shellac in a 9 W UV lamp? If yes, how long does it take?
Unfortunately, it is almost impossible to dry shellac in UV lamps with a power of less than 36 W. Theoretically, this is possible, but as practice shows, it is practically impossible and the process can take up to several hours.
How often do you need to change the bulbs in a 36W UV lamp?
The frequency of replacing bulbs in a UV lamp directly depends on the frequency of its use. With standard home use of the lamp once every 2 weeks, it is recommended to replace the lamps at least once every 5-6 months.
Interaction of Bluesky shellac with gel polishes from other manufacturers:
Are Bluesky shellac base, color and topcoats interchangeable with corresponding coatings from other manufacturers, in particular CND?
Bluesky shellac is fully compatible with CND coatings. You can use both CND colors with Bluesky top and base, and vice versa. It is also possible to use ORLY gel polish colors with Bluesky top and base.
2. Is there a fundamental difference between CND Shellac and Bluesky Shellac?
There are no fundamental differences between the coatings. CND is the first and most popular shellac manufacturer and surpasses Bluesky in price. But nevertheless, Bluesky is a high-quality analogue of CND.
Using design elements when creating shellac manicure:
Is it possible to apply dry glitter with shellac coating?
Applying shellac using glitter is possible; it is best to pre-mix dry glitter with a small amount of top coat and apply it to the dried color coating, or instead of applying the color coating directly to the base, dry it in a lamp and then apply the top coat.
You can learn more about using dry glitter when applying shellac here.
2.How to properly use stickers and rhinestones when applying shellac? At what stage of shellac application are similar design elements used?
Stickers and rhinestones are applied to the second color layer (it is best to apply stickers or rhinestones to the color coating that has not yet dried, then dry and cover with top coat). It is also possible to apply a thin layer of top coat to the dried colored coating and attach a sticker or transfer, dry it in a lamp, cover it with top coat and dry it again. in the case of rhinestones, a small drop of top is applied to the dried color, the wanderer is immersed in it, dried in a lamp, then the entire nail is covered with top and dried in a lamp for 2 minutes.
How to make a neat smile line when applying shellac without using stencils?
If you don't feel comfortable making a smile line with a shellac brush, you can use an angled design brush.
You can watch video instructions for creating a French manicure using shellac here.
How to make shellac surface matte?
To create a matte finish, there is now a special matte top, which is applied at the final stage instead of the usual top. After drying it in a lamp for 2 minutes, the sticky layer is also removed from it.
You can purchase the matte top on our website here.
General issues:
1. What is the difference between shellac and gel polishes?
Unlike gel polishes, the nail plate does not need to be filed before applying shellac. Also, when removing it, prior to applying the remover, no preliminary destruction (filing) of the coating is required.
Does shellac hide unevenness and defects of the nail plate?
Due to its density and the presence of the target component in the composition, shellac allows you to hide minor unevenness of the nail plate or significantly reduce its visible defects when they are more pronounced.
Attention! Shellac should not be used if you have serious diseases of the nail plate, including fungal infections, which often lead to nail deformation.
What is the difference between a top coat with and without a sticky layer?
The difference is that after drying the top coat without a sticky layer, you do not need to wipe your nails with liquid to remove the sticky layer. Drying the topcoat in this case is the final step.
Why does shellac hold up very poorly for some people and after just a couple of days it cracks and comes off in layers?
Sometimes shellac may not adhere well to nails due to the individual characteristics of the nail plate, for example, in the case of an overly moistened or oily nail plate, with which the coating cannot adhere sufficiently. Also, shellac may not adhere well enough to a heavily peeling nail plate, because... the coating may fall off along with the partially peeling layer of the nail plate
Which color is best for beginners?
For those who are just starting to learn how to apply shellac at home, we recommend using light enamel colors (27CS, 40504, 40514, etc.) and light shades with micro-shine (59A, 40502, 40512, 40513, 40528, etc. .d.)
How to distinguish fake Bluesky shellac from real one?
The main distinguishing feature is the price. Real Bluesky shellac does not cost less than 350-400 rubles.
The second distinguishing feature is the smell. Real CND and Bluesky Shellac has a light odor, unlike fakes, which have a strong chemical smell.
7.How long after removing the previous coating can a new one be applied?
Shellac coating does not harm the nail plate, so if you remove the coating correctly and carefully, you can immediately begin applying a new one.
8. How many applications does one bottle of shellac last?
One 10 ml bottle is enough for an average of 20-25 coatings (including two-layer application).
9. Under what conditions is it better to store shellac?
If you follow the instructions, shellac will last longer if you store it in a cool place, out of direct sunlight.
You can ask any questions about Shellac in our VKONTAKTE group
Join us to stay updated on all the news about shellac!
Comments (14)
www.myshellac.ru
Gel polish removal methods
There are two ways to remove artificial turf: using sawdust and by soaking it with a special liquid or napkins.
To remove the coating using sawdust, a special apparatus and removal cutters are required. Therefore, this option is suitable only for those girls who are familiar with hardware manicure.
Perhaps someone will have the thought: “Why not try to remove it with a rough file?” But we’ll immediately answer that this method is quite problematic, takes too much time and can damage the natural nail. It is necessary to try very hard to treat the area near the cuticle, and there is a risk of rubbing the skin. Therefore, at home, the easiest way to remove it is by soaking.
If you want to master sawdust removal, then sign up for basic courses at our licensed school “ParisNail”! After training, you will not only do a flawless manicure for yourself, but will become a real professional in the nail industry and will be able to work as a manicurist!
Maceration
This method involves soaking the gel polish with a special acetone-containing liquid. You will find a list of materials required for this procedure and detailed technology for removing gel polish in the article “How to remove gel polish (shellac) at home?”
NOTE! Not all base coats can be soaked, so ask the seller to select the base that is suitable for this type of removal.
Varieties of top products
The correct choice of topcoat will provide your manicure with maximum durability.
Choose from the following varieties:
Using the top you can make your manicure glossy or matte
Another new product is single-phase and two-phase gel polish. Single-phase is represented by only one color product, which combines the functions of base and top; two-phase, in addition to color, also contains a top coat. However, these gel polishes are rarely used because their durability is worse than that of the three-phase system.
Pros and features of gel polish without a sticky layer
The finish for gel polish without a sticky layer is the choice of those who want to simplify the manicure procedure as much as possible. The top coat does not require additional treatment of the nail with a degreaser. You simply apply the topcoat and dry it in a lamp, after which you can do your homework. Since there is no additional purchase of a dehydrator, the overall cost of the manicure will be slightly lower.
By choosing a fixer without a sticky layer, you save on manicure
The advantages of such products are manifested when working with small decorative elements. For example, when you use rhinestones and treat them with topcoat, you will not need to painstakingly remove a layer from each part.
Important! Those with thin nails should use the finish without a sticky layer with caution. The top is less elastic, so it may chip if your nails bend frequently.
But for those who have a strong nail plate, this top coat is a good choice, as it will provide maximum strength. This is confirmed by numerous reviews. Also, a finish without a sticky layer is used to design extended nails.
How to apply top coat without sticky layer
The method of applying the coating will not differ fundamentally from that used for conventional gel polish.
Follow the following sequence of actions:
Nails need to be pre-treated
No additional actions need to be taken. At first, this procedure may seem unusual to you, and you will be afraid to smear the sticky layer. However, you will quickly get used to the convenience of gel polish without a sticky layer and appreciate its advantages.
If you use a rub, the method of applying it depends on the specific product. In most cases, rubbing onto gel polish without a sticky layer is applied before drying. The top is convenient to apply, because in this case the rubbing does not roll into lumps, but forms a smooth, beautiful surface.
Why does the gel polish top coat not shine - Questions and answers
Craftswomen, help!
I don’t know what to do already and I’ve tried different varnishes. and changed tops! Cody. Haruyama. indie runeil elastic. bluesky. and without a sticky layer and rubber and changed the lamp from UV to ice 36 watts. And after drying, I waited a few minutes before removing the stickiness and still the highlight is unclear. Marina Ivanova Remove the sticky layer not immediately after drying in the lamp, but after waiting a couple of minutes. Lyubov Maksimenkova5 Only 2 answers. Source: proshellak.ru I have always dreamed of answering this question truthfully