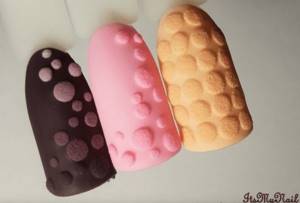
Hello, dear readers! Surely you have seen unusual patterns on your nails, as if dusted with snow? This nail art looks impressively voluminous, and at the same time delicate and soft. If you also dream of having such a manicure, velvet sand is exactly what you need. This material helps create real magic on our nails.
In this article we will tell you in detail about this miracle powder, how to work with it correctly and how to use it to make your nails delightfully beautiful. We’ll also look at other ways to create a velvet manicure.
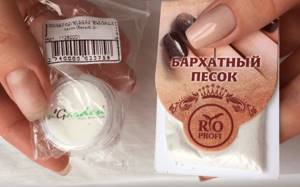
Velvet sand for nails - what is it?
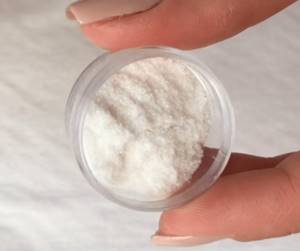
Velvet sand for nails is a powder consisting of acrylic grains. These particles are slightly larger in size than in the same acrylic powder. Visually, transparent velvet sand most closely resembles baking soda or semolina, only white rather than yellowish.
When applied to gel polish or any other raw coating, the acrylic powder penetrates it and, after polymerization, hardens, creating a durable, wearable structure. And the soft velvet effect it creates makes the manicure voluminous, textured, very delicate and a little mysterious.
The velvet coating is highly durable and can be worn for a long time without crumbling or changing texture. If you accidentally stain your nails with something difficult to remove (for example, paint), to return them to their previous appearance, it will be enough to wipe them with nail polish remover or any other alcohol-containing solution.
Velvet sand is easy to work with, so any girl can create a sand effect on her nails. In addition, it is very inexpensive, and the results from its use are simply magical and are unlikely to disappoint you.
Note: Velvet sand and flock are not the same thing. Flock is not acrylic particles, but small fibers made of viscose or cotton. In salons, craftsmen usually work with such material using a special tool - a flocider.
How to choose the right one?
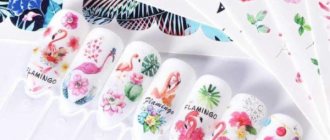
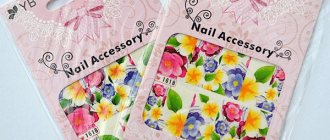
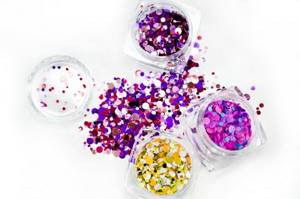
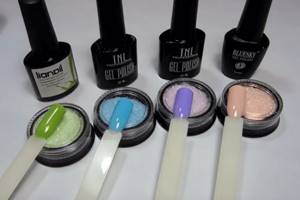
Acrylic sand comes in a variety of shades, from subtle pastels to eye-catching brights, including rainbow color combinations, neon and fluorescent colors. In general, sand for marigolds can be found for every taste and color.
But the most practical choice would be white velvet sand - it is universal because it accepts and “absorbs” the color of any coating.
Therefore, it can be successfully used in most cases. It probably works best with pastel light shades, but looks great with bright colors too.
Lovers of sparkling manicure can choose velvet sand with sparkles in the composition. Sparkles can be in harmony with the main color of the powder or contrast with it. For example, red sand with gold sparkles or blue sand with silver sparkles looks very impressive.
You can also mix your own glitter with the acrylic composition, choosing different sizes and colors for the intended effect. In general, the variety of compositions is huge and you can create as much as your heart desires. But do not forget about the proportions of the mixture and the contrast - the amount of sparkles and velvet sand should be in harmony.
Note: Velvet sand can be replaced with acrylic powder, which is used for nail extensions. It has an even finer structure and enhances the velvety effect. In addition, it is convenient to use it to decorate small details of a manicure, since it adheres well to even the thinnest lines.
Recommendations for use
Of course, when working with velvet sand, it is necessary to take into account some of the features of this material. This will help you avoid possible mistakes and make your velvet nails perfectly beautiful and long-lasting.
- Many masters recommend using a matte top coat as a coating for powder. The sand sticks to it better, and it will be easier to draw patterns. However, with a complete coating of the nail plate, you can also use gloss - in this case there is practically no difference.
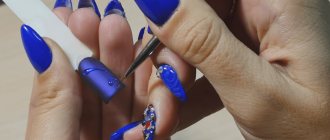
- If you want to make patterns with velvet sand, it is best to use gel paint for these purposes. Unlike gel polish, it has a denser consistency and therefore will not spread when applying the powder. If the gel paint for your drawing is too thick, you can dilute it on the palette with the required amount of top coat or gel polish of a suitable color.
- If you are making a combined design with patterns of velvet sand and rhinestones, it is better to glue the stones before creating the patterns. Why? Yes, simply because it’s more convenient - since the fragments of the pattern are placed close to the rhinestone, there will be no need to glue them with excessive care.
- When creating patterns with velvet sand, it is important to dry them completely, otherwise the sparkles will fall off very quickly. First, find out the permissible layer thickness of the material you are working with. Secondly, add about half a minute to the usual drying time in the lamp - with powder it is always better to dry longer. When drying without a UV lamp, you will have to wait at least forty minutes.
Kamifubuki nails: types of decor, secrets of long-lasting manicure and design ideas.
It’s very easy to transfer any mood into a manicure with kamifubuki. It can be a rocker, rebellious design, an elegant, sophisticated business look, a gentle airy look for a young lady, or a fiery passionate outfit for the fingers for a special occasion or significant celebration. The abundance of shapes (circles, stripes, stars, diamonds, squares, hearts) and color combinations (black with gold and pink, gray-mirror with white and holographic) just begs to be included in a creative nail painting. Any shape of nails is not a hindrance, even manicure with diamonds, the main thing is to correctly fit the kamifubuki into the design. Still think that this is too difficult and only a pro can do it? We hasten to dissuade you!
Your kamifubuki manicure can easily claim the title of “stylish nail design 2017” because:
- a beautiful image can be easily created at home, without special equipment, since any form of kamifubuki is easy to apply;
- confetti is very thin and flexible, its minimum thickness allows for a thin coating without bulges on the nail clinging to clothes and hair;
- When decorating a nail with a manicure with sequins, you can be sure that you will wear this design for a long time (longer than bouillons or rhinestones), since kamifubuki are easily and completely covered with the top (sinking in it) and remain under the topcoat layer until the next correction ;
- Only your imagination limits the options for embodied images: apply in a chaotic scattering or create a geometric manicure, decorate with a delicate moonlit jacket or create a bright disco look, apply on an accent finger or create a hurricane of color and shape on all nails.

The special beauty of kamifubuks is that they do not draw attention to themselves, fitting into the overall picture and combining with both cat-eye coatings and broken glass, looking stylish in space nail art and all variations of French. If you want to create a calm look for everyday life, choose delicate and light pastel tones of the color coating and pair them with silver, blue or berry mini-sequins. For an everyday look, kamifubuki-reverse French and kamifubuki-negative space will be good.

If a festive look is intended, the confetti manicure can be laid out in a floral pattern, herringbone or imitation chevrons. An original manicure that will surprise and delight others is a gradient of confetti, sequins inscribed in an intricate painting, glossy kamifubuki under a matte top and vice versa. A “reptile” design created using kamifubuki for nails, a “honeycomb” manicure, a sparkling Cinderella manicure with a corresponding variation of confetti will look no less chic. The latest in kamifubuki fashion is a combination of sequin techniques + volumetric casting or confetti + drops of gel polish.
Whatever style and method you choose to create the manicure of your dreams, any application of these decorative elements will have excellent results. Playful colored spots will make the design multi-layered and voluminous, emphasizing the beauty of the shape of your nails and the grace of your fingers. Let's look at the features of creating a design with the most popular types of coatings...
How to apply velvet sand
How to do a manicure with velvet sand? Very simple - no special training or any special skills are required. As a coating for application, you can use gel polish, top or base.
The choice of coating depends mainly on whether you are going to cover the entire nail with sand or just part of it, for example, patterns painted with paint.
Let's take a step-by-step look at the standard technique of applying velvet sand over the entire nail plate with a top coat.
- First, we will carry out all the necessary preliminary procedures: give the nails the desired shape with a file, remove the cuticle, polish the surface with a buff and wipe with a degreaser.
- Apply the base in a thin layer, not forgetting to seal the ends, and dry it in a lamp.
- Then apply the first layer of colored gel polish and dry.
- We cover the nails with a second layer of gel polish and dry again.
- We fix the manicure with a top coat.
- Sprinkle acrylic sand until we cover the entire surface of the nail. Do not skimp on the material - it should be distributed evenly and abundantly. You can sprinkle it with anything, for example, with a fan brush, a pusher, or a regular credit card. Many craftsmen use tips for this. It is convenient to remove excess during application by simply tapping on your finger. Before the procedure, do not forget to place a sheet of paper on the work table - this will make it more convenient to return the excess sand to the jar.
- Wait about half a minute for the powder to absorb into the coating, and then dry it in a lamp.
- Brush off any remaining sand with a brush and you're done! Velvety marigolds will delight you for at least 2 - 3 weeks.
You can also glue rhinestones or other decorative elements in the process.
Note: You can apply velvet sand directly to the gel polish (without a top coat). In this case, it is advisable to dry the manicure twice as long as usual. It is advisable to use this method only when covering an entire nail with sand.
Strengthening nails with acrylic powder: step-by-step instructions, video
Strengthening your nails with acrylic powder at home is quite simple; you don’t need to master any special skills. Below is a detailed algorithm of actions.
Step one: get your nails in order
First you need to do the manicure yourself to get your nails in order.
Using a nail file, give the free edge the desired shape;
Place your hand in a bath of warm water for 3-4 minutes. We wipe our fingers and start manicure;
With an orange stick dipped in water, we go along the contour of the nail and clean the pterygium.
Step two: preparing the nail plate
Then we move on to preparing the nail plate for coating. This is a very important stage, since it determines how well the adhesion of the natural nail and the artificial coating will occur.
We treat the surface of the nail plate with a buff to lift the scales of the nail plate and improve adhesion;
Remove dust with a special brush;
For those with wet, oily nails, to improve adhesion, apply a dehydrator to the entire surface of the nail and air dry it for a minute. You can also apply a disinfectant;
Then you need to apply primer to the free edge of the nail. Depending on the purpose and condition of the nails, we choose acidic or acid-free. The free edge is one of the most vulnerable places, and thanks to the primer, the adhesion between the nail plate and the artificial material improves, which contributes to longer wear of the coating. We also air dry the primer for one minute.
Step three: strengthen the nail with acrylic powder
Now you can move on to strengthening with acrylic powder.
Apply a thin layer of base coat to the surface of the nail plate. DO NOT dry;
How else can you make velvet on your nails?
The method described above is the most popular. Perhaps you could even call it a classic. But, of course, there are other methods that also deserve attention.
Velvet sand for the base
To obtain a velvety effect on nails, you can successfully use other materials. As an example, here is one very simple way to create a plain velvet manicure. Using this method, you can completely do without a top. We will need:
- white gel polish;
- rubber base;
- “marmalade” for nails (melange) of the desired color;
- transparent acrylic powder.
First, we carry out all the preliminary steps and apply gel polish. Then:
- Cover the nail surface with a rubber base (not top!). Of course, there is no need to dry it.
- Sprinkle the nail generously with melange, making sure that no bald spots remain. It is convenient to shake off excess material by simply tapping your finger.
- Without drying (!), sprinkle transparent acrylic powder on top. We do not skimp on the material - what is needed will be absorbed into the coating and will not allow the melange to crumble. We also remove excess powder by simply shaking it off.
- Dry it in a lamp, take a brush and remove the excess - done!
This coating is also distinguished by its durability, which is given to it by acrylic powder. It is thanks to her that the melange will stay on your nails as long as you want - until you remove it.
Varnish and top coat with velvet effect
Manicure with sand is so popular that many cosmetic product manufacturers have begun to produce special series of nail polishes with a velvet effect. Such varnishes contain particles of acrylic powder and immediately give the desired result.
The so-called velvet varnish dries in a few minutes without any lamp. It is applied in two layers - apply the first, wait 2-3 minutes, then apply the second.
Unfortunately, this coating is not durable (since it is essentially an ordinary varnish) and comes off the nails quite quickly - in just a few days. And if you fix it with a top coat, the velvety almost disappears. In addition, the sand effect itself is not so beautiful and voluminous.
Professional craftsmen practically do not use such varnishes, but if you like minimalistic design that is easy to carry out, then velvet varnish should definitely be on your shelf. In general, it is ideal for girls who like quick results without additional procedures.
Velvety nails can also be achieved using special matte finishes with the effect of velor, velvet or cashmere. But as with a special varnish, they will not be able to achieve the impressive volume that is achieved with the classic method - acrylic velvet sand.
How to remove acrylic powder
You have done the strengthening, walked away for the allotted time with a wonderful manicure, but the moment has come when it’s time to remove the coating. How to do it?
There are 2 ways to remove acrylic powder:
using the device.

Let's look at each of them in more detail.
To remove acrylic using a remover you will need:
- a rough file, the abrasiveness of which is approximately 100 grit;
- cotton pads;
- scissors for cutting cotton pads;
- remover;
- aluminum foil (you can use food grade foil instead of professional grade);
- orange stick or metal pusher;
- buff;
- file for natural nails.
We lay out all the necessary materials and tools in front of us, spread out a paper towel or napkin. This is necessary so that the debris from the removed acrylic can be immediately rolled up in a napkin and thrown away. It won't get in the way and you won't have to pick it up from your work surface.
Cut the cotton pads into 4 parts, cut the foil into 10 pieces. Each piece of foil should be of such a size that you can wrap your finger in it.
Use a nail file to remove the top layer of coating.
Apply gel polish remover to pieces of cotton pad, place them on each nail and wrap in foil, leave for 10-15 minutes.
After the specified time has passed, carefully remove the softened coating from the nails using an orange stick or pusher. Do not remove all the foil at once; work with each finger in turn.
After we have cleaned all the nails, we treat them with a buff. Using a natural nail file, give the free edge of the nail the desired shape.
At the end, it is advisable to apply cuticle oil and moisturizing or nourishing hand cream.

You can also remove acrylic with a machine. In essence, this is “cutting off” the coating with a special manicure cutter. At speeds of 25,000 rpm, it gently and painlessly removes layers of artificial material.
Note! Removing the coating with a manicure machine requires certain skills. To do everything correctly and not damage your nails, we recommend that you take a hardware manicure course.
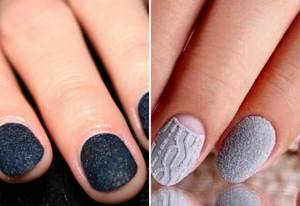
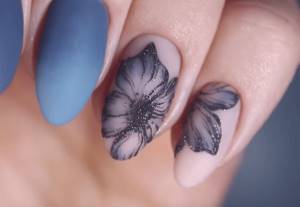
Features of black velvet
Many nail artists note that this is a very capricious material. Therefore, working with black sand requires a special approach, which is radically different from the standard one. There are two points to consider here:
- Firstly, ordinary white acrylic sand takes on the color of the gel polish, and black “eats” the color of the coating.
- Secondly, black acrylic grains dry out poorly, so they need to be applied in a very thin layer.
It is better to work with this material as follows:
- First, apply two layers of black gel polish, allowing each layer to dry.
- Apply another very thin layer of gel polish.
- Use a thin fan brush to scoop up some sand and apply it to the nail using gentle movements. Unlike white, black powder must be poured in a thin layer, otherwise it may simply not dry out.
- Dry in a UV lamp twice as long as usual.
Decorating patterns with black velvet sand must be done as carefully as decorating a full nail.
Nuances of color combinations
A harmonious combination of gel polish color and sand itself is very important to create a beautiful, elegant manicure with a velvet effect. When selecting shades for your future design, you must consider the following:
- When working with colored velvet sand, carefully monitor the harmonious combination of shades - otherwise the manicure may turn out to be dirty. The safest thing to do is to choose gel polish and sand of the same or almost the same color: in this case, the manicure will certainly look neat and elegant.
- White sand is universal because it always takes on the color of the coating. However, it looks most impressive in soft pastel shades, creating a snowy effect. You can do any light manicure and boldly decorate it with white velvet, completely or fragmentarily - it certainly won’t make it any worse.
Examples of designs with velvet sand
There are a huge variety of nail art options using this unusual coating. Velvet sand looks great on nails of any length and shape - you just need to choose what is most suitable for you.
Examples of the most popular manicure options with velvet sand - photos and brief descriptions.
Regular Full Coverage
The simplest but stylish option. Of course, it is not at all necessary to make every nail “sandy”.
It is also worth noting that such a coating is not only beautiful, but also practical - it strengthens the nail plate, so breaking such a nail will not be so easy. This velvet design enhances the beauty of any color and makes soft pastel tones even more subtle.
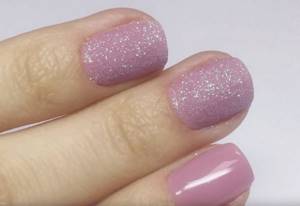
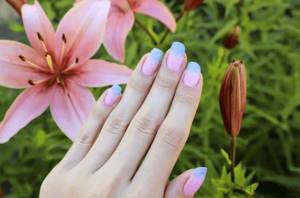
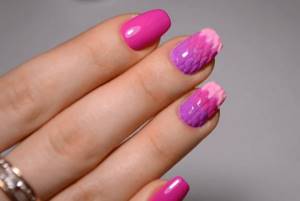
Sugar Gradient
Velvet sand looks great in combination with a gradient. Of course, such an effect can only be created with the help of universal white sand, which can take on any color.
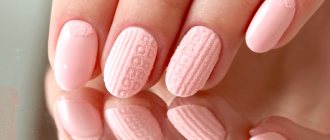
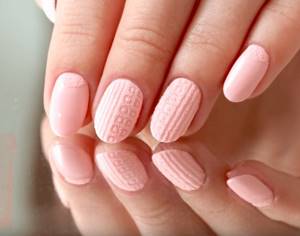
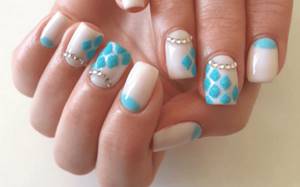
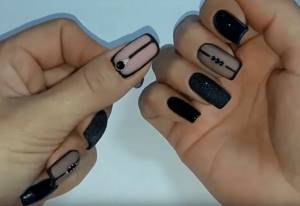
"Sweater"
Nail art with sweaters is very popular, especially in winter.
Sand harmonizes perfectly with rich colors and goes well with almost any design and a wide variety of decorative elements. For example, look how unusual and colorful a sand knitted manicure looks in combination with a French manicure and decorated with rhinestones.
Read more about the knitted manicure technique in the next article.
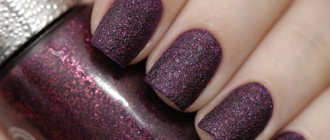
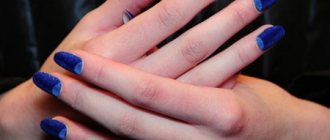
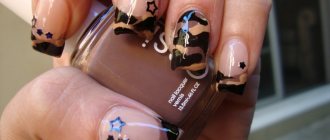
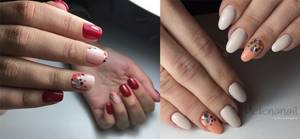
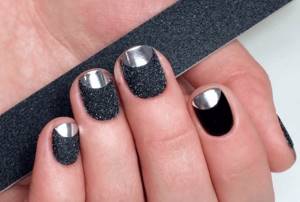
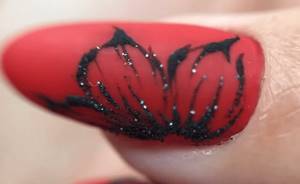
Black on red
The exquisite contrast of black and red colors will make velvet sand with glitter even more elegant.
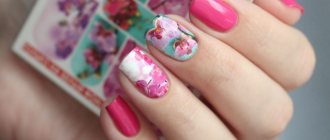
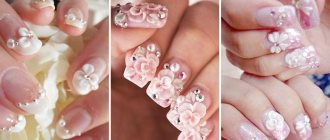
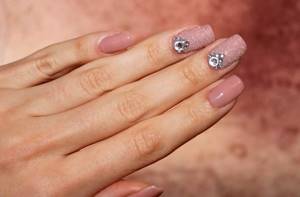
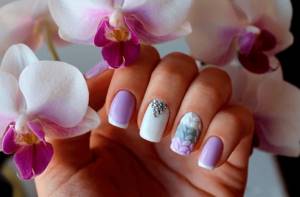
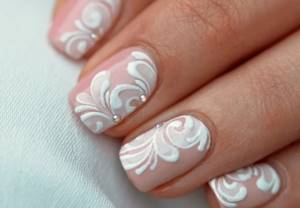
For a wedding
Light manicures with sweaters, monograms, roses and other patterns are very popular among brides. Velvet sand will help make this nail art even more amazing.
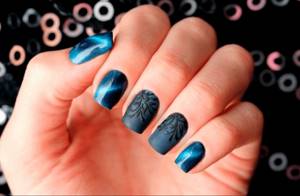
for the new year
White velvet sand resembles snow, so it is not surprising that it is often used to create New Year's designs on nails.

Sand manicure for different lengths of nails
Manicure for long nails with sand
On elongated nails you will get an unrivaled manicure with granulated sugar. It has the following features:
- When creating, stylists will be able to fully express their imagination and apply a variety of designs to the surface of the nail. It can be a marine theme, imitation lace, all kinds of geometric shapes;
- sand manicure can be generously decorated with rhinestones, which are applied in small quantities or completely cover any of the nails;
- Almost any design will look organic on long nails. It can be ombre, French, lunar nail art. Moreover, when creating them, you can use all kinds of shades, both muted and subdued, and extremely bright and saturated.

Manicure for short nails with sand
Such an elegant and original type of design as a manicure with velvety sand fits perfectly on shortened nails. Among the features of its design are the following:
- at this length almost any shade will look harmonious;
- It is advisable to give preference to solid colors. The use of prints is also allowed, but it is better if they are discreet, made in a minimalist style;
- It is better to refrain from abundant decoration with rhinestones so that the image does not turn out to be overloaded; if you use a combination of different tones, then their combination will be very organic, made in the form of a smooth transition from one shade to another. This can be done using ombre, which can be horizontal, vertical or diagonal.