Features of the material
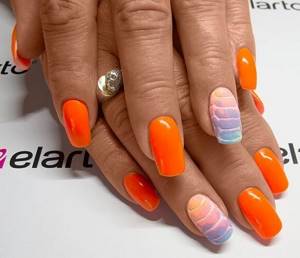
Velvet sand gradient
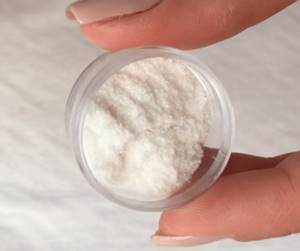
Velvet sand is a medium to coarse powder.
Compared to acrylic powder, sand consists of larger fractions. It looks like dense powder, semolina or very fine sugar.
Where can a novice craftsman get sand powder? The technology is very popular, and the material can be purchased at any professional store online and offline. If the material is not at hand, it can be replaced with acrylic powder or scrapbooking powder.
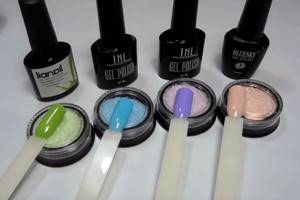
Which velvet sand is better? Experienced craftsmen recommend using medium-grain material and light shades for decoration. Transparent white is best. This is a universal solution, since velvet sand, when covered, takes on the shade of the colored base on which it is poured.
There are several varieties of velvet sand:
- White translucent . Takes on the shade of the coating it is applied to.
- Colored . Can replace gel polish and is applied immediately to the base.
- With sparkles . Used for both fine decoration and full nail coverage.
The velvety texture does not need to be covered with a top or finishing layer. Sand dusting can be used to strengthen nail plates, just like acrylic powder. It reinforces and creates a durable layer.
The coating lasts 10-21 days, just like gel polish. The texture does not crumble and does not form bald spots during wear.
Hands with this design can be actively washed with soap and do any housework as usual. The coating does not react to alcohol solvents.
To remove a design with a velor texture, you will need 15 minutes, foil and a gel polish remover on which the material is attached.
How to choose the right one?
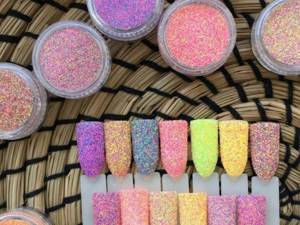
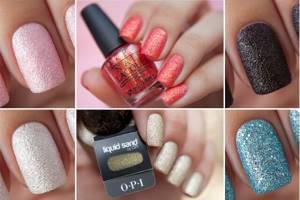
Acrylic sand comes in a variety of shades, from subtle pastels to eye-catching brights, including rainbow color combinations, neon and fluorescent colors. In general, sand for marigolds can be found for every taste and color.
But the most practical choice would be white velvet sand - it is universal because it accepts and “absorbs” the color of any coating.
Therefore, it can be successfully used in most cases. It probably works best with pastel light shades, but looks great with bright colors too.
Lovers of sparkling manicure can choose velvet sand with sparkles in the composition. Sparkles can be in harmony with the main color of the powder or contrast with it. For example, red sand with gold sparkles or blue sand with silver sparkles looks very impressive.
You can also mix your own glitter with the acrylic composition, choosing different sizes and colors for the intended effect. In general, the variety of compositions is huge and you can create as much as your heart desires. But do not forget about the proportions of the mixture and the contrast - the amount of sparkles and velvet sand should be in harmony.
Note: Velvet sand can be replaced with acrylic powder, which is used for nail extensions. It has an even finer structure and enhances the velvety effect. In addition, it is convenient to use it to decorate small details of a manicure, since it adheres well to even the thinnest lines.
How to apply on gel polish
Sand can be poured onto regular varnish, gel paint, gel polish or topcoat as a base. Also, for the base under it, you can take the UV gel of the finishing layer from the three-component gel system for extensions.
Let's look at the procedure for applying velvet sand to gel polish. It consists of the following stages:
- A manicure is performed using the desired technique, the nails are shaped, and the cuticles are processed.
- Nails need to be buffed to remove their natural shine and improve adhesion to the decorative coating.
- Degrease nails and remove dust.
- Cover with gel polish base.
- We paint our nails in two layers of gel polish or gel paint, dry each layer in a lamp for the recommended time.
- Apply topcoat or topcoat to the nail.
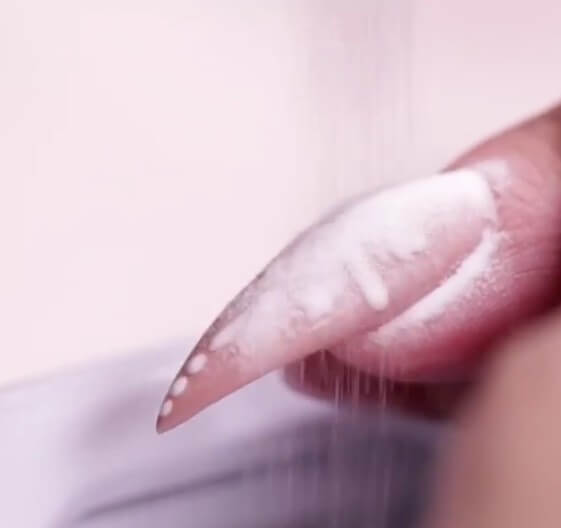
- We don’t dry it in a lamp, but immediately pour sand onto the sticky layer. It is necessary to pour from 5 to 10 layers so that it is well saturated.
- You need to wait a minute for the material to “settle” on the nail in an even, dense layer.
- Dry the layer in a lamp. It is recommended to double the drying time from the usual so that the material lasts well from 10 to 21 days.
- Brush off any remaining sprinkles with a soft bristle brush or broom.
Some craftsmen apply sand powder immediately to the second layer of gel polish, without topcoat, and dry it in a lamp for double the time. This method also provides reliable coverage, but only if the nail plate is completely covered with sandy decor.
It is convenient to pour the sprinkles onto the nail over a jar with a wide edge or over a sheet of foil or paper. Scattered residues can be returned to the container with the material and used next time.
Sand can be applied with a fan brush, a pusher, or even an inverted training tip on a holder.
You can mix sand with glitter of different shades yourself, creating a new color of the desired intensity.
Rubbing: what it is, how to use it and all application methods with step-by-step instructions
Velvet sand - how to use the material
Application methods
There are several ways to make a manicure with granulated sugar at home. However, the end result will always be different.
Design with acrylic powder
The method is suitable for gel polish lovers. The procedure is simple and does not take much time.
You will need:
- ultraviolet lamp;
- gel polish (color chosen at will);
- acrylic Powder;
- base and fixative;
- tassels.
The design is created in several stages:
- Upon completion of the hygienic manicure, apply a base coat, and then apply gel polish in 2 layers. Dry in a lamp between procedures.
- The last layer does not dry immediately. First, sprinkle the nail plate with acrylic powder.
- After drying, the final result is corrected with a brush, carefully removing excess grains.
- Apply a fixing layer.
Using this method of creating a sugar manicure, you can achieve a velvet effect. To do this, the patterns are first drawn with gel polish, and then the contours are sprinkled with powder, and all excess is removed with a brush.
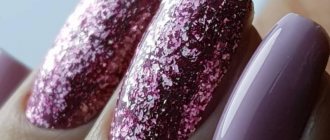
Melange
Melange is small sugar grains that create the effect of voluminous glitter on the nails.
To carry out the procedure at home you will need:
- gel polish;
- melange;
- brushes;
- base and fixer.
After preparing to apply the decorative coating, you can begin creating the design:
- Apply base to the nail plate. Dry.
- You can cover your nails with colored gel polish in several layers to create a specific design. Dry.
- The last, not yet dried, layer must be immediately covered with melange. Apply with a tapping motion of the brush.
- Remove excess and secure the result with topcoat.
Velvet varnish application technology
Sand varnish
An alternative to velvet sand is a new product, velvet nail polish.
This is a type of regular varnish with the addition of tiny acrylic powder, creating the effect of suede or light grain.
With its help, even beginners can quickly create a uniform velor coating.
The varnish dries in air in 2-3 minutes. It must be applied in two layers and covered with the second only after the first has completely dried, so that there are no grooves or screeds. You can use a fixative, but then the suede texture will disappear, leaving only a matte effect. Velvet varnish can be found from the following manufacturers: Dance Legend, OPI, ZOYA, NUBAR. The coating lasts 2-4 days, and then chips and comes off like regular varnish.
What is sand
Velvet sand is a special powder for nails, its structure reminiscent of glitter. This type of design appeared quite recently, but quickly reached the peak of popularity. The main feature of this manicure is its originality and beauty.
Its advantages
The velvet design combines a number of advantages, thanks to which many girls preferred it.
- Versatility.
Sand looks great on natural and artificial nails, and regular or gel polishes are suitable for attaching it.
- Accuracy.
When choosing a component, you should pay attention to the size of the grains of sand; the smaller they are, the neater your manicure will look.
- Strength.
This design is quite stable and somewhat reminiscent of the effect of liquid stone. The decor is not afraid of contact with water or exposure to chemicals.
- Originality.

Externally, velvet sand fully lives up to its name. The nail is like real velvet, just as soft and pleasant to the touch.
- Availability.
The material can be easily found in any specialized store. A jar of sand is inexpensive, and its consumption is low.
Powder top, cashmere-effect finish for gel polish
The effect of a velor, velvety surface can also be achieved using a matte top with the declared texture. It does not contain a sticky layer; it is applied, like a regular top coat, on top of two layers of gel polish, and dried in a lamp according to the recommended time.
The top with a cashmere effect has a dense texture and remains flexible after polymerization, making the nails even more durable and resistant to chipping and damage.
Who is the powder suitable for and why?
View this post on Instagram
Publication from Margarita Sukhikh / Tigermouse (@vydra_v_getrah)
— Who doesn’t hold gel polish well? Mineral powder is another option to try. It has a different adhesion mechanism (polymerization occurs with the help of a liquid, and not with UV exposure) - there is a chance that it will suit you.
— Who loves the thinnest possible coverage. When applied normally, mineral powder is just a little thicker than regular varnish and feels quite light. However, on very sensitive nails (I experienced this effect myself) there may be a feeling of compression in the first couple of days. It is safe.
— Those who have a history of UV allergies, nail injuries, base burns or onycholysis can be covered with powder, but only in remission. Podologists confirm that with a properly applied powder coating and regular replacement (excessive wear of any long-term coating is not very beneficial!), relapses of the nail moving away from the bed do not occur.
- Who needs it quickly? Coating with powder takes 15-20 minutes maximum.
— For those who still shudder from hardware removal. The powder is easily soaked with a special product, but keep in mind that it dries the skin. I still shoot with a camera, it’s more convenient for me.
Find out 6 more taboos in using gel polish that ruin your nails: the master says
Velvet Sand Nail Design Ideas
The most popular design directions with this texture are:
- Full Coverage
- Velvet sand painting
- Small drawings
- Ombre, gradient
- Wedding manicure
- Sweater design
- French
When applying any designs under the topping, the nail is first sealed with topcoat and the dispersion layer is removed.
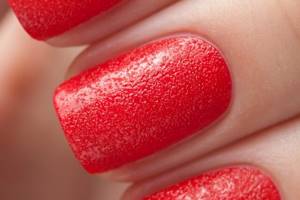
Full Coverage

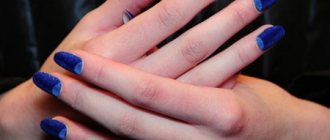
Can be performed on one nail or on all fingers. Allows you to strengthen the nail plates, which is important for square shapes with increased load on the corners. Sand is poured onto regular varnish, gel polish or gel paint after coating with topcoat. The transparent material takes on the same shade as the colored background underneath. Please note that the bright colors of a manicure with a velvety surface do fade over time. By the end of the first week, the color may lose a little brightness, but the coating will remain durable.
Nuances of color combinations
A harmonious combination of gel polish color and sand itself is very important to create a beautiful, elegant manicure with a velvet effect. When selecting shades for your future design, you must consider the following:
- When working with colored velvet sand, carefully monitor the harmonious combination of shades - otherwise the manicure may turn out to be dirty. The safest thing to do is to choose gel polish and sand of the same or almost the same color: in this case, the manicure will certainly look neat and elegant.
- White sand is universal because it always takes on the color of the coating. However, it looks most impressive in soft pastel shades, creating a snowy effect. You can do any light manicure and boldly decorate it with white velvet, completely or fragmentarily - it certainly won’t make it any worse.
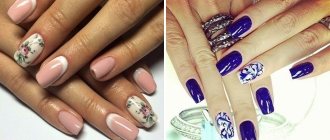
Velvet sand painting
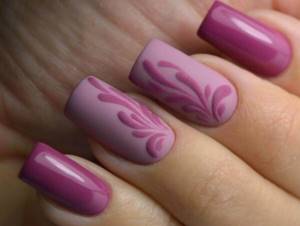
The technique allows you to combine several decoration options in one composition. Painting is done with gel paint, top coat or gel polish. The technology is as follows:
- After applying the main color of the gel polish, seal it with a top coat.
- Remove the dispersion layer.
- Using gel paint, gel polish of the selected shade, or just a transparent top coat, we draw monograms using a thin brush.
- Sprinkle the drawing with velvet sand.
- Dry it in the lamp for double the time.
- Brush off any remaining sprinkles with a brush.
The monograms of the painting must contain a sufficient amount of liquid and be “fat” in order to “take” the sprinkles. Otherwise, the drawing will have bald spots and will be uneven.
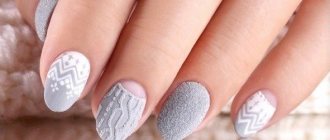
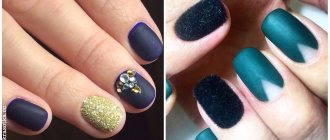
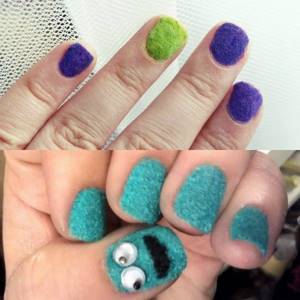
Sweater design
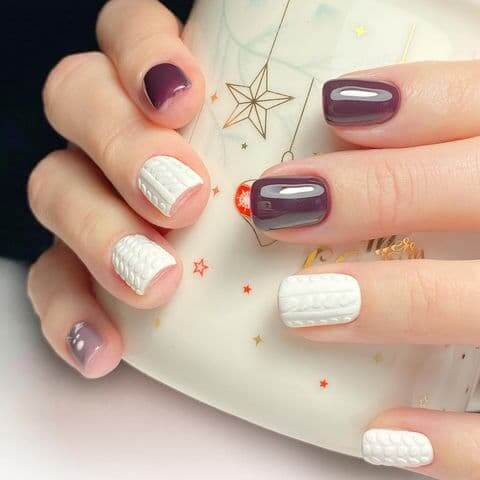
The trendy design of the autumn-winter season would not be so impressive without its voluminous velor texture. It can also be done with acrylic powder or flock. The design is applied with paint or gel polish onto the top without a dispersion layer, sprinkled with powder material, and then dried in a lamp. With sprinkles, the design becomes durable and expressive. You can choose different braid patterns for sweater designs. Read more about knitted design technology.
Ombre
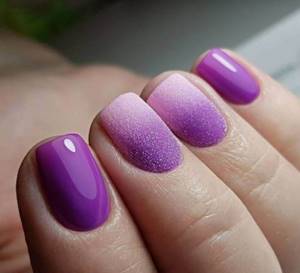
An effective gradient with sand sprinkles is applied to a ready-made gradient with gel polish. The varnish transfers its color, and a smooth, beautiful transition is obtained. In detail about the technique of performing a gradient.
The second option is to use two or three shades of sprinkles in a horizontal or vertical transition. Due to the fine-grained texture of the material, the gradient is smooth and delicate.
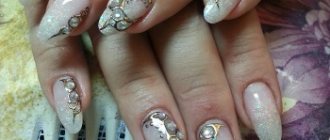
Wedding manicure
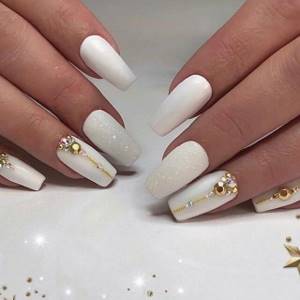
Sand with mirror or rainbow sand sparkles is indispensable in a wedding manicure. It adds a subtle shine to the base design. The classic white color acquires volume and a fascinating texture. This manicure is worthy of being included in a wedding album photo.
Wedding manicure ideas - from classic to avant-garde
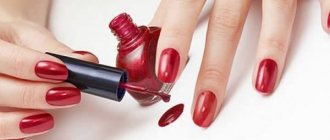
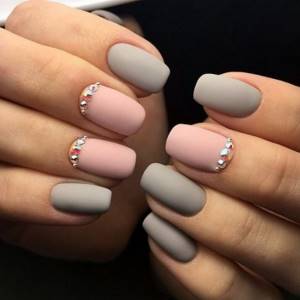
#3 Youth red manicure with minimalist design
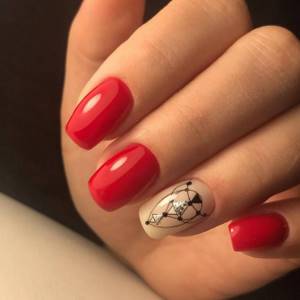
Red is considered a universal color, so it is often used to create business and everyday nail art. Girls want to see a discreet and attractive design on their nails that will not amaze colleagues, bosses and friends with unimaginable and voluminous decor.
Minimalism design is exactly what is needed for girls who are always in the thick of things, who often change their looks and do not want to think about their manicure. The trend is red manicure with negative space, color block design, floristry. To complement the red color, calm, restrained shades are used: beige, white, milky, cream and others.
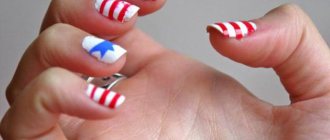
French
The powder texture is applied only to the tips of the nails, painted with a French line. This allows you to further strengthen the nails in this area. When using colored or shiny sand, the design becomes even more original.
Design options for a French jacket - a selection of ideas
Velvet sand for nails does not require special skills in mastering the technology and provides a wide field for experimentation both for masters and when performed at home. At the start, purchase a translucent material to strengthen your skills in working with texture.
Sugar manicure at home
There are several techniques for applying manicure, it is better to familiarize yourself with each and then choose the most suitable option. The first way is as follows:
- Do a regular trimmed manicure, be sure to steam your hands in a warm herbal bath, push back and trim the cuticles, use a nail file to give them a better shape, and dry each nail plate well with a towel.
- Apply a protective base to your nails.
- Now scoop up a small amount of colored dye and make a couple of strokes on each nail. Most often, calm pastel colors are chosen - sand, beige, milky, soft plum, soft pink. Sometimes, on the contrary, strongly contrasting shades are selected.
- While the composition has not yet dried, quickly but carefully sprinkle granulated sugar on the nail and wait until it sticks completely. According to nail art masters, 10-15 minutes is enough for this.
- Next, use a hard miniature brush designed for working with nails to sweep away any loose grains of sand; if you need to make a pattern, form it.
- To make a sugar manicure last longer, it is advisable to seal the result with shellac, but this technique will not work if you want a 100% velvet feeling.
How to remove sand varnish?
Removing sand varnish is not an easy task. To avoid damaging the nail plate with prolonged friction, manufacturers suggest generously moistening a cotton pad with nail polish remover and pressing it firmly against the nail for a minute or two.
After this procedure, the sand nail polish should be soaked and removed from the surface without any problems.