Fashionable designs using the ombre or gradient technique have become even easier and more fun, thanks to the advent of a tool - the airbrush for nails. If earlier ombre took from 30 to 40 minutes in the salon, now the same color transition effect can be done in 10-15 minutes on the nails of both hands.
An airbrush makes it possible to achieve not only smooth transitions of shades on your nails, but also volume, imitation of a rough texture, graphic and artistic painting using additional design materials.
What is airbrush, how to work with the tool and what ideas and designs can be obtained using this technique? Let's look into the details.
What is airbrush nails
Airbrushing is the process of coating and painting nails with paints using an airbrush tool that delivers pigment under air pressure.
The process is also called aerial writing. In general, airbrushing on nails consists of designs and backgrounds made with paints using the fine spraying technique.
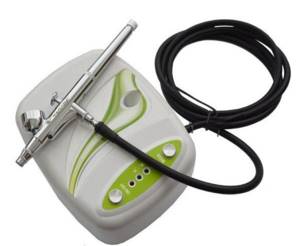
An airbrush consists of a compressor and a handle connected by a hose. The compressor pumps air under pressure into the handle. The handle contains a nozzle and a paint reservoir. The nozzle consists of two parts - material, for the material, and air.
The material nozzle comes in different sizes and varies from 0.15 to 0.2 mm to work with nail designs. Paint is supplied to the nozzle only when the handle is pressed. In the inactive position, the nozzle is closed from the inside by the needle, and paint cannot flow out of it.
There are two types of airbrushes for nails - simple and double action.:
- Simple - Allows you to control the flow of paint, but not the air flow. The tool is more suitable for working with stencils and creating three-dimensional drawings and graphic designs.
- Double-acting - They differ from simple ones by the presence of a valve that regulates the air flow. Thanks to this, the master has the opportunity to accurately draw the smallest details by hand. It can change the thickness or clarity of a drawing's edges, lines, and strokes.
Typically, an airbrush comes complete with cleaning brushes and a pipette for collecting paint. You can purchase more extended sets, with solvents and liquids for cleaning the device.
Airbrush in nail design: how to choose and use
Airbrushing can also be done with liquid coloring aerosols, where the pigment is in disposable or reusable containers.
Airbrushing differs from other types of design in the speed and ease of creating multi-color backgrounds and neat gradient transitions.
It significantly reduces the time spent by the craftsman on such manual processes and makes it possible to experiment with combinations of shades and quick stencil designs even at home.
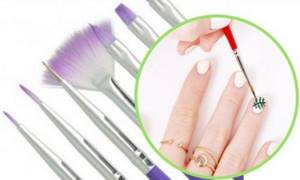
What brushes are needed for manicure: fluffy classification
If you go to the store unprepared, the variety of brushes can easily confuse you. Different thickness and shape, price category, how to figure it out?
The first classification is by purpose. Simply put, there are tools for extensions, and there are tools for nail art. So, if you just want to practice with non-trivial patterns, then the range of choices narrows.
Otherwise, brushes are divided according to three criteria:
- Material of manufacture. It can be artificial or natural. It is clear that the latter costs more. The best brushes are made from sable or kolinsky (this is a predatory animal). But, to be honest, in practice they are not much different, except that natural ones last longer.
- Pile thickness. The thinnest one is indicated by the numbers 0 or 00, and the plumpest one will have the sign 8.
- Form. There are instruments with a pile a little thicker than a hair, and there are those that open like a fan, and they all have their own purpose.
Materials for airbrush nails
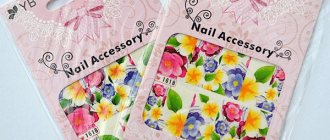
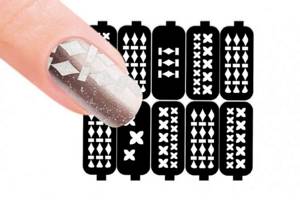
You can use an airbrush to create a whole range of nail designs: ombre or gradient, graphic designs, artistic painting with stickers and stencils, which are sold separately for working with the airbrush.
Airbrushing is performed on a completely finished varnish coating.
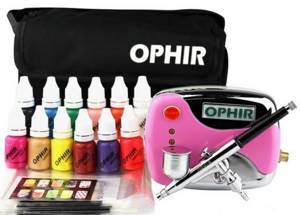
To design using this technique you will need the following set:
- Airbrush
- Airbrush paint set
- Pipette for collecting paint
- Stickers, stencils for drawing pictures
- Protective stickers for the skin around the nail (optional)
- Training tips
- Tweezers
- Acid-free primer
- Glossy and matte top
- Buff for natural nails
- Cleaner for removing sticky layer
- Airbrush cleaner, with brush
Airbrush paint is sold ready to use; 2-3 drops of color are needed to cover one hand.
Acrylic based paints are recommended. Popular manufacturers of acrylic paints for airbrush are Premium or Fluo. They can be purchased in specialized stores online or offline.
Preparation
Before you start creating a drawing or pattern, your hands need to be prepared. To do this, they are washed with soap, immersed in a warm bath consisting of water, sea salt, and kept there for 20 minutes.
- After the cuticle has softened, it needs to be processed and removed.
- The next step is to shape the nail plates using a nail file.
- Then a nourishing cream is applied to the skin of the hands and wait until it is completely absorbed.
Under no circumstances should you apply cream to your nails, this will ruin your future manicure.
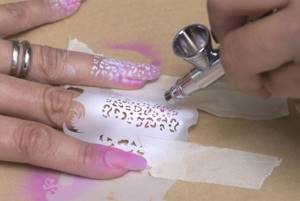
Airbrush design using stencils
A simple airbrush is designed for working with stencils.
Before applying the drawing, it is recommended to immediately think through the entire composition. This will reduce work time and you won’t have to redo it if you don’t like something during the process. You can make one nail on training tips to further focus on it. This is especially true when practicing first designs or mastering a new composition by masters.
When planning a design, one or more stencils are selected, the necessary paints are mixed or selected, the airbrush is adjusted and the paint supply distance of the tool is tested. It is convenient to do this on a napkin, a sheet of paper, or even a glove on your second hand if you are a salon master. The paint can then be washed off with water or a cleaner.
Airbrush stencils are made of flexible, elastic film. It sticks securely to the surface of the nail, gripping the side parts well. To ensure maximum adhesion, additionally go over the sides with an orange stick. This will prevent paint from bleeding into the cuticle area.
Stencils have clear and even edges thanks to high-precision cutting in production. The drawings are obtained without streaks or smudges, and are often indistinguishable from artistic painting.
The second type of stencils is applied. With their help, abstract drawings are created that do not require clear lines in execution. Such stencils are applied to the nails from above and then the pigment is sprayed with an airbrush.
Oil dry brush method
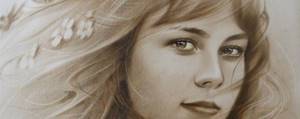
This technique of working with oil paints makes it possible to produce detailed drawings of shapes, while achieving a photographic effect. By the way, sometimes, in order to achieve maximum detail, mixed techniques are used, combining different materials. This is especially true for portraits, since they contain objects with different surface textures.
Dry brush technique: how to paint and with what
To start working using dry brush technology, you need to purchase:
- hard brushes (various sizes);
- oil paint (for example, carbon black);
- watercolor paper or other convenient surface;
- paint thinner (oil, diesel fuel, turpentine, water).
- gouache white;
- hard eraser.
The correct use of binders (oil, water) in small quantities is the main technique of the dry brush technique, since it is very important that the brush is dry. This can be seen by watching the dry brush technique video.
You can also use materials such as ink, acrylic and tempera as a dye. The thickness and texture of the paper is selected individually. If you have all the necessary materials, you can safely start painting with a dry brush from a photograph or from nature, it all depends on your experience. For beginners, it is advisable to study the dry brush portrait training course.
To begin with, you should draw barely noticeable thin outlines on paper with a pencil, since lines that are too flashy will show through the layer of paint. At this stage, it is advisable not to use an eraser in order to avoid the formation of lumps. After this, you can start typing in tone.
Having squeezed the desired color of paint onto the palette, it must be thoroughly rubbed to achieve a homogeneous mass. After applying the paint to the brush, you should run it across the palette several times to achieve even distribution throughout the pile. The brush should be almost dry, so if there is a lot of paint on it, it is better to repeat the process again. An overly oily brush can ruin the whole job.
Next, you just need to find the right tonal relationships. Additionally, video lessons specialized in the dry brush technique will help you familiarize yourself with the topic and test your own strengths.
Source: https://naydisebya.ru/risuem-v-tehnike-suhaya-kist
Preparing nails and cuticles for airbrushing
This stage is short but important. It consists of pre-treating the cuticle with a protective agent or cream, especially if the client has dry, sensitive skin. After airbrushing, the pigment is easily washed off with water or a cleanser containing alcohol or acetone, but with dry skin this can further dry out the cuticle area.
You can purchase protective cuticle stickers. They are attached around the nail to the skin, and after airbrushing they are disposed of. The stickers can be used on the second hand after processing the first; the sticky layer is enough for re-fixation.
Airbrushing is performed on a completely finished varnish coating. If it is gel polish, then the nails are painted in two layers. Then there are two possible surface treatment options, depending on whether you are using a topcoat with a matte or glossy surface.
When covering the gel polish with a matte top coat, the sticky layer is removed from it and then the design is made with an airbrush.
If you are using a glossy topcoat, then after removing the sticky layer you need to use a buff to slightly remove the shine in the area of further airbrush treatment. This way the paint will adhere much more firmly and the manicure will last longer.
It is important to buff the tips and sides of the nails so that the paint adheres well to these areas. After applying the design, the tips and surface are sealed with topcoat.
Simple nail patterns for beginners using gel polish
To ensure that the nail coating lasts a long time, gel polishes are used instead of regular polishes. Their cost is much more expensive, but this manicure can last for at least two weeks. In addition, you will need a special lamp for drying.
If we talk about drawings, then they should be performed in the following sequence:
- The plate is processed with Bafik. It is a special rectangular file;
- The primer degreases the nail;
- After applying the base, it is dried in a lamp;
- The pattern is made using the chosen technique;
- Then everything is dried again in the lamp;
- The pattern is covered with topcoat and dried again;
- Use acetone to remove the top sticky layer.
Application techniques here can be similar: foil, brush, ombre, stencils, sparkles and glitters, others. The main thing is not to overdo it with the design so that the manicure looks stylish.
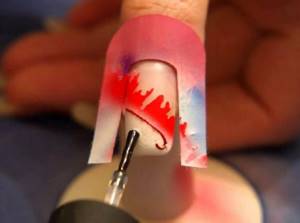
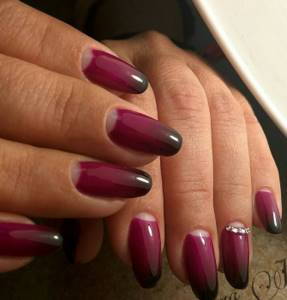
Step-by-step instructions for working with an airbrush using the example of a two-color ombre
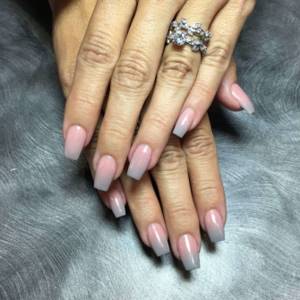
Using the example of the classic and most popular ombre design, we will consider step by step the features of working with the device. To prepare the airbrush, just plug it in, adjust the nozzle diameter and air flow intensity, and then fill in the desired paint. You will need a pipette and 2-3 drops of gray pigment. The intensity of the shade can be changed by diluting the pigment with a solvent for acrylic paints.
- Apply two layers of pink or beige gel polish, dry each in a lamp.
- We cover the nails with a matte top coat and dry them in a lamp.
- Remove the sticky layer from the top.
- Refilling the airbrush
- Testing the paint flow intensity and measuring the spray distance
- Using a pendulum swinging motion, spray the paint onto each nail in a very thin layer, increasing the intensity of the color through layering.
- Let the paint dry completely for another minute and apply top coat to your nails.
- Remove the sticky layer and the design is ready.
Experienced masters recommend applying the paint so that it lays on the nails in an almost dry layer, or “dries while still in the air.” When applying paint, it should not be visible in the air; only the intensity of the color on the sprayed background should change. It is better to work in more thin layers than to apply a lot of paint at once and end up with streaks and smudges.
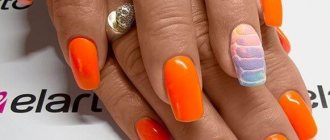
Gradient manicure ideas
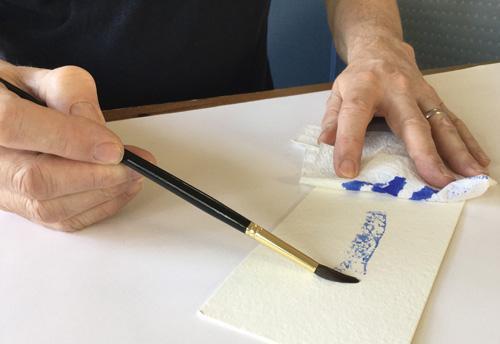
How to use the dry brush technique in watercolor step by step
Rob Dudley demonstrates the neatest way to create incredible textures using watercolors.
I find the dry brush technique to be the most useful of the watercolor painting techniques I describe, often used to convey the texture of wood, the scaly texture of a distant hedge or grass in the foreground.
In the painting above, I used a multi-layer dry brush technique to achieve the rocky texture, making sure each layer was completely dry before applying the next.
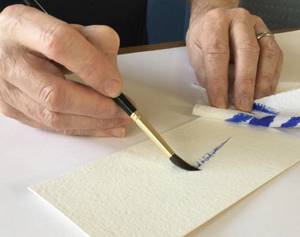
How do I use the dry brush technique?
You should work with quick strokes or light brush strokes on the paper, aiming to apply as little paint as possible to the surface.
If you think of the surface of your watercolor paper as a group of hills and lowlands, dry brush strokes will help add color to the mountain tops without drowning the valleys with water. As a result, on paper with a pronounced texture, these objects drawn with a dry brush will look more effective.
The brush is not supposed to contain any paint at all. I often have a roll of paper towels ready to blot up excess moisture from my brush or to remove paint from a surface.
It is also better to work on dry paper. If the recesses on the paper contain a large amount of moisture, then they will be evenly painted with paint and the entire effect created with the help of strokes will be destroyed. It's best to use a dry brush technique on small areas if possible, otherwise a poorly applied stroke will bleed and ruin the entire texture.
What materials are best to use?
It is better to use watercolor in tubes rather than in pens when using the dry brush technique, as they allow you to paint with a minimum amount of water, and at the same time maintain the consistency necessary for the work.
A round or pointed brush with sable bristles are considered the best brushes for this technique - I use a size 6 or 8. Using the tip of the brush is good for creating sharp, thin broken lines, which is extremely useful for painting boat mooring ropes or telephone wires.
Applying strokes with the side or center of the brush helps create broader strokes, such as a distant landscape.
A wide brush is suitable for creating a forest effect in bad weather. Drag the brush across the paper to apply the trees - simple and effective, especially if the bristles of the brush are wide and contain enough moisture.
1. wide, discontinuous texture
Hold the brush at an acute angle to the paper, so that the sides of the bristles touch the paper. Move quickly across the surface, leaving a mark, a wide broken line that follows the texture of the paper.
2 thin, sharp strokes
For sharper, less harsh strokes, increase the angle of the brush, placing it almost on the tip (almost vertical) in contact with the paper.
Source: https://urokiakvareli.ru/kak-ispolzovat-tehniku-risovania-suhoi-kistu
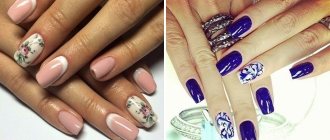
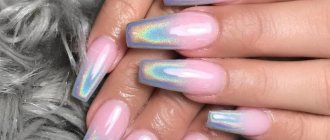
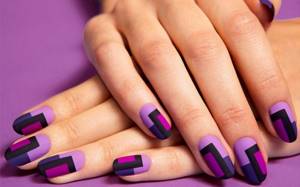
Design ideas using airbrush technique
Airbrush ombre
The device is capable of creating miracles of artistic painting on nails. To master the instrument, craftsmen usually need 2-3 days of work. They can make drawings in various techniques. The most popular and in demand:
- Ombre
- French
- Lunar
- Graphic transitions
- Flowers
- Small thematic images from templates
Silicone brushes
Progress does not stand still, and now almost every brush from the standard set has a backup in a silicone version. The name of such brushes is shapers.
“New Shift” can boast several advantages:
- Durability. No hairs deteriorate or become brittle, and the silicone is very easy to clean.
- Convenience. It’s not easy for beginners to draw the same smiles on a long-pile French coat. And such a brush is no more difficult to control than a pencil. In addition, the varnish does not spread on it.
- Versatility. In addition to drawing patterns with shapers, you can rub in pigments, shape the molding, smooth out the decor, use a sharp tip to erase your own flaws in the work, and even put rhinestones on the nail.
In the video, the master will tell you why these brushes are useful:
Whether or not to use shapers is your choice. You can buy a futuristic set to play around with original tools. However, absolutely everything that shapers can do can be easily done with ordinary brushes.
French
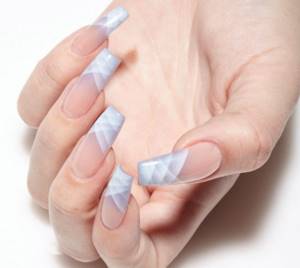
French airbrush
The same clear lines of French, only made with the help of sticky flats and gradient spraying, give new life to classic French design. It is better to perform on long nails in order to cross the strips several times. A half-tone of gray has been added to the white color, which creates an unusual play of shades at the junction of lines.

Another popular version of the French style, when a gradient is used for the background, and the tips themselves are painted over the fixed ombre effect. Use rich contrasting shades instead of black to experiment with this design with different outfits. Add rhinestones to your ring fingers to create a festive mood.
Design options for a French jacket - a selection of ideas
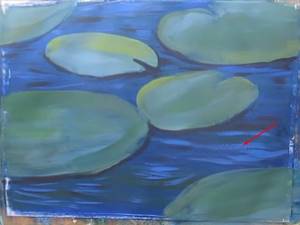
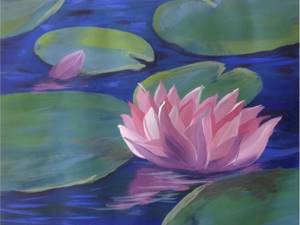
We draw water lilies on the water step by step with paints on paper
This drawing will appeal not only to children, but also to adults. We will create a picture of water lilies.
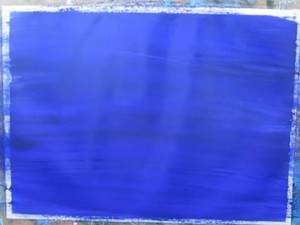
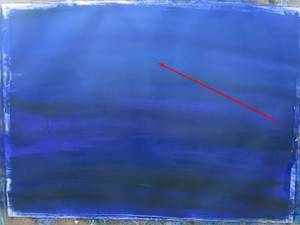
We will paint with gouache. And the first thing you need to do is create a background by applying dark blue paint to the entire sheet of paper.
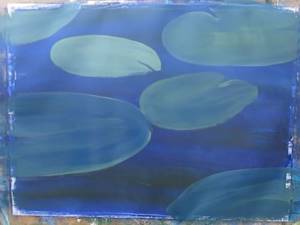
Then we take the green paint and apply it over the blue. But not with a second layer, but blurred in the lower and upper parts of the picture. The brush should be damp.
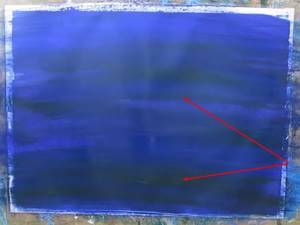
Similarly, rub white paint into the upper part of the drawing. Using a damp brush, blur it over the main background.
At the next stage you will need to draw the leaves of the water lilies. To do this, mix three colors: white, green and blue, and with the resulting shade we draw ovals, which will later become leaves.
Now mix white with green and yellow. Using this shade we draw contours along the edges of the leaves.

Mix white and dark blue. Similarly, add a few strokes to the leaves.
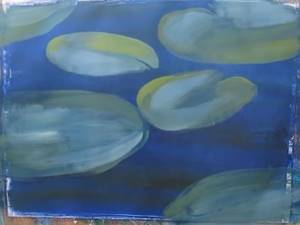
The final step is to add green on top of each leaf. but a little.
Then we mix blue with brown and outline each leaf with the resulting shade. At the same time, draw stripes on the water with the same color.
Now we mix the blue color with white and make highlights on the water. There are more of them in the lower part of the picture, and in the upper part there are smaller backgrounds.
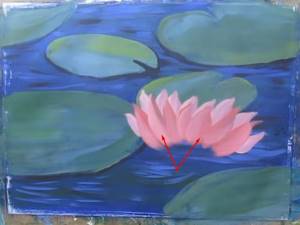
The leaves are ready, now you need to draw the water lily flowers.
Drawing water lilies
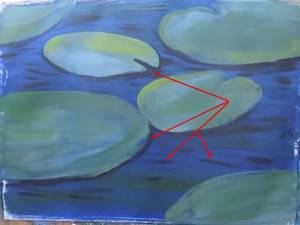
Mix white with pink, add a little blue. Using the resulting shade we draw the petals of the water lily flower. Apply each petal with a separate stroke.
Then along the edge of each petal we make strokes of white to give the flower volume.

These were the petals that are visible from the inner upper side. Now we draw the outer petals. This is the second row. Add more pink to make the shade more saturated. Apply the next group of petals. After we have drawn these petals, we also draw white along their edges.
Add a little white to this color, which was used to paint the second row of petals. With this lighter shade we draw the third row of petals.
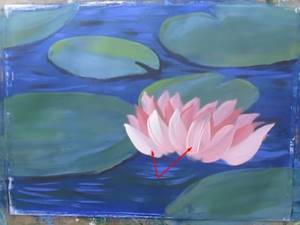
Mix pink, white and blue and draw the last row of petals. Add more blue and shade the edges of the petals.
Using the same color under the flower we draw a highlight or its reflection on the water. Then use blue to separate the flower from this highlight.
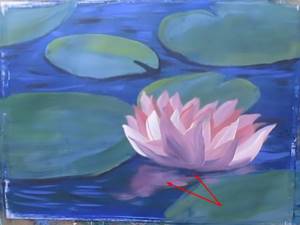
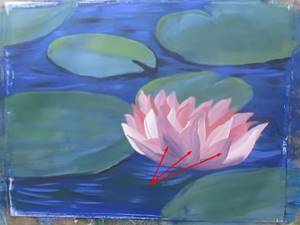
Draw an unopened bud next to it in light pink. Use brown paint to add a shadow to the leaves and blur it a little with a damp brush.
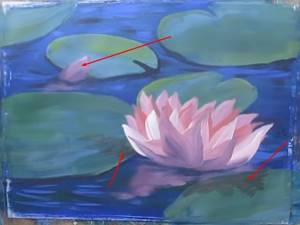
Using a light shade, add contours to several petals, stripes on the water, where the shadow of the flower is. These were the finishing touches. As a result, we got this wonderful picture.
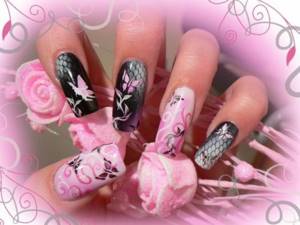
Graphic arts
The combination of different graphic stickers in one design gives an original three-dimensional effect. Combine two or three colors to highlight the play of lines. Before performing, try to make a design on tips to get symmetrical designs on all nails.
Geometry on nails - the best ideas for improvisation
How to combine with different colors and designs
The “Brush Strokes” manicure technique can be created with varnishes or gel paints of any color. But manicurists recommend combining three or four colors of varnish in a design. Moreover, one color should be bright or contrasting, and it is better to choose the remaining colors of varnishes or gel paints in the same color scheme.
You can apply strokes parallel to each other on all nails, or you can arrange them in a chaotic order. Here everything will depend on your mood or your wishes to the manicurist.
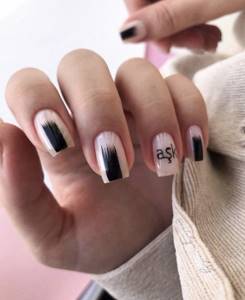
If you want something brighter, you can cover all your nails with red, white, black or neon polish and apply strokes of bright colors on top. For example, you can apply neon and crimson strokes to white nails. Or you can apply bright red and crimson strokes to neon nails. But, in the case of such contrasting combinations, it is better to use no more than two stroke colors.
The strokes look very gentle in combination with a nude manicure or with negative space. If you make the strokes brighter, then you can safely go to the party. And if you make them in pastel colors, then you can absolutely calmly go to the office or on a date.
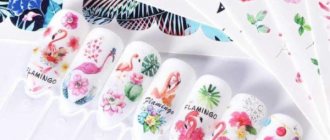
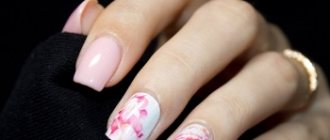
Flowers
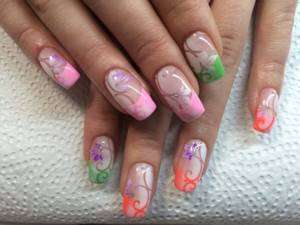
Flowers and artistic paintings receive special attention from fashionistas in the spring-summer season. You can make this design with an airbrush in half an hour. Abstract lines are made using one stencil, secured, and then a second layer is created with butterflies. The base is a colored French coat using green, pink and orange varnish.
Painting on nails: materials, step-by-step instructions, design ideas
Easy patterns on nails for beginners using stamping
Stamping is a method of transferring a particular design onto the nail plate using a stamp. This technique is considered not very complicated, but at the same time suitable for diluting a boring monochromatic manicure.

To master the technique you will need a little patience and a set of basic tools:
- A flat metal plate with engraved patterns;
- A stamp with a rubber or silicone base to transfer the design from the plate to the nail;
- Scraper for removing excess varnish from a disc.
Reference! A positive feature of the technique is the speed of execution. It can take up to two hours to apply the appropriate pattern by hand. The stamp allows you to complete the full process cycle in 15 minutes.
Step-by-step stamping scheme:
- It is necessary to degrease the surface of the nail and apply a base;
- Cover the plate with the main color and let it dry well;
- The stencil is coated with the second varnish;
- It is worth leaving the varnish exclusively in the recesses, and the excess is removed with a scraper;
- The image is transferred to the rubber surface of the stamp;
- You should first mark the places for the stamp on the nail and press the device firmly against the nail;
- If for some reason the pattern ends up on the skin, the excess is removed with acetone;
- When everything is dry, the design is covered with topcoat.
Combination of stencil designs
In one composition you can combine several stencil options: mesh, butterflies, flowers and ornate lines. When you have the time and desire to create, experiment with existing templates. Combining designs involves working on long nails to accommodate several different elements.
Dry brush - Drawing and painting techniques
Dry brushing with oil paints is usually divided into the classic technique of oil painting on canvas and painting on an unprimed surface (canvas or paper). That is, in classical painting it is also called dry glaze.
Transparency is usually preserved, but some color saturation is lost in the lower layers. Such painting can be multi-layered, and artists use white to compose the color. The layers are overlapped using dried paint and finally varnished, as the paint dries out a little.
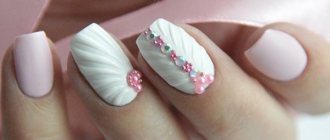
Wedding design

Using an airbrush, you can create delicate romantic nail designs in white and pink tones. All that remains is to complement them with festive decor - sand, rhinestones, sparkles, stucco. A big plus is the ability to evenly spray pigment on large, rough surfaces, where a sponge does not allow for such gradient transitions.
Wedding manicure ideas - from classic to avant-garde
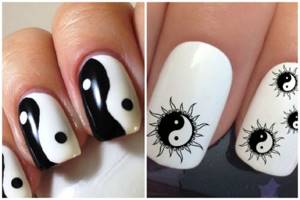
Lecture 1. “Yin and Yang”
You will need: base coat, light and dark varnishes, top coat.
Instructions:
- Apply the base coat and wait until it dries.
- Using white polish, divide the nail into 2 parts.
- Using a light polish, paint over the left half of the nail, then cover the right half with a dark polish.
- While they dry, apply 2-3 drops of varnish of the opposite color with a brush. Those. dark drops on a light background and vice versa.
- Use a brush to make streaks.
- After complete drying, seal with top coat.
Play of textures: velvet sand design
For short nails, an original solution would be not only a combination of shades, but also working with different textures. It can be acrylic powder, velvet sand, sprinkle beads, melange, flock. Spraying a second color additionally emphasizes the volume of the texture used, attracts attention and allows you to create bright, original designs. Take the idea and try it in the next image.
For a practicing craftsman, having an airbrush becomes simply a necessity among demanding and creative clients.
If you need to save time and get new, enthusiastic recommendations, add it to your arsenal of tools. It will take several days to master the technique, and then working with it will turn into a complete pleasure. Which ideas will you try first? Share with us in the comments. Comment
Lecture 2. “Rainbow”
You will need: base coat, 3-4 multi-colored varnishes, silver varnish, fixative.
Step-by-step scheme:
- After applying the top coat to the nails, cover them with any varnish at a distance of 2 mm from the cuticle and wait until dry.
- Apply another color at a distance of 5 mm, and do the same with all other shades.
- Take a thin brush and draw silver lines where the shades meet.
- Apply sealer.

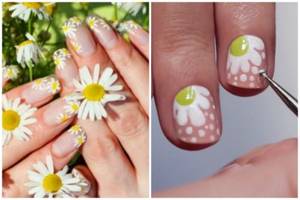
Lecture 3. “Chamomile Glade”
You will need: base, green, white and gold varnishes, fixative.
Step-by-step diagram:
- Apply base coat to your nails.
- Cover the nail with green color and wait until it dries.
- Use a brush to paint 3-4 dots in white - these are chamomile petals.
- Use gold to draw the center of the flower.
- Finish the procedure with a fixative varnish.
Lecture 4. “For lovers”
You will need: a base base, 4 contrasting varnishes (less possible), a fixative varnish.
Execution steps:
- After spreading the base coat, apply the background color to your nails and let it dry.
- Place 5 dots with other colors and draw lines through the centers of the drops with a brush so that they look like hearts.
- Secure the result with a fixative.

Creating art on nails is a very exciting process that any girl can do step by step. Be creative and be inspired by our works.