It is called ombre, degrade, gradient design. It lengthens the nail plates and looks bright and elegant. You can perform a gradient manicure manually or with an airbrush device. Materials – varnishes, paints, gels, acrylic powder. A modern master may have several methods and techniques in his arsenal.
We will look at what is needed to create a gradient on nails, the most popular techniques in step-by-step instructions, and also share bright and inspiring ideas. Let's get started!
What is a gradient in manicure, features in preparing the design and choosing colors
Ombre or gradient is a manicure built on smooth horizontal, vertical, diagonal transitions of several shades of varnish or paint on the nail plate.
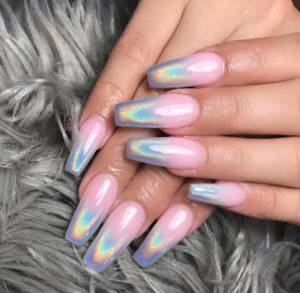
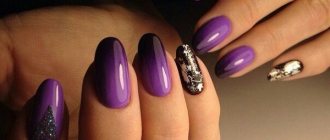
Gradient with mirror rubbing
Rubbing: what it is, how to use it and all application methods with step-by-step instructions
The most popular option is a combination of two or three colors. The darkest or densest color always “works” in a set. It will be required the least, and it is it that affects the saturation and coloring of other colors.
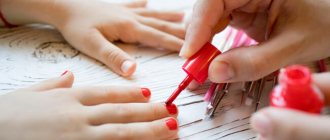
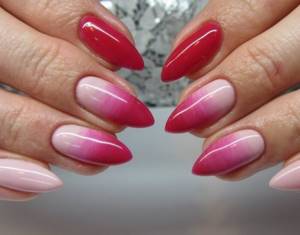
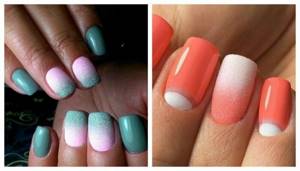
So, when creating a manicure, a gradient of red and pink colors - darker red must be introduced with a brush into pink, smoothly painting over the intermediate zone and creating a third, coral color at the junction.
The most complex combination of shades is the black-red gradient. Masters say that once you master black and red ombre, all other combinations will seem easy to perform. This is due to the fact that black is the dirtiest color in the palette. Even the smallest uneven strokes or an extra drop of black can ruin the entire transition. Especially if you work with a brush.

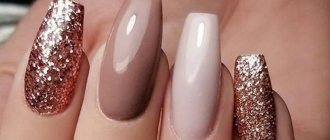
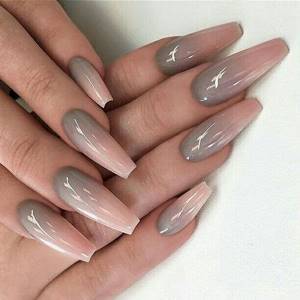
Nude ombre with mirror rub
Nude manicure ideas
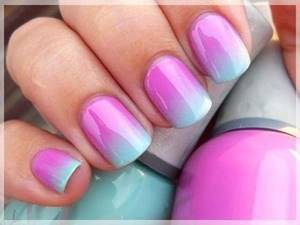
It is better to choose shades for a gradient based on the color wheel. Neighboring colors of the same group go well together, cold with cold, and warm with warm. Contrasting tones look original.
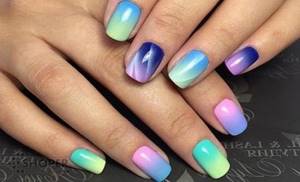
The easiest way for beginners is to work with neon gel polishes when drawing a gradient in a manicure. Neon colors blend perfectly on the blending line, and ombre always results in an almost imperceptible transition.
- For the base it is recommended to use white varnish. This is more true if you use loose, soft shades for the gradient. White makes light and pastel colors brighter and more expressive.
- The second option is to use the lightest shade of varnish from those selected for the composition for the base. If the colors are well pigmented, you can work without a base coat, applying the shades directly to the varnish base.
It is recommended to apply two or more layers of gradient, be it varnish or paint. Beginners can use self-leveling gel polish to get a perfectly even coating even at the stage of mastering the technique.
Types of gradient manicure
A gradient is a nail design that uses several shades of polish that smoothly flow from one to another. It looks impressive on paper, but even more impressive on nails.
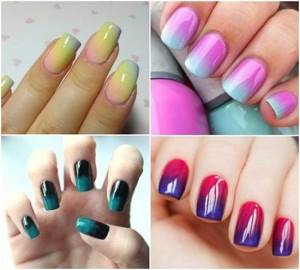
Types of coating using gradient technique
There are several types of gradient manicure.
Their choice largely depends on the shape of the nails and their length:
- Vertical is a traditional gradient option. It can be called universal, as it suits all nails. With a vertical manicure, the transition of shades occurs from the root part of the nail to the tip. A video tutorial on gradient gel polish on short nails can be seen below.
- Horizontal. The color changes from the left side of the nail to the right. More suitable for medium-length nails. This manicure can visually lengthen your nails.
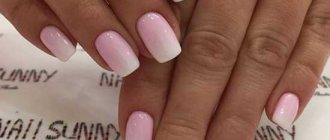
- French. White is applied to the edges of the nails and made more transparent closer to the roots. This type of manicure is suitable exclusively for girls with graceful fingers and long and thin nails.
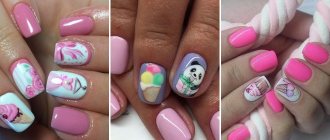
- Gradient with transition. Fingernails are painted with different gel polishes, close to each other in tone. This creates an overall picture of the transition from dark colors to lighter ones. This option is the simplest and is suitable for short nails.
- Linear. Thin lines, straight or curved, are drawn on the nails. Each new line is made a tone darker than the previous one.
Vertical gradient
For a gradient, both tones of the same color and completely different colors are used. Usually they take from 2 to 4 colors.
A manicure with a color transition can be done with regular varnishes, but everything will have to be done very quickly, before the varnish has time to dry. It is much more convenient to create a gradient on your nails with gel polish. This material does not dry in the air, and besides, such a manicure will last much longer than a traditional one.
Horizontal Gradient
Materials needed to make the gradient
Depending on the chosen method of applying the gradient, you may need different materials and tools. We will provide a list of everything you need, and all you have to do is choose what you need for each specific design from the methods listed below.
- Gel polish in 2, 3 shades or shellac
- Acrylic paint when working with an airbrush or sponge (optional)
- Gel paint
- White gel polish or shellac for base/base
- Base, top for gel polish
- Degreaser, dehydrator
- Brush: flat, comb, fan
- Acrylic powder of different shades (for design with gradient powder)
- Pigments (for ombre manicure with pigments)
- Cuticle protector: cream, tape, liquid cuticle tape, cuticle stickers
- Final cuticle oil
On the Internet you can find many instructions and life hacks on how to make a comb brush yourself. You can take any flat brush for watercolor or acrylic paints and trim it with scissors.
Comb brush for ombre manicure
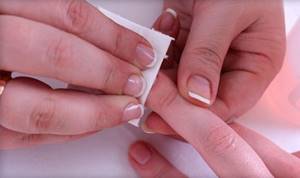
In order not to wash off the paint or varnish from the cuticle with all available means, it is better to protect it before starting work. You can carefully apply the nourishing cream, but if it gets into the gel polish when working with a sponge, the polish will swell with bubbles.
Manicure brushes - types, purpose, how to choose and care
At home, regular tape or PVA glue for cuticles is often used. In salons, professionals use Skin Defender - this is a liquid product that resembles the action of PVA glue. We apply it to the cuticle, it hardens, forming a thin elastic film. After applying the gradient, simply remove the film and the skin remains clean.
What does the French jacket go with?
- Use contrasting shades that match the color of your clothes or accompanying items (handbags, jewelry, makeup) - your manicure will not go unnoticed.
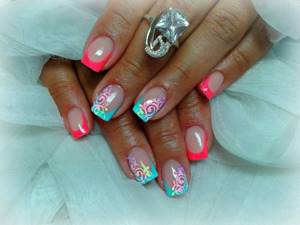
- Bolder complement the jacket with various decorative elements: Rhinestones, sparkles, beads and so on are a great way to stand out from others at holidays and parties.
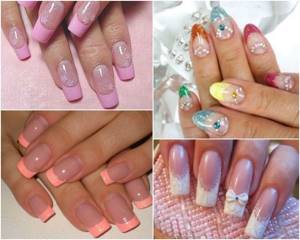
- People who do not want to draw attention to themselves may use pastel colors with a white border, and those who like to be in the spotlight will choose a combination of bright, catchy contrasting colors.
This is where we will end our conversation. Use the information for your health and feel free to experiment! If you have any additional questions about the topic of the article, ask them, I will certainly answer you. In addition, if you are not lazy and want to share your French jacket design, show photos, share information, I have been very curious since childhood and try everything on myself. Thanks in advance and good luck to you!
Gradient with a sponge: how to make gel polish
A popular, simple and proven way to create a gradient. You can work either with a special sponge for ombre or use a regular kitchen sponge with small pores. An alternative is a car wash sponge. Usually these are finely porous large sponges; this supply will last for a long time.
A new sponge can be washed and dried, or taped over the work surface to remove fine dust and particles. They will definitely get stuck in the varnish layer and may cause bubbles.
- Apply a base or white base.
- Place 2 drops of varnish shades on a piece of foil and mix them with a stick to create a transition of shades.
- Dip the sponge into the colors and apply it to the nail so that the stripes are positioned horizontally. If desired, you can do this vertically or diagonally. To avoid “bubbles”, you can press the sponge against the foil once or twice, removing the air, and then move on to the nail.
- Using patting movements, transfer the design to the nail. You can’t pull the shades so as not to blur the transition. Make 2-3 layers.
- Dry in a lamp and cover with top.
- Remove the dispersion layer and process the cuticle.
Second method with a sponge:
- Cover your nails with a white base or base coat.
- Paint the nail with stripes of the varnish chosen for the gradient.
- Use a sponge to mix the layers on the nail using patting movements, without pulling.
- Repeat in 2 or three layers. It is recommended to take a few minutes break between them so that the varnish “settles down”. Remove the excess with a brush and wait for the bubbles to settle.
- Only then dry it in a lamp.
- Cover with top coat, dry, remove the sticky layer.
- We process the cuticle.
Nail preparation
Before creating a gradient, you need to prepare your nails:
- Sand the surface of the nails with a buff.
- Adjust the length.
- Apply primer to them and dry under a UV lamp. The primer makes the nails drier, improving their adhesion to the polish.
- Apply base coat and dry it. Usually the base is transparent, but sometimes it can have a pink color.
Nail preparation
After preparing your nails, you can proceed to their design.
Gradient flat or comb brush with gel polish
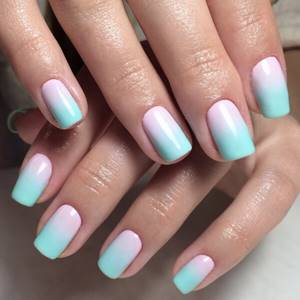
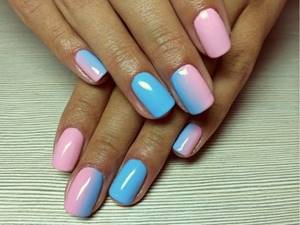
- Cover the nails with a base layer of gel polish. It can be a white or pink shade, as it is lighter in the chosen combination of pink and blue.
- On the base layer we apply the shades selected for the gradient - pink in the upper part and blue in the lower part. Varnishes can be applied at the joint or left a small gap if they are dark, contrasting tones, so as not to smear the brush.
- Wet the brush in a cleanser to achieve the effect of light moisture. Then it is convenient to wipe it on a cotton pad, also soaked in cleanser. Some craftsmen use wet baby wipes for their work. The brush is initially blotted with a napkin, and then all remaining varnish is also removed from the brush with a damp napkin while working.
- Holding the brush almost parallel to the nail, we begin to “pull” the pink color down from the cuticle with light touches, moving from side to side. It is important to immediately outline to what area you will “pull” the top color, and more intensively remove the color from the brush in the final transition zone.
- We do a light ombre in two or three layers. We dry each one in a lamp.
- We start the new layer by applying shades along the old transition lines, then tighten it again with a brush.
- It is important to constantly remove excess varnish from the brush. In the area of the free edge, the layer should be thin and neat.
- We seal the resulting layers with an ombre top coat and dry them in a lamp.
- Remove the sticky layer, remove the protection from the cuticle and treat it with oil.
Advantages
- amazing durability and preservation of original beauty;
- fight against fragility and delamination, and in the future – prevention of such ailments;
- strengthening and compacting the nail plate due to a dense gel coating;
- giving your fingers a neat and tidy appearance;
- the ability to refresh the entire image;
- the appearance and preservation of incredible shine for several weeks ;
- the ease of implementation will surprise even the ignorant and inexperienced.
Gradient fan brush
We do not get such an even and smooth transition as other methods, but the technique allows you to work quickly and get good results even for beginners.
- Apply the base pink color in two layers.
- Mix pink and red 1:1 on foil, and apply the resulting color to the transition zone on the nail with a brush.
- Apply red color to the tip of the nail.
- Wet the fan brush by pressing it against a napkin soaked in clinser.
- We place the brush perpendicular to the nail and “sweep” the layers of varnish from left to right again and again until we get the desired intensity of the transition.
- Dry it in a lamp.
- We repeat everything with the second layer, dry it in a lamp.
- We fix the result with a top coat and process the cuticle.
Modes and Opacity
There are two more unaffected options in the options bar: modes and opacity. We will not consider them in detail. These options affect how the gradient will blend in with the contents of other layers. If you're familiar with layer blend modes, they work pretty much the same way for gradients. And the Opacity function works similar to the opacity in the layers panel. Now you know what gradients are, what they are for, and what types and styles there are. I hope you learned something new and useful from this article.
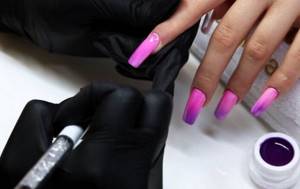
Gradient pigments
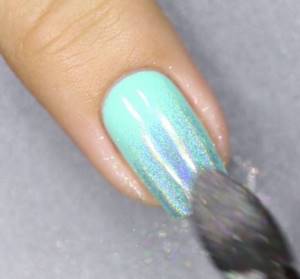
For the base, use white gel polish or just a base. If pigments are used to create the entire gradient in two shades, and not half of the nail, then a silver layer of varnish or just a base will be enough. The sticky layer does not come off.
- We cover the nail with two layers of colored blue or turquoise varnish.
- Using a flat or round brush, select the pigment and place it on the sticky layer using small strokes and lightly patting movements.
- We move from the zone of maximum color intensity to the transition zone, depending on how you arrange the shades.
- We make the layer of pigment thin but dense.
- If you combine two pigments, then start applying it in the same way from the edge to the middle of the nail. In the middle, where two pigments meet, carefully mix them with a brush, drawing one into the other. We get the pigment and put it where the bald spots form.
- We seal the result with topcoat.
- We process the cuticle.
Options for applying a “cat eye”, what 3D gel polishes and pigments are available and how to work with them
Transparency option
The Basic to Transparent gradient is mainly used to darken the edges of an image or darken the sky in a photo. In a word, to increase the detail of the image. When you work with this type of gradient, pay attention to the Transparency option, it should always be active.
Otherwise, transparency is turned off and the stage is filled with the selected foreground color.
Degrade with acrylic powder
A simple method suitable for beginners. The fine, free-flowing texture gives a transition effect with a minimum number of strokes.
- We paint our nails with white varnish and dry them in a lamp.
- We cover the nails with top, leaving a dispersion layer.
- Place one shade of powder on a fan brush and sprinkle it onto half of the nail with small movements. We start from the zone of the most intense color location and move towards the transition zone as the amount of powder on the brush decreases. The higher the brush is above the working surface of the nail, the wider, thinner and blurrier the layer is, so closer to the shade mixing area we raise the brush higher.
- Shake off excess powder periodically to ensure even coverage.
- We do the same with the second shade of powder.
- Dry it in a lamp.
- Brush off any remaining powder with a brush.
- Use a soft buff to remove rough bumps to achieve a uniform coating.
- We process the cuticle.
Creating a new document
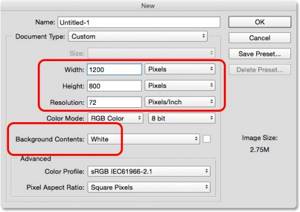
We'll start by creating a new document. To create, go to the File > New menu.
The New dialog box opens. I used the following dimensions for the document 1200x800 pixels. The size I specified does not play a huge role here, so you can set any one you wish. Leave the resolution at 72 pixels/inch, the background content is white. After all changes, click OK.
Shellac gradient: how to do it with an airbrush

Time- and effort-efficient gradient. You will need an airbrush and paint for it. With the help of airbrushing, a very smooth and gentle transition is obtained, especially in the case of white and beige shades. Airbrush is popular for creating French manicures and wedding manicures. Read more about the possibilities and techniques of airbrushing in nail design.
- We cover the nails with shellac using the base color.
- Let's dry it.
- We fix the shellac with a top coat.
- Remove the dispersion layer.
- Fill the airbrush with white pigment.
- Spray the paint in a thin layer, wait 2 minutes for it to dry.
- We secure the result with a top coat.
- Remove the dispersion layer.
- We process the cuticle.
Airbrush in nail design: how to choose and use
The final stage of manicure
After creating the design, you need to dry your nails under the lamp for 4-5 minutes. After this, you should fix the gel polish with a top coat. After the nails are completely dry, the cuticle must be lubricated with a special oil.
Author's gradient
Gradient gel polish manicure is a fashionable and practical way to decorate your nails. Many options for performing multi-color manicure allow you to find a suitable design for every woman. The technique of creating a gradient manicure is not complicated, but it does require patience and time. Step-by-step implementation of the technology for creating a gradient will make your nails beautiful even at home.