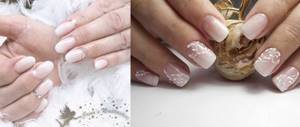
Led Baby Nails is gel nail modeling using the ombre technique. Allows you to create different shades of manicure: from elegant beige to doll pink. Will fit perfectly into the daily life of any girl. Led Baby Nails is not a new trend in nail design; it has already become a classic, as it can be combined with different clothing styles.
A smooth transition from one shade to another can be done in different ways, but transitions in the Baby Nails style should be horizontal. If desired, you can create a delicate or more intense nail design. The variety of beige and pink shades in the gel polish palettes allows you to create designs for every style and taste.
For such a manicure, it is best to go to a beauty salon and see real professionals. However, if you are a creative person, you can try to perform a simple version of ombre nails yourself. By the way, we have already told you how to do this in this publication.
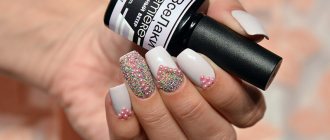
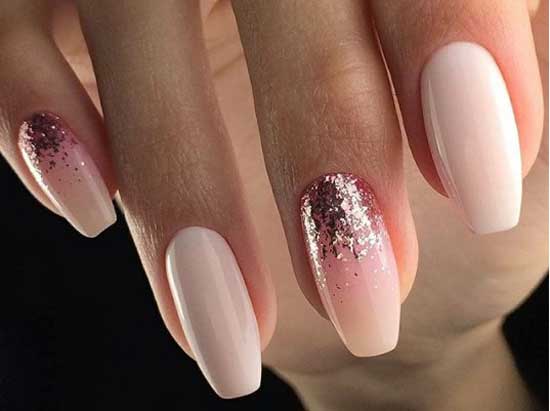
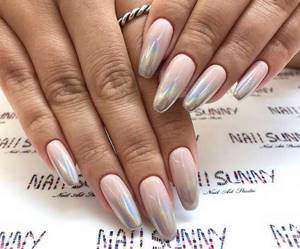
Shiny baby nails
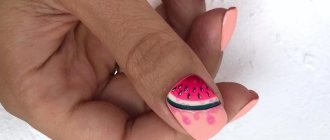
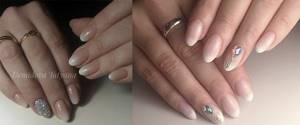
An ombre manicure can be not only in the form of a color transition from the white tip to the darker hole of the nail. The effect of a smooth stretch can be carefully decorated with sparkles. This design conveys not only a festive mood, but also a summer one, as delicate natural tones create an incredibly beautiful effect.
What is a Baby Boomer? How is it different from the classic gradient and French manicure?
The name Baby boomer became the official name of this type of ombre manicure with the light hand of nail artist Terry Malone. It takes us back to 1946-1960. Ladies born during this period preferred a manicure that was discreet and unobtrusive, neat and elegant, emphasizing the beauty and well-groomed hands of a woman and not overloaded with complex decoration. Its main emphasis is a very smooth and soft transition from the bright white free edge to the nail hole. And the main advantage is maximum naturalness and the illusion of naturalness. That is why, when creating a baby French coat, coatings of camouflage shades are used, requiring the master to have a trained eye and experience in the intricacies of selecting colors and halftones.
Baby boomer
- this is a kind of second “I” of a girl, regardless of her preferences in length and shape, the naturalness or extension of her nails. Stylish, airy, delicate and unpretentious, this design remains at the peak of manicure fashion, allowing beauties to pay more attention to makeup and outfit, as well as pleasing the eye under a strict work dress code. Among its advantages is the fact that the “boomer” does not limit the lady in the ways of his embodiment. It looks equally stylish and expressive in both varnish and gel polish versions. Lovers of super-durable manicures flaunt an acrylic boomer (or a polygel version of it), and fans of interesting accents create this look using vinyl stencils and air puffing (or an airbrush).
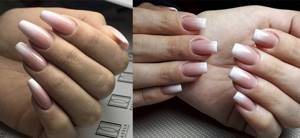
Initially, baby nails assumed a simple classic nail shape - short length and a smooth oval, without a clear smile line. However, with time and the evolution of materials for modeling artificial nails, boomer nails have become common on “almond”, “square” and even coffin-nails shapes. The smoothness of the transition and the ability to select the shade of the coating as close as possible to the natural color of the nails allows you to resort to this design in cases where a girl wants to visually correct the shortcomings of her native nails (change the shape, length, convexity). How can you quickly, correctly and aesthetically bring this image to life on your fingers? Let's learn all the subtleties!
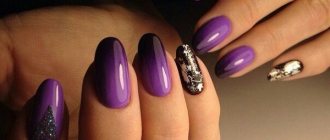
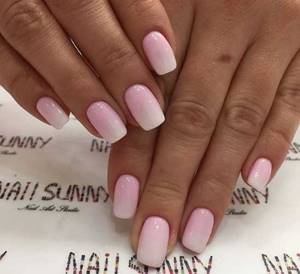
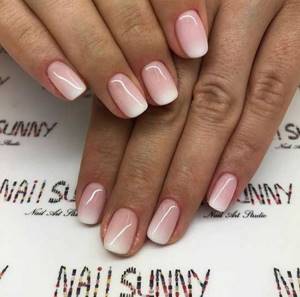
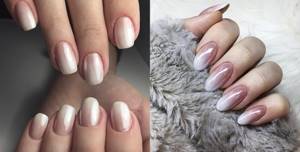
Doll pink
This year's trendiest and most stunning shades of pink look stunning either on their own or in an ombre design. Is it possible to ignore such a delicate manicure? A summer design that is amazing in its delicacy. Pastel colors on nails always look impressive and attract attention.
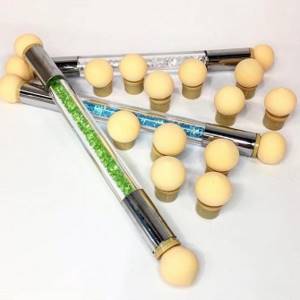
How to airpoof a baby boomer: gradient poufs on Aliexpress
In addition to such brushes, aeropuffing has now appeared on sale. It is a thick stick, at the tips of which there is a soft, microporous sponge on one or both sides. It slightly resembles a sponge in its texture, because this tip, that is, the pouf itself, contains the maximum number of pores, which are very small in size.
Thanks to this, there are no visible bubbles on the nails, which often happened when blending gel polish with sponges. These air puffing attachments are removable and can be washed and cleaned for reuse. The technique for performing aeropuffing is quite simple.
Aeropoofing on Aliexpress can be found here.
Airpoofing
Instructions:
- Usually carried out by manicurists when applying camouflage nail polish extensions, that is, camouflage gel or acrylic
- After the nails are done or adjusted, they can be slightly buffed. Because a matte top or rough surface allows you to hide all imperfections and also make the transition smoother
- Now you need to drop a little thick gel paint or varnish onto the palette and saturate the airpuffing itself with the coloring composition several times using point movements.
- Next, several pressures are applied to the free part of the palette or to the napkin so that the remaining paint remains on the paper or napkin
- After this, starting from the free edge of the nail and gradually approaching the middle, point pressing or tapping movements are carried out
- Initially, this aeropuffing will not be able to achieve a perfectly smooth transition, due to the fact that there is a large amount of paint at the tip of the pouf.
- Therefore, it is necessary to turn the handle over so that the tapping movements are made with the side part, that is, the clean side
- Now, you need to move not from top to bottom, but directly from one edge of the side roller to the other edge, directly in the border area where there is an uneven transition
- Thus, with the help of a dry, clean pouf, you will be able to shade this border as much as possible and absorb the remnants of the coloring composition
- After this, the gel polish is dried, if necessary, if the coating is unclear, apply the second layer in the same way
- In this case, the cuticle area is not touched by the airpoof, that is, it is not touched. The work is done directly from the tip of the free edge to the middle of the nail bed
Baby Boomer
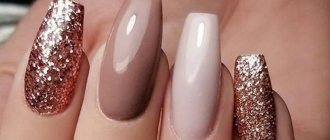
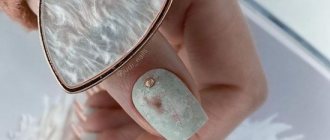
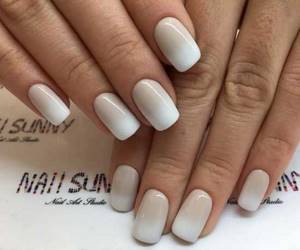
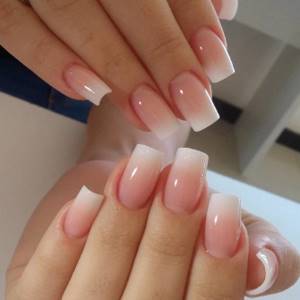
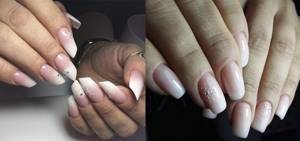
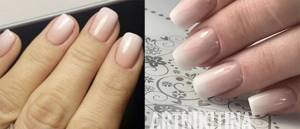
Beige baby nails
An essential nail design for an elegant woman. The most delicate combinations of beige and white remain in trend this year.
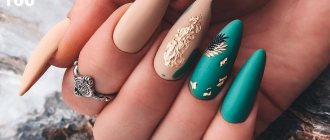
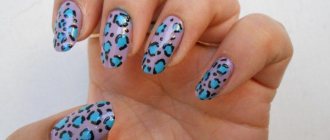
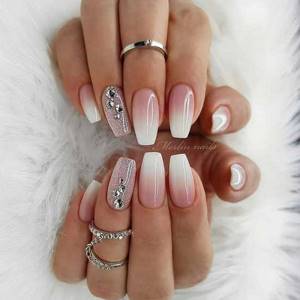
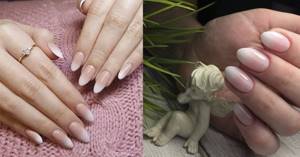
Combined design
Baby nails combine beautifully with other nail designs, such as moons. And with decorative crystals, monograms, foil, caviar manicure. Options with rubbing look very impressive and festive. The color of the gradient also matters. For example, a combination of pink shades looks great on tanned hands, and a cool beige color scheme is better suited for ladies with aristocratic pallor.
- We recommend on the topic: Pearl manicure, 15 options for tanned hands.
- Beautiful manicure for a seaside holiday, bright ideas for summer.
How to create a baby boomer with gel polish, varnish or acrylic?
Since this design is based on the classic horizontal gradient technique, creating such a design using any coating is very simple. In many ways, the beauty and grace of such nude manicures depends on the well-groomed hands and nails in general. Therefore, giving preference to boomer nails, take care of your skin and nails a day or two before creating a manicure. For example, by performing a spa manicure, or treating your hands to a paraffin therapy procedure (cold or classic hot. If you don’t have time for long rituals, try the express option: mask-gloves.
When starting the actual design, complete the basic preparation. Namely: treat the cuticle with remover or remove it with scissors, adjust the length and shape of the nails with a nail file. If there are aesthetic defects in the nails, select a healing or leveling base (for varnish or gel polish design). Before applying the base, do not forget to lightly remove the gloss from the nail with a buff and wipe it with a degreaser.
Baby boomer on nail polish and gel polish
We talked in more detail and with all the important details about the secrets of gradient design in our educational articles:
- Fashionable lacolette - gradient manicure with thermovarnishes and thermogel varnishes;
- Gradient on nails: photo ideas, tips and secrets, educational photos and videos.
Therefore, within the framework of this article, we will only reiterate the importance of choosing several shades for a smooth stretch, selecting several brushes to create a transition (thin brush and flat brush for a gradient), as well as having in your beauty arsenal such necessary auxiliary tools as: a sponge for a gradient, a palette or silicone mat for mixing shades, a liquid or clinser for gel polish, a corrector for eliminating random blemishes, as well as liquid manicure tape, which greatly facilitates the creation of this design.
In the gel polish version of the boomer design, the master can save a little time and make the manicure less “thick” in terms of the number of layers of materials applied, if instead of the classic transparent base he uses a densely pigmented camouflage coating. It can be either camouflage without decoration or a tint base, the texture of which is decorated with microshimmer.
Let's also consider creating a delicate milky French boomer using no less durable and expressive materials - acrylic powder and a new item in our range - acrylic gel (polygel)
Acrylic Babyboomer can be done in two ways - by applying colored powder to gel polish or by creating an acrylic mixture with monomer and then forming a stretch mark on the nail. The second method requires extensive experience working with acrylic nails and selecting a slow-hardening monomer. Only in this case will you have time to simultaneously apply two acrylic balls to the nail and smoothly stretch them, forming a beautiful milky pink (beige) stretch mark. In the combined version, you will definitely need a device for drying the design. This method is simpler and more accessible for beginners to master.
Let's do it step by step:
- We apply a layer of gel polish base (classic, rubber or camouflage - depending on the needs of your nails) to the previously prepared nails, dry it in a lamp;
- We cover the nails in 1-2 layers with white gel polish of a creamy texture, dry it and cover it with top coat. We try to keep the top layer thin. In this case, you will get a neat and delicate design, and too many acrylic grains will not stick to the top;
- Take beige-pink acrylic powder and a fan brush. Apply powder to the undried top with light tapping movements in the direction from the cuticle to the free edge;
- A little before reaching the area of color mixing (approximately the middle of the nail), we raise the brush higher to reduce the area of acrylic scattering. This way the powder will lie softer, at the base of the nail its layer will be denser, and at the middle it will be translucent, blending beautifully with the French stretch;
- We repeat the same steps with the white acrylic color, scattering it from the free edge to the middle of the nail. Once we get a smooth mixture of shades, we send the nails to dry in the lamp. After drying, brush off excess acrylic from the skin with a brush;
- Using a soft buff, carefully polish the finished design so that the nails become uniform and smooth. We remove the dust again and cover the design with topcoat. The finished Boomer can be supplemented with decorative elements that suit its style.
It is no less simple and convenient to create this type of air gradient using acrylic gel (polygel). The undoubted advantage of this material is that there is no need to use a monomer, mix the material and maintain proportions. Performing a manicure requires the use of a lamp to polymerize materials. Let's look at it step by step:
- We apply a layer of primer to previously prepared nails to improve the adhesion of the base to a layer of colored decorative material and air dry it. Next, make a base for gel polish and dry it in a lamp;
- We pick up a ball of camouflage shade of acrylic gel (polygel) with a brush or an orange stick (depending on the product packaging) and apply it to the nail. Wetting the brush in a clinser, stretch the acrylic gel from the cuticle to the free edge of the nail, gradually reducing the thickness of the material laid out;
- We repeat the same steps, but with a white shade of acrylic gel. Using a hard fan brush, mix and stretch the border of the colors;
- Next, you need to dry the coating in a lamp: 2 minutes in a UV device or 1 minute in an LED lamp. And sand the finished design with a buff or nail file to create a uniform surface;
- We remove light dust with a lint-free cloth soaked in a client, cover the nails with topcoat and polymerize it in a lamp;
- We complement the final design with suitable moderately shiny decorative materials.
A little advice: when working with polygels, for more convenient and comfortable work, use tips or reusable forms for laying out the material. In the case of tips, the polygel is applied to their reverse side, and then pressed tightly against the nail (the material is transferred in the form of a kind of acrylic “slider sticker”). When the manicure is ready and covered with top, it’s time to think about whether you will wear it solo, in its pristine beauty, or want to complement it with decorative elements.