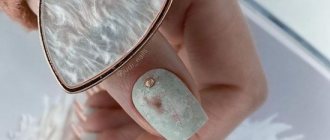
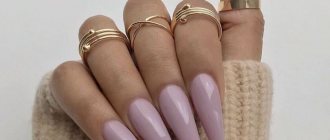
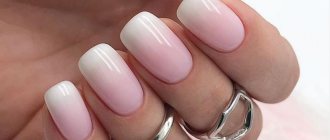
Hi all! Here I want to talk about such a fashionable accessory for nail design, which is called Melange. You can find other variations of its name online: marmalade, sugar, ice cream. In fact, it's all the same thing. Next, we will take a closer look at what it is, how to use it and attach it to nails, and also consider design options using melange.
Melange for nails (sugar, marmalade, snowball, ice cream - whatever they call it) is a set of small flat sand crystals, similar to very small confetti. They come in different colors, plain, two or more colors, with or without glitter and look very interesting on nails.
This type of decor is something between sprinkling and rubbing in terms of the size of the grains, so the technique can be used as one or the other, while obtaining completely different results. Here we will look at a nail design option with melange sprinkles.
Using melange, a design in the Candy Chic style is created - a little rough, matte, bright and very appetizing! And the correct application technique makes it incredibly durable and neat.
I propose to consider the technique of attaching melange using the example of accessories from Irisk. I have this set called Ice Cream number, consisting of colored circles: pink, purple, light green and turquoise - such a bright mix!
Premiere “North Wind” gel polish (code GPC-97) from the basic collection. This is a light lilac, whitened shade, delicate and mysterious, for lovers of everything airy and vanilla. It is a little capricious and requires application in a very thin and even layer, otherwise it may boil in the lamp. A dense coating is easily obtained in just two layers, even despite the thinness of application. Here's a photo of his solo nails:
As an additional accessory for this design, I used pink pearls, which match both the color of gel polish and the color of melange. In the end, I came up with this nail design:
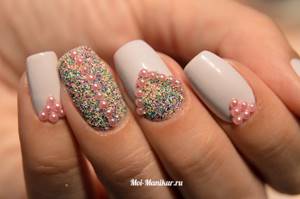
As you can see, melange can be used not only for sprinkling on the entire nail, but also for drawing, so to speak. Still, you can’t create exquisite thin lines and monograms from it, but you can strew certain areas with such sugar.
Feature of marmalade for nail design
- An effective imitation of a sugar surface - both externally and to the touch (the surface is rough).
- Economy. One small five-gram jar is enough for several applications, taking into account the complete coverage of all nails.
- Minimum time investment and ease of creating a stylish manicure - even beginners can master it the first time.
- Incredible durability: the crystals are immersed in the color or finishing layer. This ensures stability during housework and everyday wear.
- Can be applied to any decorative coating and during extensions.
- A variety of designs - from boldly shocking and office to romantic and festive.
- Great price with luxurious results.
How to use it correctly
You can easily create a nail design at home.
To do this, prepare your nails: remove excess length, remove or push back the cuticle. Apply a color finish of your choice (varnish or shellac) or extend your nails.
Cover the surface with top coat or finishing gel, but do not dry or cure the coating. You can choose one nail (for example, on the ring finger) or decorate it all at once. Decide whether you will apply the appetizing decoration in a solid layer or draw a pattern.
Take some crystals with a pusher and pour them onto the dispersion layer according to a pre-designed pattern. If there is not enough material, scoop more. You can use it differently. The second technique involves rubbing small particles into the sticky layer of gel polish (in this case, they can be additionally covered with a finish).
Dry the coating in air or in a lamp. Wipe any decor that has not stuck to your nails back into the jar.
When it's time to remove your manicure, soak a sponge with foil in nail polish remover. Wrap your finger in it and leave for 5-10 minutes. The particles will come off the nails along with the coating.
What is presented in the FRENCHnails online store
Do you want to buy inexpensive marmalade for nail design? The FRENCHnails online store is the best option for a profitable purchase! The catalog contains a wide selection of sugar crystals for every taste.
The chic palette includes not only monochromatic decor, but also magnificent colors:
- from violet-lilac violet-pink to lilac-yellow and violet-raspberry;
- from blue-blue to dark blue;
- from orange to coral and scarlet;
- from yellow and yellow-green to light green and emerald.
Clients are delighted with the ease of ordering in our store! They note the variety of payment options, regularly held promotions, high delivery speed and the ability to receive a parcel anywhere in Russia.
With this decor your nails will look incredibly delicious!
The application technique is quite simple - below we will discuss the design of nails with marmalade step by step. The procedure includes several main steps:
It is important not only to understand how to apply, but also to take into account an important nuance, which is the choice of colors. When choosing a shade, you need to take into account that in the dry version, sand looks slightly different than when applied to the nail plate.
How to use nail dust correctly?
Shimmering dust for nail design is rubbed into a sticky layer of gel polish or gel and covered with 2 layers of fixer (top, finish) with a sticky layer. Using shimmer dust in different shades, you can create any gradient, both horizontal and vertical, and create a variety of nail designs!
Interesting materials:
How to choose a water bottle for a baby? How to choose a wedding date using numerology? How to choose a baby sled and stroller? How to choose a Windows boot disk? How to choose the length of children's skis? How to choose the length of clothing? How to choose a board with nails? How to choose Chanel perfume? How to choose jeans for full hips? How to choose an eco fur coat?
How to make marmalade on your nails with a “sugar” manicure effect
How to make marmalade on your nails to get a voluminous texture? In this case, a different method of applying velvet sand is used. You need to completely complete the manicure, remove the sticky layer, and perform the following steps:
- Apply base coat to the nail plate.
- Cover with marmalade, carefully spreading it over the nail.
- Dry in a UV lamp for 2 minutes, remove excess with a brush - no final coating required.
It is important to carry out the marmalade design on nails according to the steps described above - accuracy in work and strict adherence to technology will help you get an impressive result. You need to remove the marmalade the same way - for this purpose, a special product is used, which is applied to a cotton swab and fixed on the nail with foil. After the required time, all that remains is to remove the remaining coating.
How to make a marmalade manicure and design ideas
Applying a stylish coating to your nails yourself is absolutely not difficult if you know the technology and have the necessary materials with you. Many people are interested in: how to make a marmalade-effect manicure?
How to do a marmalade manicure
To begin with, this design gets its name due to the fact that it has a velvety matte surface with acrylic powder, resulting in a coating reminiscent of the famous delicacy. The texture of this manicure is quite large and rough. However, the effect is impressive.
Since gel polishes are widely used in the nail industry today, you can’t do without them when creating a marmalade manicure. So, for work you will need the following components:
- lamp for drying gel polish;
- base coat varnish;
- white palette for patterns;
- velvet sand with glitter;
- glossy or matte varnish;
- thin brush.
How to use marmalade for nail design: important nuances
To figure out how to properly apply marmalade on your nails, you should use professional secrets that will be useful to both beginners and experienced professionals. Namely:
- You need to apply the topcoat with a separate brush, thoroughly cleaning it before each immersion in a bottle of topcoat - for this purpose, you should moisten a lint-free cloth with gel polish remover and keep it handy. Otherwise, shining particles will get into the top, and it will be damaged.
- The question often arises about how to make marmalade on nails, creating beautiful patterns. To do this, you need to perform a classic manicure, remove the sticky layer, and then apply the selected design with a thin brush. All that remains is to cover it with sand crystals and dry it in a lamp.
- It is better to use a white shade as a basis for any drawings - it does not change the color of the marmalade.
Tips on how to apply marmalade for nails will help you understand the nuances of the procedure - and then the first time you will be able to create a beautiful manicure with an unusual texture.
Creating the “marmalade” effect
When creating a manicure with gel polish, you must carefully follow the instructions for its use. This determines how durable the manicure will be. We provide step-by-step instructions on how to apply marmalade for nail design yourself and at home:
- The first thing you need to do is prepare your nails well, that is, do a basic manicure. You need to give your nails the desired shape and carefully treat the cuticles.
- Before applying gel polish, the nail plates must be as smooth as possible, so we apply a buffer to them.
- The next step is to treat your nails with a degreaser. Once it is applied, the nail plate should not be touched.
- Primer is applied to the nails. This is done in order to open the scales of the nail plate. This way the interaction with the gel polish will be as dense as possible. After applying the primer, you must wait until the nail turns white.
- We apply a transparent base and send the nails to dry under an ultraviolet lamp. Drying time is indicated in the instructions for the base. After drying, remove the sticky layer.
- Next, a color layer is applied. It should not be very thick so that it does not flow or crack when drying. It also dries under an ultraviolet lamp. Then we do not erase the sticky layer, but proceed to applying powder.
- Apply colored sand to the sticky layer and gently rub it in with a brush. Then we brush off the excess material.
- We cover the nail plates with the finishing coat and dry them in an ultraviolet lamp for two minutes.
This is how the “marmalade” nail design is obtained, the photo of which we see in the article. Everything is quite quick and simple, the main thing is to remember the sequence.
Nail design with marmalade: photo
“Sugar” or “marmalade” manicure is a spectacular idea. Sand looks best in combination with bright, rich shades: red, purple, blue. Below are photos of nail designs with marmalade that will help you appreciate the beauty and originality of this design.
Mmm... Yummy! Yes, this is the only thing that comes to mind when your eye stumbles upon a nail design with marmalade: the photo instantly reminds you of the feeling when sugar drops melt on your tongue... If you are a truly “sweet” girl, then you simply have to try it (of course, not the taste ) such a manicure!
I would have devoured it! Marmalade ingredients
In fact, the “marmalade on nails” design has many names. It was also called sugar, melange, snowball, even ice cream. Essentially, it means marigolds have been sprinkled with shiny or colorful sand, making them look like a real sugar treat.
What do you need for such deliciousness? Firstly, bright varnishes. If you have ever tried marmalade, then you know that it can be pink, yellow, red, pistachio, orange... For complete authenticity, also perform a manicure in such “juicy” and “delicious” shades!
And the marmalade effect is obtained with the following ingredients:
- Acrylic powder with shimmering shine.
- With sparkles.
- Melange for nails (the main supplier of the new product is Vogue nails).
The materials are used in the same way as when creating a “velvet” manicure. That is, sprinkle the top with sand. The technique is incredibly simple and does not require long preparation and meditation in the Shaolin school of nail masters. Any sweet tooth can handle it.
A delicious delicacy recipe. How to make nail designs with marmalade
The technology is performed in gel polishes. If you wish, you can be patient and “candied” regular varnish, but you want the deliciousness to please you longer? Therefore, take a look at the line of your own gel polishes and feel free to take on the one that you think is the most delicious! Well, read how to apply varnish and “sugar” step by step.
Here's what you'll need for marmalade nail art:
- Base, top and colored gel polish.
- Melange for nails.
- Pusher.
- Ultraviolet lamp.
- A piece of foil.
- Nail brush.
- Liquid for degreasing and removing sticky layers.
5 steps to a sweet manicure
After you have prepared the ingredients, you can start making “goodies” with your own hands.
Step 1
It is necessary to prepare the nail plates for volumetric decor. The basic rule of all kinds of sprinkles and rubs is a smooth surface, then the efforts of the master will not be in vain. Remove the cuticle and thoroughly polish the nails with a buff, file the ends so that the cut is even and without any fringe. Don't skip the degreasing step.
Step 2
Apply gel polish base and dry in a lamp.
Step 3
Now comes the turn of the varnish. Cover your nails with a couple of layers, leaving each one to dry. If you plan to make only one nail marmalade, do not touch it, and the rest can be immediately coated with the finish and degreased. This move will protect the manicure from sand crystals accidentally sticking to the residual stickiness.
Step 4
Apply the finish to the nail intended for design. There is no need to dry it. Immediately scoop up the melange sand with a pusher and sprinkle the nail on all sides with “sugar” over the foil. Don’t skimp on the material, the more sand, the more appetizing the design will be!
Step 5
After this, you can send the nail to the lamp. When the result has polymerized, brush off all excess and admire the deliciousness!
Shake the remaining melange from the foil back into the jar and let it wait for your next inspiration.
You can clearly admire the process in this video:
Nail design with marmalade, master class from Imkosmetik
Nail design with marmalade is perhaps the most “delicious” design option. In its structure, it looks like a cross between velvet sand, sparkles and broths. But it has its own advantages over each of these materials.
- sand creates a velvet effect on the nails, and marmalade creates sugar;
- sparkles give a pronounced shine, but with marmalade it’s more likely not shine, but shimmer - very subtle and delicate,
- The broths look like droplets of water, but the marmalade fully lives up to its name and creates the effect of a tasty delicacy.
Despite the fact that marmalade nail design looks very unusual, it can easily be used in everyday life and even integrated into a business dress code. There will be no problems with application either - you can even do it at home, since no special means are required to attach the marmalade.
So, how to make a manicure using sugar?
1. Prepare your nails for the design, apply a base coat and dry.
2. Cover your nails with colored gel polish and dry in a lamp. Pink, lilac and peach shades look the most delicious. We used the following:
3. Cover the nail chosen for the design with a top coat and, using a spatula/pusher, sprinkle a small amount of marmalade over the entire surface of the nail. Dry in a lamp and remove excess with a brush.
4. Cover all other nails with top coat and dry. The design is ready!
As you can see, there are no difficulties in application and even a beginner can cope with it. Experiment and surprise others with your bright and unusual manicure!
Choose your marmalade color to create a stunning design!
- design
- manicure
- marmalade
- nails
Previous article Next article
imkosmetik.com
Basics of marmalade manicure durability
Melange is not much different from ordinary acrylic powder or glitter. To make your decor enjoyable for as long as possible, consider these nuances:
- Apply a generous layer of topcoat, or better yet, use a rubber topcoat. It is very thick, which means that the sand or powder will get stuck in it well and will not fall off.
- After sprinkling, take your time to instantly dry your creation in a lamp. Allow at least 10 seconds for the decor to fix in the top layer.
- To prevent the “marmalade” from clinging to your hair and clothes, you need to remove excess flakes from the tip of the nail. Just run your fingertip lightly along the end and remove the decor.
That's all the secrets!
Photo examples of the “marmalade” technique for nail design
It is easy to cover one or all of the fingers with “sugar” powder, and this will be the easiest way. But it’s much more interesting to make marmalade on your nails in the form of an unusual pattern or design, combining it with popular nail art techniques. In a word, see for yourself!
Gradient
The cutest ombre effect is obtained by sprinkling it with “sugar”. First you create a gradient, and then decorate it with shimmering acrylic powder. Simple and tasteful!
Ombre can also be placed on the nails adjacent to the “marmalade” ones; it certainly looks stylish.
Marmalade hole
You can’t spoil the idea with lunar design! A thin brush, a drop of top - draw a hole and sprinkle it with melange. Or you can remember the negative space and leave the lunula untouched, but cover the rest of the plate with decor. Rhinestones are placed along the edges of the hole, and they add chic.
French
It turned out that the marmalade coating looks harmonious with French nail art. Give up futuristic “smiles” and choose a delicate semicircular jacket; it will go best with cute sand. This option is suitable for any romantic event. Even for a wedding!
Sweet Rainbow
Who would like to ride a sugar rainbow? Yes all! So don't be afraid to combine bright, rainbow colors with acrylic powder and go to the land of pink ponies and cotton candy!
Confectionery neighborhood
Marmalade is very soft and friendly and therefore goes well with many nail art techniques. Sliders in the form of funny pictures of cakes and cute animals or blooming flowers look great next to the sugar sprinkles. Hand-painted, monograms, rhinestones, geometry - say “Yes!” Melange will give a knitted design warmth and originality. Even the somewhat aggressive “broken glass” trend looks good with a gummy treat.
In the field of nail services, many new products regularly appear, and some of them cause real explosions in popularity. One of the most striking trends can be called marmalade for nail design. It is otherwise called “melange”. Today we will tell you about the rules for its use and look at step-by-step instructions on how to properly create a stunningly beautiful marmalade manicure.
Ideas for designing a delicious “marmalade” manicure
A beautiful manicure is considered a sign of well-groomed nails, but to truly surprise those around you with its design, you need to use unusual decor. Recently, “marmalade” nails have become very popular among the fair sex. This “nail art” looks great on nail plates of any shape and size, in addition, it is easy to create it yourself at home.
The “marmalade” nail design, also called melange, is a coating in the form of confectionery sprinkles or multi-colored sugar crystals. When applying these decorative elements, an interesting “candied” surface effect is created. Marmalade nail art is ideal for both everyday and evening looks. This manicure is easy to perform - to create a “sweet” decor, you only need to have melange, glitter and acrylic powder on hand.
The registration process itself is as follows.
- First, you need to tidy up your nails, since they must be symmetrical, even and have an ideal shape. You should also pay attention to the cuticle. It is not recommended to steam it before using gel polish, as the plates can absorb excess liquid. It is best to treat the cuticle with special softening preparations. After the nails are ready, you need to remove the shine from them and thoroughly degrease them, which will ensure good adhesion of the varnish to the base.
- Next, a transparent base is applied to the plate and dried under a UV lamp. When the nails are dry, they are coated with gel polish and dried again in the lamp.
- Then they choose any shade of colored varnish that would harmonize with the style of clothing. A combination of white and black colors is considered a win-win option - it is against this background that marmalade patterns will look expressive and beautiful. The colored coating is opened with a topcoat, polymerized and the sticky layer is removed.
- All nails, except those on which the marmalade design will be placed, are then coated with a protective topcoat. The remaining plates are covered with glitter, powder or melange sand. Everything is dried and fixed with a finishing agent.
If the base varnish has a sticky layer, then the decor is applied directly to it. When there is no sticky layer, the nails must be opened with a top or base, this will ensure the duration of the manicure.
As a rule, the “marmalade” coating turns out to be rough and many girls find it uncomfortable. To make this manicure practical, just cover the design with an additional layer of top coat and dry it. As a result, the nails will be smooth.
When creating “marmalade” nail art, it is also important to pay attention to the fact that the drying time must be doubled, this makes the coating more long-lasting and durable.
In order for decorative elements to be better fixed on the plate, they should be applied to a generous layer of base.
There are many ways to create a “sweet” manicure. This design can be applied to all or just one or two plates. Purple and pink backgrounds work well for marmalade patterns. “Marmalade” ombre and French look especially chic. To complement this manicure with original notes, experts recommend using the following decorative elements.
- Sugar candies. They are presented on the market in a huge assortment, so you can choose melange, neon and plain elements for decoration.
- Acrylic powder with fine glitter. It allows you to create an interesting “sweet” surface. To decorate with acrylic powder, the nails are covered with a base of several layers of colored varnish and their base is polymerized in a UV lamp, after which they are fixed with a topcoat. The patterns are effective if acrylic sprinkles are applied using a pusher.
- Jelly beans. Such decorative elements are considered universal because they are suitable for creating a manicure at any time of the year. Jelly beans look especially chic when creating a New Year's manicure. In summer and spring, it is recommended to decorate nails with multi-colored details in light shades. They fill the image with tenderness and style.
- Melange. This is a special material consisting of small particles that have a multi-color effect.
- Confetti. They are applied to nails in the same way as acrylic powder or melange. In this case, as a background it is necessary to select a colored varnish that would go well with sparkles. To prevent the “marmalade” confetti manicure from having a too rough surface, after drying the plates, sanding should be done with a buff. Confetti is extremely popular to achieve a “marmalade gradient” effect. To do this, sprinkle sparkles of a light shade on one part of the nail, and a darker one on the second.
- Sugar varnish. After complete drying, this material creates a rough “marmalade” surface of different colors. This design option will adequately decorate both summer and winter manicures.
Marmalade nail art comes in a huge variety of designs, so to create it you need to constantly experiment with texture and color scheme. For an everyday look, it is best to choose classic shades, and a festive manicure can be diluted with brighter notes. The following types of “sweet” decor are in fashion this and next season.
- Ombre. To beautifully design your nails with this effect, you must first make a gradient, then decorate with acrylic powder. This design will look simple, stylish and tasteful. In addition, you can use a variety of combinations of bright colors in the decor.
- Marmalade hole. Lunar manicure is always popular, but if you sprinkle the traced moon with marmalade melange, you will get a chic look. An interesting solution would be to sprinkle the nail plate, in which the “moon” will remain untouched. The edges of the smile can be additionally decorated with rhinestones.
- French. Despite the fact that French manicure is classic, recently many stylists prefer to replace futuristic “smiles” with semicircular shapes sprinkled with “sweet” sand. This nail art is well suited for a romantic look and is very popular when decorating a manicure for brides.
- Confectionery decor. Since marmalade is considered a friendly and soft finish, it can be combined with various design techniques. For example, small pictures of animals, cakes or flowers will look great on sugar sprinkles. It is allowed to use hand-painted decoration, depict geometry and decorate with rhinestones.
- Matte manicure. To create “marmalade” nails, it is not necessary to use a glossy background. If you replace it with a light matte finish, you get an interesting combination in the form of a “crumbly” dessert and cotton candy. Since contrasting colors are not always suitable for everyday looks, it is recommended to replace them with dark shades. An interesting choice for “marmalade” nail art would be light green, gray, black, red and purple. In the coming season, the main trend will be a rainbow combination, in which the “sugar” manicure gets more sweetness and brightness.
To learn how to make a high-quality marmalade manicure, watch the video.
Step-by-step instruction
Melange for nails looks like small multi-colored sugar crystals or confectionery sprinkles. Applied to nails, it creates the effect of an original “candied” surface, which looks very unusual and interesting. Making this nail design is very simple - any girl can handle it. We bring to your attention step-by-step instructions so that you can be convinced of the simplicity of this nail art.
- Prepare your nails for applying decorative coating. Get a hygienic manicure, give your nails a beautiful shape, and degrease the surface.
- Melange is usually used to decorate only one nail, and the rest are covered with a monochrome coating, designs or something else at your discretion. Therefore, cover all the nails with the base, then with the main color, leaving the ring finger untouched. Dry in a lamp.
- Cover the nail of the ring finger with a layer of thick top or base. Now you need to apply the melange. Sprinkle it onto the nail using a spatula, holding your finger over the jar or lid. Make sure that there are no uncovered areas on the nail. Dry in the lamp twice as long as usual.
- Brush off excess decor with a brush.
As you can see, getting the marmalade effect on your nails is very easy. Melange can be used in other ways. For example, apply to patterns painted with acrylic paints, or use as a rub. When rubbed, you get a completely different manicure, closer to the traditional one, but no less beautiful. You will find all three options for using “marmalade decor” in an interesting video.
You are already convinced that there is nothing complicated in creating a marmalade manicure. You will definitely succeed the first time - there will be no unsuccessful attempts. To make it even easier for you to master this simple art, be sure to read our recommendations.
- If the base gel polish has a sticky layer, then the melange can be applied directly to it. If there is no sticky layer, then first coat your nails with a base or top coat. According to the observations of many women, melange on the base lasts longer than on the top.
- The coating turns out to be rough, which is not always convenient from a practical point of view. If you don’t like it, then simply cover the design with a layer of topcoat and dry it in a lamp - the surface will become smooth.
- The most convenient way to apply “marmalade” is with a pusher. It is better to do this directly above the jar with the decor so that the excess pours back. This way you will significantly reduce material consumption.
- Sprinkle the melange starting from the nail hole to the free edge to distribute the particles evenly.
- Be sure to dry the design well in a lamp. Drying time is twice as long as when using gel polish.
Marmalade for nails
Marmalade for nails: you will lick your fingers
The IMKOSMETIK team carefully monitors the rapidly developing beauty industry and offers its clients only the most fashionable and popular products. We are pleased to present to your attention a hot new product - Nail Passion nail marmalade.
This is a unique design development, something between broths, velvet sand and sparkles. To be more precise, the material took the best from each of them. True to its name, nails with a marmalade design are similar to the oriental sweet of the same name, sprinkled with glittering sugar. A manicure using them can look either gentle and romantic or bold and rebellious.
Why should you try marmalade for nails?
1. This is the case when using a simple material you can create a breathtaking design in a short time.
2. Sugar decor is not a superstructure over the main coating, it is part of it, since the smallest particles are imprinted into the layer of varnish or top coat. Therefore, as a result, you get a long-lasting manicure that is resistant to water and other influences.
3. Despite all the playfulness of the name and appearance of the material, it can be used to create quite serious, office versions of manicure with a special charm and mystery.
4. Marmalade has a low cost, but great possibilities and a huge number of design options.
5. The product is easy to use and suitable for home manicure.
6. Gets along well with various substances, has excellent contact with both natural and artificial nails.
7. The provided volume (5 g) is enough for a continuous coating of more than 30 nails.
8. In addition to the jar of marmalade sand, there is a special applicator for applying the material. This device helps to use the product economically.
The website presents a wide palette of “marmalade shades”: 24 bright colors, including 8 solid colors and 16 deep mixed ones. Each mix combines pollen of several tones. The colors are selected in such a way that together they create a rich, multifaceted mixture. Believe me, this is the only time when you will want to lick your fingers not from culinary masterpieces, but from the delicious look of a sugar manicure.
How to apply marmalade for nails?
1. After traditional processing of the plate, cover it with a base layer and dry it in a lamp.
2. Apply the main gel polish and cure it as well.
3. Then apply top coat.
4. Before drying, sprinkle our sugar with a pusher spatula and lightly press with your fingers, dry in a lamp. As you can see, everything is elementary!
Clients will come to you again and again for this sweetness. And you, like a fairy, will create delicious miracles on their nails with the help of magic pollen. Therefore, it’s worth stocking up on this charming delicacy in advance and ordering Nail Passion marmalade for nails in our online store.
imkosmetik.com
Photo gallery of bright and juicy nail art
A manicure using a special melange sprinkle turns out unusual, bright and very stylish. By using your imagination, you can create different designs every time. Melange can be applied to just one nail to complement the design or to all of them at once for maximum saturation. Nail design can be complemented with rhinestones, painting and other decorative elements. After looking at the photo, you will understand why marmalade nails have become so popular.
This beautiful manicure can be done using melange for nail design. This will take you a minimum of time and effort, and the result will certainly exceed all expectations. We highly recommend that you learn how to make a beautiful matte geometric manicure using marmalade. You will find a detailed tutorial on how to perform this nail art in the final video.

