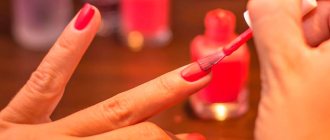
Manicure is not just a pleasant procedure after which you can enjoy beautiful nails. It involves contact with the client’s skin, so it should be as safe as possible. The cleanliness of the instruments used during the session is very important. They must be not only visually clean, but also completely sterile. This can be achieved thanks to special equipment. Next, we will tell you how to get rid of pathogenic microorganisms that are dangerous to health and life, as well as why sterilization is mandatory for every beauty salon and master who works at home.
Sterilization of manicure instruments: why is it so important
Any products that come into contact with the client's skin or nails can become a source of infection for serious diseases. This does not happen as rarely as it might seem at first glance. Even during the simplest procedures, the integrity of the tissue can be compromised - this also applies to microtraumas without traces of blood, invisible to the eye. Such damage becomes an open gate for bacteria, viruses, fungi and other microbes.
The most common types of diseases transmitted by contact include:
- viral infections (hepatitis B and C, human papillomavirus, HIV);
- bacterial (mainly staphylococcal and streptococcal);
- fungal (Pityrosporum ovale, Candida sp., Epidermophyton sp.);
- parasitic (various forms of helminths).
A microscopic amount of blood is enough to become infected with the hepatitis B or C virus, which affects more than 300 million people worldwide. They lead to liver cirrhosis, jaundice, cancer and even death. During manicure procedures in salons that do not sterilize instruments, you can also catch less dangerous diseases, for example, the well-known fungus. But it causes a lot of discomfort - the aesthetic appearance of the nails deteriorates, peeling and itching occur. Treatment and recovery take several months. It is much easier to sterilize the instrument after each client and carefully follow safety rules.
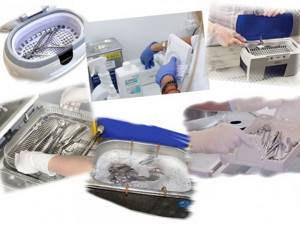
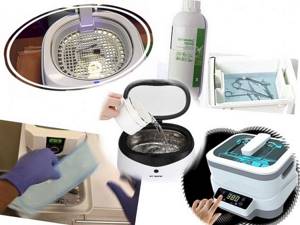
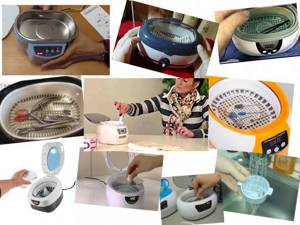
Types of ultrasonic sterilizers
This product can be divided into several categories:
- Purpose: household and professional.
- Liquid used: tap water, special solutions.
- Control type: mechanical (manual), electronic, combined.
- Material: plastic, metal, mixed.
- Method of closing the box: hinged lid, removable.
Household sterilizers are available for purchase by anyone. Such models are best suited for disinfecting small tools and devices. Popular in beauty salons, can be used at home, and are also often purchased for small private organizations if processing of certain things is necessary.
Read also: Insulating a house with polystyrene foam
Professional devices are larger in size and power, and are mainly purchased for medical institutions (dentists, gynecologists, operating rooms...). Their price is many times higher than the cost of household models, which makes them unsuitable for use in small salons and clinics.
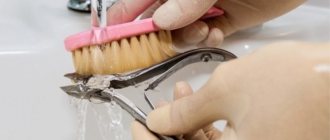
Processing manicure tools
The complete cleaning process involves four steps and can take several hours depending on the type of equipment used. High-quality processing of accessories necessarily implies:
- Primary cleansing
- Disinfection,
- Sterilization,
- Proper storage.
Beginners often confuse disinfection and sterilization, mistakenly considering them interchangeable concepts. The difference between them lies, first of all, in the fact that during the disinfection process vegetative forms of mycobacteria, fungi and parasites are destroyed, which can contribute to the formation of various types of diseases. However, many pathogenic microorganisms survive the procedure and remain on the instruments, and may soon begin to multiply on their surfaces.
During sterilization, absolutely all microbes die, including the smallest bacterial spores. After such treatment, the products become completely sterile and do not pose any threat. But without proper storage they lose these properties. It is important to keep them in special craft bags and print them immediately before the session.
Why are sterilizers needed in salons?
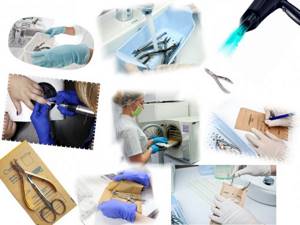
Manicure is not only a very complex process that requires care, but also a responsible one. Failure to comply with basic safety and hygiene rules can result in quite unpleasant consequences. For example, after completing the necessary procedures, all the master’s tools must be thoroughly cleaned.
Material processing consists of the following stages:
- Disinfection is a set of measures aimed at destroying microbes that cause various diseases.
- Pre-sterilization cleaning – mechanical cleaning of the surfaces of accessories from plaque, protein deposits, and chemicals.
- Sterilization is a procedure that involves the complete destruction of pathogenic bacteria, fungi and spores that cause inflammation and skin infections.
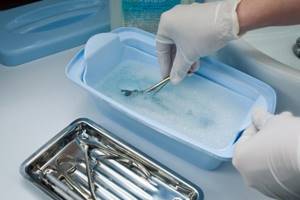
Disinfect instruments simultaneously with mechanical cleaning. First, treat the materials with a soft napkin or cloth soaked in a special disinfectant. Then the instruments are immersed in the solution for a certain time, thoroughly dried and sterilized in sterilizing devices.
SanPiN requirements
Disinfection and sterilization of a manicurist's working tools is regulated by sanitary and epidemiological rules and regulations (SanPiN). They apply to beauty salons and services provided at home. Failure to properly sterilize is considered a violation of the law, and a salon owner who does not follow safety rules may face unpleasant consequences, ranging from fines to being banned from operating.
The SanPiN requirements clearly state that instruments intended for reusable use must be washed, then disinfected and sterilized. A separate employee must monitor the process, but more often the masters themselves do this. In order for the disinfection and subsequent sterilization procedure to proceed without violations, it is necessary to keep a log and carefully monitor the cleanliness of accessories. It is important to use high-quality and modern equipment.
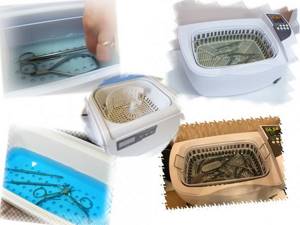
What manicure instruments need to be sterilized?
All accessories are divided into two main categories: disposable and reusable. The former can only be used once and disposed of after each client. These include soft buffs, brushes, orange sticks for removing cuticles and other products that cannot be heat treated. They accumulate skin and nail particles that cannot be removed by other means. Accordingly, all that remains is to throw it away after the session. But most instruments can be reused after sterilization. Among them:
- nippers and knipsers;
- scissors;
- pushers and tweezers;
- files;
- cutters for hardware manicure.
The main thing is that they are made of heat-resistant materials - steel or ceramics. Give preference to products without plastic, wood or silicone elements that can deteriorate when exposed to high temperatures. Such tools can be found in the Royal Gel online store.
Safety requirements at work
Like any other electric ball device, a sterilizer can pose a certain threat to human health - for example, it can give an electric shock if you do not handle it too carefully.
- It is strictly forbidden to turn on the ball device if there are no quartz glass balls in the sterilizer flask.
- After completing the work, the plug must be removed from the socket.
- Do not touch the device and balls with bare hands during the first minutes of operation and after it.
- There is no need to cover the sterilizer with any cloth: air must regularly enter the device.
- The container cannot contain items made of plastic or wood.
- It is prohibited to process items for longer than 40 seconds: this may have a detrimental effect on their condition.
It is necessary to turn off the sterilizer for manicure instruments immediately after processing the instruments has finished. Failure to comply with this rule may result in a fire.

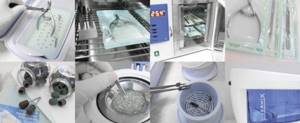
How to sterilize manicure tools
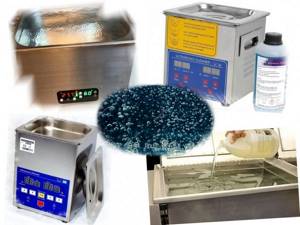
This function is flawlessly performed by special equipment, which is used not only by nail technicians, but also by cosmetologists, dentists and other medical professionals. It has a detrimental effect on microbes, killing them with high temperatures or ultrasound. For sterilization you can use:
- glasperlen balls,
- autoclave,
- dry heat cabinet,
- UV sterilizer.
They all differ in price, size, efficiency and operating principle. Glasperlene devices are considered obsolete because they require regular replacement of filler balls, which, in turn, cannot penetrate into all grooves of the products. Their main advantage is their affordable cost. Ultrasonic devices are best used in combination with heat treatment. Autoclaves and dry-heat ovens demonstrate the greatest efficiency, but they are quite expensive.
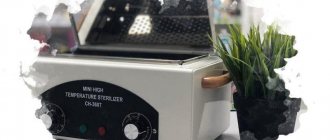
Air sterilizer GP – 20 MO – 3rd place
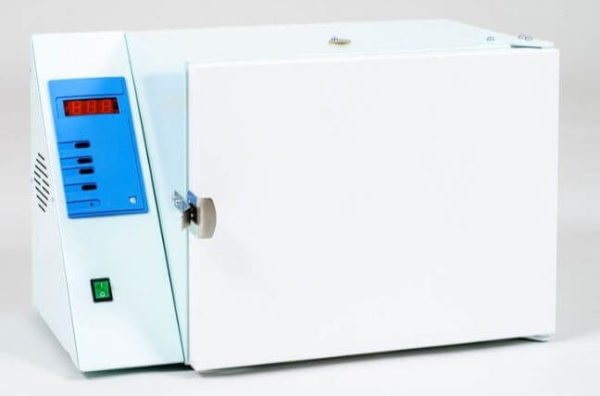
A dry heat sterilizer from the Kasimovsky plant was created to speed up the sterilization procedure for surgical instruments and medical devices. Good quality performance makes it suitable for use in a nail salon. It differs from the GP-10 model in its chamber capacity, which can accommodate up to 10 sets packed in craft bags.
Functional:
- Digital display;
- Ability to save up to 10 programs into the device memory;
- Cooling;
- Display;
- Equipped with overheat protection function.
Characteristics:
- Material: stainless steel
- Temperature conditions: from 50 to 200 degrees;
- Heating to 180 degrees – no more than 35 minutes.
- Overall dimensions - 626x450x415 mm
- Internal: 392x225x280 mm
- Volume: 20 l
Sukhozhar GP-20 has a registration certificate from the Ministry of Health of the Russian Federation, as well as all certificates of conformity. Recommended for use in high-traffic salons.
The GP-20 MO sterilizer is registered in the State Register of Medical Devices of Roszdravnadzor.
Instructions for sterilizer GP-20 MO
Chemical sterilization of manicure instruments: rules according to SanPiN
Stages of sterilization
The sterilization sequence must not be disrupted. It consists of several steps that cannot be combined with each other. Microbiological studies confirmed that after such treatment all known bacteria, viruses, fungi and parasites die. Consequently, the risk of contracting any disease is reduced to zero.
- The first step after using manicure accessories is preliminary disinfection using an ultrasonic cleaner or disinfectant solution.
- Then the instruments should be rinsed under running water and disinfected again in an ultrasonic bath.
- Next, the products must be washed in distilled water, dried and sealed in craft bags.
- The last step is heat treatment in an autoclave or dry-heat oven.
Each stage must be carried out in a separate place. It is also necessary to prepare a place to store used (dirty) and sterilized instruments. They cannot be in contact with each other, stored on the same shelf or on the same table.
▼ Increasing the temperature of the working solution enhances its effect.
A BUBBLE READY TO BURST OR SERKETS OF WORKING WITH AN ULTRASOUND WASHER
So, you purchased a budget ultrasonic cleaner, carefully read the instructions, but at the same time some critical points remained “behind the scenes”, let’s highlight them.
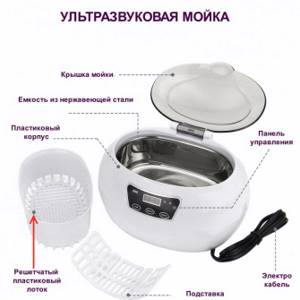
1. Load the instrument into special lattice trays; this design provides the most complete circulation of ultrasound.
2. Load the tool in one, maximum two layers, laying it out so that its cutting parts do not come into contact with other objects.
3. Monitor the level of the solution - it should completely cover the working equipment in the tank. For a compact sink with a bath volume of no more than 1-2 liters, it is advisable to load the tool in 1-2 layers, but not more than 30-70% of its capacity.
▼ The lower the solution level, the lower the cleaning efficiency.
In the photo: the solution should completely cover the objects in the bath
4. Arrange accessories not in bulk, but so that larger instruments do not create a sound shadow, obscuring smaller ones; the effectiveness of their disinfection and cleaning depends on this.
5. Carry out ultrasonic cleaning with the lid of the device open.
6. The temperature of the solution during disinfection and cleaning must be at least +18 °C (room) and not higher than + 40 °C.
7. Carefully select a disinfectant and cleaning agent in an ultrasonic bath. Under the influence of ultrasound, any potentially harmful properties of the chemical solution are greatly enhanced and destroy the instrument.
8. Follow the manufacturer's instructions when diluting and using disinfectants, observing their concentration, as well as temperature conditions and duration of ultrasonic treatment.
9. When using a combined (bifunctional) disinfectant-washing solution, the disinfection time is calculated from the moment of immersion in it.
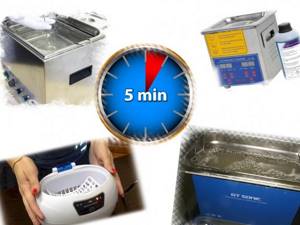
10. The duration of ultrasound for cleaning dirt should not exceed 3-5 minutes at a frequency of 35 kHz (kilohertz).
In the picture: ultrasonic cleaning time 3-5 minutes
11. The use of metal lattice containers for loading instruments in ultrasonic cleaning helps to weaken the ultrasonic field and reduce the cleaning efficiency. The metal grid weakens the field (screens) inside the metal mesh container, reducing the intensity of vibrations of ultrasonic waves coming from outside the emitter, and worsening the quality of cleaning.
12. To improve cleaning, it is recommended to use a plastic mesh tray. The objects contained in it are placed compactly in the zone of maximum ultrasonic action, which contributes to effective cleaning. Such a container provides convenient drainage of the solution, washing, and preservation of the mixture for subsequent disinfection operations.
In the photo: we use exclusively plastic lattice trays to load tools
13. It is impossible to place objects on the metal bottom of the bath without a tray , this will lead to failure of the generator-emitter and a decrease in the level of cavitation.
In the photo: this is what one of the millions of unskilled disinfection workers looks like - a bubble ready to burst
14. Tools on hinges - load cutters and scissors into the tray open. This will reduce the overlap of the hinge surfaces and allow fluid access to them.
15. Monitor the quality of the solution daily. If it becomes cloudy and a specific odor appears, it must be replaced. Stale, dirty solution poses a danger:
- deterioration of cleaning and disinfecting properties;
- reducing cleaning efficiency;
- the appearance of corrosion on the metal under the influence of settled foreign particles.
Pictured: quality control and solution replacement - an indispensable condition for effective cleaning and disinfection
16. Monitor the mixture level. Its deficiency will lead to disruption of circulation and cavitation, overheating of the generator-emitter and, ultimately, to breakdown of the device.
17. Replace the detergent and disinfectant in a timely manner, or top up if the level drops.
18. Replacing liquid for an ultrasonic bath, as well as adding fresh liquid to restore the required level, requires its degassing.
19. Degassing is carried out in free mode with the container empty of instruments for 5 minutes of operation. That is, the device works “idle” for 5 minutes without manicure equipment, but with a solution!!!
In the photo: without degassing the solution, washing is ineffective
20. The effectiveness of ultrasonic disinfection and cleaning depends on the correct choice of its main parameters:
- composition and concentration of the solution, it can be a cleaning agent or a combined detergent-disinfectant;
- temperature, set depending on the composition and aggressiveness of the product experimentally, practically, it cannot be lower than +18 °C (room) and higher than + 40 °C;
- The emitter power of the device used for cleaning is at least 40 kHz, because power below 35 kHz is ineffective;
- time of the process.
The higher the power of the generator-emitter and the higher the temperature of the solution, the less time the cleaning process will take.
▼ On average, with a standard Us-wash generator power of 35-40 kHz, the processing time is 3-5 minutes. Its increase with an aggressive solution and a powerful generator-emitter can lead to damage to the instrument;
- sizes of processed objects. Large ones, so that they do not create a “shadow” that obscures the “trifles,” should be placed at the very bottom of the tray.
In the photo: we lay out the tool carefully and in order
21. The temperature of the solution used for cleaning and disinfection should be correlated with its concentration, chemical composition and power of the ultrasonic generator-emitter.
▼ The higher the temperature of the disinfectant, the stronger the effect of the chemical agents included in the composition, making it more and more aggressive with each added degree.
22. After ultrasonic disinfection and cleaning, it is necessary to thoroughly rinse the instrument (can be done directly in the tray) to remove residual detergents and disinfectants. Washing takes place in 2 stages:
- first under running water,
- then rinsing in demineralized (distilled) water to wash away impurities (chlorine, silicon, rust) that have settled from the water supply.
23. Thorough drying after rinsing completes the ultrasonic disinfection and cleaning process.
▼ Only dry instruments are loaded into the sterilizer. To reliably remove residual water, it is better to use a hair dryer. Loading a tool into a dry-heat oven damp, we end up with stains and corrosion on it.
In the picture: our goal is disinfection of the instrument, cleaning, rinsing and placing it in the sterilizer after bathing in the ultrasound bath, as well as sterilization itself - achieved, you can work
HOW TO CHECK THE EFFECTIVENESS OF PROCESSING IN AN ULTRASOUND DEVICE
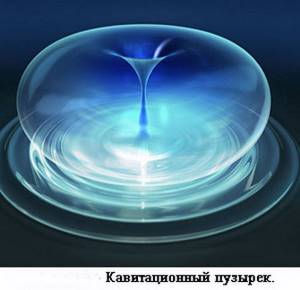
We already know that cavitation is the emergence and microexplosions of tiny air bubbles. The shock wave that occurs during their bursting crushes, crushes and knocks dirt off any surface, providing unhindered access to the disinfectant solution.
In the picture: a lot of small evil bubbles guarantee excellent cleaning of instruments in an ultrasonic cleaner.

However, the lower the frequency of ultrasound radiation, the larger and more harmless the bubbles. Most of these bumpkins, ignoring dirty places, quietly float up and silently dissolve in the atmosphere, having lost their aggressiveness and striking power.
In the picture: large and lazy bubbles refuse to clean our tool

High-quality and effective cleaning is guaranteed only by intense, powerful and dense high-frequency ultrasonic energy. It generates an active cloud of microbubbles, which flow around objects and are distributed along the entire perimeter of the bath.
To check the quality of the ultrasonic cleaner, periodically test the level of ultrasonic radiation intensity. There are two simple ways:
- on a microscope slide;
- on foil.
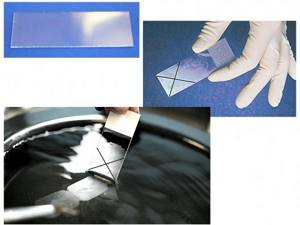
TEST USING MICROSCOPE SLIDE
The test using a microscope slide is performed after it has been frozen. The frozen section of glass is moistened with water and drawn with a No. 2 (soft) pencil along diagonals, like the letter “X”, from corner to corner. We quickly immerse the frozen and lined part, before it has time to thaw in our hands, into a pre-prepared washing or combined solution, and turn on the ultrasonic cleaner in normal mode. We mark the time using a timer. With normal, acceptable cavitation, the “X” we drew should disappear within 10 seconds. Let's check. Let's draw conclusions.
In the picture: a test on a glass slide is needed for the correct selection of processing modes: temperature, time
FOIL TEST
- Take food-grade aluminum foil.
- Pour into an ultrasonic cleaner and degas the solution.
- We cut it out of foil and place 3 rectangles measuring 100x200 mm in the ultrasonic bath. The first one is in the center, the rest are on the sides at a distance of 50 mm from the edge.
- Turn on the ultrasound for 2-3 minutes.
- After the test, we check the result.
- If the experimental foil has changed - chewed, crumpled or perforated, then everything is in order with the ultrasound frequency and cavitation.
Pictured: the process of testing “on foil” and its consequences
WHEN WORKING WITH AN ULTRASONIC WASHER IT IS IMPOSSIBLE
- Turn on the bath without solution.
- Leave the device switched on all the time. This leads to overheating of the main working units and parts and to the evaporation of the solution and a decrease in its level.
- Place the tool directly on the bottom of the bath without a lattice plastic trough.
- Drop, shock, or treat the device carelessly.
- Use flammable liquids as a solution.
Pictured: ultrasonic bath - a delicate device that requires careful handling; it is not recommended to throw it or drop it on the floor
Let us note the advantages of ultrasonic washing in disinfection and pre-sterilization cleaning over the traditional method. After all, many manicure fairies perform primary disinfection the old fashioned way, in baths with a disinfectant solution, manually washing and cleaning the tools with brushes.
PROS
- Careful and high-quality removal of all types of contaminants.
- The ability to immediately, without waiting for the dirt to dry on the working parts of the instrument, begin the soaking process in an ultrasonic bath.
- Complete exclusion of contact with contaminated instruments during cleaning.
- Possibility to passivate the tool and remove rust in a solution of citric acid.
- Saving working time by combining, when using a combined solution, disinfection and pre-sterilization cleaning processes.
- High-quality disinfection and cleaning of hard-to-reach places.
In the picture: an inexpensive and practical magic ultrasonic bath-lifesaver
Yuri Frolov
Nail Kit - chain of nail cosmetics stores
Read about the advantages of working with an ultrasonic device when washing, cleaning and disinfecting manicure instruments here
Read about how to choose the right device for ultrasonic washing, cleaning and disinfection of instruments here
How to sterilize cutters
Hardware manicure is not as traumatic as a classic edged one, and more effective than an unedged European one. It is impossible to perform it without special equipment, as well as a set of replaceable cutters. With their help, you can quickly remove old coating, get rid of cuticles and rough skin. They must be removed and sterilized after each client. They are made from heat-resistant ceramics or corundum, so they are not afraid of high temperatures. On the sterilizer, you should select the appropriate degrees and processing time. Modern devices are equipped with a user-friendly interface and ready-made modes, including for cutters.
Sterilizer “Ferroplast” 10 – 5th place
Ferroplast is a Russian company specializing in the production of medical equipment. The Ferroplast dryer is designed for sterilization of medical and manicure instruments, as well as other products that can withstand heat up to 200 degrees.
Functions:
- Drying tools;
- Synchronization of reports on completed cycles with a computer;
- Delayed start.
Device characteristics:
- Useful chamber volume – 10 l;
- Dimensions – 345*430*450 mm.
The set includes 5 shelves that can be used simultaneously and ensure maximum loading of the device. Sukhorzhar Ferroplat-10 can operate continuously for 16 hours, after which a break of 8 hours is required. The same manufacturer has a model with a chamber volume of 5 liters, however, the price difference between these models is insignificant, so it is better to choose a device with a larger volume.
The device has a registration certificate and can be used in beauty salons, hairdressers and beauty salons and clinics.
How to sterilize files and buffs
The choice depends on the material of the products. Files with a hard abrasive coating can generally be reused multiple times and can be sterilized at high temperatures. They are designed for correcting the length of nails, cutting down artificial material and other manipulations that are considered “heavy artillery”. For delicate procedures, such as plate grinding, soft buffs are used. They should not be placed in a dry heater, autoclave or glasperlene sterilizer, as they may simply melt. Treatment is limited to disinfection using running water, antiseptics, and an ultrasonic bath. The ideal option is to use disposable files and buffs.
How to sterilize manicure tools at home
When seeing clients at home, it is necessary to clean supplies in the same way as in a salon. This needs to be done even if you are doing a manicure only for yourself - after each use, bacteria begin to multiply uncontrollably on the surface of the product. Even conditionally pathogenic flora can become a source of disease over time. Therefore, do not be lazy to purchase a compact sterilizer for home use. If you don't have one, metal tools can be placed in an electric or gas oven. In this case, you should set the maximum temperature and wait at least 30 minutes. They must first be washed under running water and dried with a disposable towel.
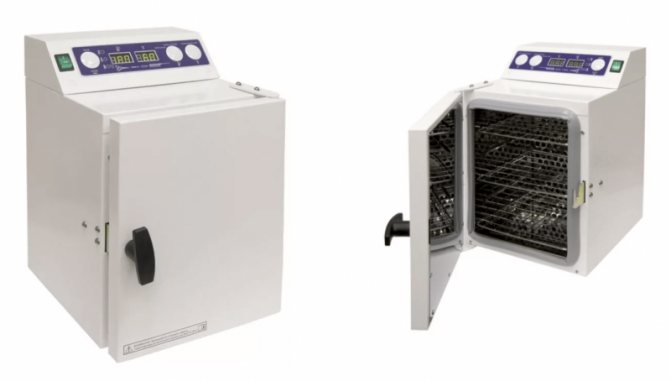
Air sterilizer GP-10 MO – 2nd place
The air sterilizer was originally intended for processing medical instruments, needles and other consumables, but has also taken root in the nail industry. The model is professional and ideal for a nail salon.
Production: Kasimov, Ryazan region
Functions:
- Digital display;
- Ability to save up to 10 programs into the device memory;
- Cooling;
- Equipped with an overheat protection function.
All parts of the GP-10 tendon in contact with manicure instruments are made of corrosion-resistant steel.
Flaws:
- Noisy;
- At first the door closes quite hard.
Characteristics:
- Temperature conditions from 50 to 200 degrees;
- Heating time to 180 degrees – 30 minutes.
- External dimensions: 442*450*415
- Internal: 208*225*280
- Volume: 10 l
- Price from the manufacturer – 16,500 rub.
The Sukhozhar Kasimovsky plant has a declaration of conformity, and the plant itself has an international certificate for the production of medical products.
Instructions for dry heat sterilizer GP-10 MO
The GP-10 MO sterilizer is registered in the State Register of Medical Devices of Roszdravnadzor.
How to choose a sterilizer
When choosing a sterilizer for a salon or home use, you should pay attention to a number of important factors:
- Manufacturer. We recommend trusting companies that have proven themselves in the nail service market. Cheap Chinese homemade devices may not live up to your expectations. You cannot skimp on safety - consider buying a sterilizer as an investment in your own reputation and health. Pay attention to certification.
- Time of processing. The greater the flow of clients, the less time is left for cleaning tools. It is important to be able to sterilize them during the working day on an ongoing basis and immediately before the procedure. In new generation devices, the shortest program lasts only seven minutes.
- Operation volume. Due to space constraints, sterilizers are often located in the same areas where clients are received. It is worth choosing equipment that is as quiet as possible.
- Dimensions. If you don't have a lot of space, pay attention to the dimensions of the device when purchasing. The stores offer a wide range of devices that will fit on a standard work surface.
- Appearance. Gone are the days when sterilizers were not a very attractive element of the interior of the salon. Today they feature a modern design and are available in many colors.
- Guarantee. When choosing equipment for a salon or home use, pay attention to the warranty period provided by the manufacturer and the store. In the event of a sudden failure, you will have to act very quickly.
Remember that manicure should be safe. It doesn’t matter whether you are a master or a client, following our recommendations will save your health and even life.
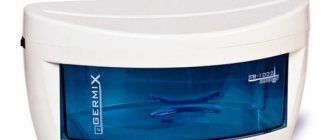
What are the benefits of quartz models?
A quartz sterilizer is also called a ball or glasperlene sterilizer. It is used to clean small medical and cosmetic instruments made of metal. As a rule, the sterilizer itself is a plastic container, the inside of which is made of heat-resistant metal.
Quartz balls are poured inside the metal flask. This, by the way, is where the second name of the device came from – glasperlen, because “glasperlen” is translated from German as “glass ball”. It is noteworthy that during operation the plastic body of the sterilizer does not overheat, which is quite convenient when using it repeatedly during the day. The temperature inside reaches 180-200°C, and such a high temperature range ensures complete disinfection of objects in the container. The glass balls themselves are heated to 250°C.
A significant advantage of the sterilizer is its speed. The time for heating the balls to the maximum temperature is 15-20 minutes.
The basic model of the sterilizer has two indicator lights. If the red light is on, it means that the operation process has started, if it is green, the device is in heating mode.
Keep the objects to be sterilized in the container for no more than 20 seconds. This time, provided that the device is fully heated to the maximum temperature, is enough to kill all microbes, fungi and viruses. Such a short sterilization cycle allows it to be used continuously, which is especially valuable for a heavily loaded manicurist.
Before starting work, it is very important to thoroughly disinfect the tools and let them dry on a clean, dry cloth. After all, craftsmen most often deal with metal accessories, and if they are placed in a sterilizer wet, corrosion may occur.
The disadvantages of this type of device include its small volume. Often, instruments can only be submerged halfway. In some cases this is enough, in others sterilization must be performed in two stages.