Home page » Beauty » Nails
Author of the article
Svetlana Pavlikhina
Reading time: 6 minutes
AA
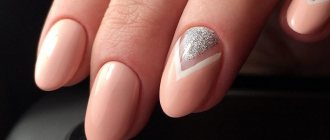
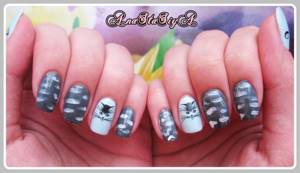
Water stickers can give your nails a sophisticated look. They are easy to use. They are not expensive at all. The main thing is to study the instructions for their use in advance. After this, you can safely apply the decoration to your nails. The result will exceed all expectations, and the manicure will look fresh and original.
Technology of using stickers
It is easy to attach decorative elements to the nail plates and use them. For manicure you need to prepare the surface.
You should also ensure that you have the necessary tools. After this, you can apply the sliders themselves. The main thing is to figure out how to use these products.
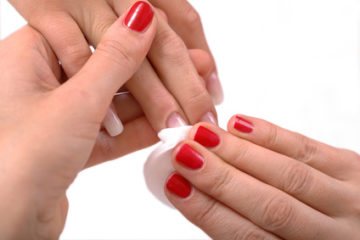
Features of nail preparation
Before gluing the sliders, the nail plates need to be prepared:
- Remove the old covering.
- Steam your fingers in warm water.
- Clean the areas under the nails and the surface.
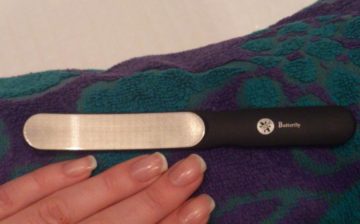
- Using a nail file, give the plates the desired shape.
- Remove cuticles.
- Treat your nails with alcohol or a special degreaser.
- Apply base coat.
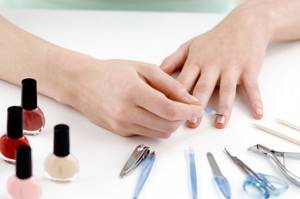
Required tools and materials
In order to create a manicure at home, you need to ensure that you have the following tools and materials:
- stickers;
- scissors;
- a bowl of warm water;
- cotton pads, sticks;
- UV lamp (when applied to shellac);
- orange stick;
- fixative
Slider gluing technology
The instructions will help you apply the stickers correctly.
To transfer them to the surface of the plate, you need to perform the following steps:
- Place the decorative element on the surface and measure the required size.
- Cut off the desired part using scissors.
- Immerse the sticker in warm water for 20-30 seconds. The liquid should not be cold, otherwise the peeling process will be slow.
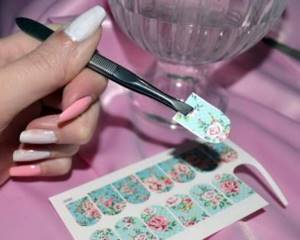
- When the protection comes off, remove the slider from the water using tweezers.
- Place the decorative element on the surface.
- Place a cotton pad on top. Such actions are necessary in order to remove excess moisture.
- Using cotton swabs, smooth the film with gentle movements.
- Dry the surface thoroughly.
- Apply a fixative to your nails.
It is important that all layers dry well. The period of wearing the manicure depends on this.
Preparing nails before gluing
Before applying water-based nail stickers, you must properly prepare the surface:
- saw off;
- treat the cuticle area;
- carry out hygiene procedures.
These simple manipulations will create a strong base for sliders and a well-groomed manicure.
How to prepare your nails yourself at home:
- Using nail polish remover without acetone, remove old polish;
- give the desired shape to the nails;
- make a soap or salt bath with the addition of a few drops of essential oil;
- lubricate the cuticle area with a nourishing cream to soften it;
- wash your hands thoroughly and disinfect each nail plate with an antiseptic;
- cut out excess side skin and cuticle using manicure scissors or a gentle chemical composition made from fruit acids;
- take a buff and polish the surface of the nails, thereby ensuring practical attachment of the art design and the immediate base;
- in the case of nails extended with acrylic mass, it is necessary to polish them with a pusher, then remove the dusting, grease and treat them with a special antiseptic;
- apply the base - the colors of the sticker and the background should be combined and harmonized.
The process of creating a beautiful and stylish manicure is simple, the main thing is to follow the above recommendations of qualified masters. After pasting the ornaments, completely cover them with a fixing transparent layer, starting from the nail base and ending with its edges.
How long do they last on nails?
With high-quality preparation of the nail plates and strict adherence to the rules for gluing sliders, the manicure will last at least 2-3 weeks. But the wearing time largely depends on what materials are used.
If the film begins to peel off quickly, it is most likely that it was glued to a coating that was not completely dried. It is possible that the sticker itself was very wet.
The pattern does not last long if it is glued to an excessively thick layer of varnish. Also, the service life is significantly reduced when low-quality decorative elements are used.
If the manicure turns out to be ruined due to chips in the fixative, it means that the film was not dried properly, and there was no room left for the base to adhere to the varnish, or the tips were poorly sealed.
The durability of the manicure is also affected by the fixative . You should make sure that it is designed to hold aqueous stickers.
What you need to know about nail stickers?
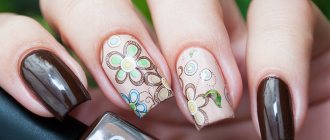
Many people remember how in childhood they glued flower petals to their nails, imagining themselves as adults. Apparently, it was these pleasant memories that gave impetus to the creation of nail stickers. When they first appeared on the market, they had an adhesive base. Being dense, they formed folds and generally looked cheap - not an option for an “adult” manicure.
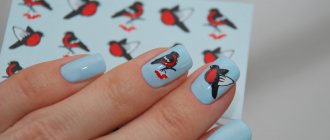
Very soon they were replaced by water stickers - thin films with a printed pattern. They fit tightly to the nail plate, are wear-resistant, and some are even stretchy. Many people know modern stickers as sliders, from English to slide, which translates as “slide” or “move.” The name contains the secret to removing stickers from the backing.
Features of gluing to different surfaces
The procedure directly depends on what surface the sticker will be glued to. Depending on this, the steps to perform a manicure differ.
On natural nails
Even a beginner can handle the technique of applying stickers to regular varnish. No special skills are required. To do this, it is enough to prepare the surface. Perform the following actions:
- Apply two layers of base coat, waiting until they dry completely.
- The sticker is soaked in water.
- Transfer it to the surface.
- Remove excess moisture and smooth with a cotton swab.
- When the surface is completely dry, a transparent coating is applied on top to secure the decorative elements.
For gel polish
Manicure using gel polish is more reliable and durable.
Execution technology:
- Nails are prepared according to the standard scheme.
The shiny layer is removed with a nail file.- The plate is given the desired shape.
- The surface is treated with a degreaser.
- A layer of gel polish is applied.
- The marigolds are dried under a UV lamp.
- The slider is placed in water.
- After 30 seconds, it is removed with tweezers and transferred to the surface.
- Wait until completely dry.
- Apply a finishing coat of varnish.
- Nails are dried under a lamp.
Basic beginner mistakes
Before applying a slider design to gel polish, study information about the main mistakes so as not to make them.
Why was the final drawing not bright enough or almost invisible?
This usually happens when applying a pattern to a bright or dark-colored gel polish. If you plan to apply a small sticker to a separate area, it is better to choose a light, solid nail color.
Why do chips appear on the finish coating?
There may be several reasons for this. The main ones are as follows:
- Before applying the top coat, you did not dry the glued element well enough. In this case, chips will be inevitable; the lamp has dried the top, but the moisture remains inside.
- You haven't given the finish any room to bond. This happens especially often when using a sticker on the entire nail. Therefore, it is so important to leave small areas around the edges free in advance, as mentioned in the instructions.
- Incorrect application of the finish, namely unsealed edges of the nail. When working with gel polishes, it is very important to apply at least two layers of top coat in such a way as to seal the free nail edge: to do this, apply the coating by going beyond the edges of the nail plate and going around it.
Why does the pasted pattern come off along with the top coating?
This problem occurs quite often, since not everyone is able to attach the slider design to gel polish correctly. This happens because one or several layers at once were not dried enough.
It is very important to monitor this during the procedure. Then the manicure done will delight you for a long time.
Why does the slider not completely adhere to the nail? Why do bubbles and unevenness appear?
Most likely, you didn’t immediately start sticking the wet slider onto your nail, but decided to dry it. Doing this is completely optional; the wet slider is flexible and easily spreads over the nail. After drying, it becomes rougher and becomes more difficult to work with.
The use of various kinds of stickers on gel polish is one of the popular and simple areas of nail art. It is useful for those who like to do manicures at home to know how to stick a slider design on their nails, as well as how to fix it on gel polish. This procedure will not cause any difficulties and will leave only pleasant impressions. Do slider nail designs correctly and be beautiful to your fingertips!
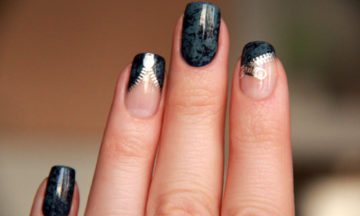
Varieties
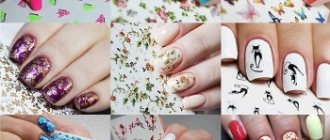
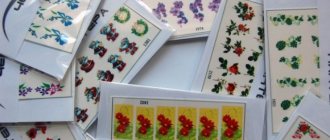
There are several types of decorative elements:
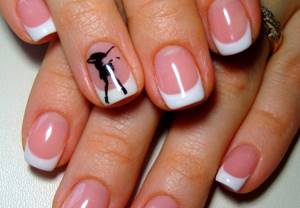
- For the entire nail . Cover the surface completely. It is allowed to use varnishes of any shades. They have the longest service life.
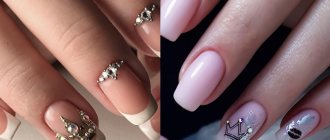
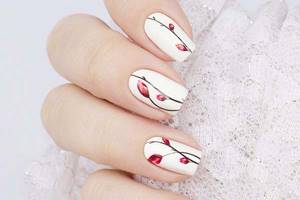
- On a transparent basis . Looks impressive. But this option is not suitable for bright varnish coatings. It is used only on white and light varnishes. But when using them, it is possible to create a design of any theme. Thanks to this, the manicure catches the eye.
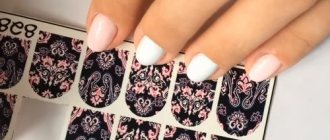
- With a dense pattern . When using such products, the nail plate needs careful preparation. Combination with other decorative elements is allowed.
Do I need to varnish the sticker?
The question often arises: is it necessary to varnish applied decorative elements?
The answer is yes, and there are several reasons for this:
- ensures durability and integrity of the image structure;
- creates a pleasant smoothness on the surface of the nail;
- makes the drawing more expressive and bright;
- protects against the effects of negative external factors;
- smoothes out all existing irregularities on the surface of the nail plate.
The use of varnish is considered mandatory, because with its help you can create a stylish and catchy manicure and keep its aesthetics unchanged for a long time.
Is it possible to make stickers yourself?
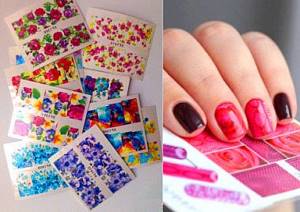
It is not at all necessary to purchase stickers intended for manicure. You can make them yourself. The only drawback is the simplicity of the image.
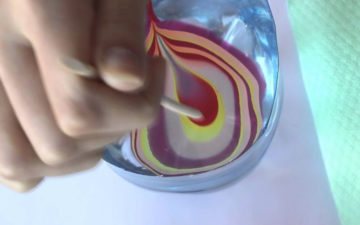
Using water and varnishes of several colors, you can create an original 3D design.
To do this, you need to drop a few drops of each varnish into water, then immerse the nail in the resulting composition, after removing the excess varnish, remove it with a cotton swab.
Wave stencils deserve special attention. They are cut out of paper with serrated scissors and coated with mother-of-pearl varnish.
The plate is covered with a base layer, then a self-made sticker is fixed on it. It is covered with a fixative on top, otherwise it will last for a short time.
Application of 3D stickers

Most often, stickers with a volume effect are made using the principle of waterless application. This is due to the fact that the pattern is more complex and it is not always possible to apply it to the thinnest film. Some tips on how to use this type of nail stickers are given below.
- Prepare stickers, cut if necessary;
- Prepare your nails;
- Degrease the plate;
- Apply a layer of base and dry;
- Apply colored varnish, preferably in two layers;
- Let it dry a little, but not completely;
- Peel the sticker from the base;
- Place the sticker on the plate and press down slightly in the center;
- Press down along the edges;
- Make sure there are no air bubbles;
- Apply a layer of top coat and dry;
It is quite difficult to apply this type of nail stickers with your own hands.
They are made on a thick base. Therefore, they can bulge and adhere poorly to the surface. Typically, such stickers are made in small sizes. [yandex3] [google3]
Advantages and disadvantages
Water stickers have a number of advantages:

- the film does not harm the nail plate;
- you can change the design often;
- the products do not stretch, so they are convenient to use;
- do not stick to fingertips, which cannot be said about adhesive-based sliders;
- manicure takes little time;
- upon contact with liquid, the shape does not change, thanks to this it is possible to perfectly calculate the size;
- gluing onto gel polish is allowed;
- performing a manicure does not require special skills and effort;
- wide range, many variations of thematic products;
- affordable price;
- duration of wear: the result lasts about two weeks, while the shade does not change, chips, cracks do not appear;
- can be removed using regular nail polish remover.
There are only a few disadvantages:
- if you do not apply a fixative on top, the sticker will quickly peel off;
- difficulties when cutting elements to fit the plate (during these actions, snags are formed);
- When adjusting an image, there is a risk that the workpiece will be damaged, so you need to cut out the elements very carefully.
Why do chips appear on the finish coating?
The reasons why water-based stickers applied to nails may chip may include the following factors:
- the presence of moisture that was not completely eliminated during drying under the lamp;
- minor free areas of the nail were not left along the edges during the application of the varnish, thus the finishing coat could not reliably adhere to the nail plate;
- the finish was not applied correctly, meaning the nail edges were not “sealed.”
Failure to comply with these important points leads to the rapid destruction of the created manicure.