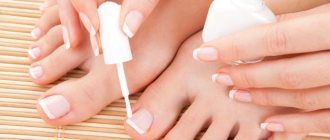
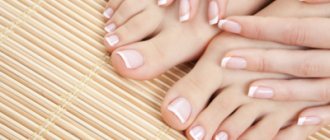
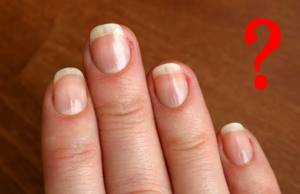
A flawless pedicure is relevant regardless of the season. Of course, in the summer they pay more attention to it. Everyone starts wearing open shoes. To get the perfect result you need to know how to paint your toenails correctly.
If you are not limited in funds, you can simply contact a specialist at the salon. But if you don’t have enough money, time, or just like to take care of yourself, you need to follow certain rules to get the best result.
Preparing nails for coloring: where to start?
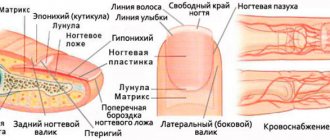
Before you learn how to paint your nails beautifully, you need to understand how to prepare them for painting. Preparing the nail plates is a fairly important procedure that contributes not only to the perfect application of varnish, but also to the overall impression of the manicure. The preparation process includes:
- processing of side rollers;
- cuticle trimming;
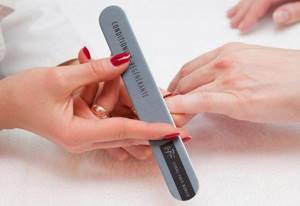
- alignment of nails to the same length;
- removing burrs around the plates;
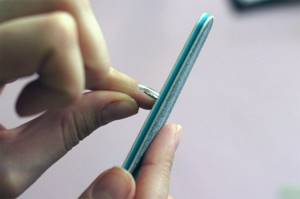
- nail polishing;
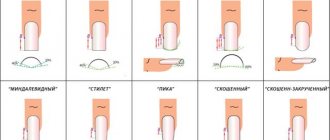
- giving the nails the desired shape.

Processing side rollers
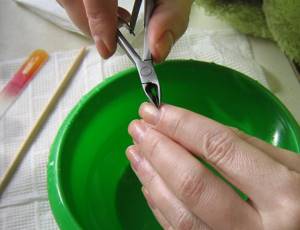
Cuticle trimming
Nail polishing
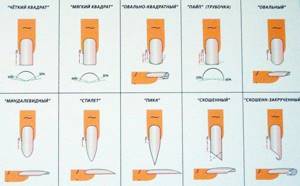
Nail shape
To paint nails at home, you may need a toothpick, a cotton swab, cotton pads, and nail polish remover (alcohol, acetone) as improvised preparations. They will come in handy if the manicure is done poorly, with marks. Even experienced and skilled nail technicians use this “first aid” kit, because no one is immune from mistakes and blunders. Also, if you get quick-drying polish on your skin, you need to remove it as soon as possible - otherwise, wiping it off later will be a big task.
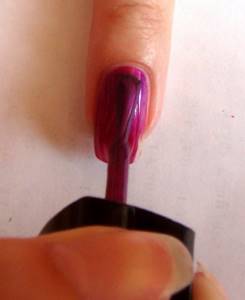
Life hack - How to make perfect highlights?
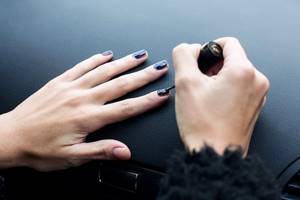
You won't get a perfect highlight without a round lamp. Its appearance directly depends on the light source. Under a regular lamp it will appear square, angular or oblong. A beautiful round glare can only be obtained from a round lamp. In its absence, it will be very difficult to form it.
To get the perfect glare, a regular round table lamp will do. After applying the strengthening, the nails can be held under a regular lamp for 20-30 seconds, and then sent to an LED or UV lamp.
PS: Subscribe to my blog and Yandex Zen channel so you don’t miss anything.
Use of channel materials is allowed only with an active link to the blog
BestNails54.ru !
Technique for applying colored nail polish
So, your nails are the same length and desired shape, can you apply the first coat of polish?
Stop, before you start painting, you need to make sure that your nails are clean and there are no traces of hand cream or other greasy cosmetics left on them. Such products can interfere with the even application of the varnish and contribute to its rapid peeling. To clean your nails, you can use nail polish remover, regular acetone, alcohol, or simply wash your hands thoroughly in warm water and soap, and then dry them well. The varnish will last a long time and will lie more evenly on a completely dry surface.
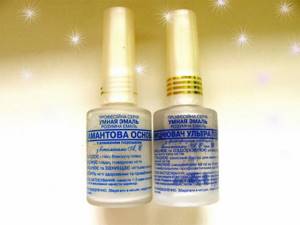
Applying base coat for varnish
The next step in learning how to paint your nails neatly and beautifully involves applying a basic base to them. The base coat allows the polish to go on smoother and more beautiful, as it fills in all the unevenness and roughness of the nail surface, and also protects the nails from the negative effects of the aggressive components of the base coat.
Usually the base has a transparent color and is applied before the first layer of colored varnish. It contains various useful substances: talc, silk, etc. As a base, you can use a varnish with a strengthening effect - the main thing is that it is transparent and does not affect the color of the main coating. In addition, the base prevents the colored composition from penetrating deep into the nail and giving it an unsightly yellowish tint over time. Therefore, a light or transparent varnish on such fingers will look more impressive.
Applying color coating to nails
[yandex2] [google2]
Finally, comes the most interesting and creative process - painting your nails with colored varnish. How can you paint your nails in the most beautiful, original, correct and bubble-free way?
First of all, you should pay attention to the quality of the coloring agent. Only a high-quality product with a valid shelf life and not diluted with acetone and other means can turn the painting process into an exciting experience. A good polish will stay on your nails for a long time and will not start to come off within a couple of days after painting.
After choosing the color of the paint composition and the intended design, you can begin painting. To do this you need to do the following:
- Warm the polish by holding it in your fist or placing it in a warm place. This way the product will acquire a homogeneous consistency and lie smoother, without bubbles.
- Adjust the direction of the incident light. For right-handers, it should fall to the left, from above, for left-handers, on the contrary - to the right, from above. The wrong direction of the light will not allow you to determine how the nails are painted - correctly or not, whether there are flaws in the manicure, etc.
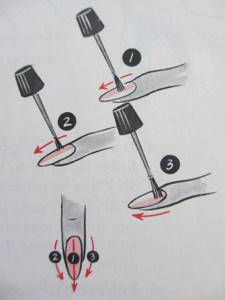
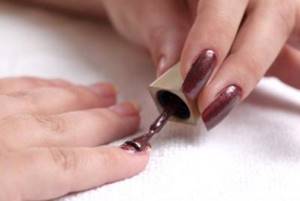
- It is recommended to start coloring with the little finger, gradually approaching the thumb.
- You should not try to paint the entire plate with one stroke - smearing a small amount of paint will cause gaps to appear and will apply unevenly.
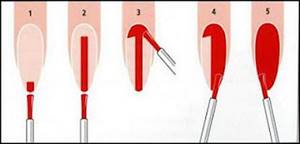
- You should start applying varnish to the nail from its middle, gradually moving to the base and then to the sides.
- How to properly paint short nails with polish? To do this, you need to take a small portion of the coloring agent with a brush and distribute it evenly on the nail plate. If you want to lengthen short nails, then you do not need to completely paint over them from the sides. A video or a detailed photo report can tell you more about how to beautifully paint short nails.
- The consistency of the coloring composition should not be too thick, but it should not spread over the plate like water: the thickness should be medium.
- In order to paint your nails simply, quickly and beautifully, as experienced masters do, you must always apply two layers of colored coating. It is in this case that the color of the varnish will be more saturated, intense and bright. Each layer should be given time to dry.
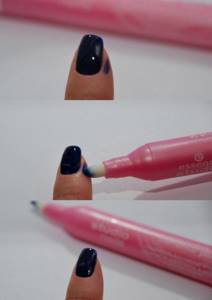
- If during the painting process the coloring composition gets on the skin, and it is not possible to wipe it off completely without touching the nail, you can remove only the largest strokes. Small ones will disappear on their own during the day if you wash your hands several times with soap and water.
- During the painting process, you should make sure that the varnish does not get on the cuticle, otherwise the whole impression of cool nail art will be ruined.
- After applying two layers of the base coat, it is important to apply a fixative - it will prevent the beauty from quickly disappearing from the nail plates.
- After applying the fixing agent, it is important not to get down to work for at least half an hour - the paint should dry well.
How to level?
The procedure for straightening the nail plate is very simple. It is necessary to take into account the specifics of the material.
Suitable for strengthening nails:
- base for applying gel polish;
- biogel;
- various extension gels.
Any product that forms the basis of a manicure should be thick. Liquid bases or gels are not suitable. They will simply flow off the surface of the nail.
Base alignment
The base should be thick, preferably using rubber. The thicker it is, the easier it is to strengthen it. More liquid products will quickly flow down to the side rollers.
The following bases are suitable:
- Kodi;
- Komilfo;
- Lovely Base;
- NeoNail;
- Adore Professional.
Base alignment
Strengthening technique:
- Prepare your nails.
- Apply a drop of base of the desired size with a brush in a thin layer.
- Place a drop in the apex area (almost near the cuticle). Pull it towards the cuticle and stretch it in 3 movements. The first is in the center, the second is on the right edge, the third is on the left edge. Don't be afraid to ruin everything. The base brush is very soft, it will not push through the drop, so go ahead with confidence.
- Use the corner of the brush to form the shape of the nail.
- Turn the nail (hand) over, seal the end and dry thoroughly.
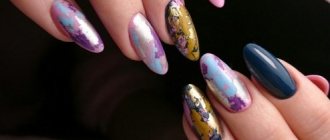
Rhinestone design on nails
Leveling with biogel
The choice of most girls will be biogel. It has a thick consistency and is highly soluble. Manufacturers produce special biogels for thin nails. This will be a real salvation for problematic nails with detachments. Choose a soft brush with a round shape and long bristles. It should practically not touch the nail at all. The biogel should stretch due to surface tension.
The following biogels are suitable:
- Bio Stretch Gel (BSG);
- Atica TM;
- Creator;
- Yoko;
- El Corazon
Leveling with biogel
Before leveling with biogel, be sure to apply a base layer.
Strengthening technique:
- Using a brush, apply a thin primer layer of biogel to the prepared nails.
- Rub the base well, especially in the area of the side ridges, under the cuticle and seal the end of the nail.
- Dry the layer. In terms of time, the biogel dries like a regular gel polish: about 30 seconds in an LED lamp and 2 minutes in a UV lamp.
- Apply the second leveling layer to the dried primer layer. Place a drop of the required size of biogel on the tip.
- Place in the center of the nail about a millimeter from the cuticle.
- Push the brush forward a little towards the cuticle.
- When the drop lies along the cuticle, pull the material down to the tip. Without much pressure, spread the biogel over the nail, not reaching the end of the free edge, so as not to touch the dispersion layer and not disrupt its integrity.
- Work the side zones, stretch the material from the droplet to the tip closer to the rollers.
- Turning the nail sideways, form a longitudinal line. Lightly hook the layer with the corner of the brush and pull down along the nail in long, even strips.
- Near the side rollers, the thickness of the bead should be minimal.
- As a result, you will have a small volume in the center of the nail from the cuticle to the tip with the highest point somewhere between the center and the cuticle at about 1/3.
- Flip your finger (hand) over and seal the end.
- Dry the layer in a lamp.
Painting nails at home

How to beautifully, easily and correctly paint your nails at home?
Everything is very simple here: all you need is a good supply of time, a little patience and endurance, as well as the necessary tools and means for manicure. The process of painting nails will become more pleasant and of high quality if you sit comfortably in a chair or chair, place a small pillow or roll of rolled fabric under the hand being painted, adjust the lighting, turn on your favorite music and get down to business with all the confidence and desire. The emotional mood in this event is no less important than the quality of the varnish and the set of necessary accessories.
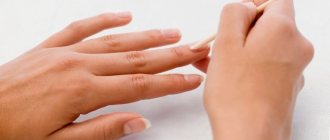
A big challenge for girls who do their own manicure is the procedure of applying varnish to their right hand. How to paint the nails on your right hand correctly, with two colors, one, and even learn how to make pictures and drawings? Here are some small details:
- In order for a right-handed person to paint his nails unusually and beautifully on his right hand, like a skilled master, you need to carefully examine the nail plates of your hand;
- then you should choose one of the nails and focus on it;
- Having dipped the brush in the varnish, you need to begin to carefully and carefully apply it to the plate, starting from the right side and gradually moving to the center, and then to the left side;
- After allowing the first layer to dry, you should paint the nails with the same care with the second layer of paint.
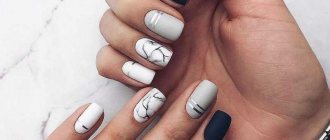
How to paint your nails
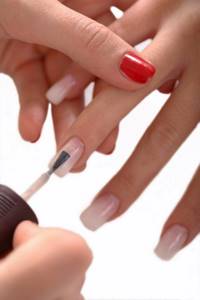
How to paint the nails on your right hand
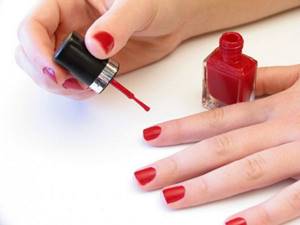
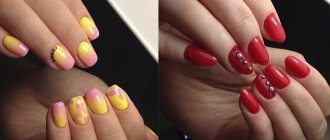
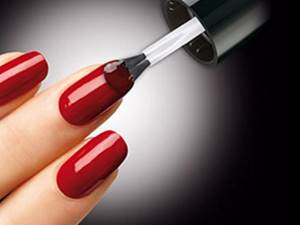
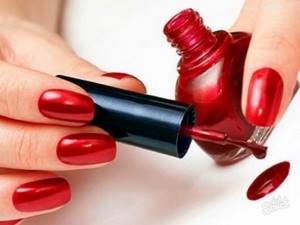
Paint your nails with red polish
Carefully paint the nail
What do you need
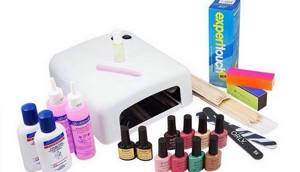
Everything you need to carry out the procedure for strengthening the nail surface can be purchased in specialized stores. Thanks to this, work can be carried out at home. To begin with, you will have to spend a large amount, but in the future it will pay off. You should buy quality products, even though they cost more. Poor quality material will only damage your nails.
Tools and materials
The first thing to prepare is the gel itself. To perform a helium manicure you need to purchase:
- sticks (metal or orange) for moving the cuticle;
- nail file, buff, polishing the nail surface, giving them the desired configuration;
- cuticle remover for unedged manicure;
- nippers intended for trimming manicure;
- primers that remove excess moisture - acid-free or acidic for normal or wet nails, respectively;
- synthetic brush for applying polymer;
- ultraviolet lamp for drying the material;
- cleaners that degrease the nail surface and remove the sticky layer;
- products for nail decoration (varnishes, rhinestones, sparkles);
- cotton pads, lint-free wipes.
Before purchasing materials and tools, you need to make sure the quality of the product. It is recommended to purchase products from trusted brands, based on user reviews.
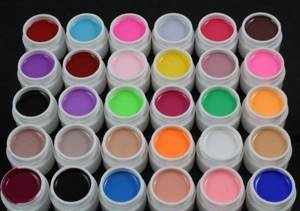
Gel selection
When applying the polymer, three layers are formed: base, modeling, finishing. Each of them has its own functions. The base is the base on which subsequent layers are applied. Modeling – forms the nail plate, is responsible for the strength of the material. Finish – designed to protect against negative external factors. Therefore, special attention must be paid to the choice of material.
Getting beautiful, healthy nails largely depends on the quality of the material. There are several types of gels:
The “phase” of the base indicates the number of polymer layers formed.
Single-phase gels
It is better to use a single-phase product for beginners who are practicing helium treatment on their own for the first time. It is a mixture that includes all three polymer layers. The liquid consistency makes it easier to distribute the substance over the nail plate. In addition, the load on the natural nail is not so significant, since the single-phase layer is thin. Due to its low density, the nail plate “breathes” and does not dry out. The advantages of the system include saving money and time.