How to draw roses on nails
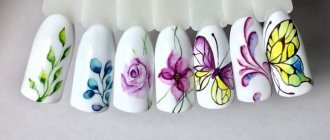
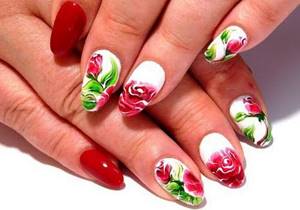
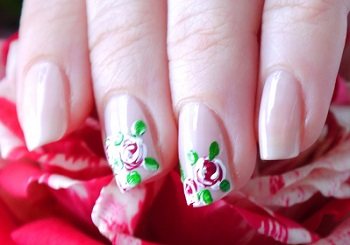
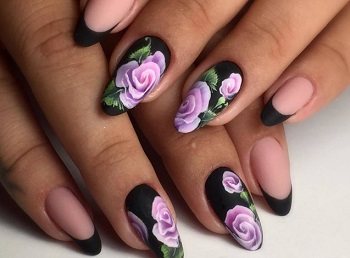
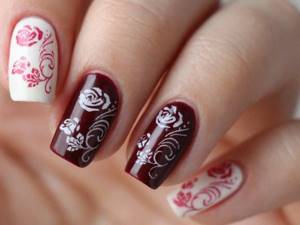
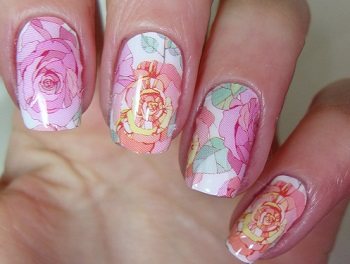
Floral motifs have found their application in nail design. The image of a rose rightfully became the queen. The noble flower looks exquisite using the technique of painting on wet gel polish. The trend is for roses created in muted burgundy and beige tones.
The method of drawing on a wet surface has its own characteristics. If on a simple varnish the design is made with a needle, then on gel varnish the design is made with a thin brush. For this technique, varnishes of a certain company are used. Ordinary gel polishes do not spread when painting. But you can try a little trick - drop a little base into the varnish. Perhaps you can do it. Try experimenting.
Advantages of floral design
Neat ladies' hands with an impeccable manicure look quite cute and elegant. Both large flowers and small buds look very original on nails, and the contours of these designs can be clear or blurred.
Delicate manicure with roses
The key advantage of floral design is that it suits almost any look and style. With this nail art you can go on a date, a party, or go to work or a business dinner.
In addition, despite the advice of stylists to use floral themes on nails exclusively in spring or summer, this painting looks great on nails in the cold season.
Floral nail art techniques
If you do not have artistic talent, but dream of learning how to draw a rose on your nails, then it will be very useful for you to master one of the basic techniques of painting on nails, namely:
Roses on nails
- painting with gel polish using dots;
- applying images to a wet coating;
- rose in Chinese painting technique;
- creating a three-dimensional image;
- sculpting a flower with acrylic.
In addition to these techniques, there are several more techniques for designing a manicure: using special stickers, stencils, stamping and all kinds of films for nail art.
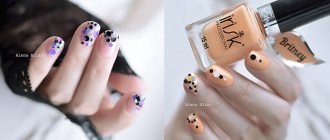
Drawing a rose with gel polish using dots
Roses on nails using dots
A dot is a needle-shaped metal rod with a small ball at the end. Sometimes there are variants of unusual “two-in-one” tools: on one side there is a dots, and on the other there is a drawing needle.
This is quite convenient when thin lines are drawn with a needle, and larger ones with dots. To draw a beautiful flower on your nail, use the following step-by-step instructions:
- Prepare the basis for drawing. Get your nails done, polish your nails well, and apply your favorite polish as a base color. Dry this layer, and then start applying the design.
- Drop a small amount of varnish onto the base using a dot, then add a drop of another, brighter varnish to the center, and use a needle to make a few strokes, partially mixing the colors and giving the shape to the petals.
- Dry the coating in a lamp and only then apply a finishing gloss, which you then also dry.
Manicure using dots
This manicure can be complemented with various decorations, such as rhinestones, beads or sparkles.
Wet drawing
The technique of drawing on a wet base is special, thanks to it you can create quite interesting design options.
Drawing dew using wet technique
But it also has its own difficulties - when working with gel polish on a wet base, you can encounter the fluidity of the material, so you need to perform all stages of the manicure carefully and correctly, following the technology. To master this technique, you will need a special long-lasting coverage kit and two colors you like.
- After standard preparation of the nail plate, a gel polish base is applied and dried in an LED lamp for about 30 seconds or in a UF lamp for about 2 minutes.
- Then the background color is applied in one or two layers, each of which is also carefully cured in the lamp.
- On top there is a layer of the background tone of colored gel polish, on which a wet drawing will be done, starting from a small semicircle in the center of the bud, unfolding the pattern along the petals. After finishing the drawing, you should wait 15-25 seconds for successful spreading and only then start drying.
- After drying, apply a glossy top coat to the surface of the nail and also dry it in a lamp.
Wet manicure
If there is a sticky layer, it must be removed with a special product. Thanks to this technique you will get a fairly simple but very elegant design:
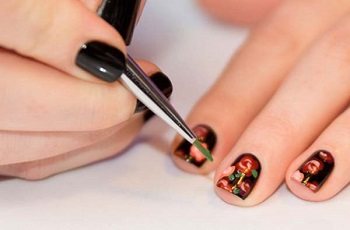
Rose with Chinese painting
When making a rose using the Chinese painting technique, you can depict a young bud or an already formed flower.
Drawing of a young bud
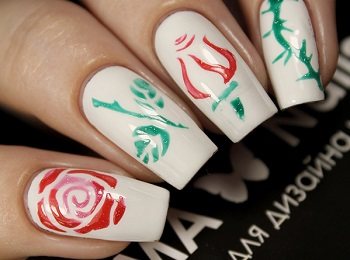
- For bud roses, take two varnishes - red and white, as well as green to depict the stem and leaves.
- Using the edge of the brush, we first pick up one color, then the second, and mix them on a special mirror surface, obtaining an intermediate tone.
- On the prepared base we apply a stroke in the form of a semicircle, curved to the side.
- On the opposite side, do the same trick, connecting the edges of the semicircles and giving the image the shape of a bud.
- Then use a thin brush to paint over the green stem, leaves and base of the bud.
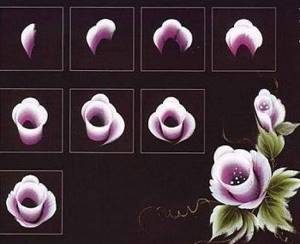
Diagram of drawing a bud in Chinese technique
To capture your creativity, apply a glossy base and cure in a lamp.
Drawing of a blooming rose
To make such a rose, prepare three varnishes: white, red and black.
Manicure with roses using Chinese technique
- Mix red and white varnishes to obtain an intermediate shade.
- The starting stroke should be convex, semicircular and thin. We begin painting on the nail on the left, directing the beginning of the stroke slightly lower than its end.
- We make the second stroke in the same way as the first, raising its end higher than the beginning.
- Make subsequent strokes smaller and slightly lower than the first ones in a circle.
- Then paint rose petals on the bottom and sides using an emerald-colored polish.
- The resulting flower will have a finished look if you draw its contours with thin black borders.
Be sure to fix the image with a glossy base.
A manicure with Chinese painting is quite difficult to perform for beginning fashionistas; before performing it, you need to carefully study the technique of applying a design to the nails:
Technique for performing the work
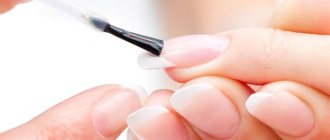
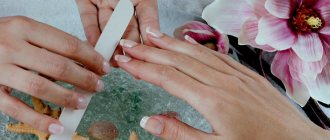
First, we prepare the nail plates in the standard way: we push back the cuticle or, if necessary, remove it, polish the nail with a natural nail polish (100/180 grit), and wipe it with a degreaser.
The next step is to apply the base coat for the gel polish (don’t forget that it should be from the same company as the polish itself). Dry in the lamp for 2 minutes. If you have an LED lamp, then half a minute is enough. We cover the nails with the main varnish in 1 or 2 layers - this will depend on the degree of density of the varnish. Dry each layer.
Now the crucial moment begins - apply another layer of gel polish and do not dry it. All work is carried out on a wet layer. We begin to draw the rose from a small semicircle and continue to surround the core with petals. The algorithm for drawing a flower is the same as for any drawing. When the flower is drawn, you need to wait a while. The varnish should spread over the surface, forming an elegant flower. And only after that we send the nails to dry.
If you already have some experience in drawing roses, you can try drawing lines inside the flower with a different color. This will give the drawing a finished look. After completion, cover the nail with a finishing coat and, if necessary, remove the sticky layer with a special liquid.
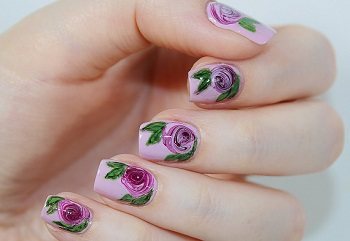
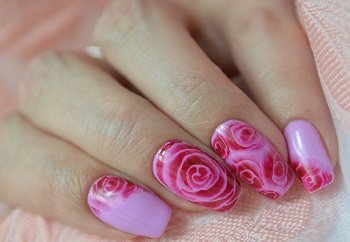
Image of a voluminous rose on nails
It is easier to make such a drawing using acrylic or watercolor paints . They are easily diluted, blurred and mixed with each other. They can easily stretch the image, which will allow you to get a complex, but at the same time elegant and voluminous design.
- Apply a contrasting varnish to the prepared base, painting a small area of the nail, which will subsequently become the rose design.
- Using a super-fine brush and pre-prepared paint, paint the approximate outline of the rose in white, starting from the center.
- Using pink paint, make a stretch from the outline of the petal to its center. Thus, in contact with the white tone, the petals will take on a voluminous appearance, evenly moving from a light to a brighter tone.
- Using the same method, draw the leaves.
- When finished, after your picture has dried, cover it with a glossy topcoat.
When drawing using this technique, it will be difficult to stretch flowers in a small area, so long nails are welcome here.
The main secret of this painting is a firm and confident hand, which will make a clear stroke, which will allow you to get a beautiful smooth transition of shades.
Useful tips
- The nail coating needs to be chosen so that it spreads well, only then will you get the intended masterpiece.
- If wet shellac is not liquid enough and does not spread, it is recommended to mix it with a liquid top coat. And so that it does not flow under the sides of the nail, it should be applied in a thin layer.
- To make the intended drawings on the wet gel coating look neat and beautiful, it is better to make them using a doggy brush. This is a brush with a thick handle, a thin tip, and it picks up paint well.
- To create bright, unique and interesting nail looks, it is recommended to stock up on various manicure tools: brushes, dots of various diameters, a needle, pencil, toothpick, tips (to initially practice artistic skills on artificial nails).
Manicure with wet polish is a win-win option for those girls who don’t like to spend a long time fiddling with their nails. You can create any interesting images, the main thing is that the dots and lines spread well over the nail plate. The rest is a matter of imagination or the successful application of schemes for creating a manicure on a damp surface.
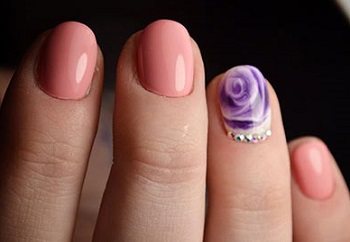
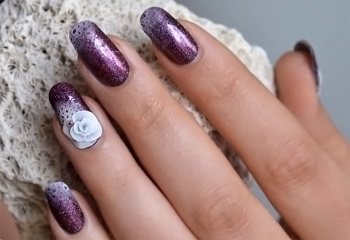
Modeling a rose with acrylic
Designs using acrylic sculpting are very popular as wedding manicures. An acrylic rose looks very beautiful on a French-style manicure. To perform this nail design, you need to prepare the nail plate in advance by doing a manicure according to all the rules and extending your nails using the French technique. Then, having prepared acrylic powder, monomer and thick glossy paper, you can start sculpting:
- To form a bud, take powder of two colors and, without mixing them completely, use a monomer to form a small ball of the size you want your rose to be.
- Make a thin round plate from the ball and fold it in four, obtaining the core of the flower.
- To get a more voluminous bud, you can use the same method to repeat the second layer of the flower and place it in the center of the previous one.
- After smearing the area where the flower will be attached with glue, position the sculpture and use a brush to give it the shape of a flower.
- Using the same method, form the leaves and attach them to the base of the flower, connecting them together. This trick will make them look more voluminous and not just stick to the nail base.
- At the end of the work, you should cover the manicure with a glossy top coat.
This manicure design looks very gentle, romantic and does not require additional decorations.
Design ideas
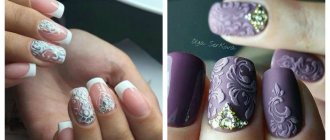
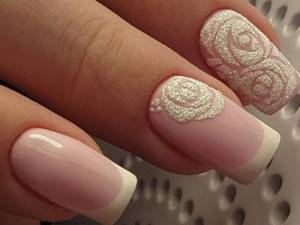
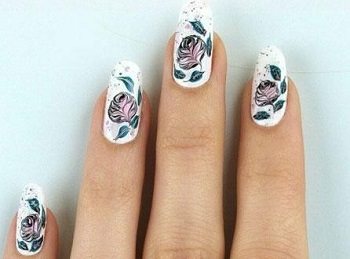
The most relevant design to complement the floral pattern is the French one. It looks very beautiful on both short and long nails. One popular option is an image with white roses. You can create such a pattern using gel polish or using modeling.
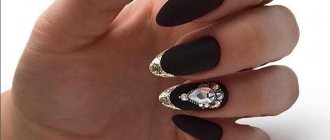
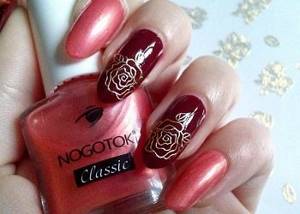
You can draw a voluminous rose or dilute the design with various elements. The golden outline will look very stylish and unusual against the background of dark tones.
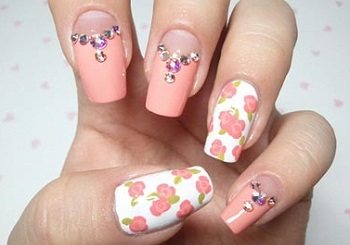
Highlighting 2 fingers with roses is considered one of the traditional options. The white background goes perfectly with this image. You can also experiment and use blue tones. Pink colors combined with dark shades will give the image freshness and glamor.
The combination with rhinestones will add sophistication to the look. Against the background of silver and gold tones, the stones will look quite original. To create such an accent, you should not overdo it with details.
Decoration with velvet flowers will add zest to the design. A gentle accent will definitely interest everyone around you. Acrylic powder is used to create this manicure.
A wedding design with roses will look cute and romantic. Red velvet accents will highlight the individuality of the look. Gel manicure for a wedding can be safely combined with additional ornaments and rhinestones.
A large rose in a wedding design will not look very appropriate. It is best to use a fashionable 3D effect or fine painting.
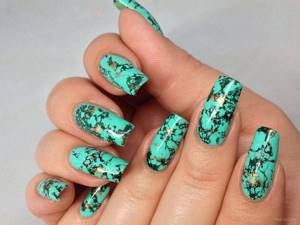
Lunar manicure will be more relevant than ever this season. This design will highlight the beauty and grace of nails in any color. Beautiful colorful accents are the main characteristics of this idea.
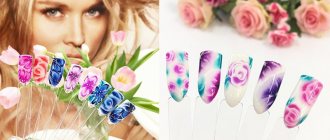
Roses in combination with multi-colored varnishes will look quite unusual. The flower can be painted in pastel colors. The remaining nails can be covered with bright varnish.
Flowers in pastel colors with a white base will emphasize a flirty mood. To create such a manicure, it is enough to have good imagination and patience. This design allows you to create an original and interesting image.
Simple ways to manicure with roses
In addition to the above-mentioned techniques for drawing roses on nails, there are also simpler methods. These are all kinds of stencils, stickers, films, stamping. With the help of these available tools, you can quickly obtain high-quality elegant drawings that do not require a lot of time and exhausting work from the master.
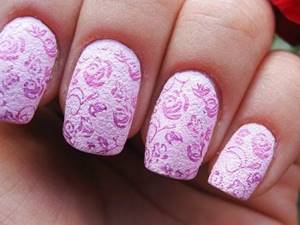
Stencil rose
Stencils are special paper stickers that have slots in the form of a pattern, in which the desired image is formed when varnish is applied. When working with a stencil, you need to remove it from the special base, carefully glue it to the nail, carefully pressing down to avoid the appearance of bubbles. Varnish is applied to the slots and left until completely dry. Then the stencil is removed and a manicure-fixing coating is applied on top.
Experienced masters paint a rose on their nails without using stencils, imitating a stencil design:
Nail stickers
This type of design is one of the simplest. Special stickers are applied directly to the wet base, dried, and then covered with gloss. Thanks to this simplest technique for designing a manicure, you can get a fairly high-quality image.
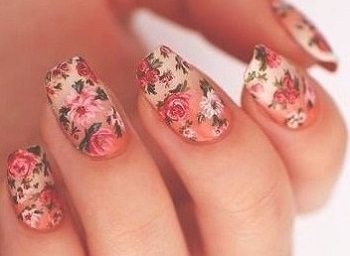
Films for design
Using design films you can even get photographic images of flowers. They are applied both to the entire length of the nail and to individual areas. To do this, they are cut to obtain the required fragment of the image, heated under a lamp for 10 seconds, applied to the nail and covered with a fixative.
Stamping
A clear advantage of this type of design is the speed of execution. Having a variety of metal stencils in your arsenal, you can create a huge number of drawings without much effort. To obtain an image of a rose, apply a small amount of varnish to a metal plate, using a scraper, remove the excess, leaving the varnish only in its recesses. Then stamp with a soft stamp and transfer the design onto the prepared nail. Then apply the sealer.
Design Features
The technique is based on creating a pattern on the nail plate using wet varnish. Using a special tool, the desired print is applied - flowers, patterns, stencil design. Due to the slight free movement of the hand, beautiful monograms are formed on the nails, and the colors are partially mixed, resulting in bright and original combinations.
The design can be done with simple varnish, but thanks to the special formula of gel polish, it has its own features and advantages:
- Duration of work . The varnish hardens under a UV lamp, as a result of which you can slowly model a clear and even pattern.
- Liquid consistency , thanks to which the lines spread over the nail, forming delicate patterns. Products that are too liquid are not suitable for manicure.
- A bright palette of varnish that has good durability and stays on the nails longer than regular nail polish.
- Easy to apply over wet gel polish. The ability to use simple tools in your work without purchasing professional add-ons.
The viscosity of the gel polish should be taken into account. It should have a medium density and spread slightly over the nail for high-quality fixation of the design.
To bring creative ideas to life, you will need a needle, toothpick or brush. Natural brush bristles will allow you to create soft shapes in the design, while artificial bristles will make them more distinct and brighter.
Basic principles of depicting a rose on nails
- Too many colors and decorations on your nails can look quite harsh and colorful.
- Large roses look very stylish not on all nails, but only on one , for example on the ring or middle one. Small flowers on each nail look more harmonious.
- When drawing roses on several nails, you need to stick to one color scheme .
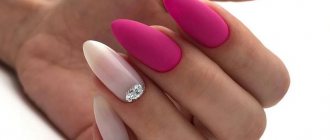
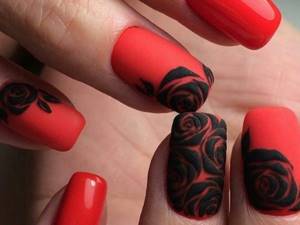
- The combination of shades of the coating and the design itself should be contrasting . If the base is dark, then the flower should be in lighter colors and vice versa.
- Roses in natural shades look more natural on nails.
The design on the nails should be contrasting
Every girl can do a manicure with a picture of a rose at home. Experienced fashionistas will prefer more complex design techniques; beginners will benefit from stickers or thermal film. By following the simple rules of floral manicure and mastering the simplest drawing techniques, you can create real masterpieces on your nails.
More interesting articles:
Some tips for creating a drawing
An inexperienced artist should not use a white background as a basis for drawing, as the slightest errors are clearly visible on it. Choose a darker background - pink, lilac, light green, etc. The rose itself can be painted in burgundy, purple, red, and blue.
Before starting work, check on the tip whether the varnish you have chosen spreads well enough. Very liquid or thick is not suitable for creating our technique. Try gel polishes from Bluesky or Kodi, perhaps through trial and error you will find yours.
When applying the finishing coat, do not press down the brush too hard; the pattern may be smudged. The same effect can be obtained by removing the sticky layer before applying the finish. To keep the design well preserved, keep your nails under the lamp longer.
To ensure that the design of your nails with wet gel polish and roses does not look sloppy and vulgar, we draw in the following order: on the little fingers we make one small rose in the corner of the nail. On the nameless ones, we make the same flowers, but larger. We fill the middle fingers completely with roses. On the index and thumb we make small flowers, like on the little fingers. Or draw a rose on only one or two fingers and leave the rest plain.
The technique allows you to create masterpieces of amazing beauty. It allows you to experiment with colors, the shape of the flower and its location on the nails. Use this opportunity and make yourself and others happy.