How to make three-phase gel polish:?
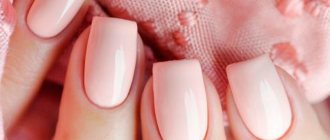
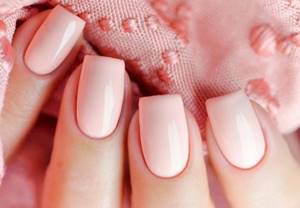
Gel polish is exactly what you need if you are tired of repainting your nails every 3-4 days. Thanks to the special composition, you will get the perfect manicure, because gel polish combines the advantages of regular varnish and artificial nails. The application procedure will not take much time, but the result will please you from 2 to 4 weeks. This coating does not lose its appearance, does not fade, does not chip, and at the same time strengthens your nails.
Fashion does not stand still, the variety of colors is constantly expanding, and the quality of varnishes is increasing.
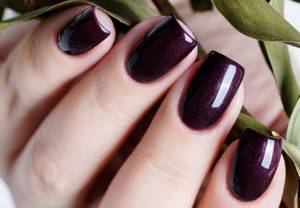
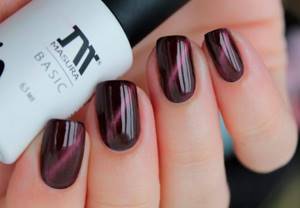
Very interesting among the new products are a variety of jelly gels or “cat’s eye” coating.
Brief overview of varnishes
According to their structure, varnishes come in three types:
- single-phase;
- two-phase;
- three-phase.
If you decide to choose a single-phase gel polish, then its application is not considered difficult. All layers, first – base, second – modeling, third – finish, were combined in one bottle of gel polish.
The two-phase structure is a little more complicated. Here, on the prepared nail we apply a base layer of varnish, followed by colored gel polish, which acts as the final layer. For this procedure, you should purchase two separate bottles.
The three-phase system already combines three main and irreplaceable components, and they are all complementary to each other. So, it contains:
- Strengthening base gel.
- Colored coating.
- Protective top - gel.
It is thanks to the “top” that the nails are reliably protected from the aggressive influence of the external environment.
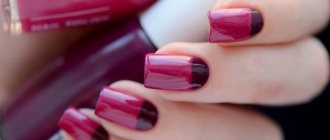
Based on the multi-layer nature and properties of each component, three-phase gel polish is an excellent solution for strengthening and beautiful appearance of your manicure. Gel polish will not chip or lose color saturation, which cannot be said about regular polish. It is worth noting that three-phase gel polishes are absolutely odorless, which makes them safe and non-toxic for our body.
Tips for Beginners
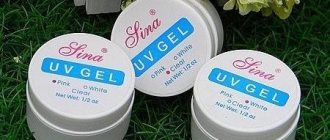
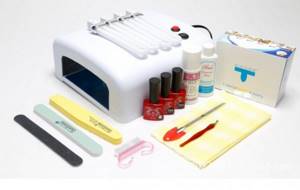
Those who decide to try doing a manicure with gel polish on their own need to stock up on the necessary equipment, and first of all this applies to special ultraviolet lamps. There are two types of such lamps on sale - UV and LED. It is best for beginners to give preference to the first option, as it has a lower cost and is easier to use.
You will also need special files of various sizes and a special file for grinding the nail plate - buff. In addition to the gel polish itself in various shades, you will also need a special base and fixer.
Particular attention must be paid to ensure that these two products are intended specifically for gel coating; those used for nail extensions are not suitable. After using them, the gel polish begins to crack within a few hours.
As a last resort, you can coat the gel with ordinary colorless varnish, but in this case you should not count on long-lasting manicure.
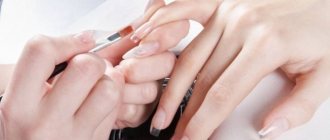
First of all, you need to undergo special training. It is preparation for further work that plays an important role. Not only its appearance and durability, but also the opinion of you as a specialist depends on how correctly the manicure is performed.
This can be done either at specialized courses or by asking a good specialist to show you a master class. It’s even better to take private lessons periodically, this way you can avoid many problems at work and, if necessary, immediately receive competent help. The instructions for working with gel polish itself are very simple, all the steps are accessible, understandable and described in detail, but it is still better to see once than to read or hear several times.
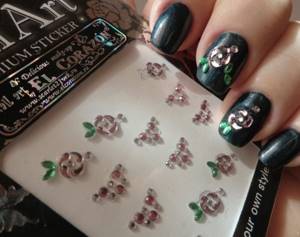
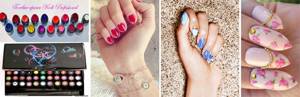
Simply applying gel polish to your nails in one color quickly gets boring. Therefore, it is recommended to constantly improve your professionalism. The easiest way is to purchase special stickers, rhinestones and stencils to create drawings and patterns.
Experienced manicurists strongly recommend that all beginners, even those who plan to apply gel polish exclusively for themselves, create a portfolio of their work. This will allow you to clearly see the progress of your activities or spot some mistakes.

Performing a manicure with three-phase gel polish
Let's take a closer look at three-phase gel polish and how to apply it to the surface of the nails.
Preparation
Preparation plays an important role in applying a manicure and takes place in several stages:
- The first thing you need to do is get your nails in order, remove the cuticle, make the desired nail shape and file off the top glossy layer.
- The next step is to thoroughly degrease the nails using a special product.
It should be noted that if you have oily hand skin, then repeat this step twice to maximize the adhesion of the layers. The degreasing procedure is carried out so that fungus does not grow under the coating, invisible to the naked eye.
- Next, we apply a more gentle acid-free primer.
You need to refrain from acidic products, as they have a specific, not very pleasant odor and penetrate into the deeper layers of the nail. This layer is designed to ensure strong adhesion of the nail plate to the selected varnish. The primer dries within 20 seconds, without using a UV lamp.
Performing a manicure
The next stage, manicure, takes place in several steps:
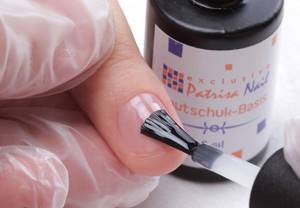
- Applying a gel base layer.
Apply the base thinly and evenly over the entire nail plate, including the free edge of the nail. A thin layer of base, like all subsequent layers, will be most appropriate. Dry in a UV lamp for 2 minutes or in an LED lamp for 30 seconds.
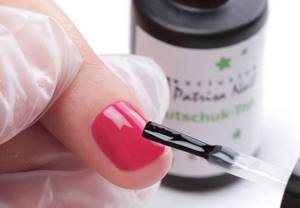
- Now let's move on to the most interesting part - the color coating of our nails.
At this stage, the first color layer should be as thin as possible. A thick coating of colored gel polish can lead to the formation of bubbles or waves when interacting with a UV lamp, which we absolutely do not need. If your layer is not dense enough, apply a second layer of colored gel polish (don’t forget to seal the end of the nail). If you ignore this procedure, soon expect chips and cracks at the ends of your nails. Dry in a UV lamp for 2 minutes or in an LED lamp for 30 seconds.
- Further, at your request, you can apply decor, be it artistic painting, sparkling rhinestones or iridescent sparkles.
After decoration, the manicure goes into the next form.
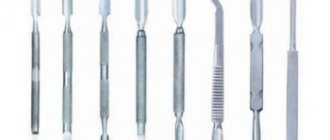
Tools
To make a high-quality manicure and not damage the nail plate, you must use the following tools:
- Lamp for drying layers. There are 3 types of lamps: LED or LED lamps, gas light, ultraviolet. The most popular is the latter device. The ultraviolet lamp appeared on the market earlier than others, has a varied design and a wide price range. However, it works due to UV lamps, which dry out the skin and nail plate. In addition, with frequent use, they quickly burn out. It will last no more than 3 months in the salon. Each UV lamp has a different power, which affects the drying speed. Experts believe that it is safest to buy 36 W lamps. They dry the layer in 2 minutes. and cause minimal harm to hands.
LED lamps are more expensive, but more durable than previous ones.
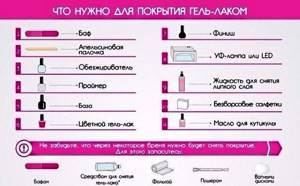
They dry gel polish in 10-30 seconds, which significantly reduces manicure time. Such lamps are much more convenient for home use; they are compact, do not cause discomfort and do not dry out the skin. You need to choose models with lamps located around the entire perimeter, otherwise the gel polish will dry unevenly.
Gas light lamps combine LEDs and fluorescents and are characterized by low energy consumption and durability. It does not dry out the skin and is suitable for all types of varnishes, but the drying time of the layers depends on the brand and varies from 30 to 180 seconds.
- Files. They are necessary to give your nails the desired shape and length. Instruments made of glass or ceramic with a hardness of 180/240 grit are best suited.
- Soft brush. Necessary after each stage of nail treatment. Removes dust, nail and skin particles.
- Orange stick. With their help, you can safely move the cuticle, remove excess gel polish or apply patterns.
- Pusher. Can be used instead of an orange stick: gently pushes back the cuticle and removes excess skin.
- Wire cutters. Must be made of surgical steel. This will ensure that cuticles and hangnails are removed safely.
- Buff or soft file. The abrasiveness of these tools is 160/180 grit. Needed for polishing or removing the top layer.
- A set of brushes for applying various varnishes and designs.
The application of gel polish is carried out step by step using a variety of auxiliary materials: napkins, antiseptic, gloves, medical mask, oil for moisturizing the cuticle, degreasing composition, and means for removing the sticky layer. After each use, all instruments require thermal or chemical treatment.
Completing the composition
Now we have come to the end of our procedure, which also takes place in several steps.
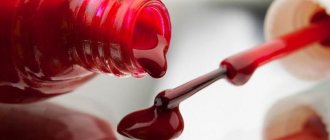
- Finish coating.
The coating is applied in a regular layer with the obligatory sealing of the end of the nail. If you have a manicure with rhinestones, we recommend applying a top coat in two layers - this will provide maximum protection to your convex jewelry. Then thoroughly dry each layer of applied varnish in a lamp. Hard and strong nails are guaranteed.
- Remove the sticky layer from the top coat.
For this procedure, it is best to use a cotton pad soaked in a special liquid to remove stickiness. But if you don’t have one at hand, you can use regular alcohol - the result will not disappoint you.
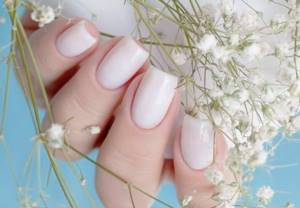
After all the procedures have been completed, your coating is ready. Three-phase gel polish, with careful handling of manicure, will be worn for several weeks, maintaining its original appearance.
By spending a little more time on a professional manicure with three-phase gel polish, as opposed to single-phase, we get a more lasting effect and better composition quality. Another positive feature of three-phase varnish is that it is easier to remove and does not stain the nail plate.
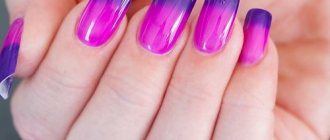
Fashion trends in 2019-2020
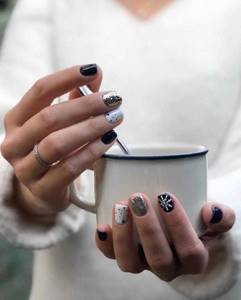
One of the fashionable new products in 2019-2020. became nail art, which turned into real art. These are individual patterns and designs on nails.
Simple geometric patterns are out of fashion; modern nail art is all about artistic compositions.
Particularly popular are the designs not on a pair of nails, but on 10 fingers. Each episode on the nail continues the next and builds a single composition.
Convenience and practicality are the companions of modern fashion. Therefore, the trend this year is short and medium length nails.
Bright, acidic colors also came out of the top. In 2019-2020 sky, green, orange, olive, brown, mustard, fuchsia, yellow are welcome. The classic color combination: black, white, red has not gone out of fashion.
The average cost of applying gel polish in a salon is 1,500 rubles. Independent step-by-step procedures will significantly save budget and time.
Author: Anastasia CHEKUNOVA
Removing varnish
To properly remove three-phase gel polish, we will need:
- 10 - 12 cotton swabs (we recommend using a cotton base, as it has a better effect on the nail), a couple of orange sticks and 10 pieces of foil approximately 10 by 10 cm.
- Gently moisten the sponge in gel polish remover, cover the nail with it and wrap it in foil.
- We wait about 15 minutes.
- We remove the foil and cotton wool (sponge) from the finger that was the first to wrap, remove the gel polish with a stick (the coating should crumble a little from the impact of the stick).
- Remove the remaining manicure elements with a small nail file.
If you are not going to apply a new manicure right away, it is useful to treat your natural nail with cuticle oil. In case of applying a new manicure, the oil completes the manicure procedure and is applied immediately after removing the sticky layer.
Peculiarities
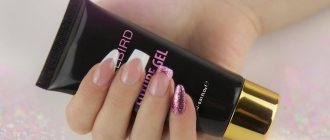
Gel paint is available in a different color palette, ideal for extended and natural nails. If there is no suitable tone, the compositions can be mixed together. Masters like to use this technique to create an exclusive manicure. The applied pattern can be adjusted before drying and during polymerization under a lamp.
The main advantage is the ease of application to the nail. The liquid structure does not spread at all. And one layer is enough to achieve rich color.
A finishing coat should be applied over the patterned layer. This way the manicure will last longer and will resist mechanical stress.
Photo of nail polish coating
Even more photos at the link: Gel polish photo.
How much does a gel manicure cost in Moscow salons?
Everyday chores not only take up time, but also force women to look for ways to maintain a beautiful manicure longer. If previously a nail service could only offer nail extensions, then with the advent of gel polishes an alternative appeared. A fashionable manicure on natural nails will last for several weeks if you apply gel polish as experienced nail technicians do in salons. Below are the prices for services of Moscow companies:
| Salon name | Address | Service price (rubles) |
| House of Beauty "MAYAK" | st. Tverskaya 29/2, in the Aquarium garden | 1 800 |
| "8 days a week" | m. Novoslobodskaya, st. Krasnoproletarskaya, 9, bldg. 2 | 3 000 |
| "Suzanne" | st. Upper fields, 36/2 | 900 |
| Nail extension studio | M. Taganskaya, st. Verkhnyaya Radishchevskaya, 9, building 4, office 317 | 800 |
| "CELEBRITY" | MKAD 66th km, Crocus City Mall, 2nd floor | 1 300 |
Draw flowers step by step
A popular element of manicure is flowers, especially roses. To apply the pattern you need to use a dots and a needle
Place a dot on the finished coating and carefully draw a line with a needle, twisting a kind of spiral. If you perform the technique on wet gel polish, the outlines of the colors will be more blurred, which will give a natural look.
Choose dark shades as the base color and paint on them with light varnish. You can also use the reverse technique - dark flowers on a light background. Try painting the leaves using a green tint. It is best to do this with a thin brush. Dry each layer separately so as not to smear the design when applying the next element.

Flowers pattern
Flowers are not considered the most complex pattern, but we recommend practicing on tips on which we paint with gel polish. The video of applying manicure is presented step by step below.
Hand skin care
In order for the skin of your hands to maintain beauty and youth for many years, it is necessary to do skincare procedures. We will need:
- cuticle oil;
- hand cream.
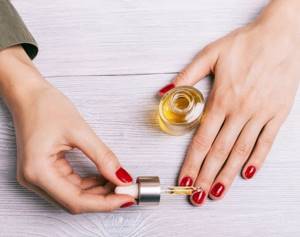
At the end of the manicure, you need to apply cuticle oil. Place a drop of oil on the cuticle of each nail and rub in well.
Please note that there are mineral and natural oils. Mineral oil forms an invisible film on the surface of the cuticle
If you use this oil every day, you will get the opposite effect: the cuticle will begin to dry out. This oil is more suitable for masters: the client comes for a manicure once every 3-4 weeks, and mineral oil is ideal for single use. At home, on a daily basis, it is better to use natural oil, for example “Dadi Oil”, “Monami”.
After the oil, you need to apply a moisturizing or nourishing cream to the skin of your hands and cuticles.
NOTE! It is necessary to take care of your hand skin not only after a manicure! Before going to bed, smear your hands with a moisturizing or nourishing cream, and in the cold season, before going outside, with a protective cream. Once every 1-2 weeks you can scrub and perform paraffin therapy
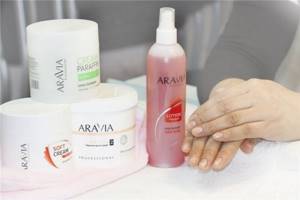
To save time and money, you can purchase cream paraffin from “Aravia”.
Let's look at the technology for using such a cream.
- Thoroughly scrub your hands to remove dead skin cells.
- Apply a moisturizing or nourishing cream and rub it in well.
- Apply a thick layer of paraffin cream.
- We put on plastic gloves and do not take them off for 15-20 minutes.
- After the specified time has passed, remove the gloves and wipe off the remaining paraffin cream with a paper towel.
After the procedure, it is advisable not to wet your hands for two hours.
Be sure that after such care your hands will tell you: “Thank you!”
Single-phase gel system
Single-phase gels are the best option for beginners who have just mastered the theory and begun to comprehend practice. There’s simply no better way to get your teeth into it. Single-phase extension does not require a large number of tools or materials. This allows you to reduce the cost of the procedure.
A single-phase expansion system involves the use of only one type of product. This does not mean at all that it will be applied in one layer: several layers will be made of one type of gel.
ON A NOTE.
Single-phase systems do not always allow you to create ideal nail shapes. Such a product is a mixture of several layers with different purposes and structures.
The essence of the method is simple to the point of banality. First, a primer is applied to the nail plate, and it is extremely liquid (this will allow it to be quickly absorbed). The second layer allows you to model the nail of the desired shape. If you mix these layers, this will lead to a deterioration in the characteristics of both stages of processing the nail plates.
An important and not very pleasant feature of a single-phase gel: it tends to flow, which slows down and sometimes reduces the quality of the simulated layers. In addition, the single-phase extension system assumes the absence of a protective layer, which usually helps to maximize the “lifespan” of the extended nail.
In fact, the main advantage of single-phase gel is its affordable price. Otherwise, it behaves the same way as most generic products: it combines several products, but each of them is inferior to a highly specialized product.